
Overview of “Website AI Agent”Website AI Agent, is an AI-powered chatbot that can be embedded into a business website to interact with visitors in real time.
The Website AI Agent uses the configured Knowledge Base and Agent Instructions to answer visitor questions. It can also perform configured CRM actions, such as collecting visitor details, creating or searching tickets, booking appointments, creating tasks, and searching existing CRM information.
The Website AI Agent also provides a Live Chat Inbox, where CRM users can monitor customer conversations and take over conversations from the AI when human assistance is required.
How to Install and Configure the Website AI Agent in vTiger?License SetupBefore configuring the Website AI Agent, the Website AI Agent license must be activated.
- Purchase the Website AI Agent Integration from CRMTiger’s extension store.
- You will get a zip file in the email.
- Login to vTiger CRM and install the zip file as you would install any plugin or extension
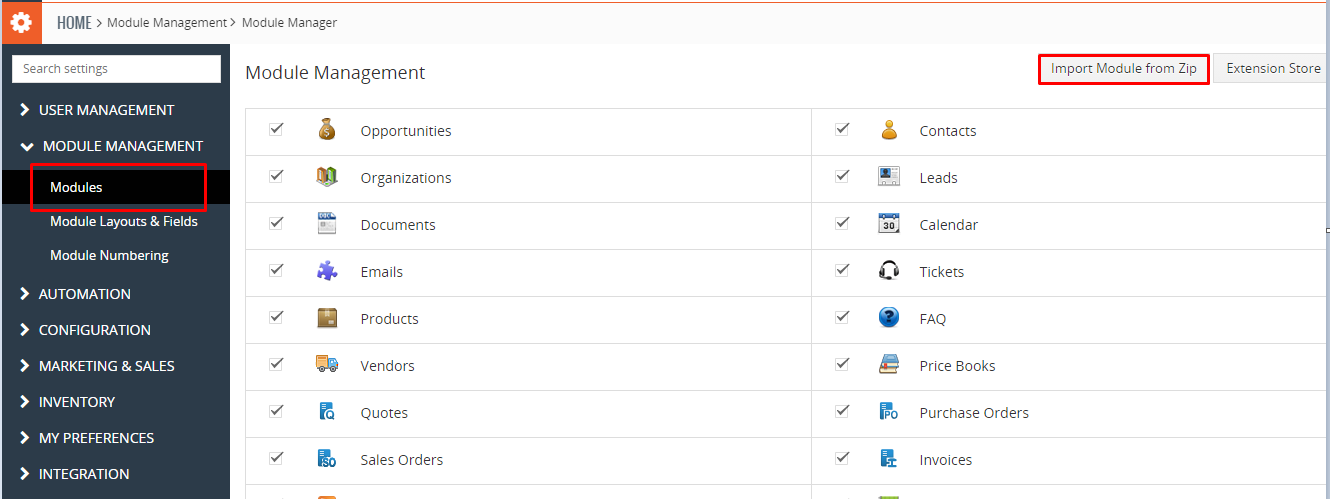 Install the .zip (package) file of the extension by navigating to CRM Settings → Module Management → Modules, then click the “Module from ZIP” button as shown in the screenshot above.
Accept the disclaimer checkbox as shown in the screenshot below, then select the ZIP file from your Downloads folder (assuming you have received and saved it from CRMTiger). Click the Import button to complete the installation.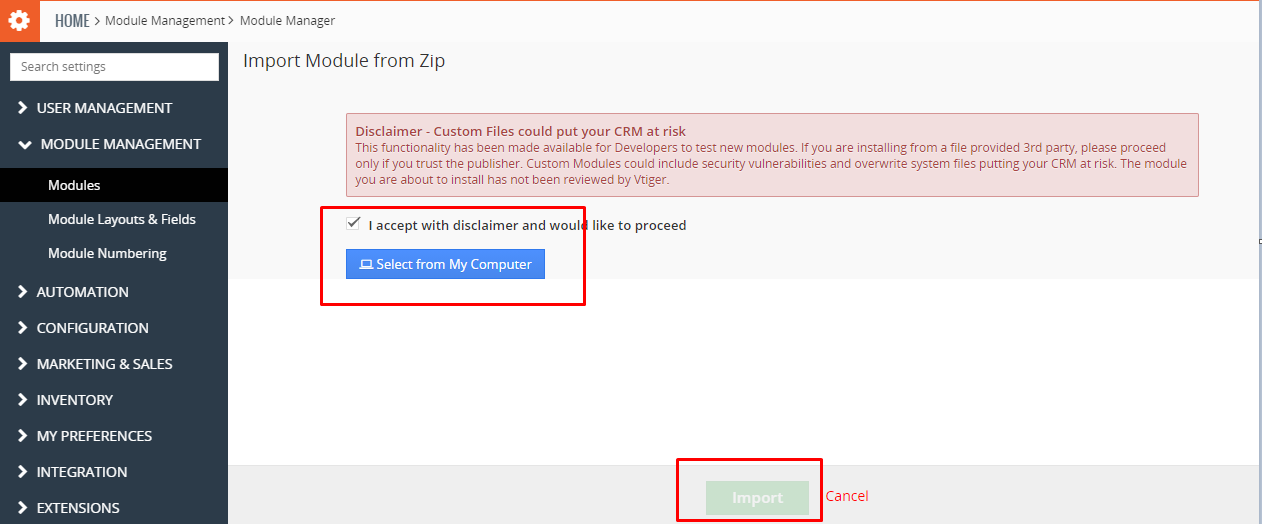 Once the installation is complete, the extension will appear under CRM Settings → Other Settings, as shown in the screenshot below.
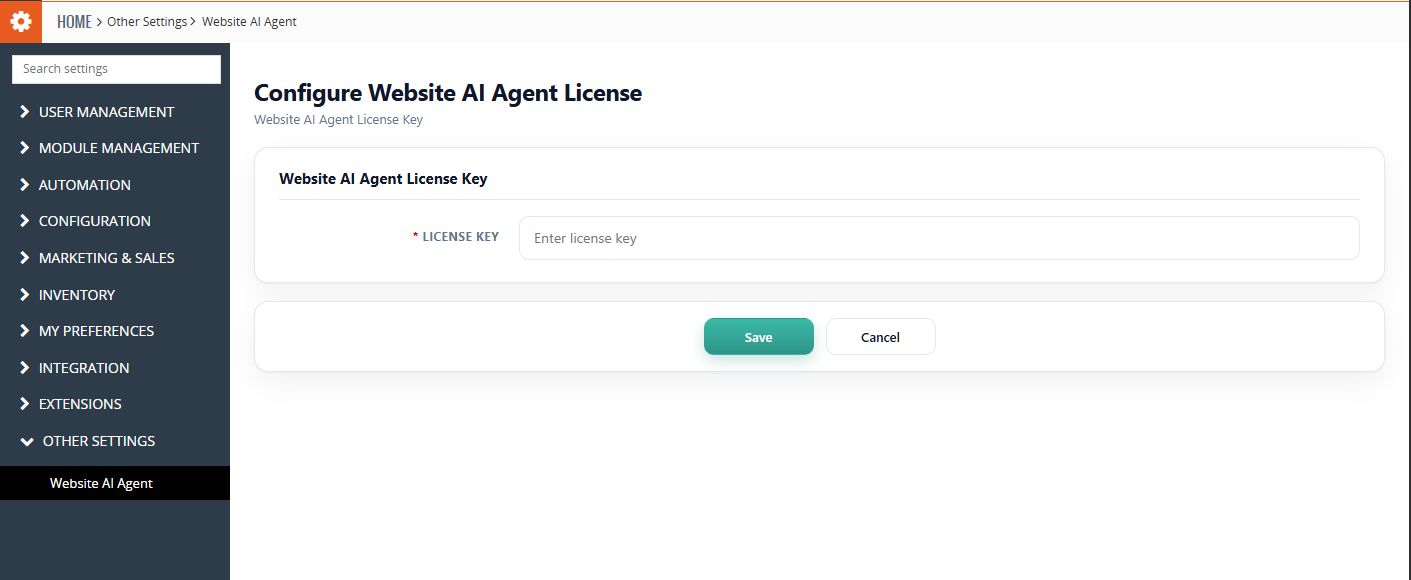 License ConfigurationNavigate to License Configuration:
- Go to Settings → CRM Settings → Other Settings → Website AI Agent.
- Enter the License Key from your CRMTiger order.
- Click Save.
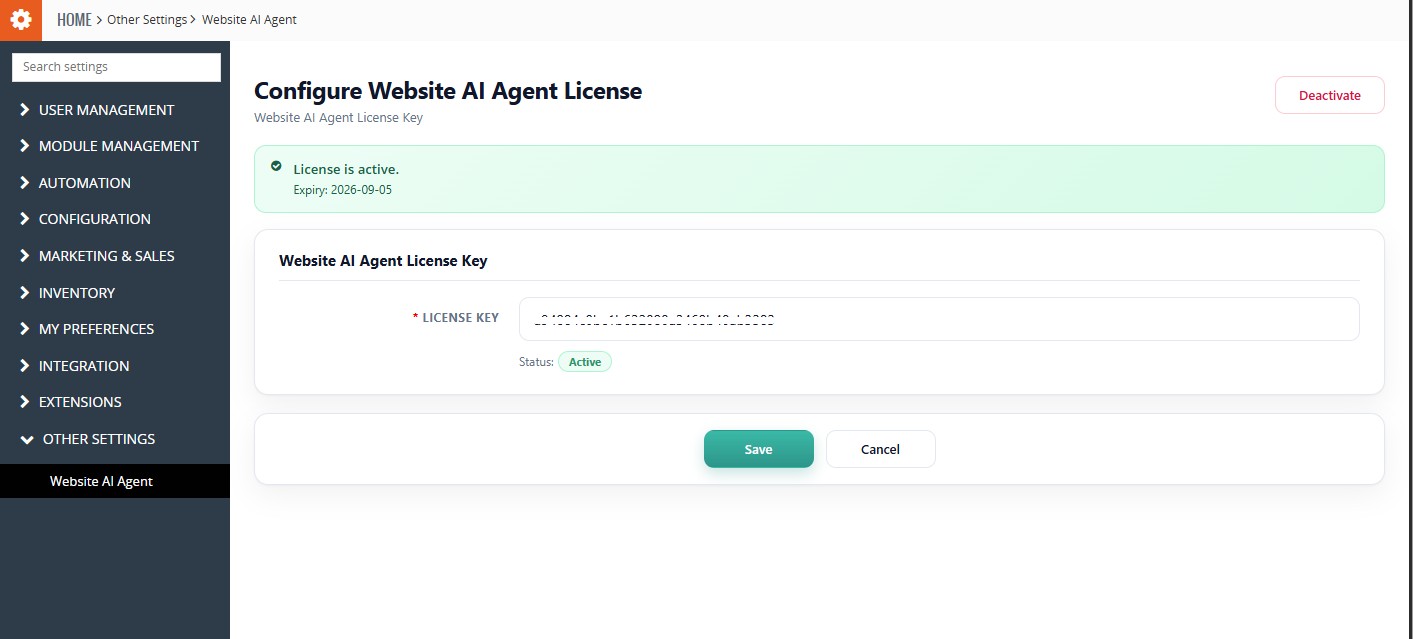 Website AI Agent ConfigurationAfter setting license key setup, You can create and manage AI chatbot agents for your website by clicking on Add Record.
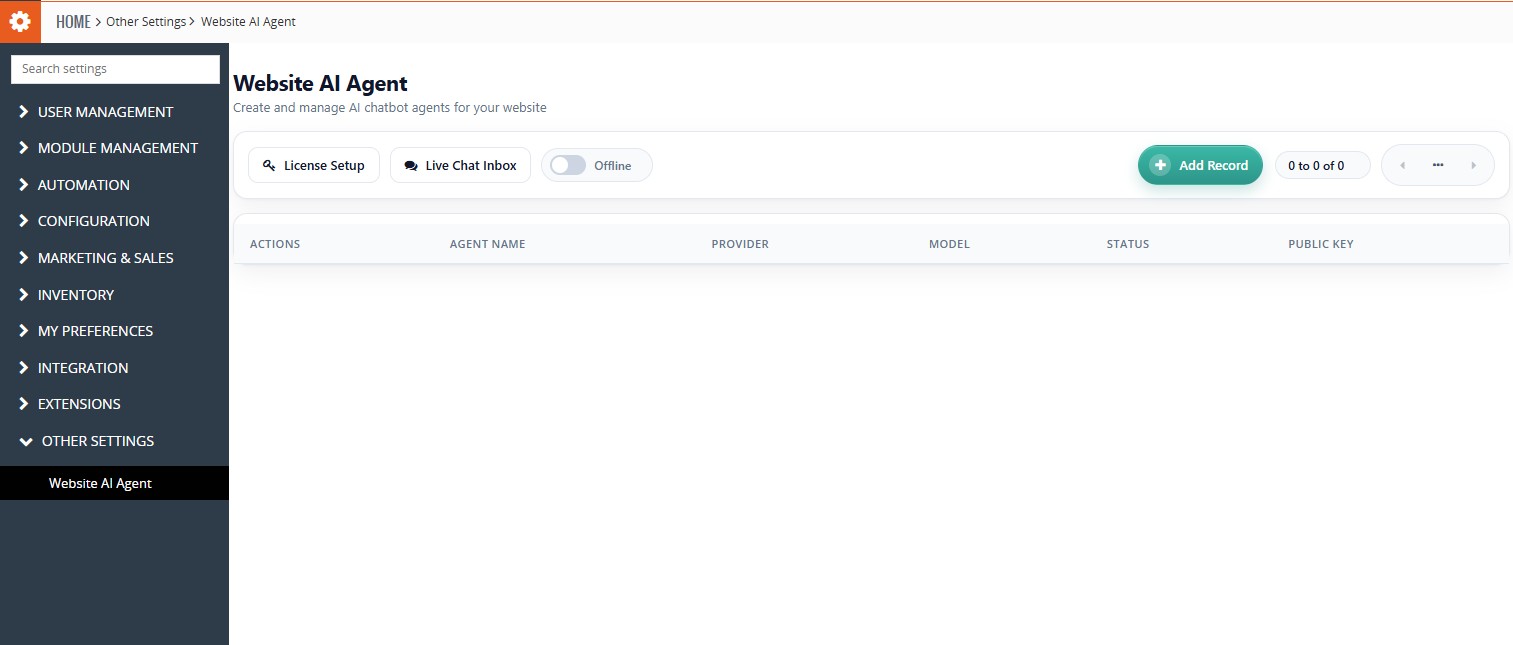 Add AI Agent
- Navigate to Other Settings → Website AI Agent.
- Click Add Record.
- Configure the AI Agent using the available configuration sections.
- Configure General Configuration.
- Configure Safety Rails.
- Add documents and websites under Knowledge Base.
- Configure the required Actions.
- Configure the Website Widget.
- Copy the generated Embed Code and add it to your website.
- Click Save.
General Configuration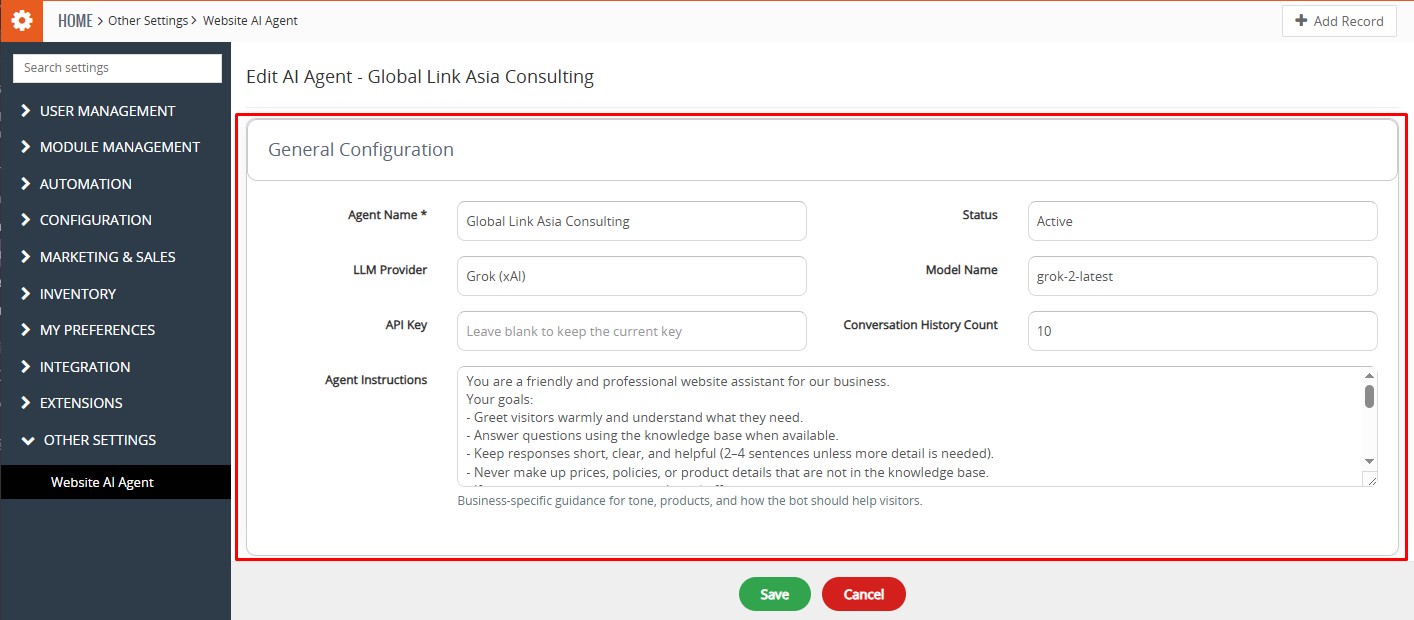 The General Configuration section is used to configure the AI Agent and its AI provider.Configuration Fields
| Field | Description |
|---|---|
| Agent Name | Enter the name of the AI Agent. |
| Status | Defines the current status of the AI Agent. |
| LLM Provider | Select the AI provider used by the Website AI Agent. Available providers include OpenAI, Grok (xAI), and Google Gemini. |
| Model Name | Enter the AI model to be used with the selected provider. |
| API Key | Enter the API key required to connect with the selected AI provider. |
| Conversation History Count | Defines the number of previous conversation messages considered by the AI when generating responses. |
| Agent Instructions | Define the AI Agent’s role, behavior, response style, business guidelines, and other instructions. |
Need an API Key?
Safety Rails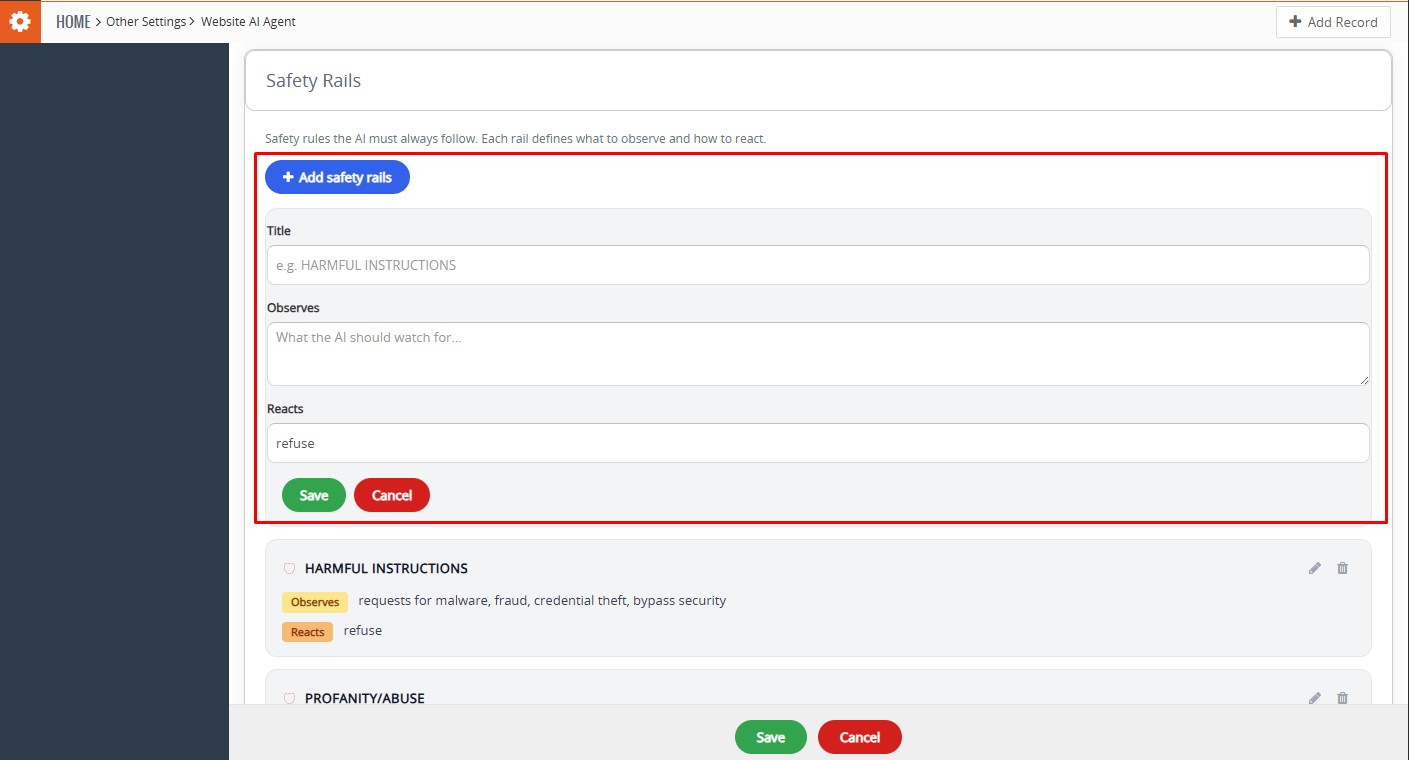 Safety Rails define the rules that the Website AI Agent must follow when interacting with website visitors. Each safety rail specifies what the AI should observe and how it should react when the defined condition is detected.Add Safety Rail
To add a Safety Rail:
- Click + Add safety rails.
- Enter a Title for the safety rule.
- In Observes, specify what the AI should watch for.
- In Reacts, select the required action:
- Refuse – Refuse the request.
- Warn – Warn the visitor.
- Escalate – Escalate the conversation.
- Redirect Human – Transfer the conversation to a human agent.
- Click Save to add the Safety Rail.
Example:
Title: HARMFUL INSTRUCTIONS
Observes: Requests for malware, fraud, credential theft, or bypassing security.
Reacts: Refuse.
Knowledge Badge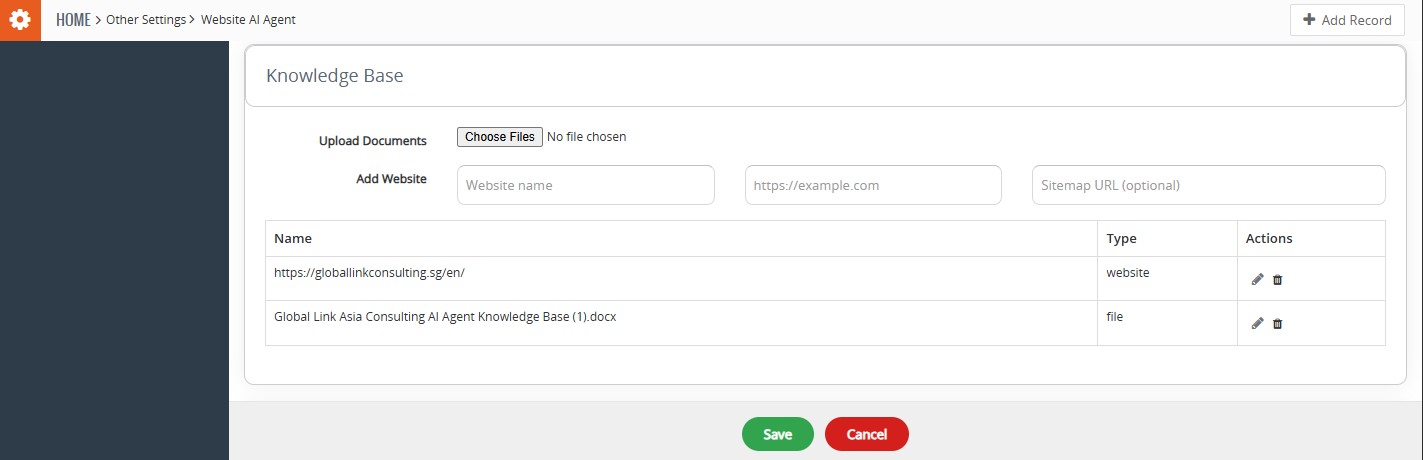 The Knowledge Base provides information that the Website AI Agent can use to answer visitor questions accurately.
- Upload Documents – Click Choose Files to upload documents containing business information.
- Add Website – Enter the Website Name, Website URL, and optionally a Sitemap URL to add website content to the Knowledge Base.
- Added documents and websites are displayed in the list with their Type.
- Use the Edit or Delete icons to manage existing Knowledge Base sources.
- Click Save to save the Knowledge Base configuration.
The AI Agent uses the configured Knowledge Base sources to provide relevant responses to website visitors.
Actions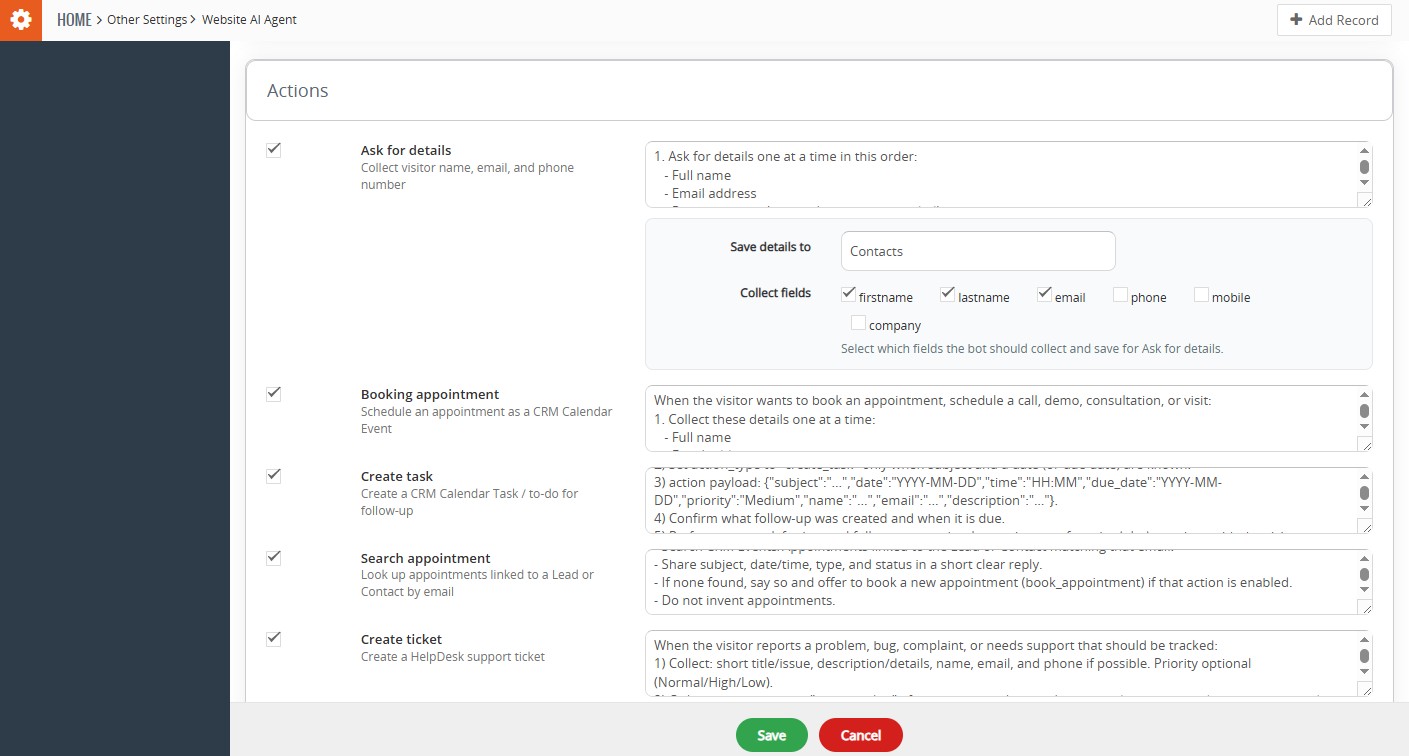 The Actions section allows you to select the tasks that the Website AI Agent can perform for website visitors.
- Ask for details – Collect visitor information such as name, email, and phone number and save the details to Leads or Contacts in CRM.
- Booking appointment – Schedule appointments as CRM Calendar Events.
- Create task – Create CRM tasks for follow-up or to-do activities.
- Search appointment – Find existing appointments or bookings.
- Create ticket – Create a HelpDesk support ticket from the visitor’s request.
- Search ticket – Find existing tickets using the ticket number or email address.
- Search task – Look up existing CRM tasks or follow-ups.
- Connect to humans – Transfer the conversation from the AI Agent to a live agent.
- Close conversation – End the visitor’s chat session.
To enable an action: Select the checkbox beside the required action, configure its instructions if needed, and click Save.
Website Widget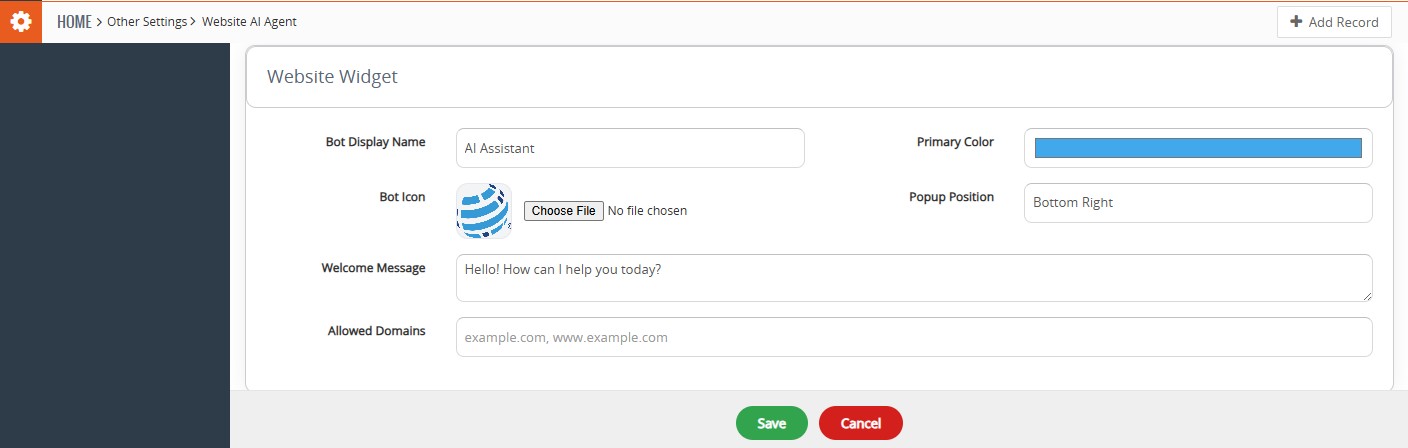 The Website Widget section allows you to customize how the AI Agent chat appears on your website.
- Bot Display Name – Enter the name displayed at the top of the chat widget.
- Bot Icon – Upload an icon or image for the AI Agent.
- Welcome Message – Enter the initial message shown to website visitors when they open the chat.
- Primary Color – Select the main color used for the chat widget.
- Popup Position – Select where the chat widget appears on the website, such as Bottom Right.
- Allowed Domains – Enter the website domains where the AI Agent widget is allowed to appear.
Click Save to apply the Website Widget configuration.
Embed Code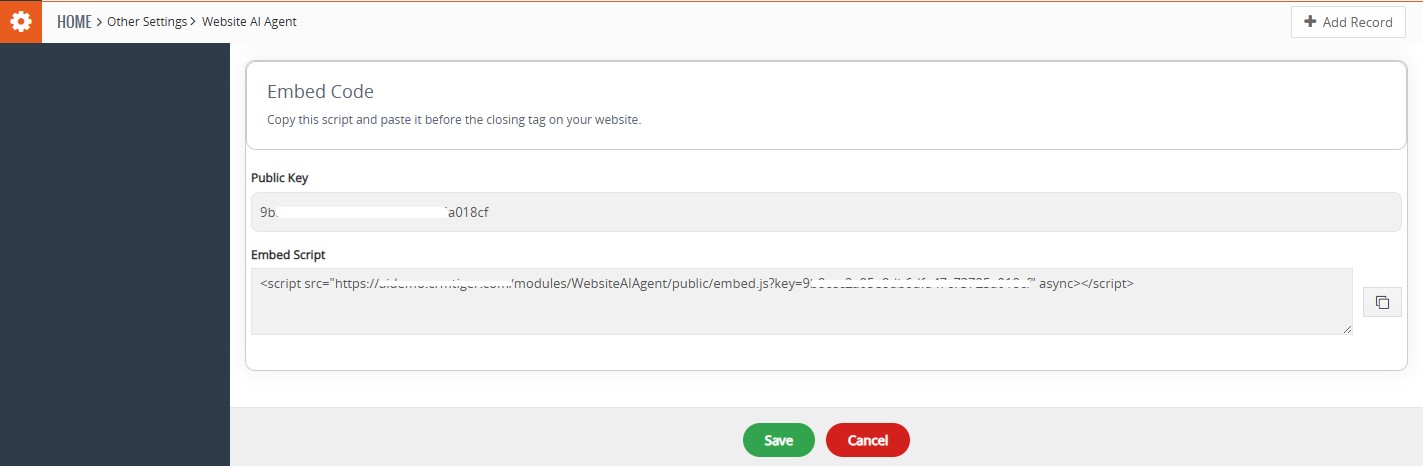 The Embed Code section provides the script required to add the Website AI Agent chat widget to your website.Embed Code Configuration:
- Click the Copy icon to copy the generated Embed Script.
- Add the script to your website’s HTML before the closing
</body>tag. - Save and publish the website.
- Open the website and verify that the AI Agent chat icon is displayed.
Note: The Public Key and Embed Script are generated for the configured AI Agent. Use the generated script as provided without modifying it.