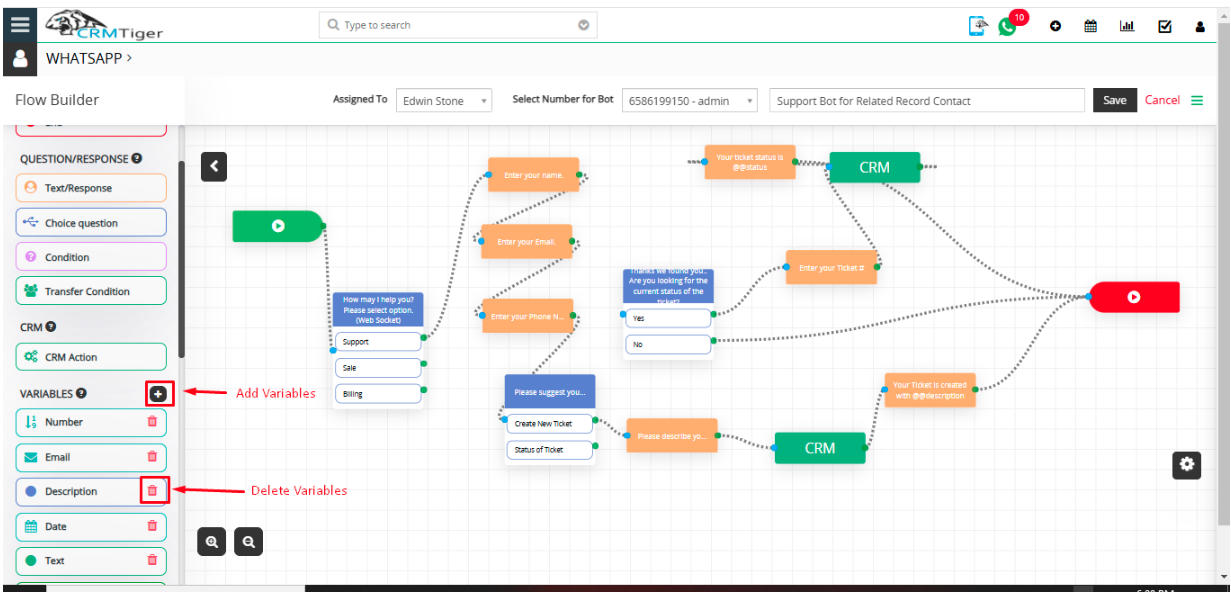
Users can set the flow according to the requirement for the Bot.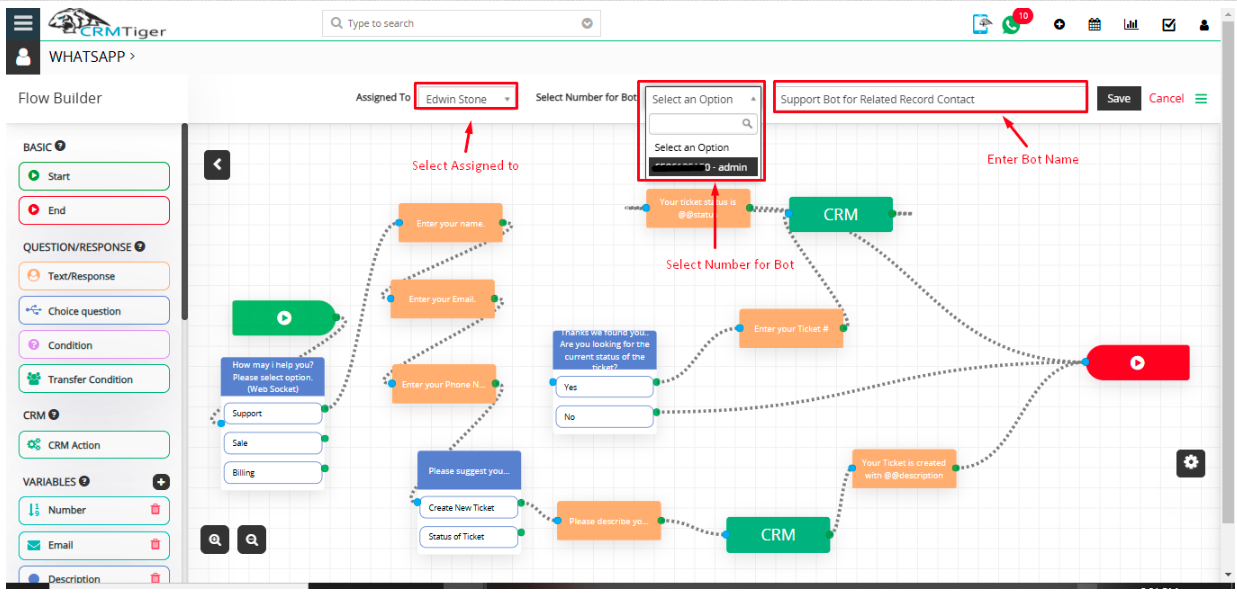
- Basic:
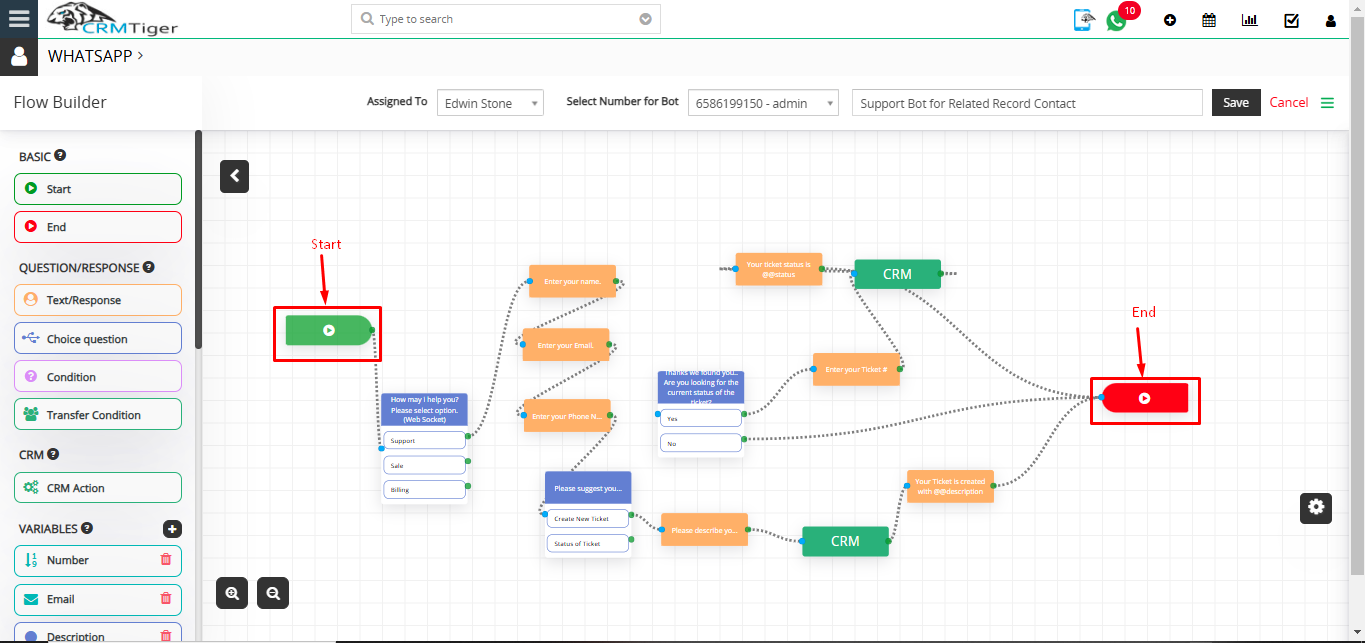
- Start: Use this node when you start designing the Bot flow.
- End: Use this node when you end designing the Bot flow.
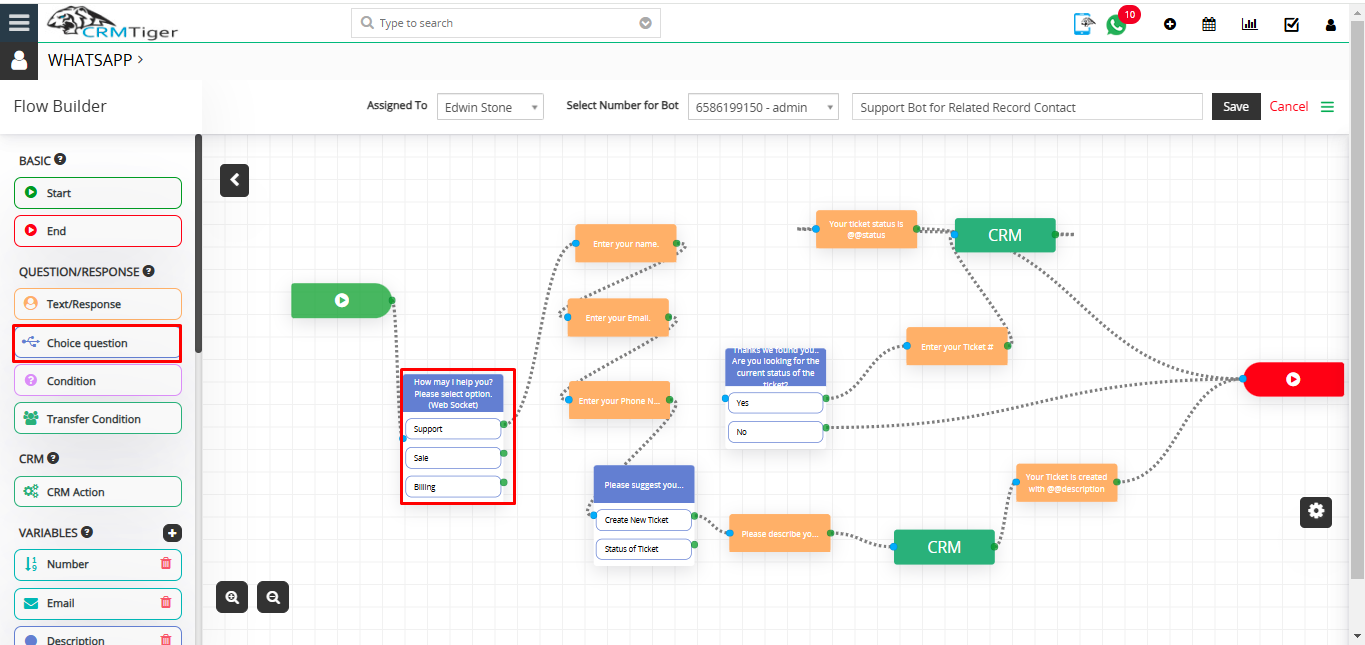
NOTE : Bot must start with a choice question.
- Question/Response:
- With this feature, users can set various types of questions in flow to Ask customer.
- Add Condition to check it against a response from a customer in Bot.
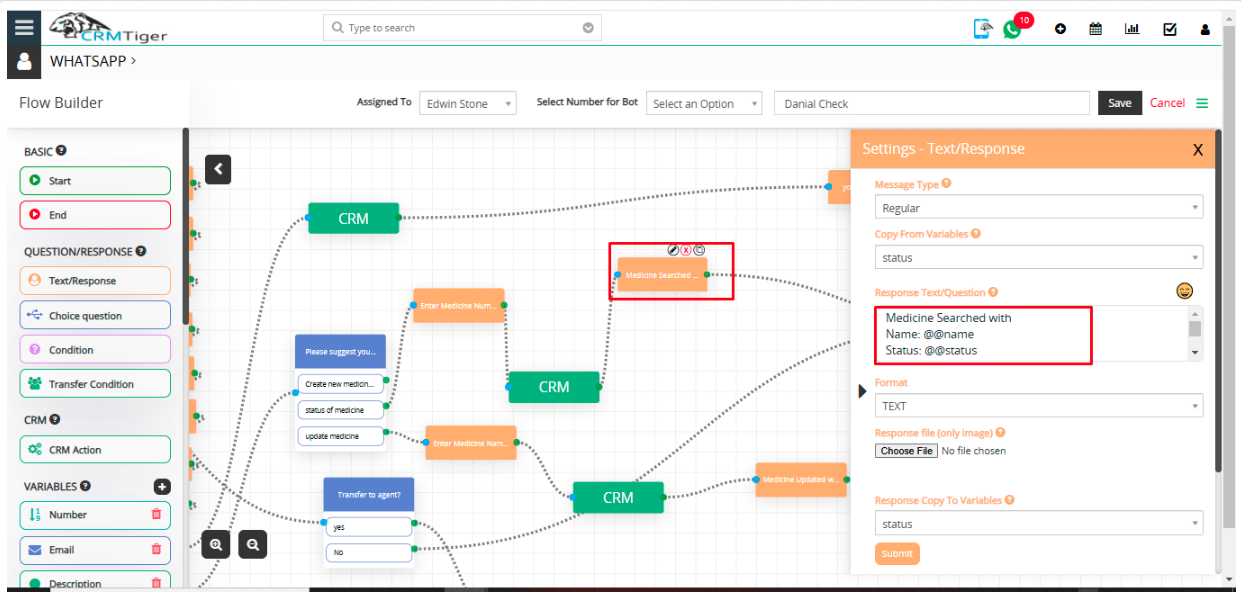
- Question/Response Action Settings:
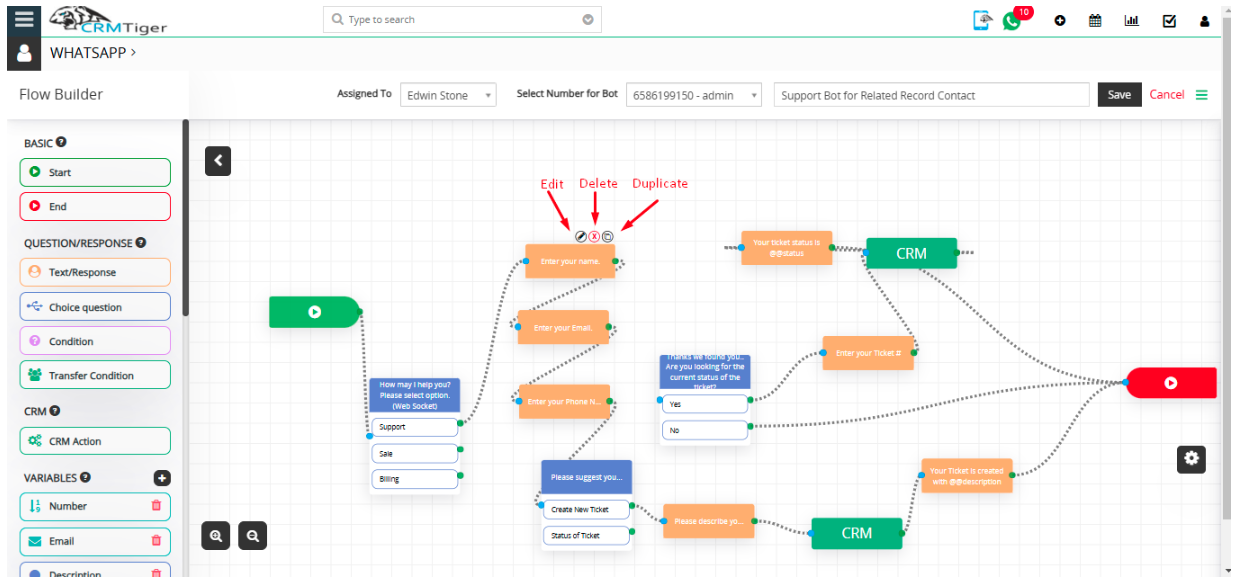
- Quick Actions for Added Questions/Responses and CRM Actions:
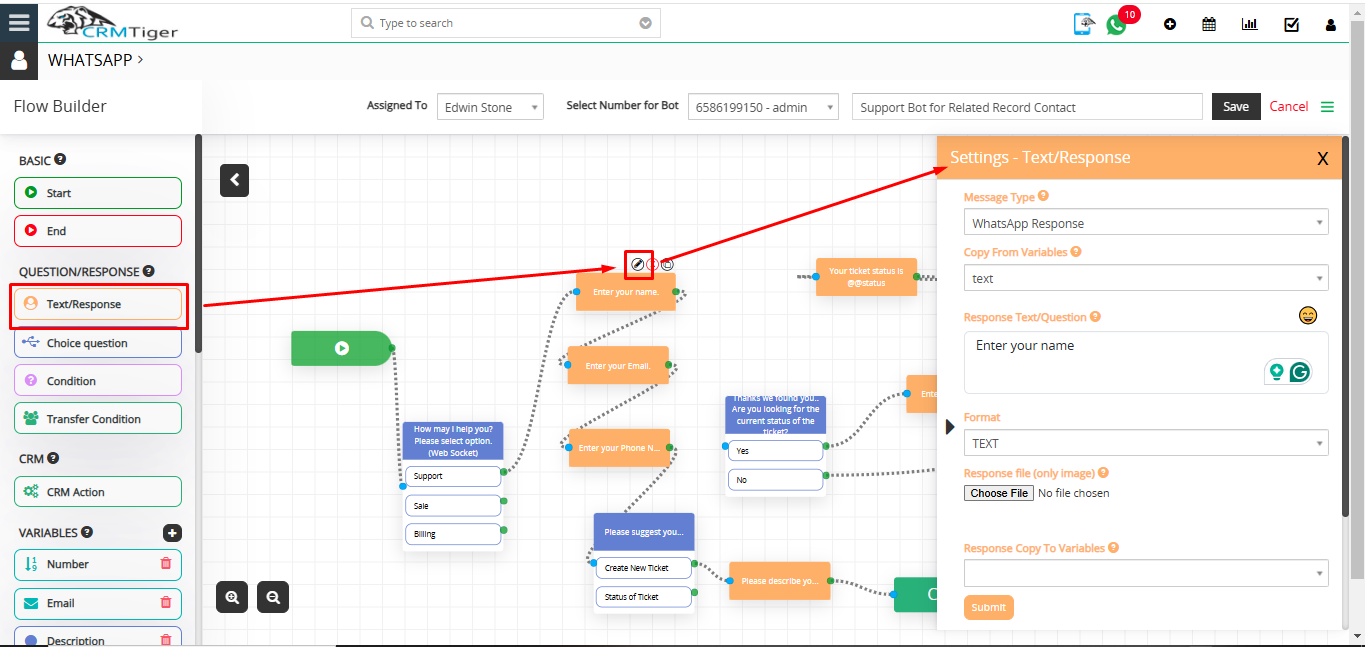
- Users can edit, delete, and create duplicate questions/responses and CRM actions added to the bot by click on the icons shown below
- Text/Response:
- Message Type:
- Regular message – This is a regular message type format sent to customers from Bot.
- WhatsApp Response – This message type will display responses to customers in WhatsApp format.
- Copy from Variables:
Select variable to add or copy to the message which converts to actual value when sent message to customer. - Response Text/Question:
Type a message as a response or ask a question to the customer.
- Format:
Select any format like text, number, email and date for response.
Note : To validate NUMBER, EMAIL, DATE format, you can use same name variable in English as “number”, “email”, “date”.- Response file:
Send Image as response to the customer along with text. - Response copy to variable:
Copy customer answer of question from bot to variable which can be used to store in CRM or reply to customer on various stages of Bot flow.
- Message Type:
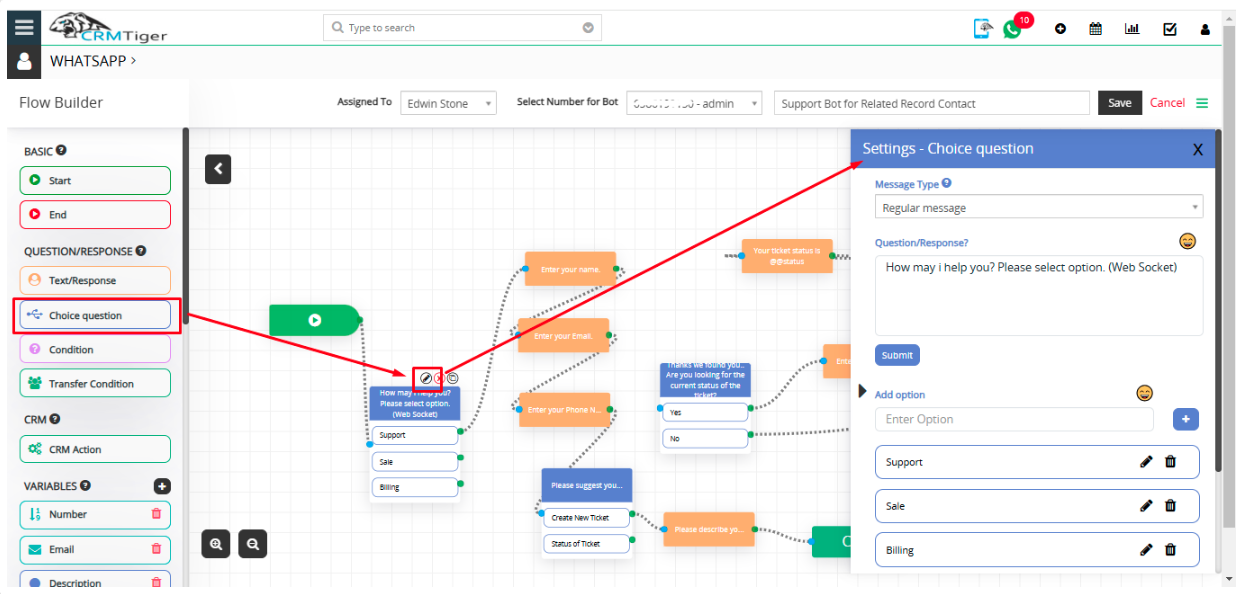
- Message Type:
- Regular message – This message type will display responses to customers in WhatsApp Regular format.
- Question/Response:
Add a question for the flow according to your choice. - Add Option:
Add an option for the question according to your choice.
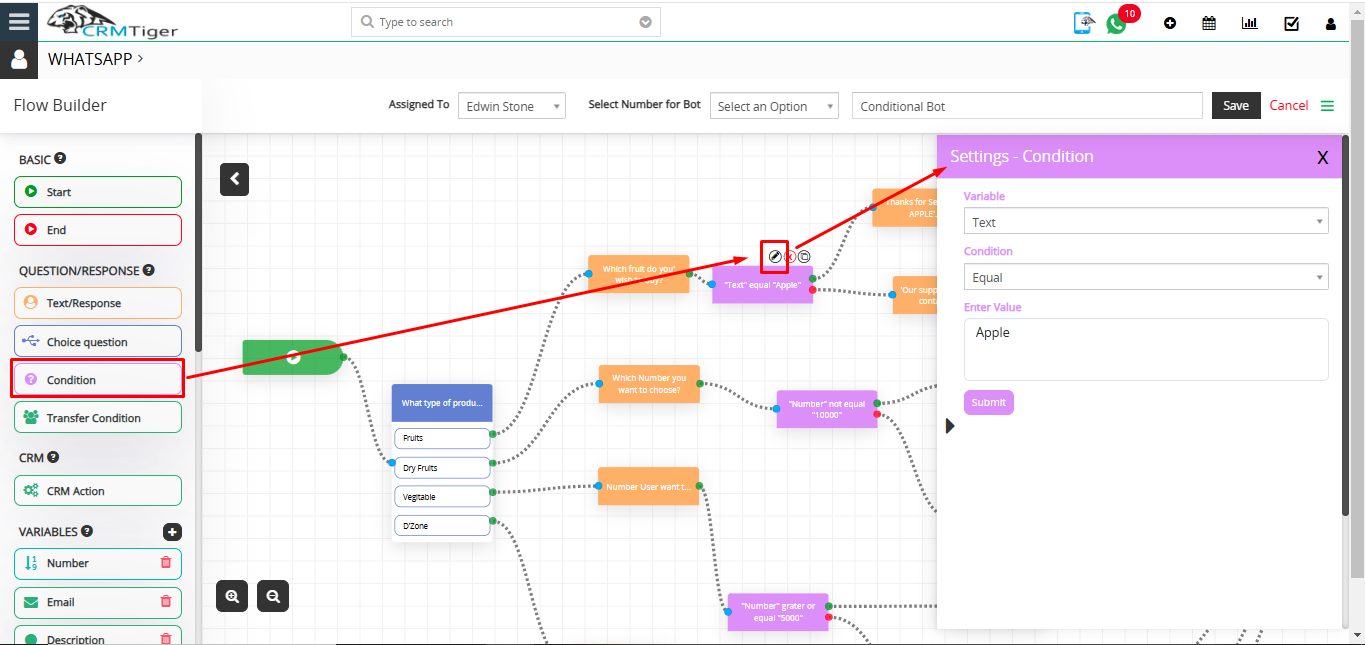
- Condition:
User can add condition for the question if it’s true then it will fire the value which is set.- Variable:
Select a variable like number, email, date or description for the value. - Condition:
Select the condition for the question like a value equal to Apple etc. - Enter Value:
Enter value according to the variable type selected.
- Variable:
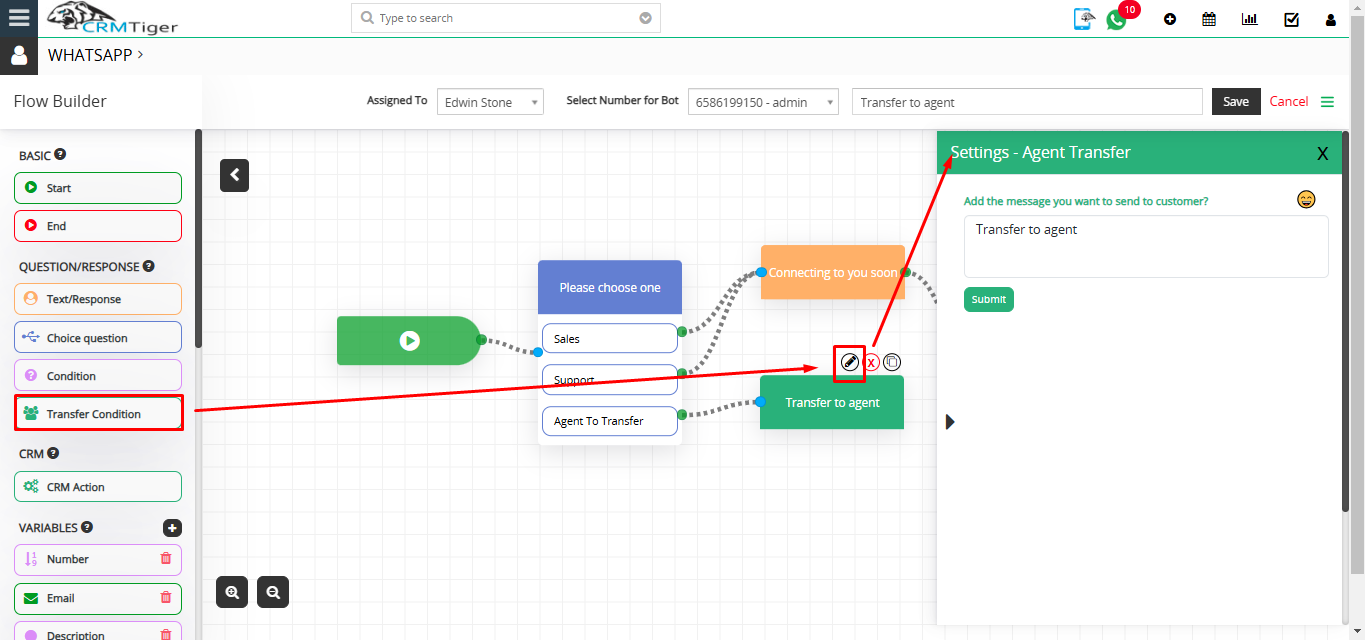
- Transfer condition: When the user selects the Transfer condition, the bot will transfer the chat to an agent and switch from robotic to manual mode.
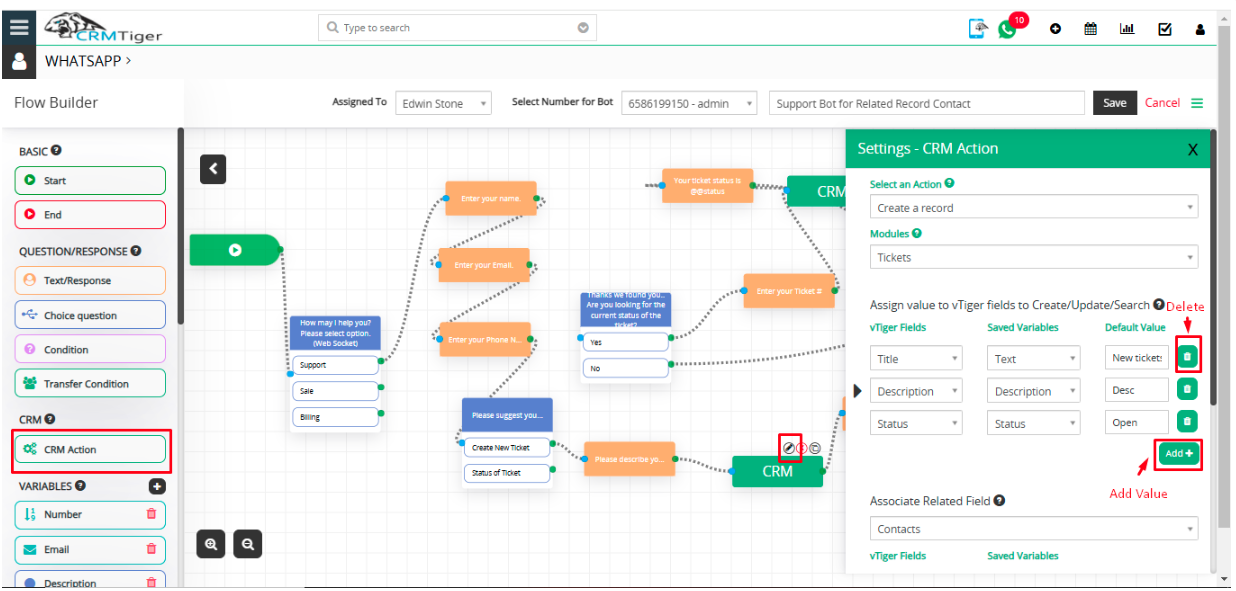
- CRM Action:
With CRM Action You can Insert/Update/Search record To or From CRM.
CRM Action Setting:- Select an Action:
Select an Action should allow the user to select various operations on CRM.- Create a Record – It allows you to Create record in CRM from responses from the customers.
- Search a Record – It allows you to search records from CRM from the value pass to CRM field.
- Update a Record – It allows you to update an existing record in the CRM with the values the user has set to update in the bot.
- Select an Action:
- Modules:
Select module to Search/Create/Update record to or from CRM - Assign value to vTiger fields to Create/Search/Update: :
- vTiger field – Select vTiger fields to copy value to vTiger fields from available variables.
- Saved variables – Select available variables used to store customer’s input from chatbot’s questions.
- Save variable(Response) from vTiger field:
On create/search/Update on CRM it will return selected field value to customer to be displayed in WhatsApp bot.- Copy to variable – Select variable type as name, email, date or description for copy variable.
- Copy from vTiger Field – Select fields for copying variables from vTiger field.
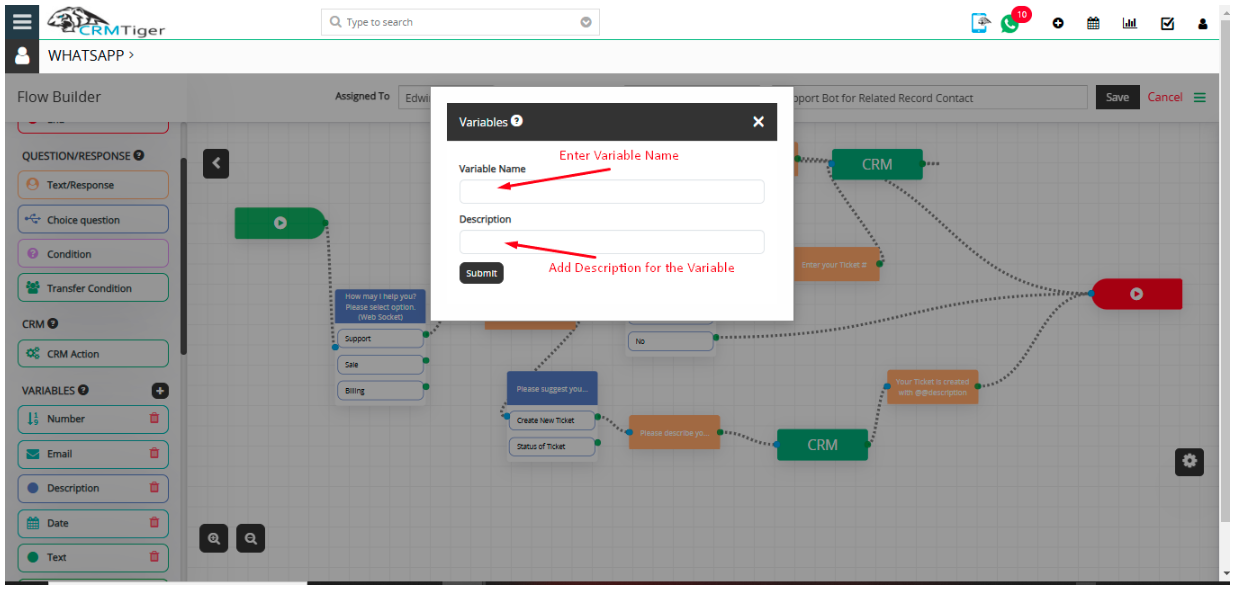
- Add Variable Pop-up:
- Variable Name: Enter name for Variable
- Description: Enter Description for Variable
- In the final response, the user has the option to print a response for all UI types included.
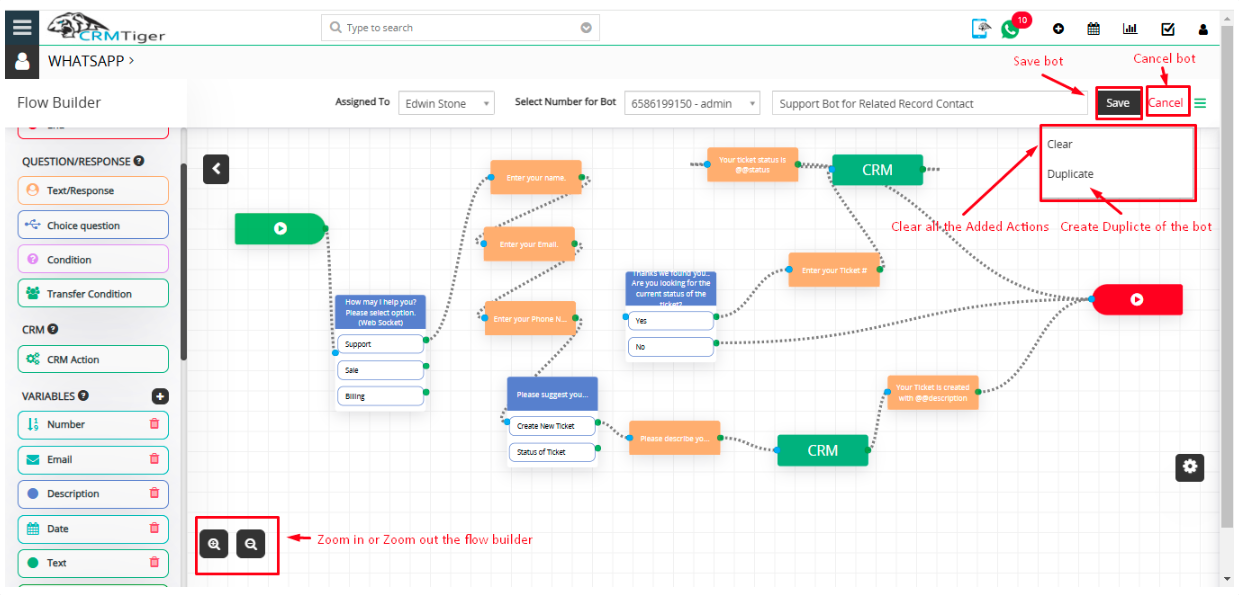
- Users can Clear all the added actions by clicking on the Clear option and also duplicate the created Bot from the Flow Builder.
- Zoom In and Zoom Out buttons are also there for the flow builder.
- Save or Cancel the Created bot by clicking on the save or cancel button
- When you click on the radio button, the bot will disconnect. Additionally, if the scan number is disconnected, the status will show as ‘Disconnected.
CRM
 Variables:
Variables used to copy answers from customers using bot like their name, email, phone etc. This will be used to map with respected CRM fields to Add/Search/Update To or From CRM.
