Overview of “AI Content Assistance”The AI Powered Content Assistant revolutionizes your workflow in vTiger CRM by effortlessly generating clear, professional content, whether you’re writing internal comments, descriptions, or customer emails, all with a single click.
How to Install and Configure the AI Content Assistant in vTiger CRM?
- Purchase the AI Content Assistant Integration from CRMTiger’s extension store.
- You will get a zip file in the email
- Login to vTiger CRM and install the zip file as you would install any plugin or extension
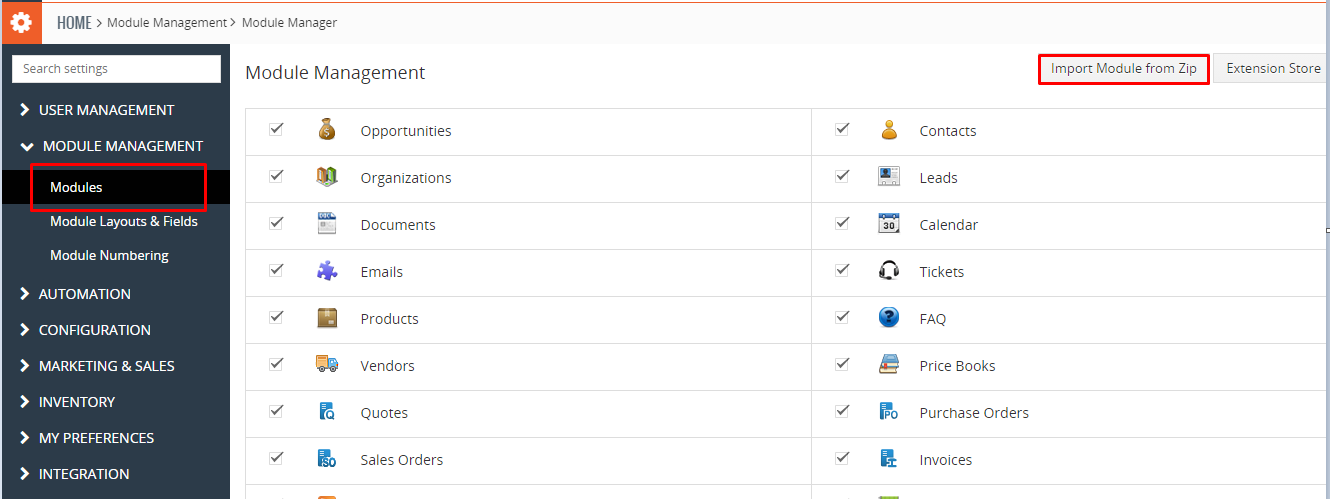
- Install the .zip (package) file of the extension by navigating to CRM Settings → Module Management → Modules, then click the “Module from ZIP” button as shown in the screenshot above.
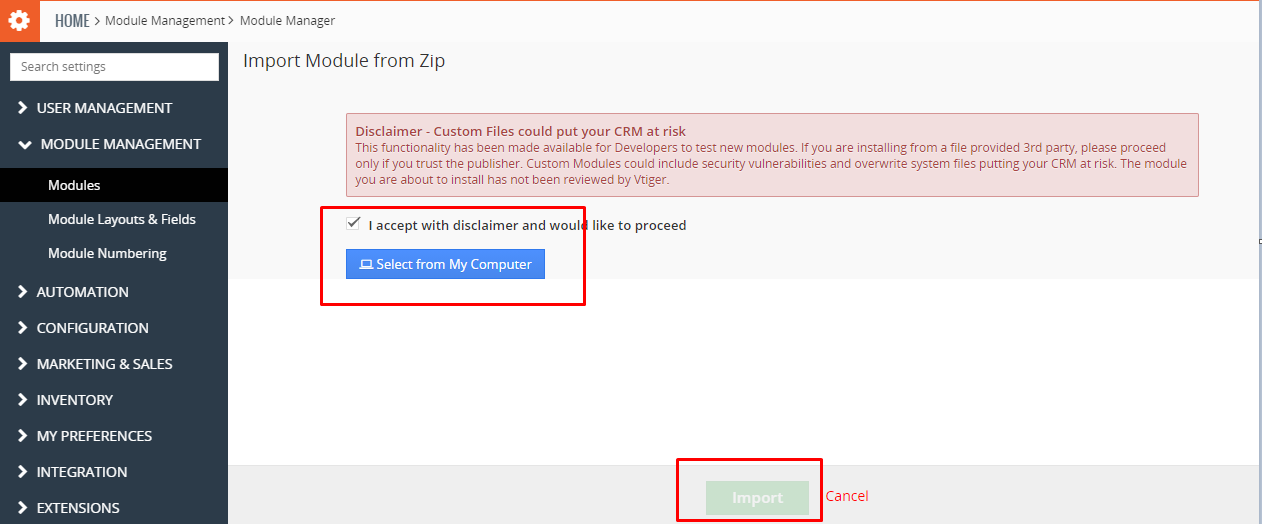
- Accept the disclaimer checkbox as shown in the screenshot below, then select the ZIP file from your Downloads folder. Click the Import button to complete the installation.
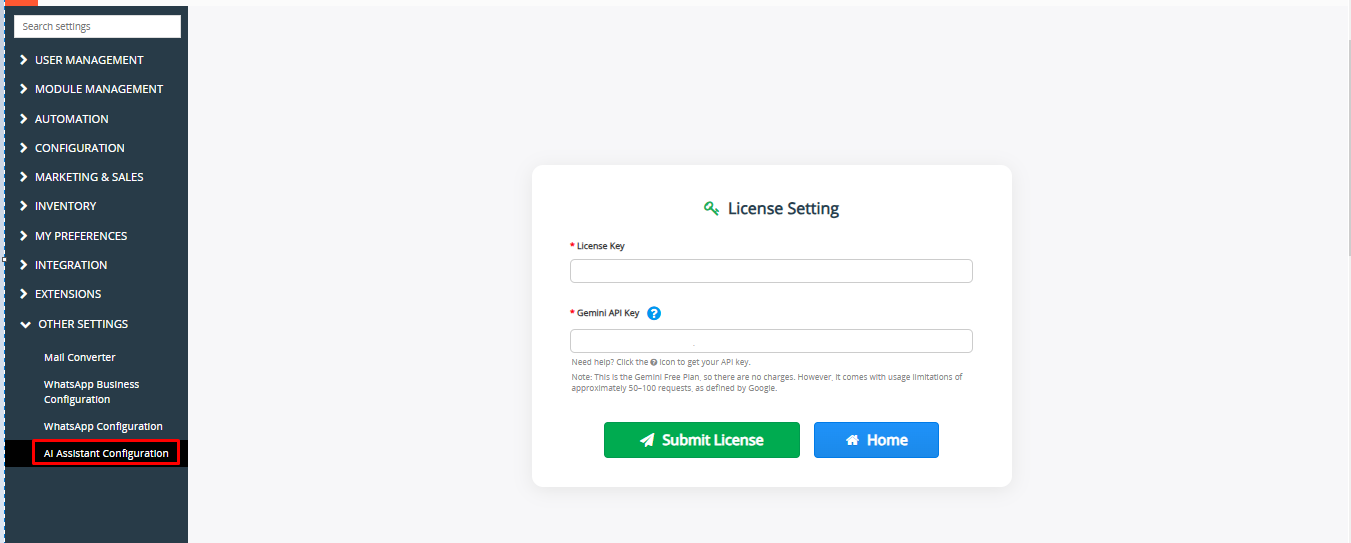
- Once the installation is complete, the extension will appear under CRM Settings → Other Settings, as shown in the screenshot below.
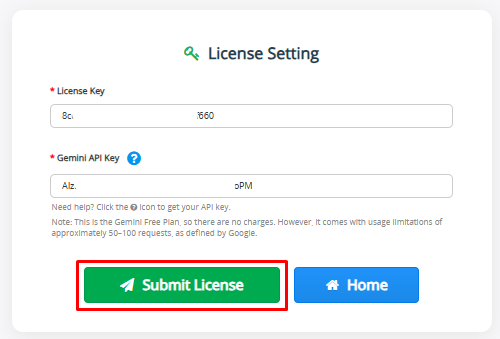
License Configuration
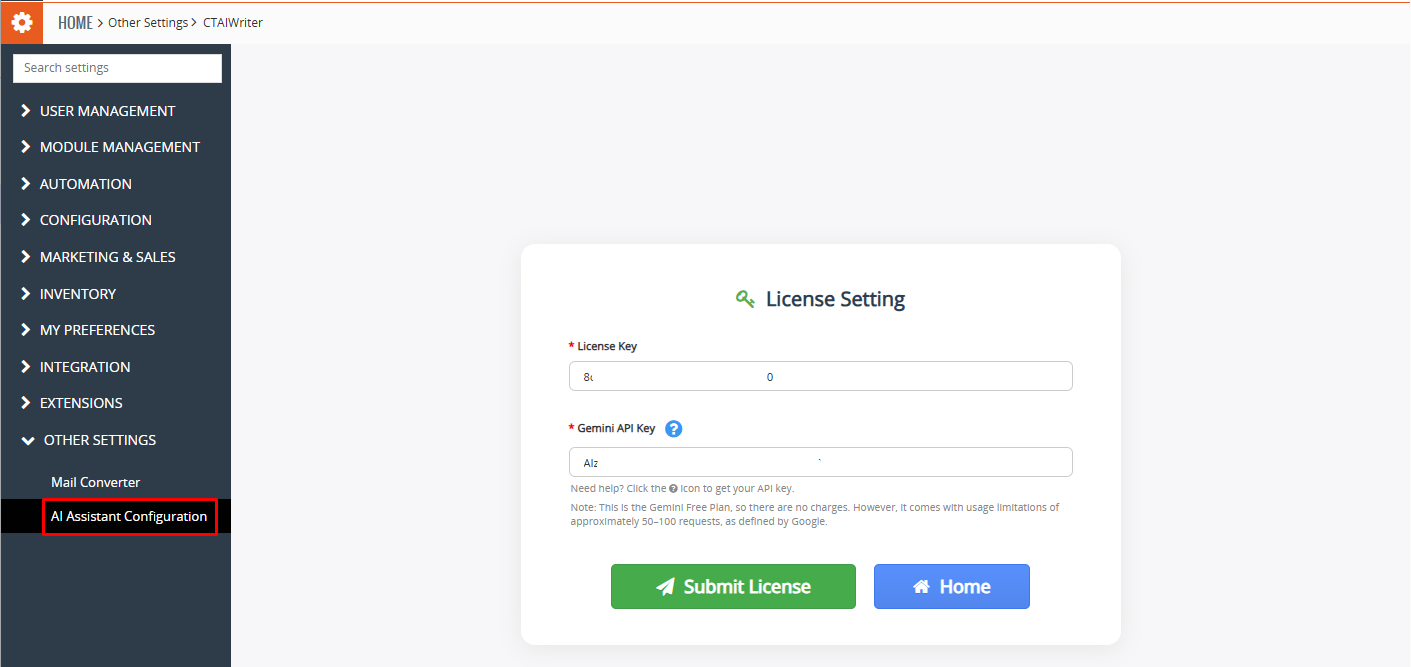
Navigate to License Setup:
1. Go to:
Settings → CRM Settings → Other Settings → AI Content Assistant Configuration
Settings → CRM Settings → Other Settings → AI Content Assistant Configuration
2. Enter:
- License Key (from CRMTiger order)
- Gemini API Key
Get Gemini API Key: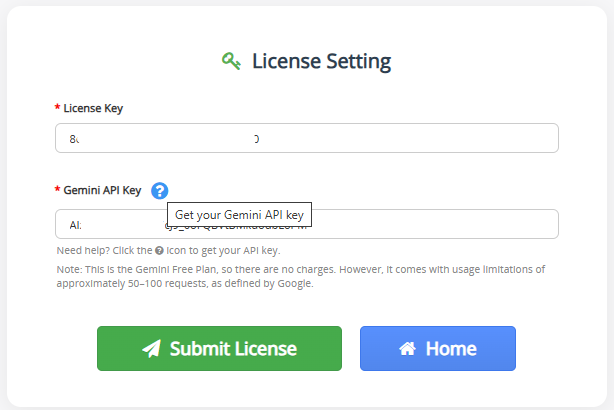
3. Click the info icon next to Gemini Key input. It opens Google AI Studio.
Gemini Free Plan – Request Limits (Usage Caps)
| Limit Type | Free Plan Limitation |
|---|---|
| Number of Questions per Day | Allowed, but with a daily cap (exact number not disclosed; estimated 30–50 prompts per day). |
| Speed Limit | Slower responses during busy hours or if limit is close. |
| File Uploads | Not supported at all in the free plan. |
| Characters per Request | May limit long questions or messages (usually around 4,000–8,000 characters max). |
| Chat Length | Only remembers limited part of the conversation (no long memory). |
| Image Uploads | Limited support (sometimes allowed on mobile, not fully functional). |
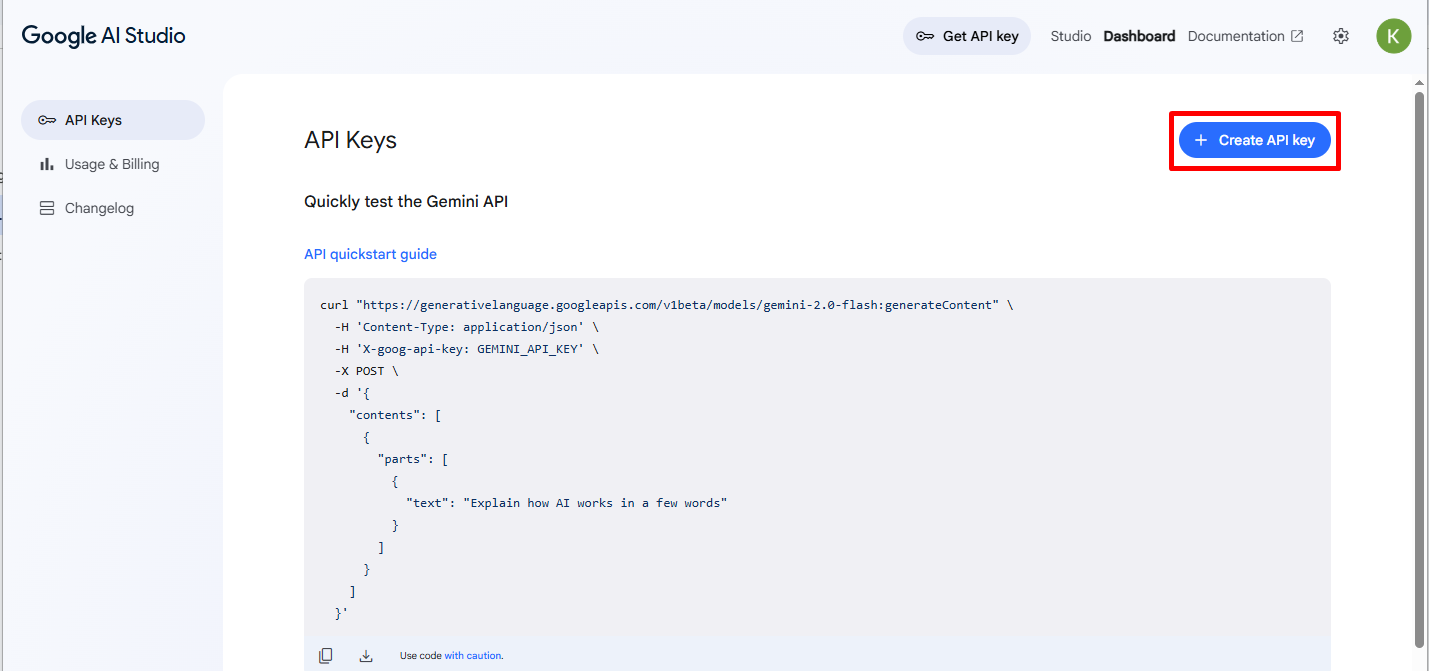
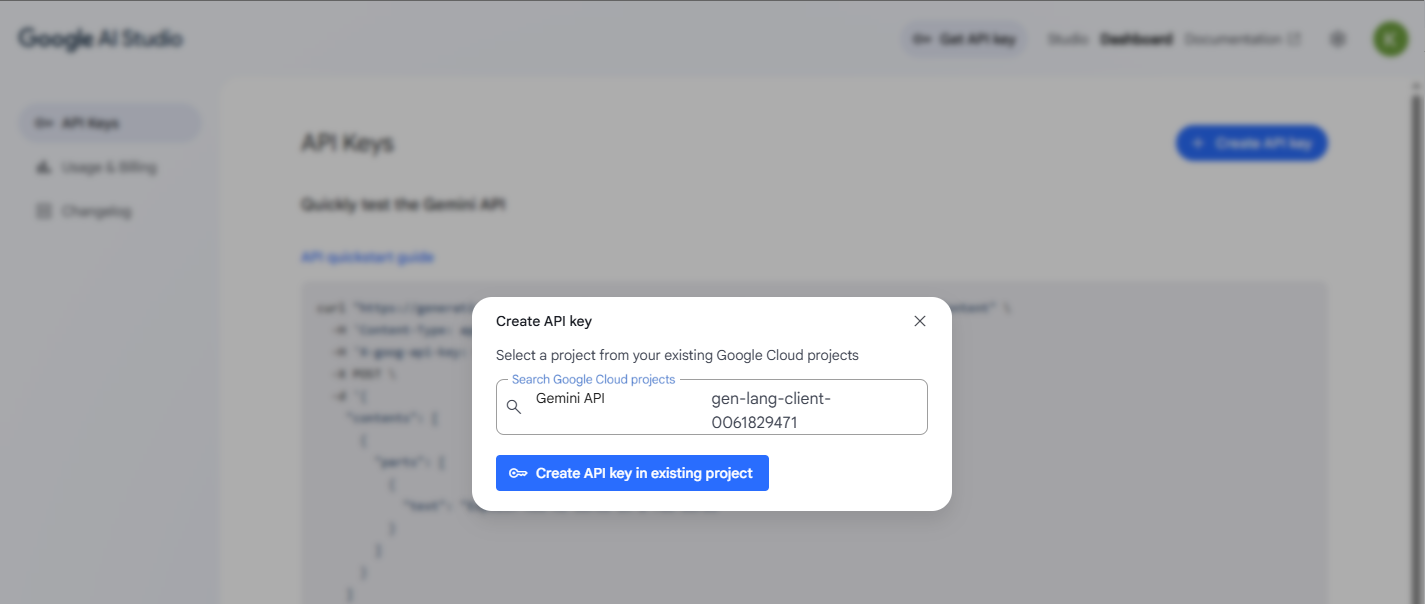
4. Click Create API Key, select a project, and confirm.
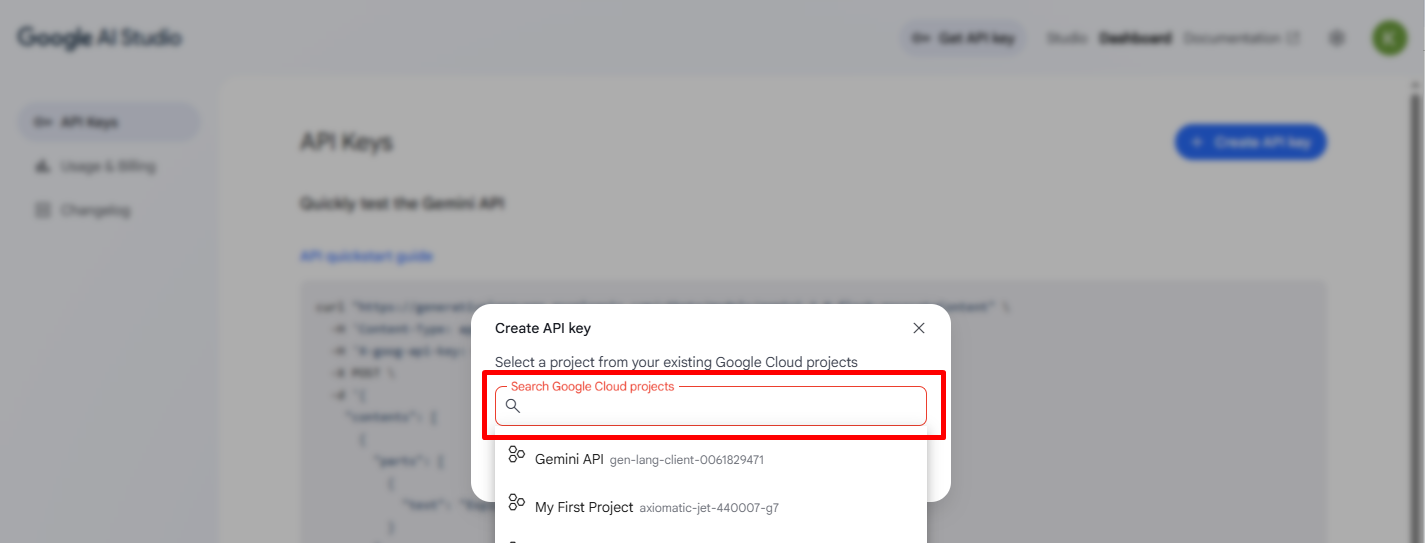
5. Click on “Create API Key for existing Project”.
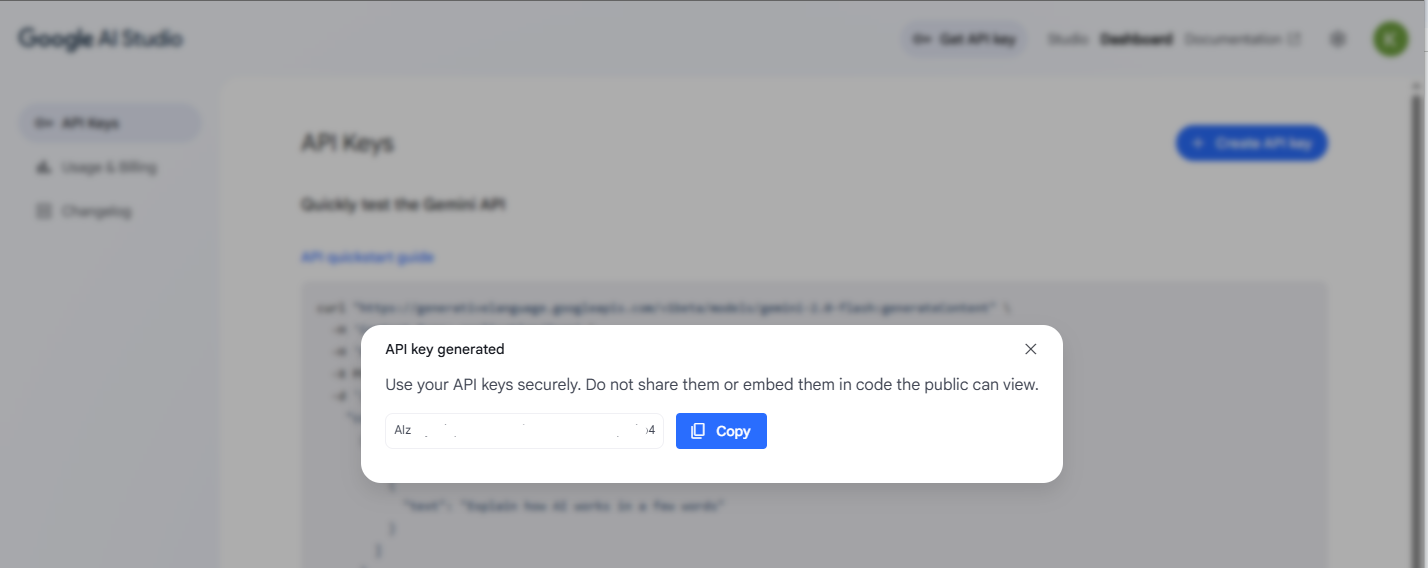
6. Copy the API key and paste it into CRM.
7. Click Submit License.