How to Install and Setup the CRMTiger Gmail Extension ?
There are Two steps to install this plugin – download from CRMTiger.com website and Chrome store
Following are the steps to install and setup Chrome Gmail extension.
Step1 – Get the CRM extension from the CRMTiger website by purchasing from here
<URL of purchase of Chrome extensions on CRMTiger>
- You will get a zip file in email.
- Login to vtiger CRM and install the zip file as you would install any plugin or extension
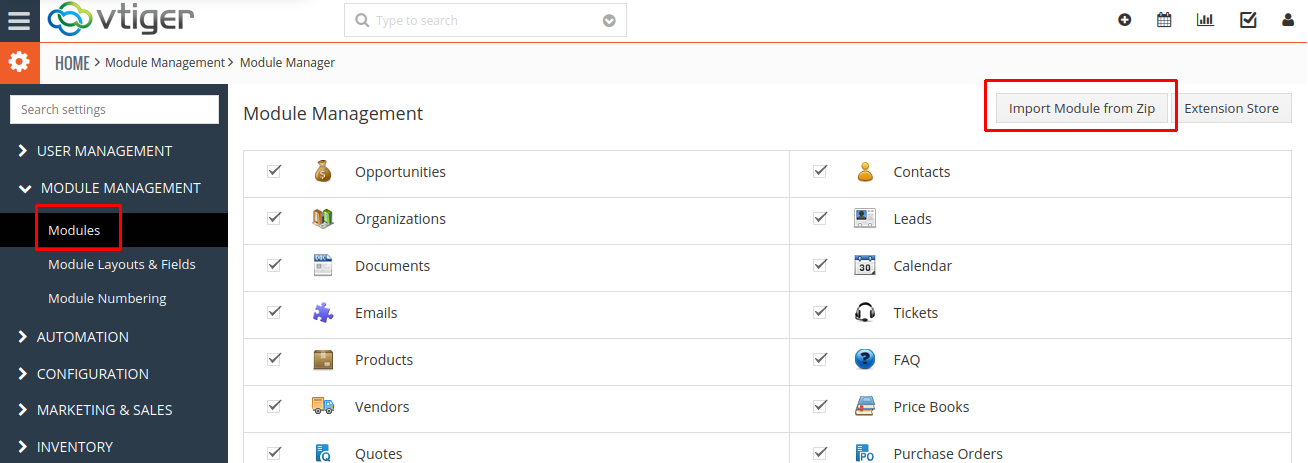
- Install the .zip (package) file of the Extension via CRM Settings -> Module Management-> Modules. Click on the
 button as shown in above screenshot.
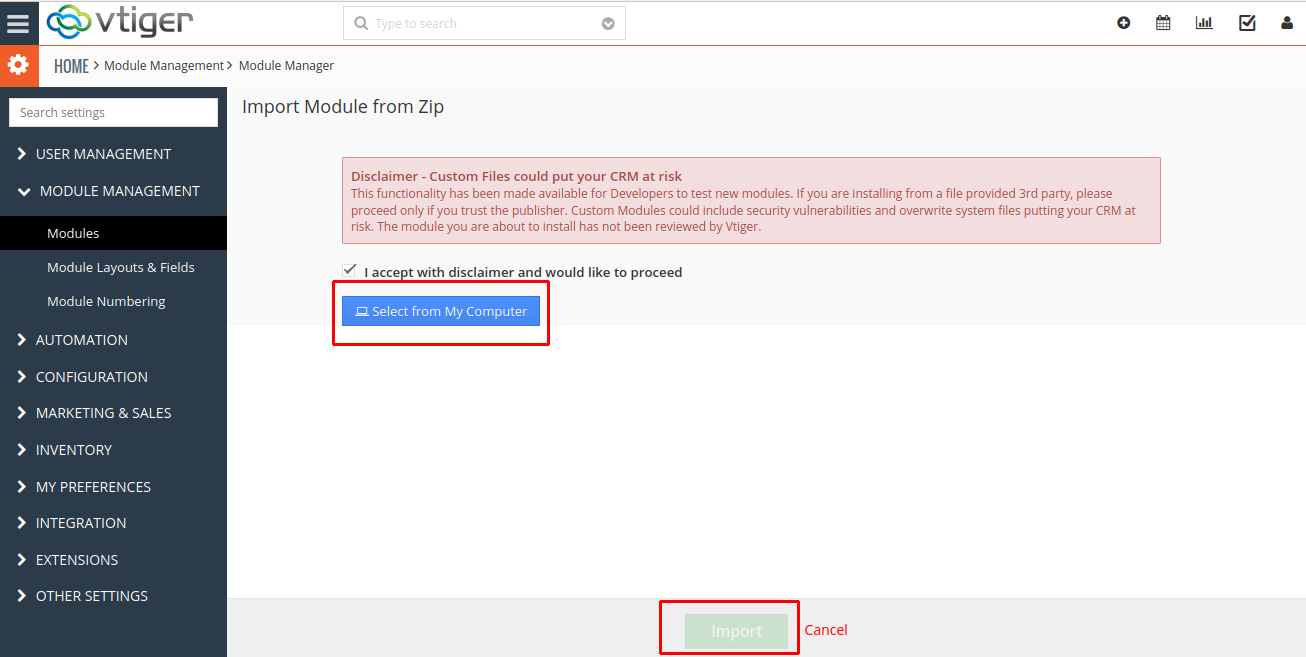
 - You need to accept the disclaimer as shown in the below screenshot and select the zip file from your DOWNLOADS folder (assuming you have received the file from us and downloaded into your Downloads folder). Then click on the IMPORT button to complete the installation.
- Once the plugin is successfully installed, proceed to the next step.
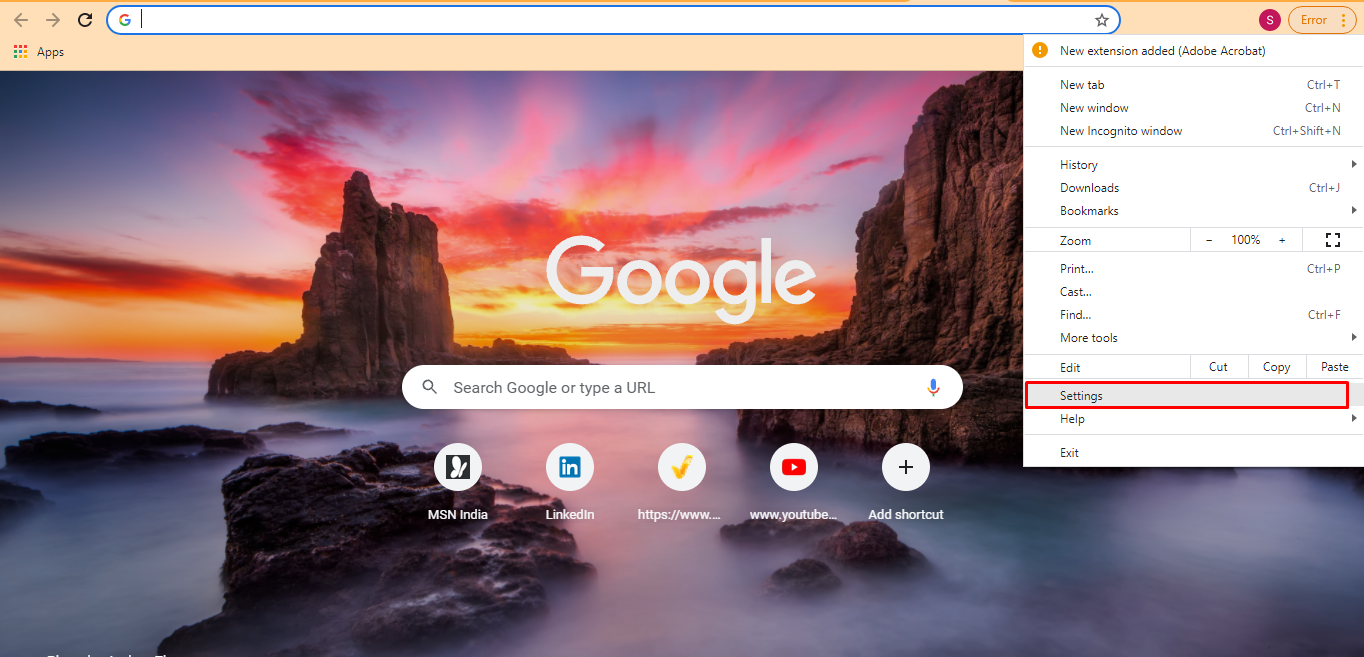
- Open your Chrome Browser (version <number>) and locate the UPDATE button with three dots as shown in the below screenshot. Open Settings menu item as highlighted in the screen shot.
Step2 – Download the CRM extension from the Chrome Store. Login into your Gmail account as usual and open any email.
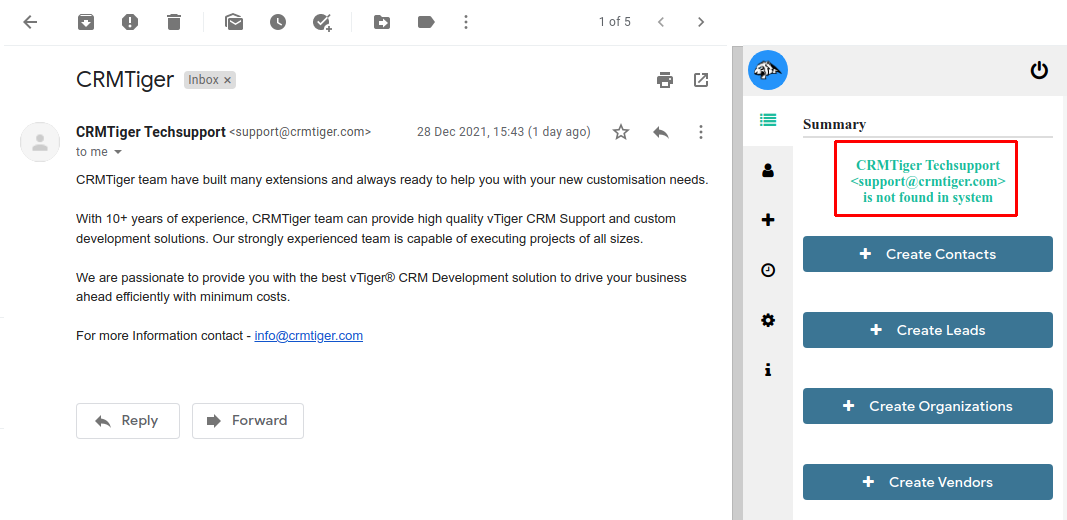
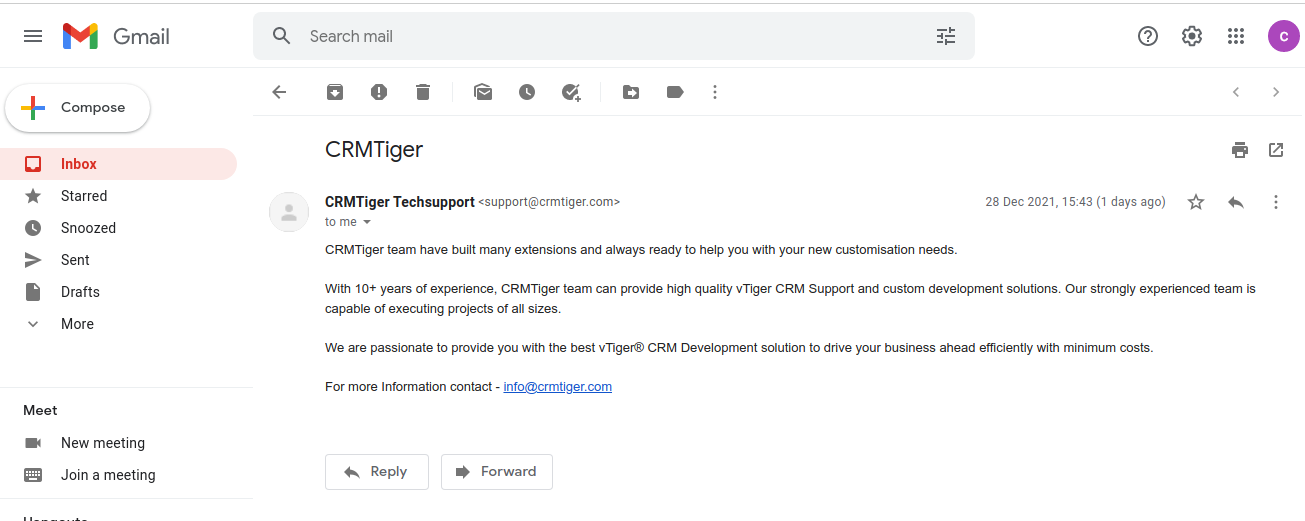
You will see a screen like this.
 Now because your browser has Gmail plugin installed, the screen will look like this
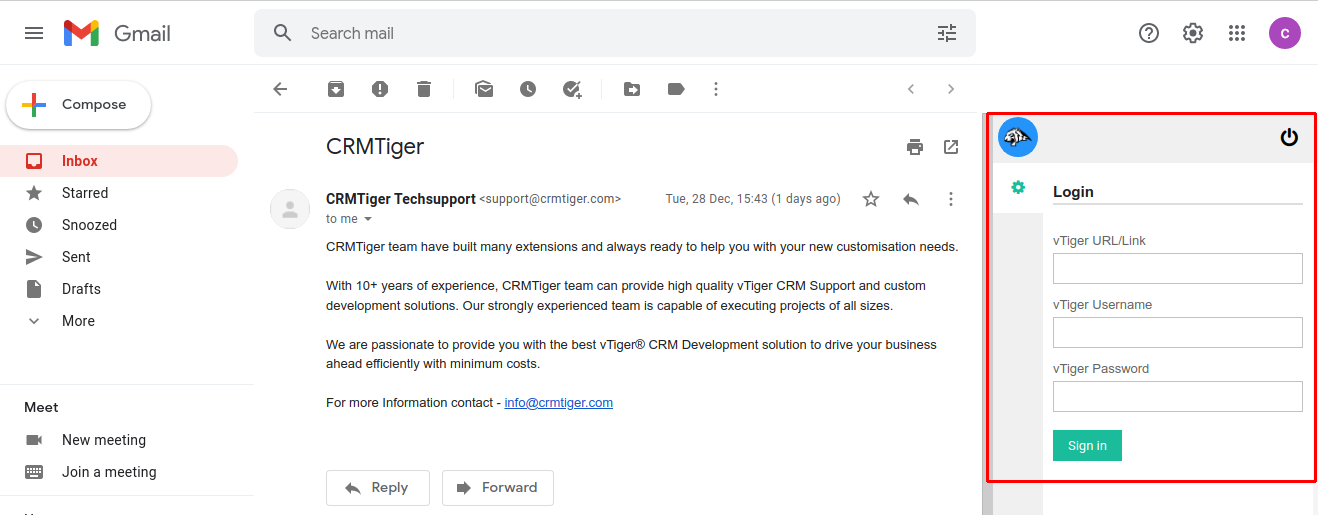
Here locate the CRM screen within the Gmail screen. For the first time, it will require logging into the CRM. Enter the CRM credentials and login
Once you are logged in your screen will look like this.