
How to configure AI Content Assistant?After configuring the license key, go to CRM Settings > Other Settings > AI Content Assistant Configuration to enable the AI Content Assistant for the desired modules. Refer to the screenshot below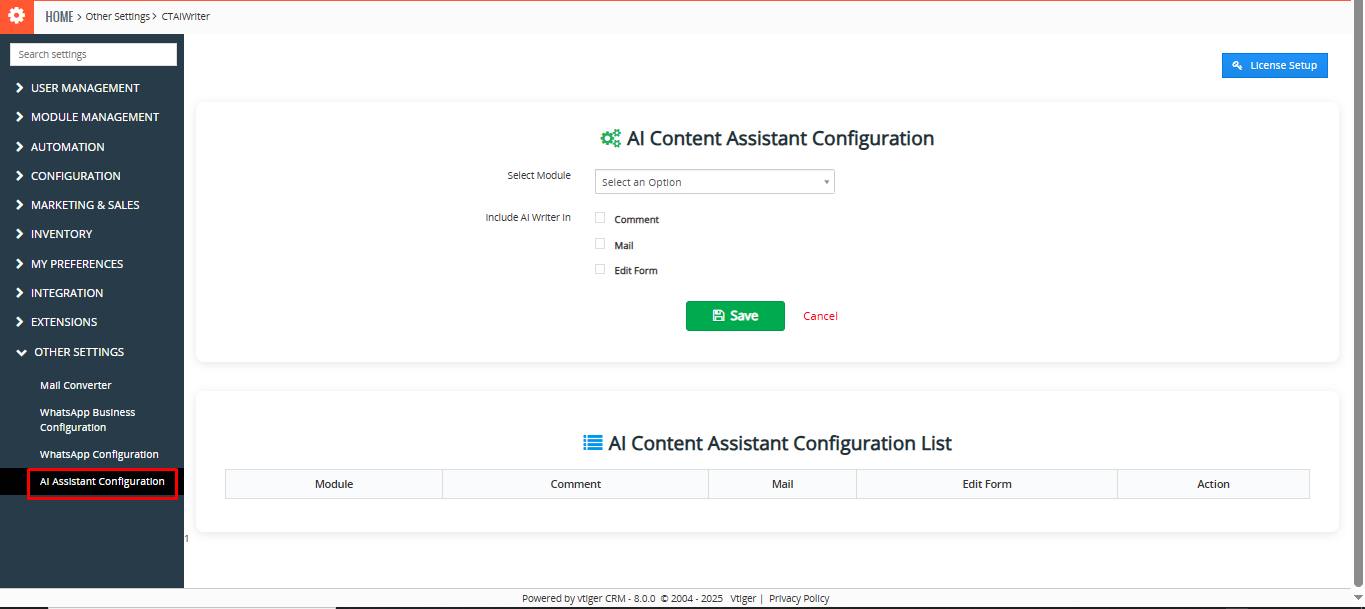 Select Modules to Enable AI Content Assistant:After activating the license, you will be redirected to the AI Content Assistant Configuration page.
Select a module (e.g., Contacts, Leads, etc.).
Choose where you want to enable the AI Content Assistant:
- AI Content Assistant in Comments
- AI Content Assistant in Email
- AI Content Assistant in Edit Form (applicable only to Text Area fields)
After selecting the desired module and the areas where the AI Content Assistant should be enabled, click Save. The selected configurations will be listed below, as illustrated in the screenshot. By clicking on “Delete,” the user can remove the selected module from the AI Content Assistant configuration, as shown in the screenshot below.
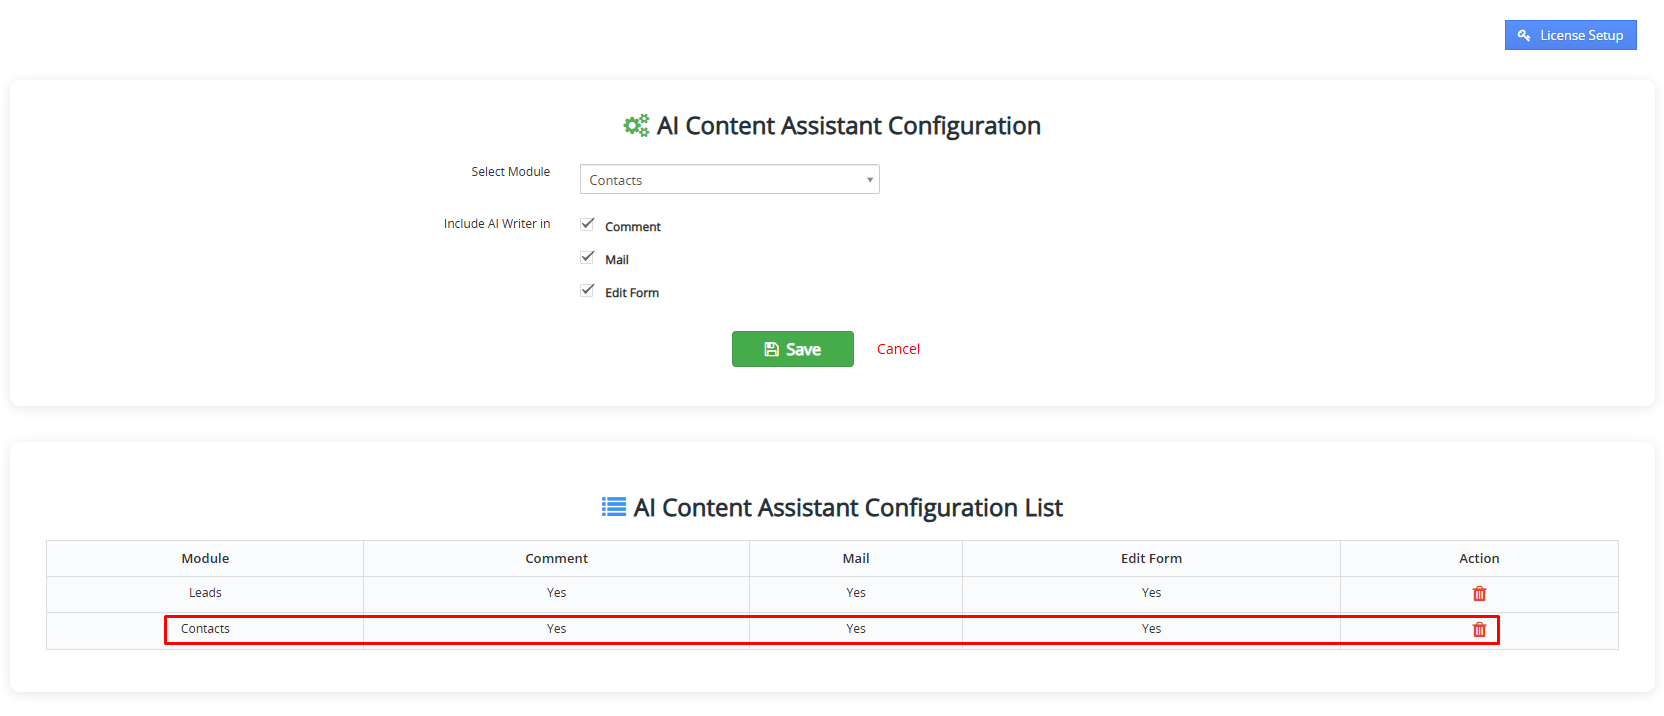 How to use the AI Content Assistant effectively?AI Content Assistant in the Comments Section:
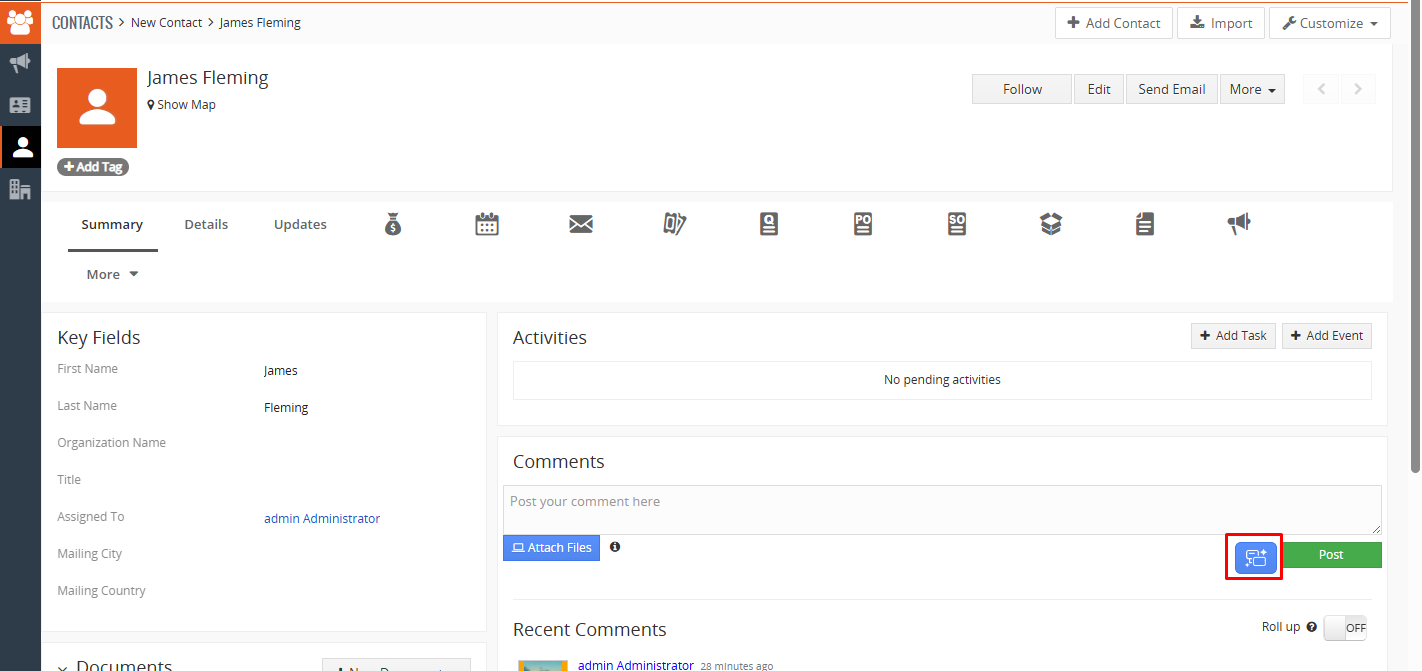
- Open a module, such as Contacts.
- Select a record from the list.
- Click the AI Content Assistant button located in the Comments box.
 When the AI Content Assistant button is clicked, a pop-up titled AI Content Assistant appears, as shown below
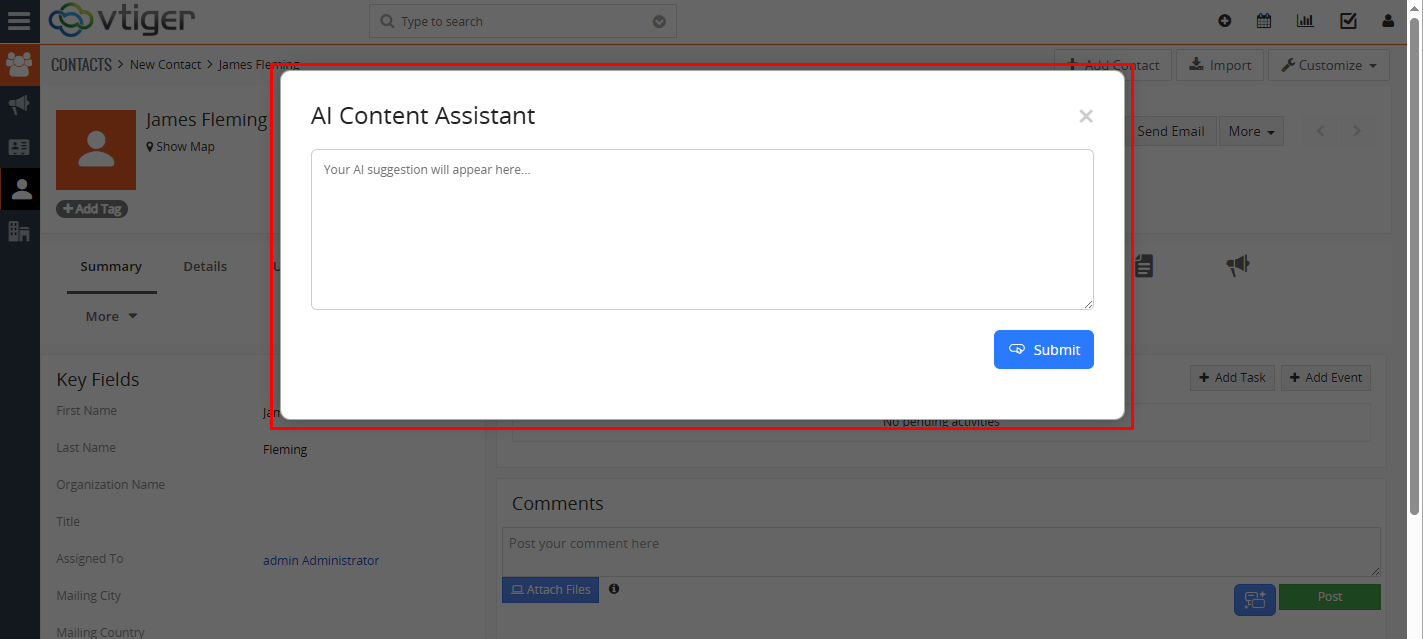 Type your suggestion and click Submit to view the result.
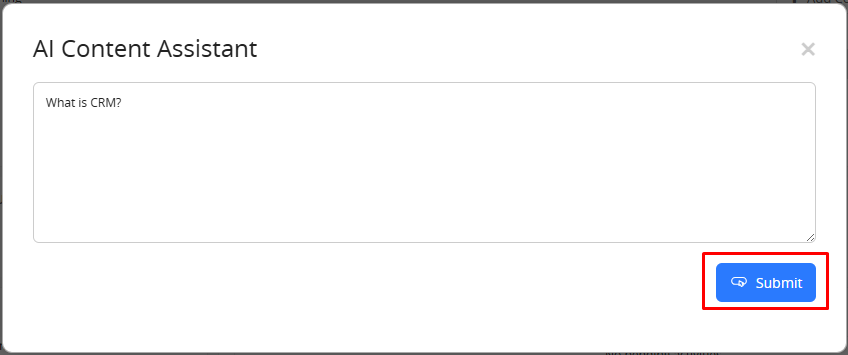 The search results will be displayed in the following format, showing relevant responses based on your input.
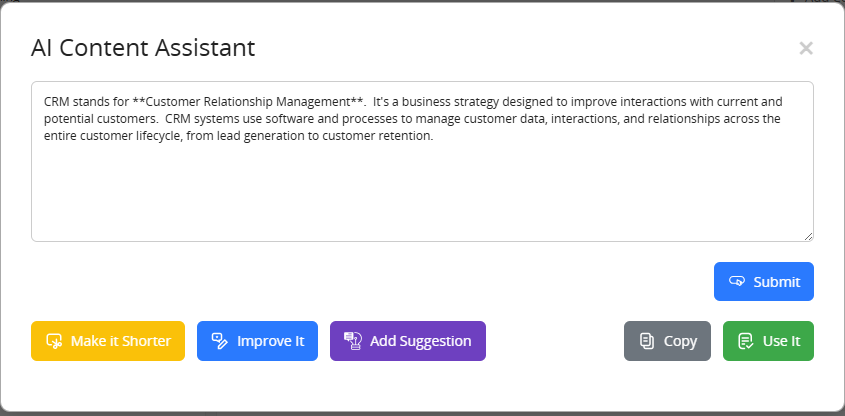 Clicking the “Add Suggestion” button will display an “Add Prompt” input field within the button area, allowing you to enter a custom prompt for search.
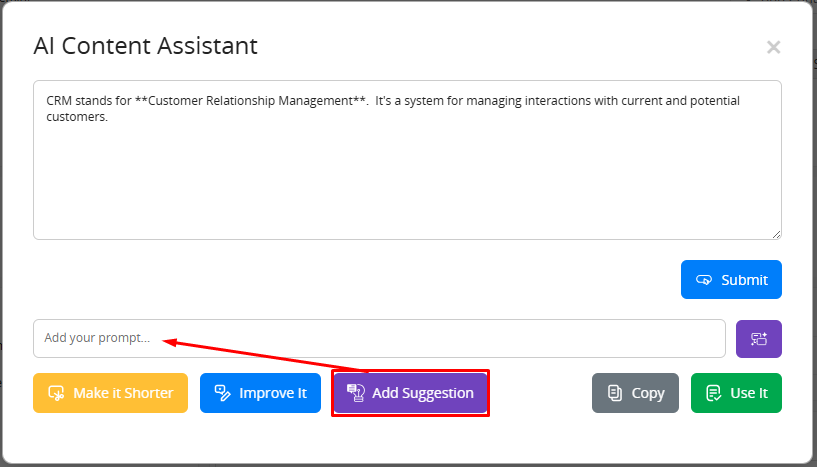 Click on the ‘AI Content Assistant’ button to add detail in the existing response. Suggestions are shown based on the record context.
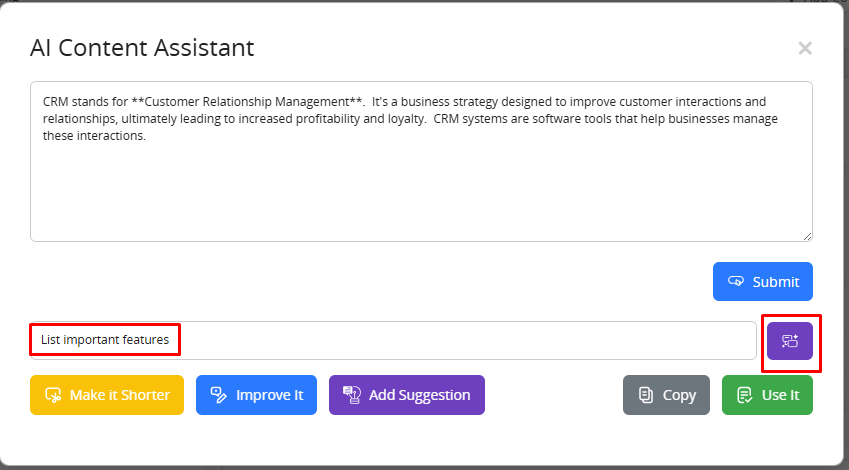 After entering the prompt and clicking the ‘AI Content Assistant’ button, additional content details will be displayed in the AI Content Assistant based on the search.
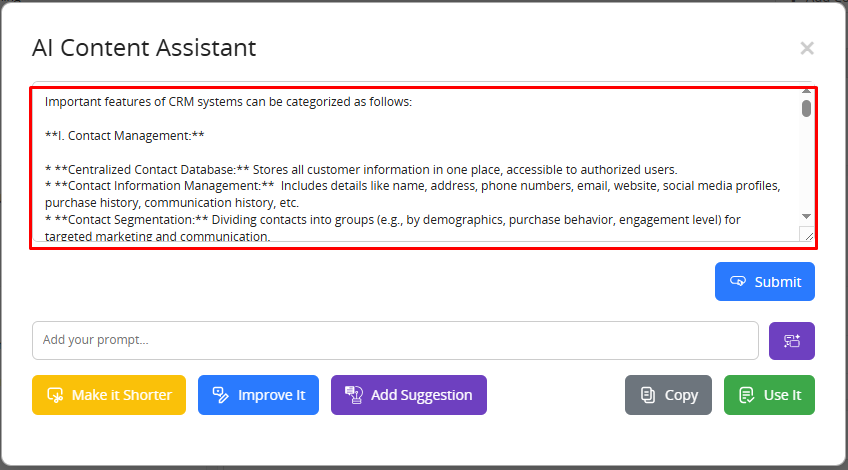 By Clicking on the “Improve it” button the AI enhances the existing content as shown in the screenshot below
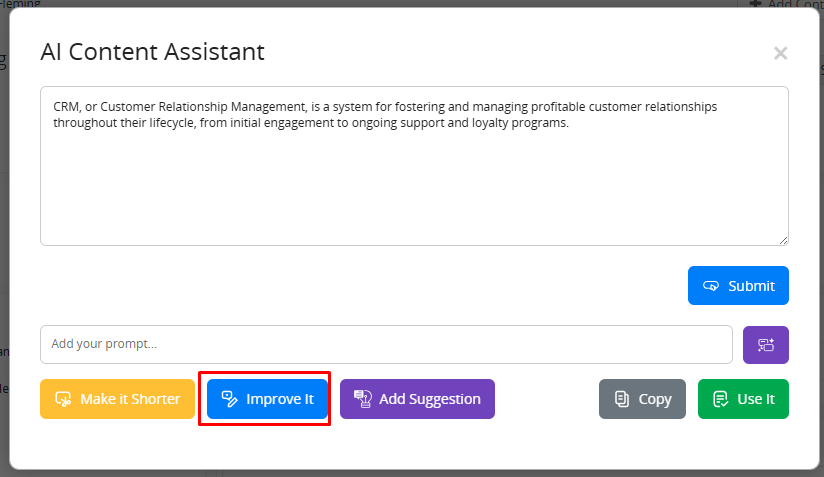 By Clicking on the “Make it Shorter” button, it provides a shortened version of the content while retaining its core meaning.
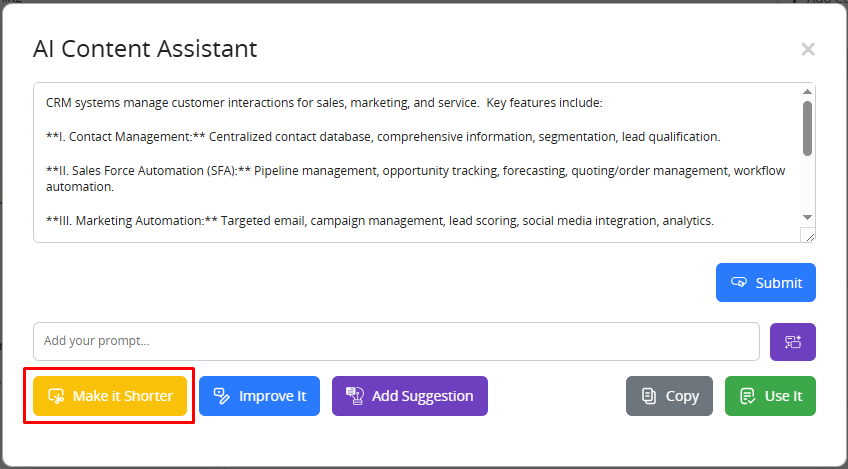 Click the “Copy” button to copy the response result to your clipboard.
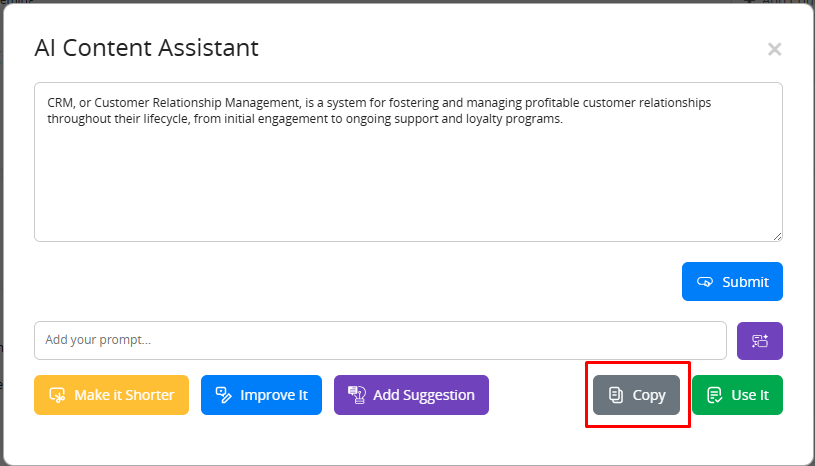 Click the ‘Use It’ button to insert the comment that you have searched and modified.
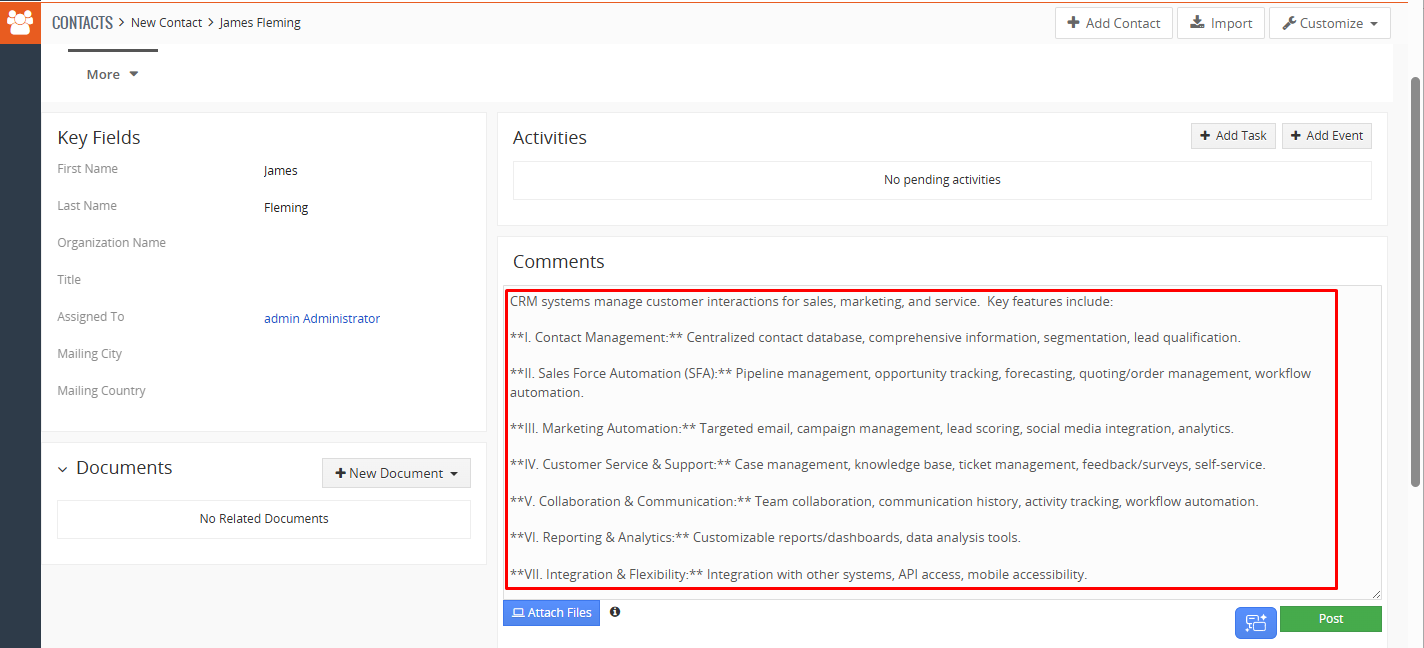 Once the user clicks the “Use It” button, the selected content will be added to the comment box. By clicking “Post” the user can then submit the content as a comment, as shown in the screenshot below.
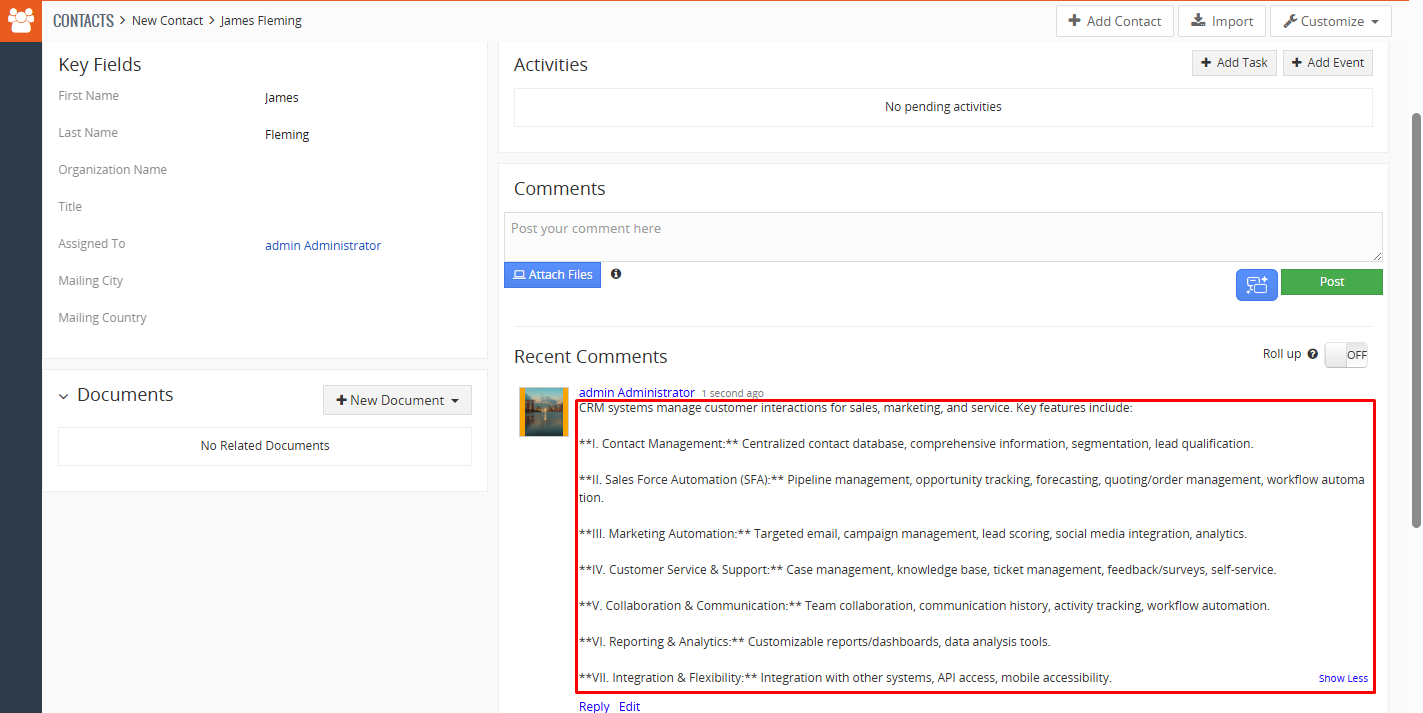 AI Content Assistant in the Edit Forms (Text Area Fields Only):All text areas within the create and edit forms will include the AI Content Assistant, offering the same features described above for the comment field.
The AI Content Assistant will be available next to editable text areas.
It offers context-aware suggestions that can be applied instantly.
As shown in the screenshot below, the AI Content Assistant is displayed within the create form.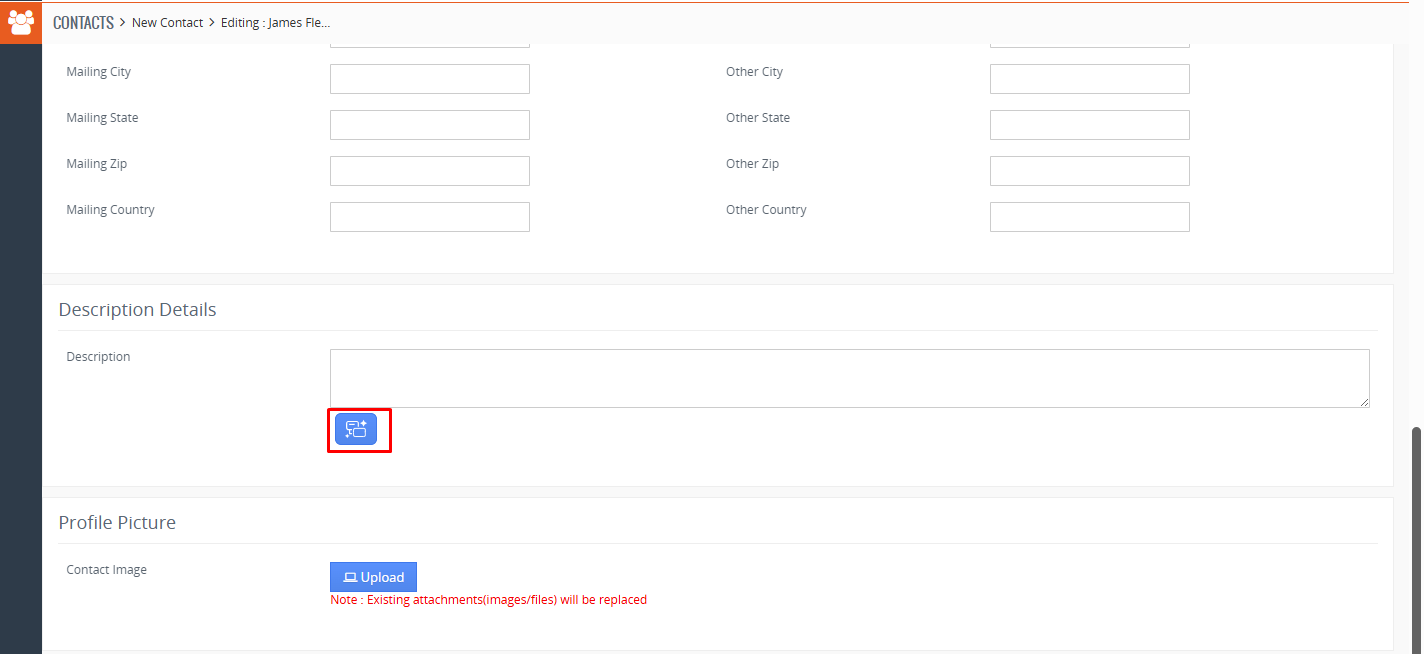 As shown in the screenshot below, the AI Content Assistant is displayed within the Edit form.
 AI Content Assistant in Email:The AI Content Assistant is seamlessly integrated into emails to help users draft, edit, and optimize content directly within their email interface.
The AI Content Assistant appears when composing or replying to an email, as shown in the screenshot below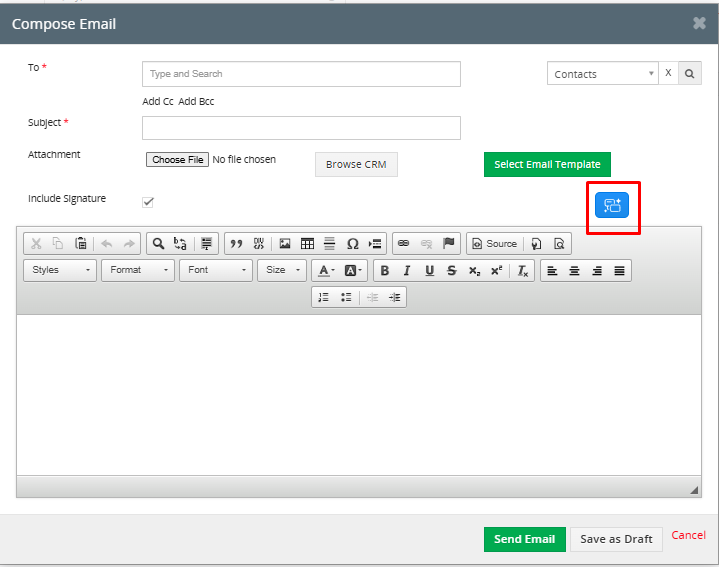 The AI Content Assistant can create email drafts for you or guide you with suggestions on how to structure and phrase your message effectively, as shown below.
 Note: All features of the AI Content Assistant remain the same as those explained under the AI Content Assistant in the Comments section.