Login to WhatsApp Chrome Plugin
- Before Login to WhatsApp Chrome Plugin you should follow installation steps as mentioned in installation guide.
- Once installation as per the installation guide has been completed please open https://web.whatsapp.com in your chrome window.
- On loading of https://web.whatsapp.com it will automatically display chrome Plugin on right side of your web. WhatsApp interface.
- Note that because your browser has the WhatsApp plugin installed, the login screen will look different.
- You will need to add the following details to access the screen:
- vTiger URL/Link :
- Username :
- Password :
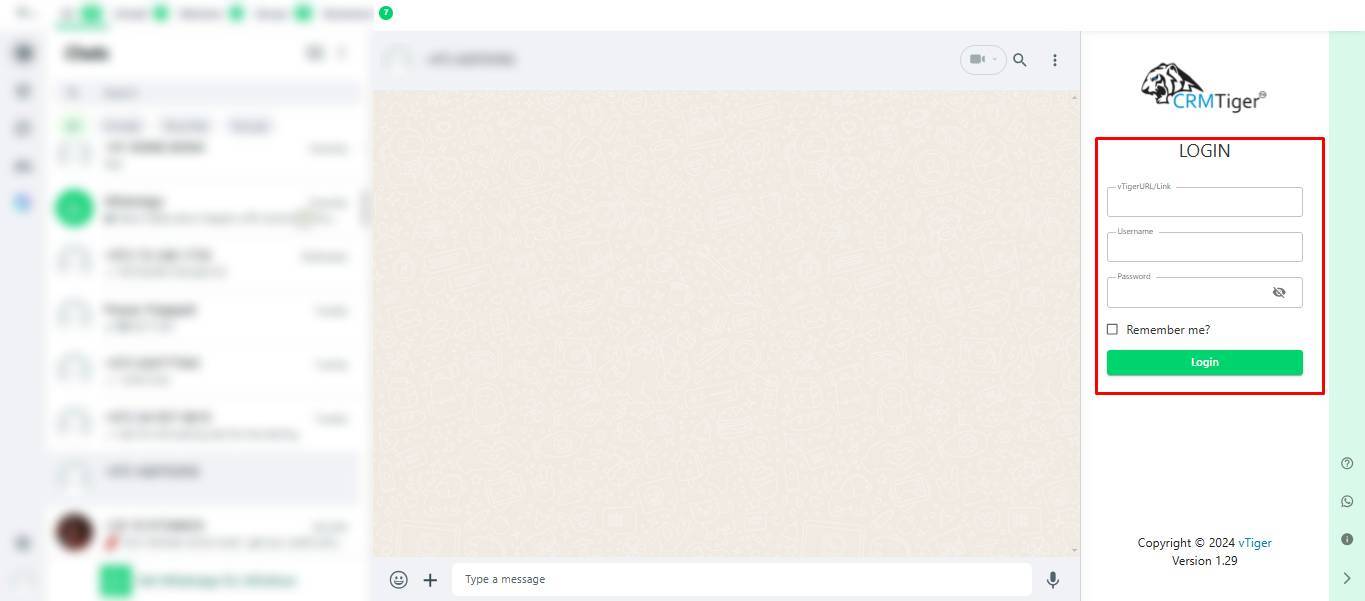 (Note: The vTiger URL/Link, Username, and Password that you use to log into the CRMTiger – WhatsApp Chrome Plugin for vTiger CRM should be the same as those used for the CRM.)
- Clicking on the information icon will take you to the detailed page explaining how to use and install the WhatsApp Chrome Plugin for vTiger CRM.

- If no contact is selected after logging in, the page will appear as shown in the screenshot below.

CRMTiger’s WhatsApp Chrome Plugin for vTiger has features to integrate your WhatsApp with vTiger system easily.
Here is the List of features
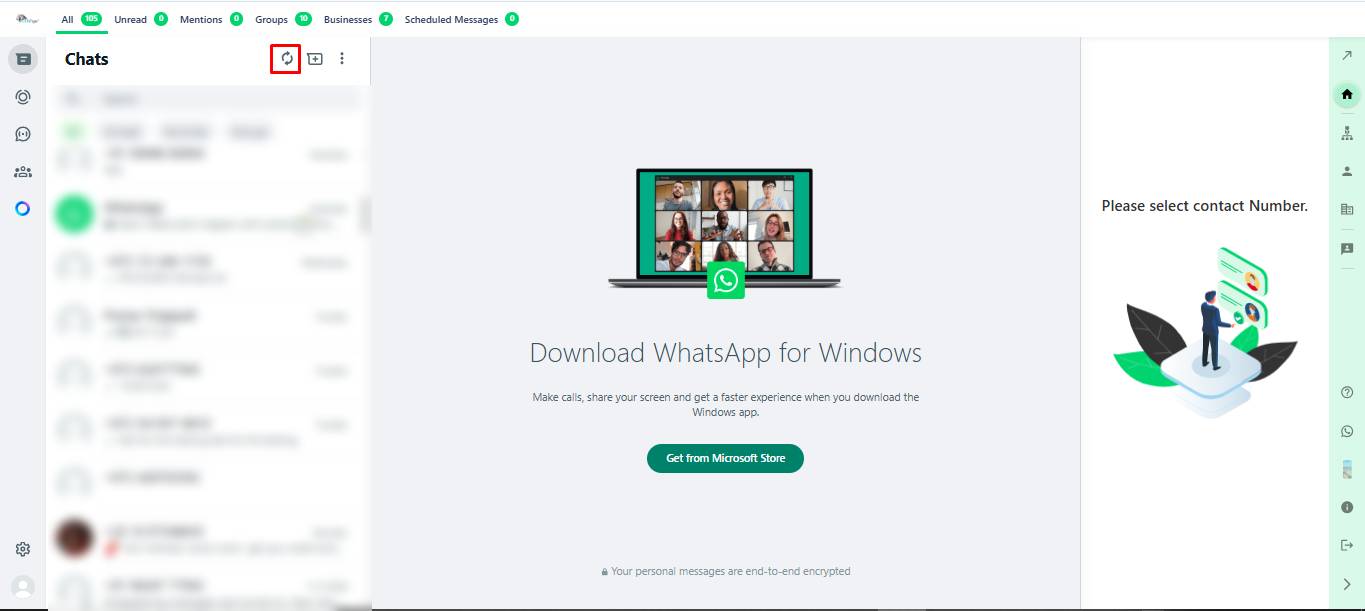
How to Sync all your WhatsApp Contacts to CRM Contacts ?
- Users can sync all their WhatsApp contacts to the CRM by clicking on the icon displayed below
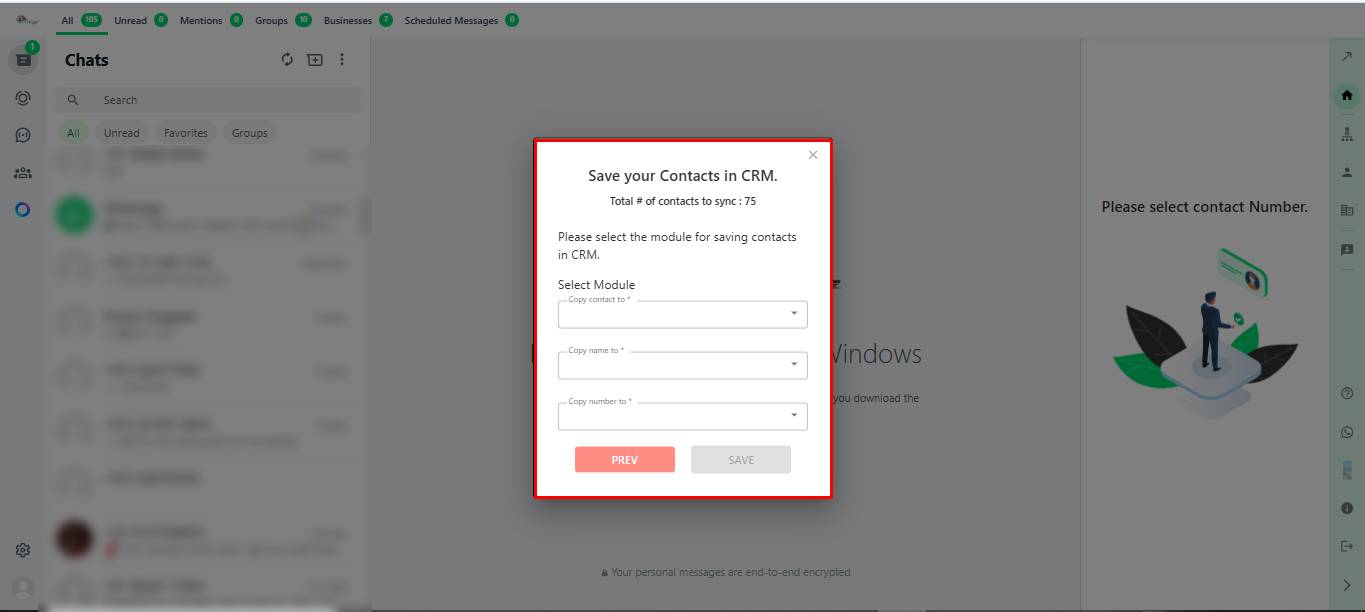
- Users can save individually selected contacts by applying filters or save all contacts by selecting ‘Save All Contacts’.
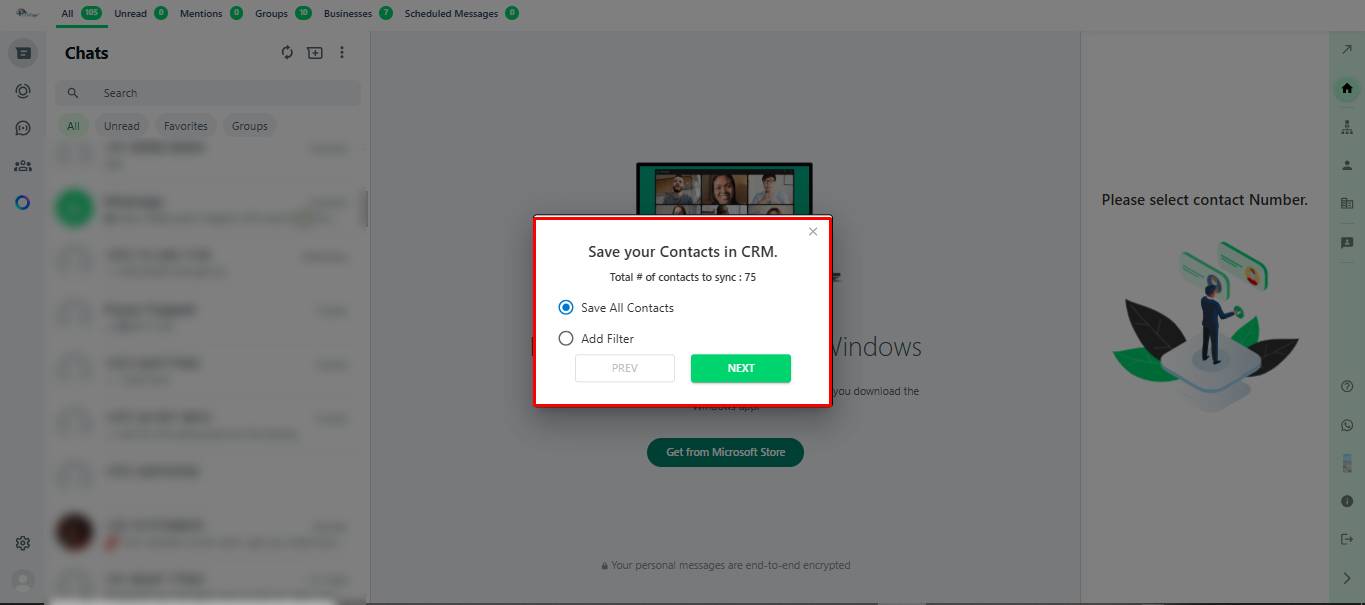
- Once the user selects the option to save the contact, a pop-up box with the screenshot displayed below will appear. In this pop-up, the user will be prompted to choose the module in which they want to save the contacts. Additionally, they can specify the ‘Copy Name To’ field for saving the contact’s name and the ‘Copy Number To’ field for saving the contact number.
- Once the contacts are saved In CRM it will display as shown in the below screenshot

- The arrow in the screenshot below navigates the user to the Dashboard of CRM, from which the user has logged in

- The home icon displayed in the screenshot below navigates the user to the home page of WhatsApp Chrome Plugin from any other page

- The help icon shown in the screenshot below will take the user to the Chrome Web Store to update the extension
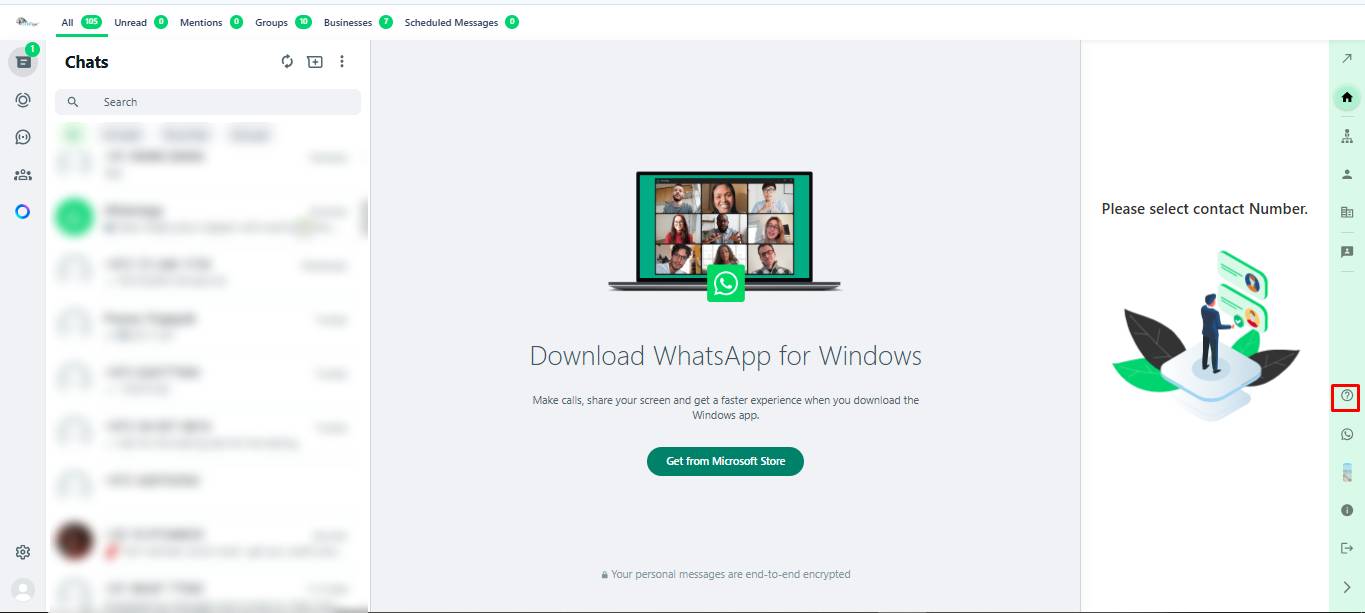
- The Talk with Us icon shown in the screenshot below is for support, allowing users to ask questions or get help with understanding the features of the WhatsApp Chrome extension
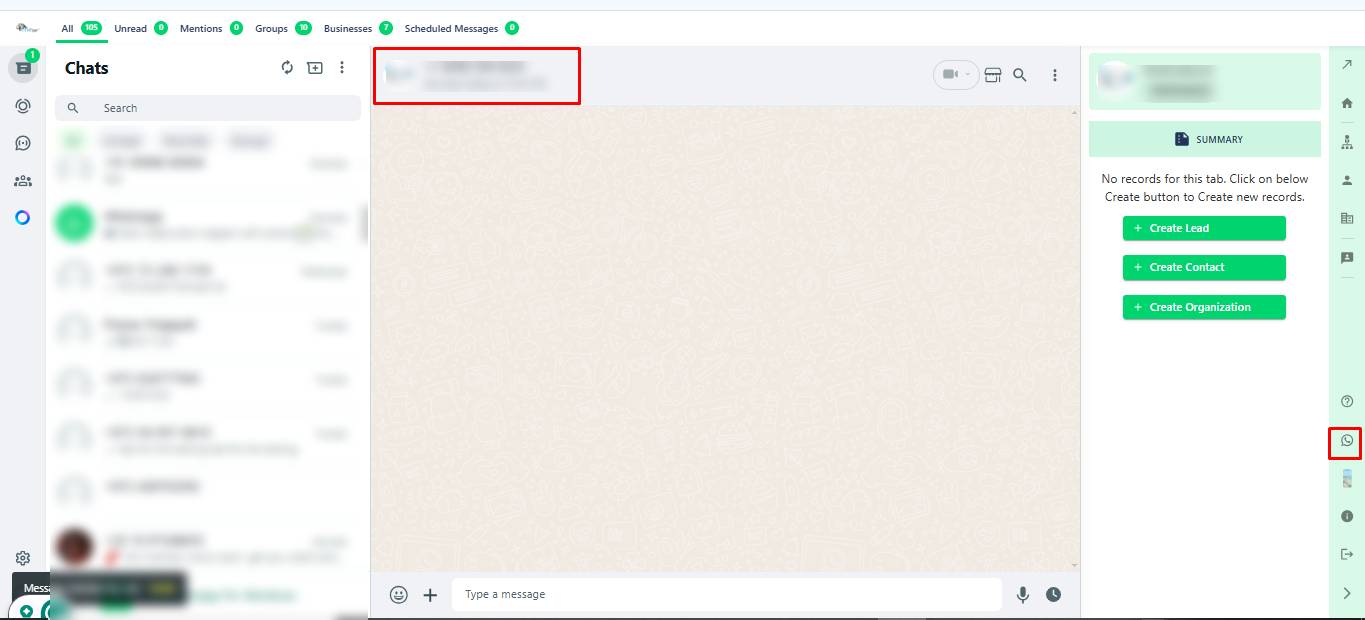
- The user profile icon displayed in the screenshot below navigates the user to the My Preferences page of the CRM.

- After logging in and selecting a contact, your screen will appear as shown below if it’s not registered in the CRM.
- You can create contact/Lead and Organization by this extension.
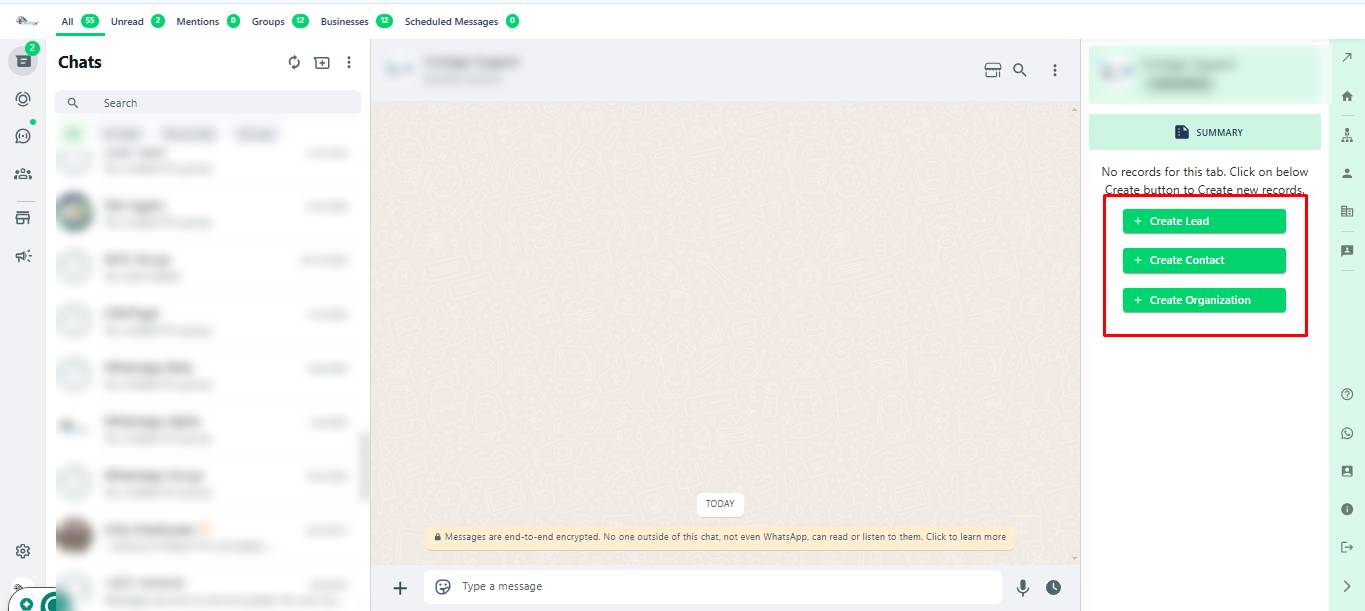
- You can check your unread messages, see anyone who mentions you, view the total number of groups available in your WhatsApp contacts, and access WhatsApp Business accounts with just one click on the icons shown in the screenshot below.

- Users must keep any phone number field mandatory to save the record from WhatsApp to CRM.


- Users can enable fields for quick creation or mandatory from module layout and field to display fields in WhatsApp Chrome Extension, Only then will they see the fields in the create form.


How to create records in the CRM from WhatsApp?
- Please note that the plugin has already fetched the details of the recipients of your current WhatsApp conversation and is displaying them within the plugin window.
- If the recipient is not found in the CRM, you can add them to the displayed modules, such as Contacts, Leads and Organizations. This allows you to add records directly to these modules in the CRM.
- For example, if you want to add the record as an organization, simply click on the ‘Create Organization’ button, fill in all the remaining fields as shown, and click on the ‘Save‘ button

How the WhatsApp page looks after saving the record from WhatsApp to CRM?
- Select any contact for which you have created a record from WhatsApp to CRM, It will show the page as in the screenshot below.
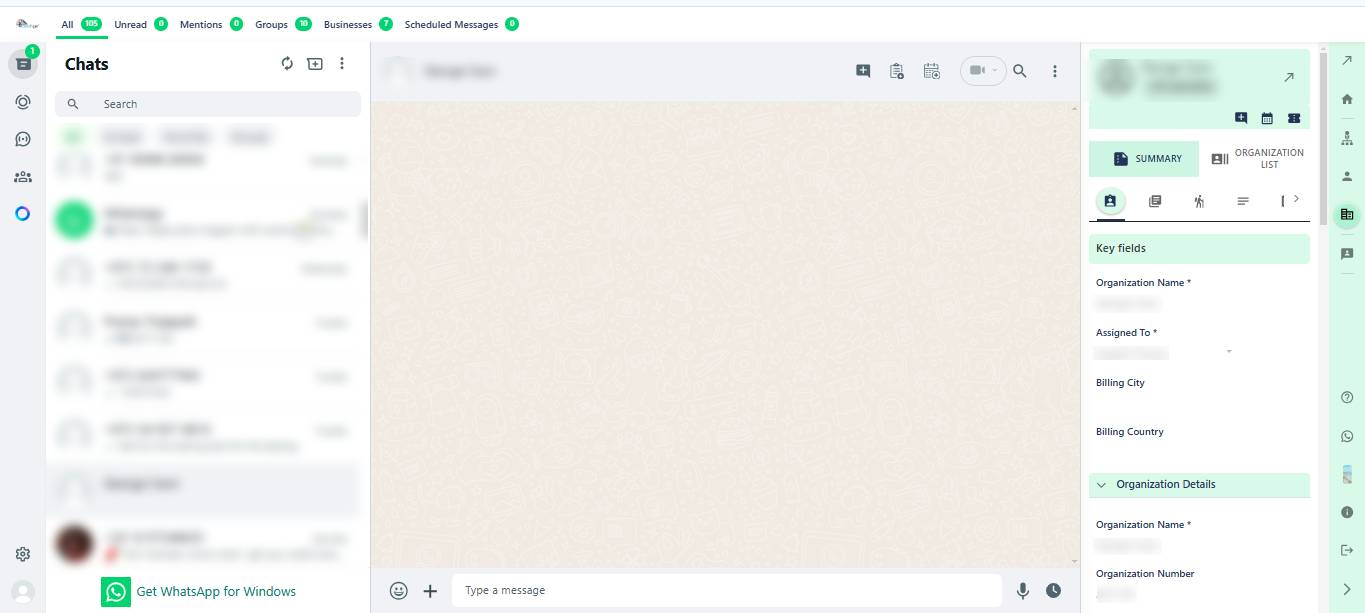
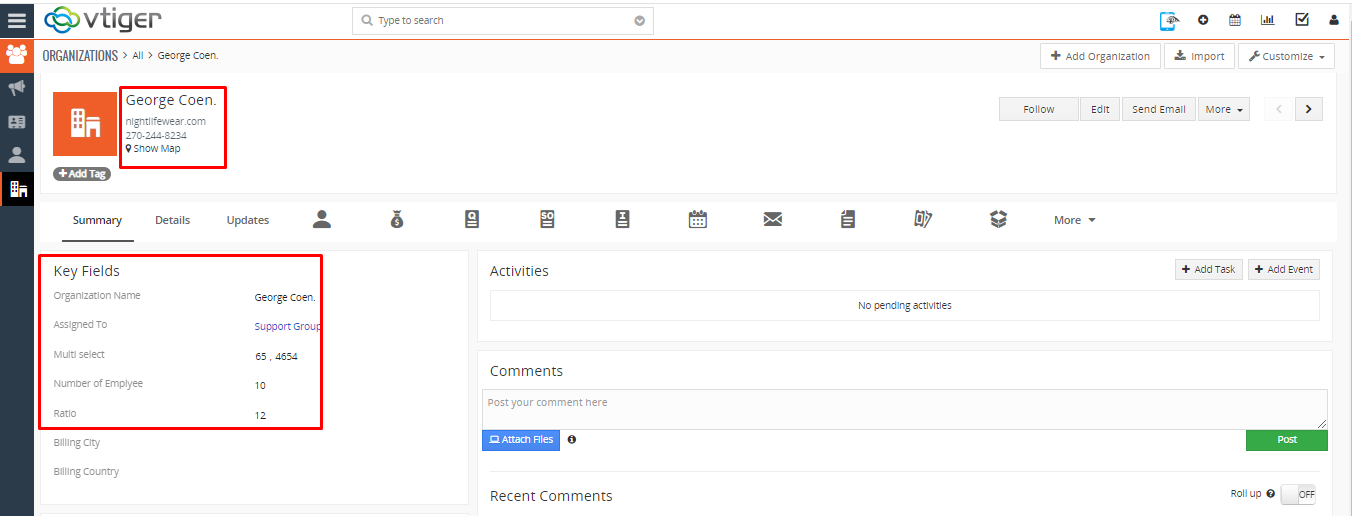
- A Record has been created in CRM as you create record from WhatsApp Chrome Plugin

- It shows record details that you have added from the WhatsApp Chrome Plugin to CRM.
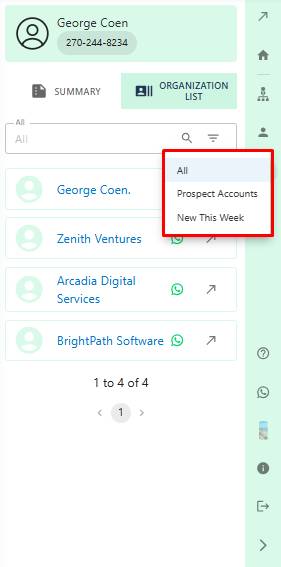
- To see a list of all the records saved in the CRM, the user has to click on the module list, as shown in the screenshot below.

- By clicking on the icon displayed below, users can select the filter to view the desired list.
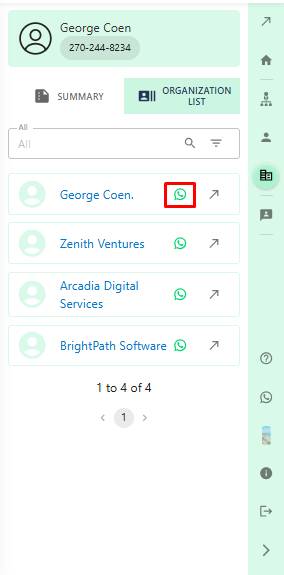
- Users can also access a specific user’s details screen in the CRM by clicking on the navigation arrow shown below.

- Users can initiate a chat with a specific contact by simply clicking on the WhatsApp icon depicted in the screenshot below, thereby opening the chat box directly.

- As above, Users can access the list of saved records in the Lead, Contact, or Organization modules, as shown in the screenshot below
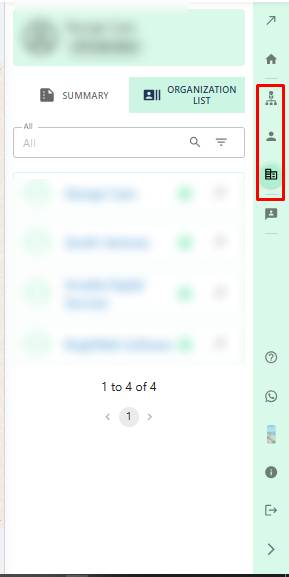
How to add multiple records for one contact ?
- Select a name from your WhatsApp contacts and create a contact record.
- Click on the “Leads” button to create a lead record for the same contact.
- Similarly, click on the “Organization” buttons to create organization records for the same contact.
- In the screenshot below, it is shown where you can add one record to multiple modules.

How to Add/Create all the related tabs from WhatsApp Chrome Plugin to the CRMTiger?
- All the related tab options such as Comments/ Activities (Task/Event)/ Tickets/ Opportunity are given in WhatsApp Chrome Plugin and you can add them by quick create feature, or view the added record through the CRM.
(Note: you can only use this functionality after creating the record and saving it from WhatsApp Chrome Plugin to CRMTiger)
- All Related tab will display as in below screenshot:

- Users can comment, add tasks, or schedule events directly from the WhatsApp chat window by clicking on the icon displayed in the screenshot below.

- Comments: This functionality in related tab is designed to allow users to post comments directly from WhatsApp Chrome Plugin for vTiger CRM

- Activities: This functionality is designed to allow users to directly add Events or Tasks from the WhatsApp Chrome Plugin to the CRMTiger.

- Tickets: This functionality is designed to allow users to generate tickets directly from the WhatsApp Chrome Plugin to the CRMTiger

- Opportunity: This functionality is designed to allow users to add Opportunity from the WhatsApp Chrome Plugin to CRMTiger

- Users can create a new record or navigate to an existing record-related tab to create or select directly from the WhatsApp Chrome Plugin.
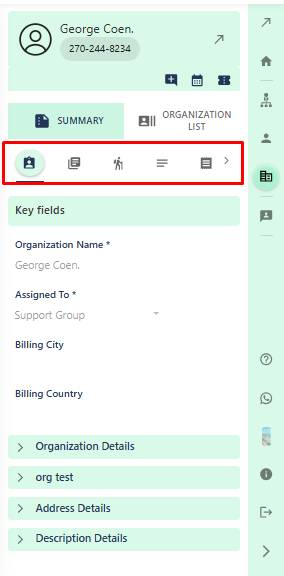
- Users can view the added record under the specific tab by clicking on that particular record or tab.

- Users can edit the added record under a specific tab by clicking on that particular record or tab edit icon.

How to Save Group Records from WhatsApp Chrome Plugin to the CRMTiger?
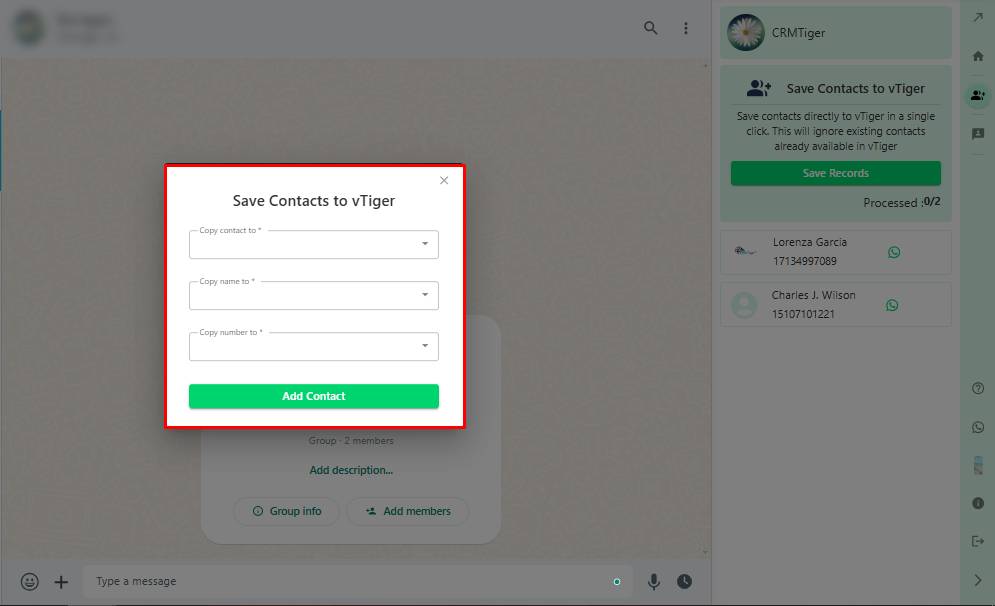
- Select the group of WhatsApp and click on save records, select the module and field where you want to copy the record and you may save all the records for the same name as in WhatsApp.
- You can save Multiple records as contact/organization and lead to the CRM by WhatsApp Chrome plugin.
- While saving the Group record the WhatsApp Chrome Plugin page will show as below screenshot

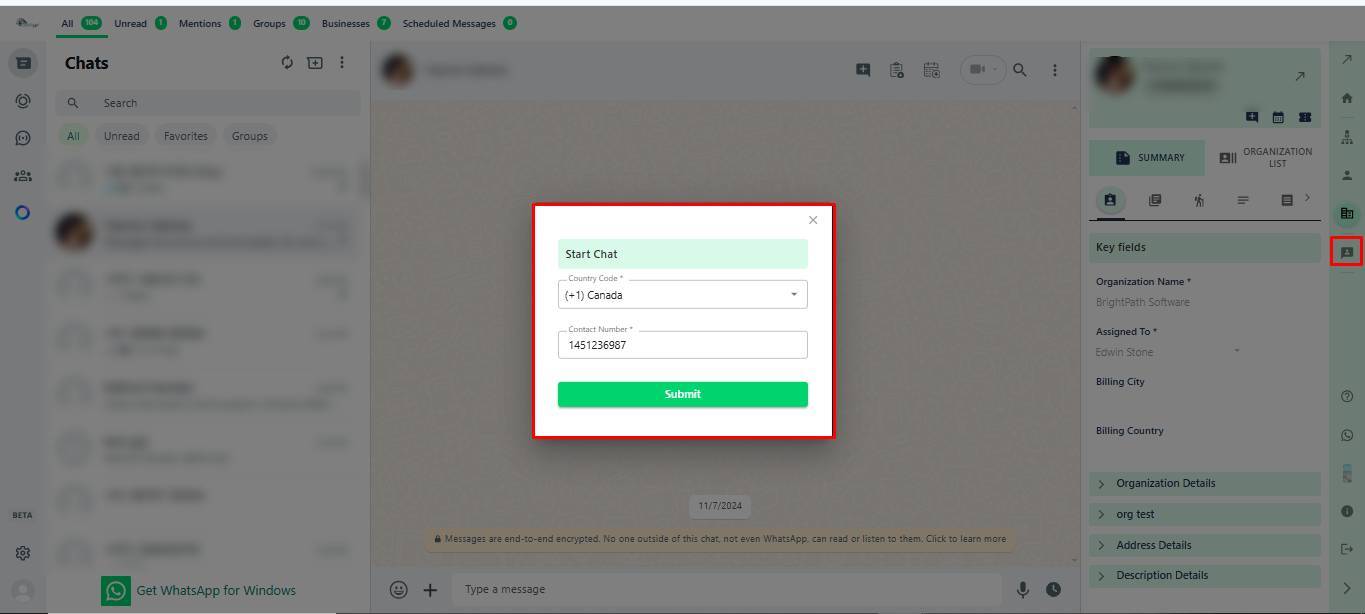
How to start chat with the unsaved number?
- The user can initiate a conversation with an unsaved number directly through the WhatsApp Chrome extension by selecting the appropriate country code, entering the phone number, and clicking the “Submit” button. Upon submission, the extension will automatically open the chat window for the entered unsaved number.
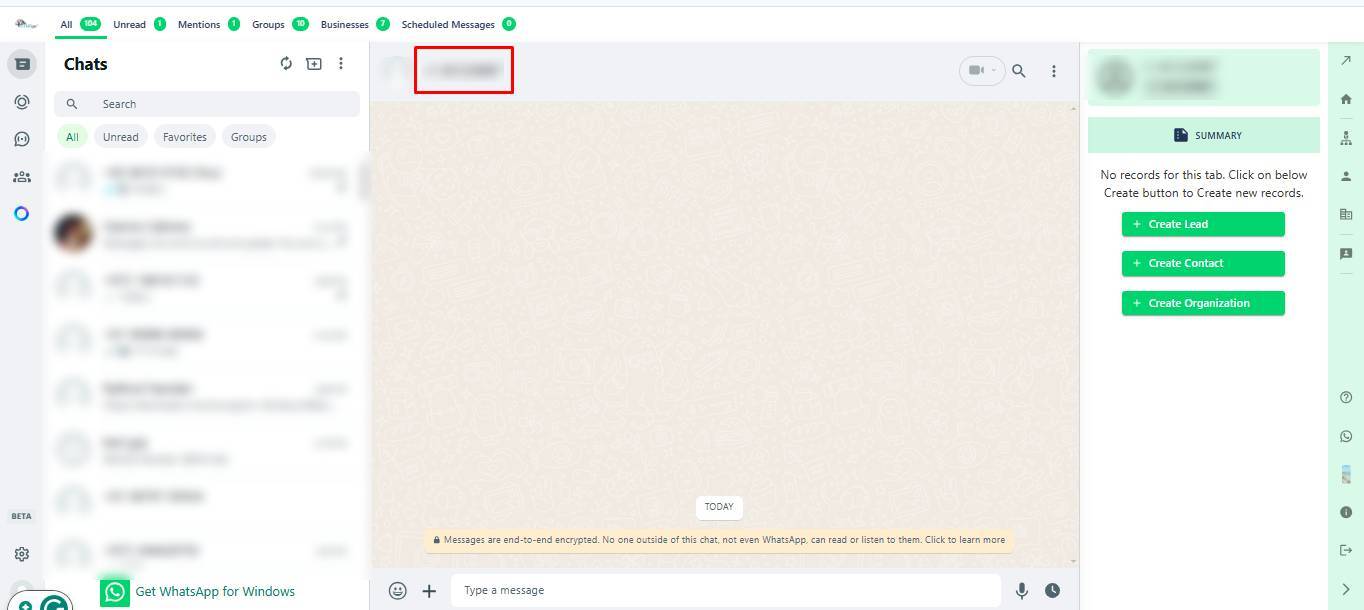
How to schedule a message from the WhatsApp Chrome Plugin?
- To schedule a message click on the schedule message icon as shown in the bellow screenshot
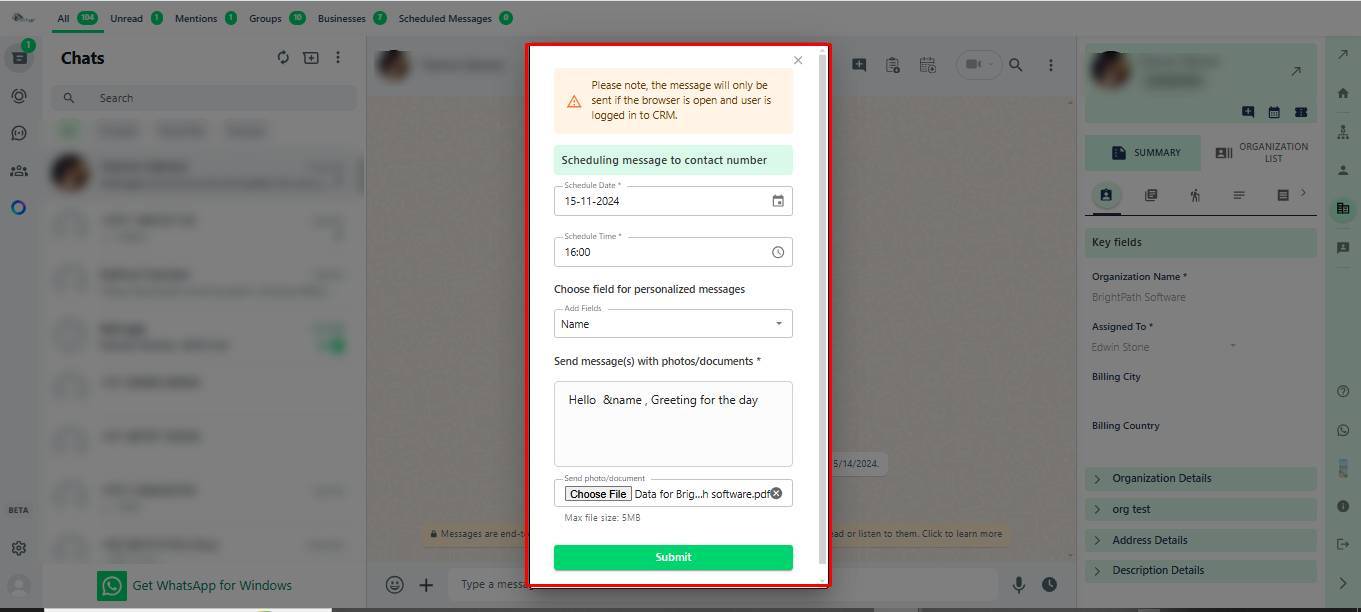
(Note: Please note, the message will only be sent if the browser is open and user is logged in to CRM.)

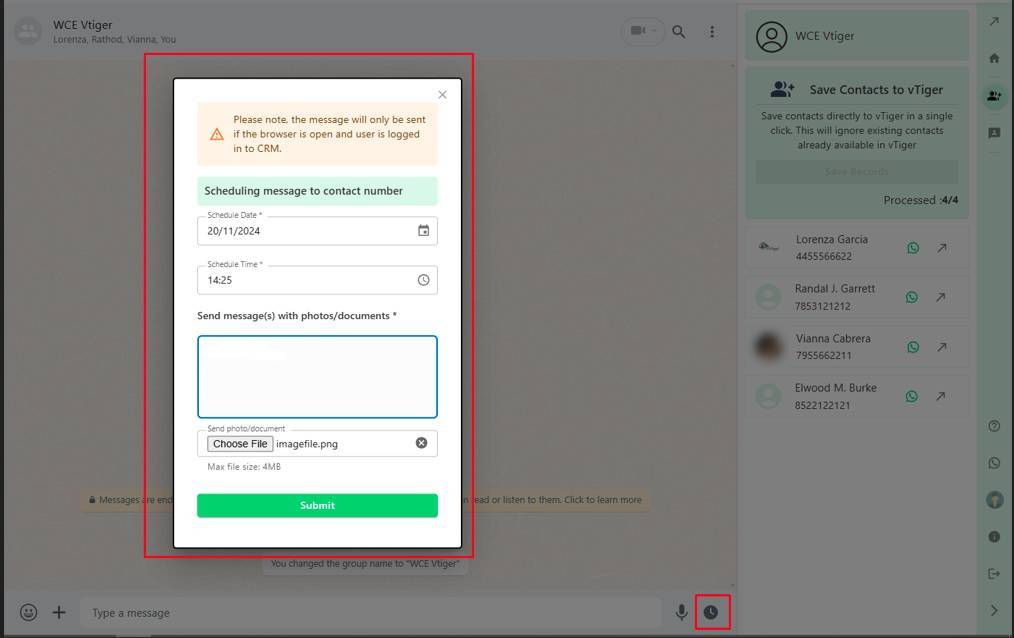
- Clicking on the schedule icon, opens a pop-up window, as shown in the screenshot below, by selecting date and time it is allowing the user to customize the message and also attach a document.
- After scheduling the message, a card is displayed, as shown in the screenshot below, until the message is sent.
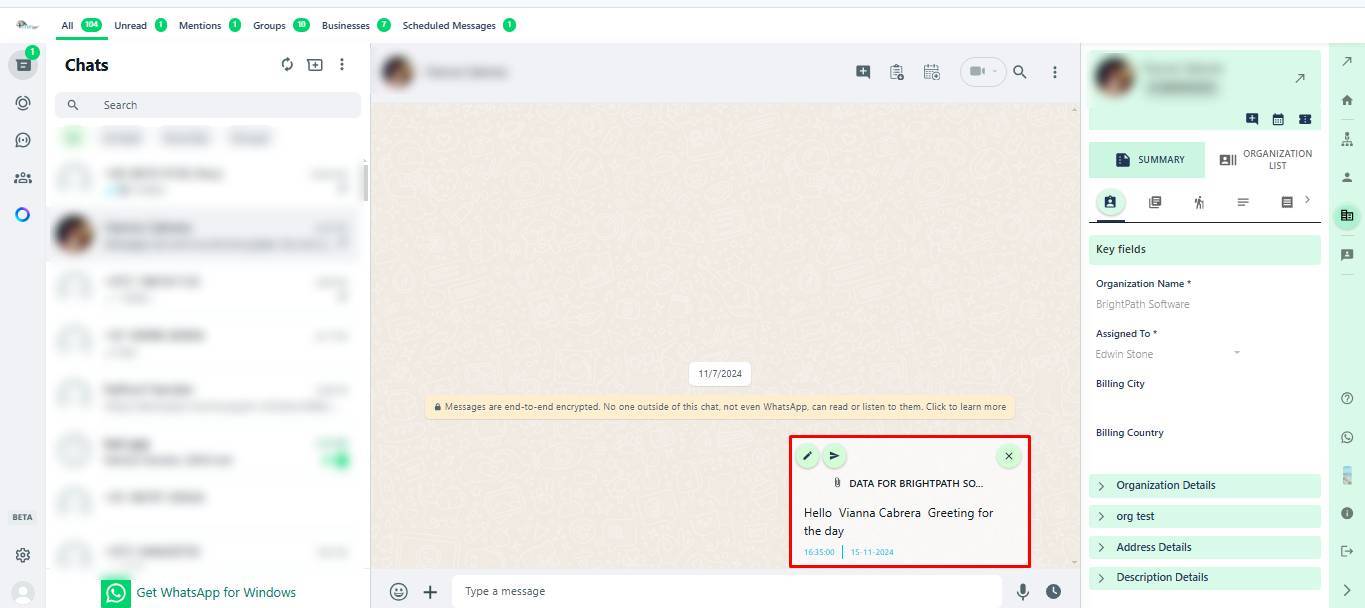
- In the displayed card, the user can edit the message, send it immediately, or delete the scheduled message, as shown below..
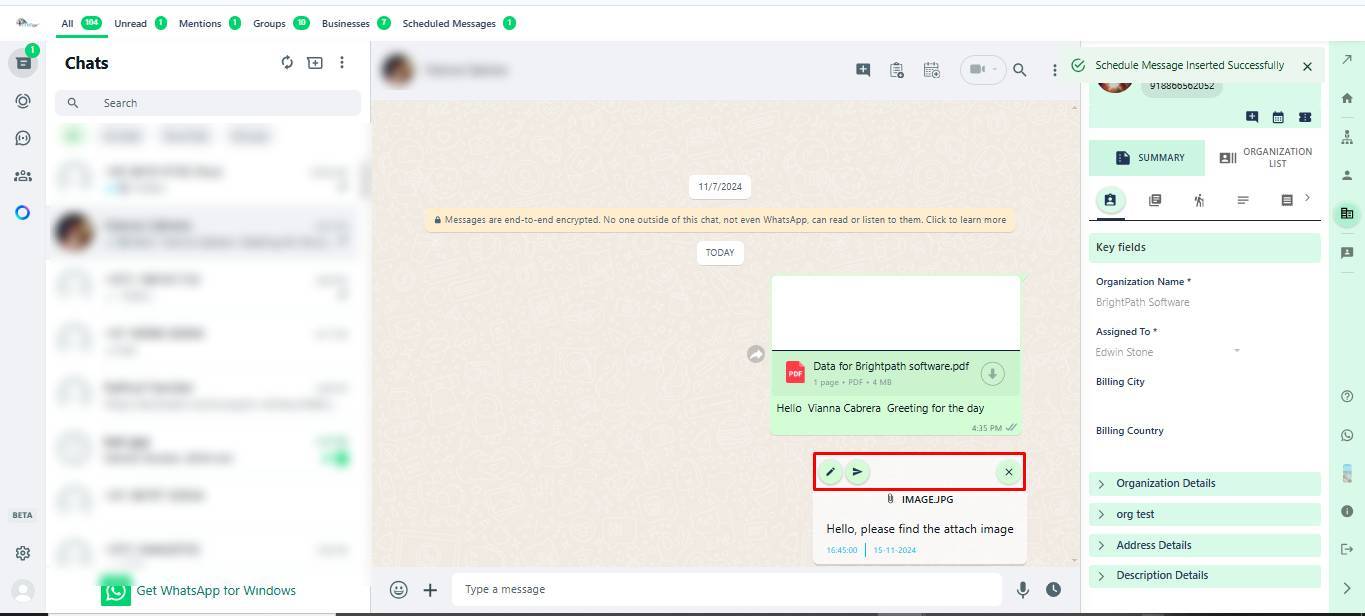
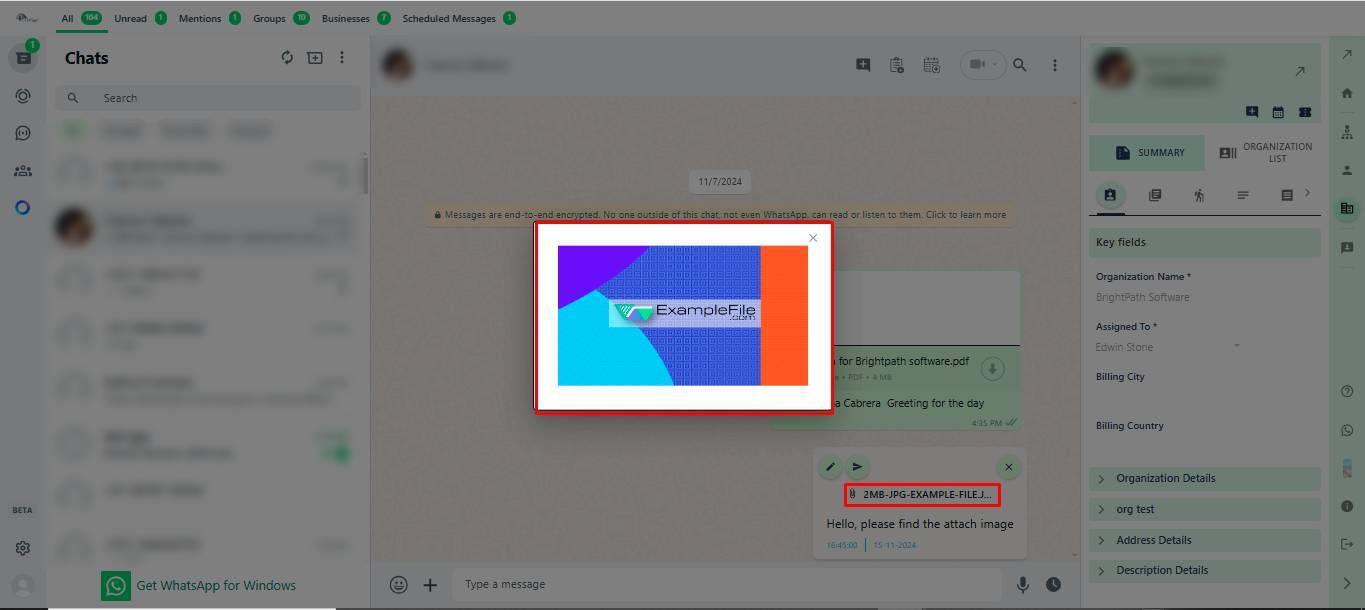
- The displayed card also provides a preview of the scheduled image or document (if supported) as shown below.
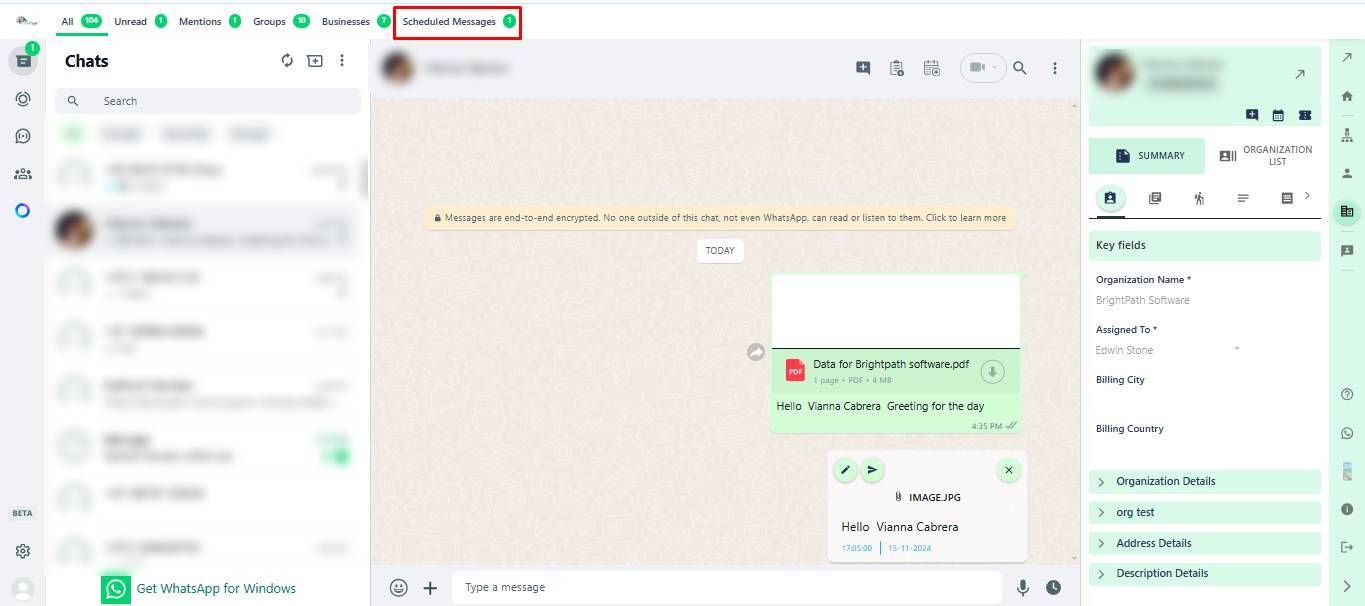
- The header displays the scheduled message count, indicating the number of contacts to which user has scheduled the message, Clicking on the header reveals a list of these contacts.
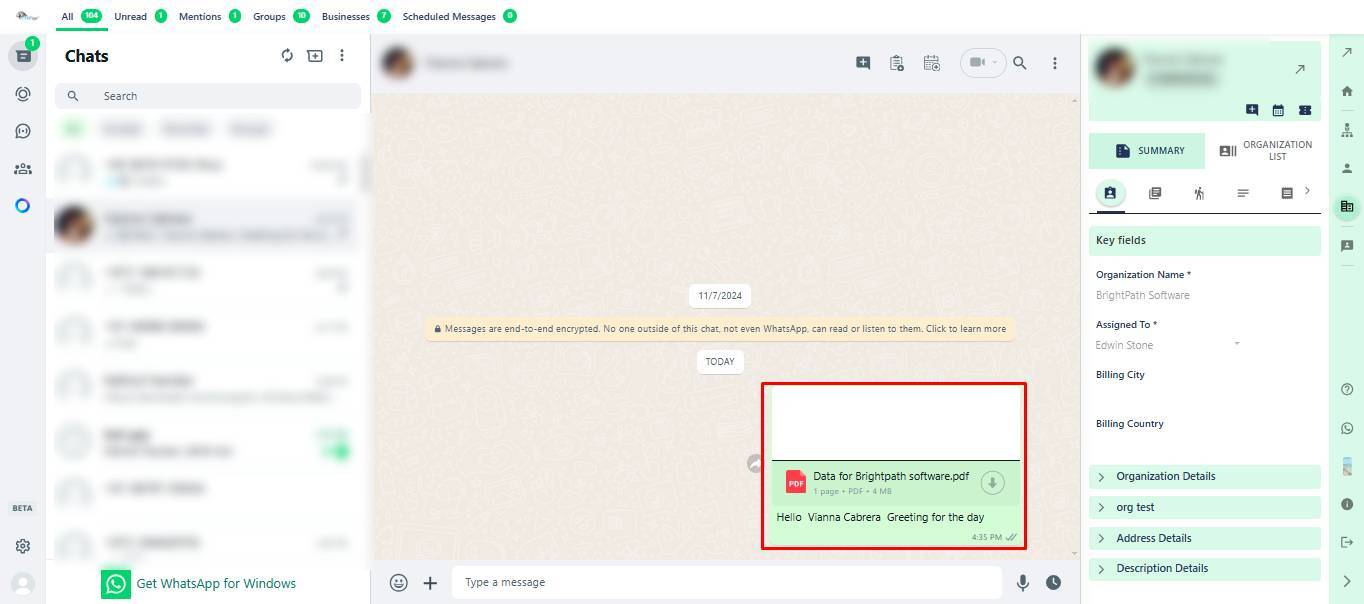
- When the scheduled date and time are reached, the message is sent successfully, as shown below.
- Users can also schedule messages for WhatsApp groups as shown in the below screenshot
How to log out from CRMTiger – WhatsApp Chrome Plugin for vTiger CRM?
- Click on the logout icon as shown in the below screenshot to logout from WhatsApp Chrome Plugin

How to Deactivate the plugin from the browser?
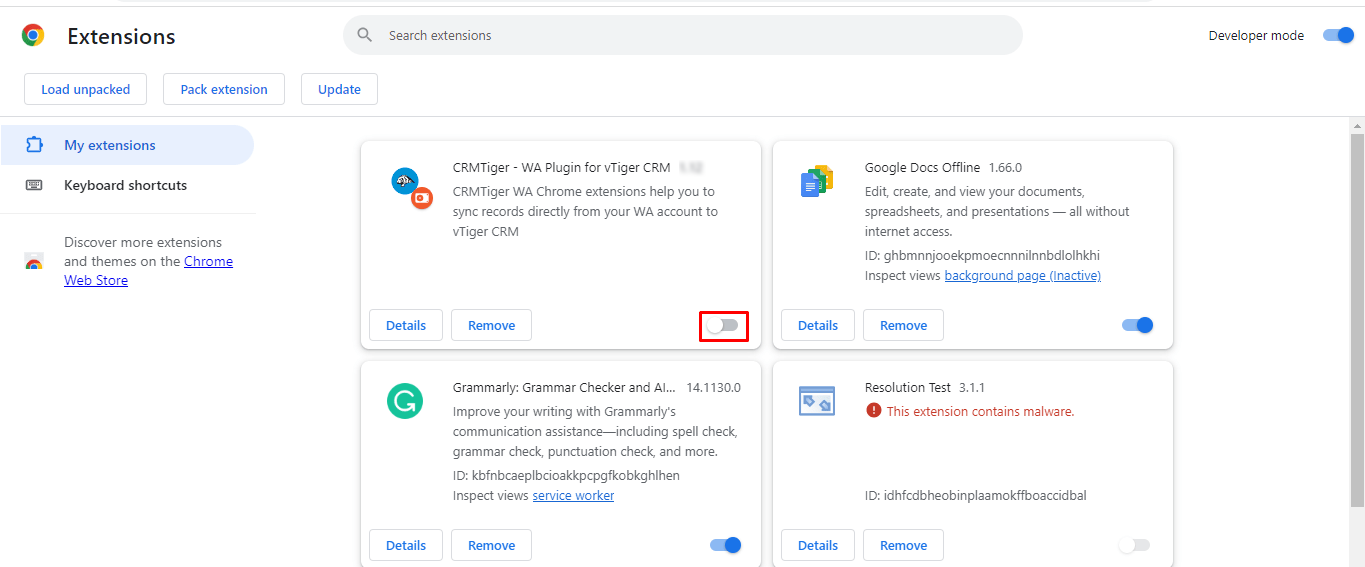
- Users only need to go to the Chrome extension and turn off the radio button for the CRMTiger WhatsApp Chrome Plugin for vTiger.
