Overview
Office365 Extensions allow each user to set up their own Office365 Contacts Configuration to Sync contacts from vTiger to Office365 and vice versa.
Features
- Admin can configure the Credentials, Add Settings for Sync Contacts and also be able to select Users for which they want to allow Sync from vTiger to office365 and vice versa.
- Non-admin users can only configure their Settings for Contacts & Sync Data
- Users are able to see the Log of Sync Contacts.
Steps for Using Outlook Contacts Feature
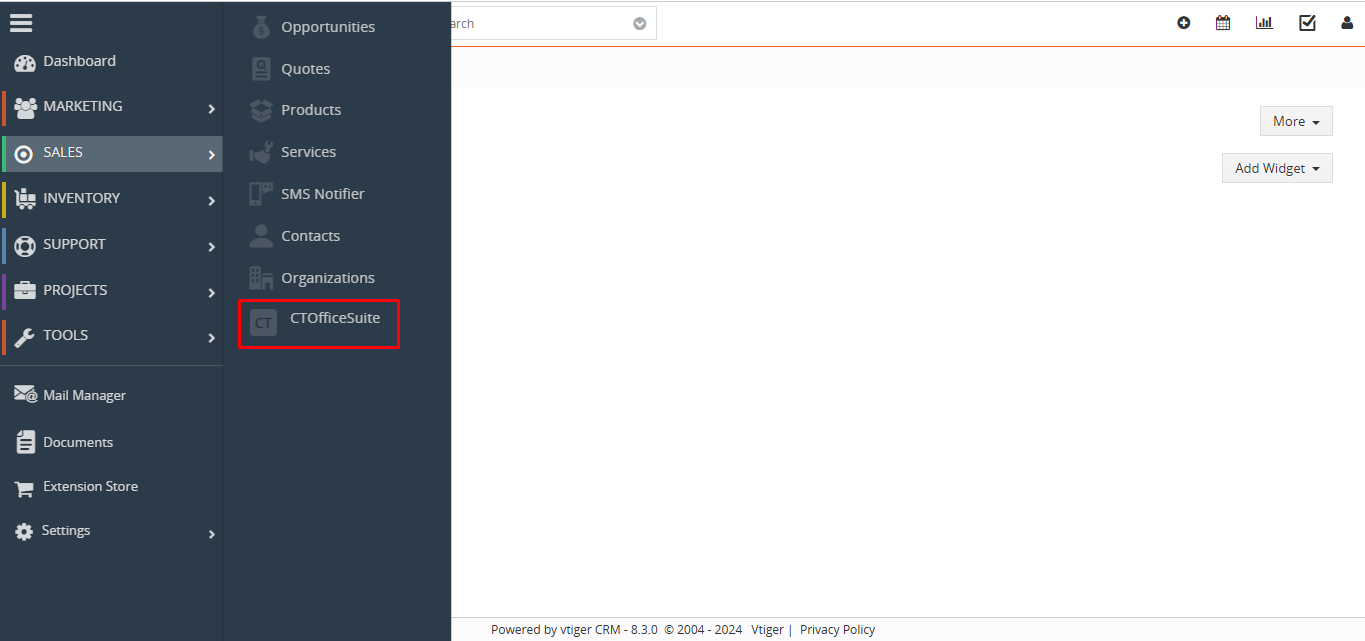
1. In the CRM Menu Page → Click on Sales → Click CTOfficeSuite Link.
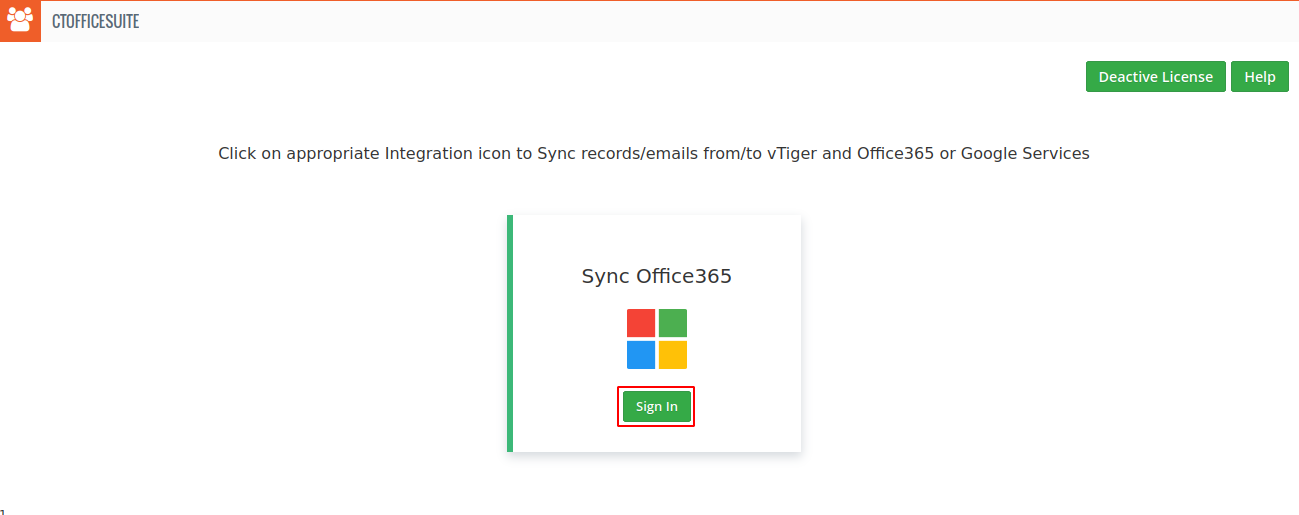
 2. Once CTOfficeSuite Page opens, It’ll look as shown in the below screenshot. If users want to use Office365 then need to click on the Sign In Button.
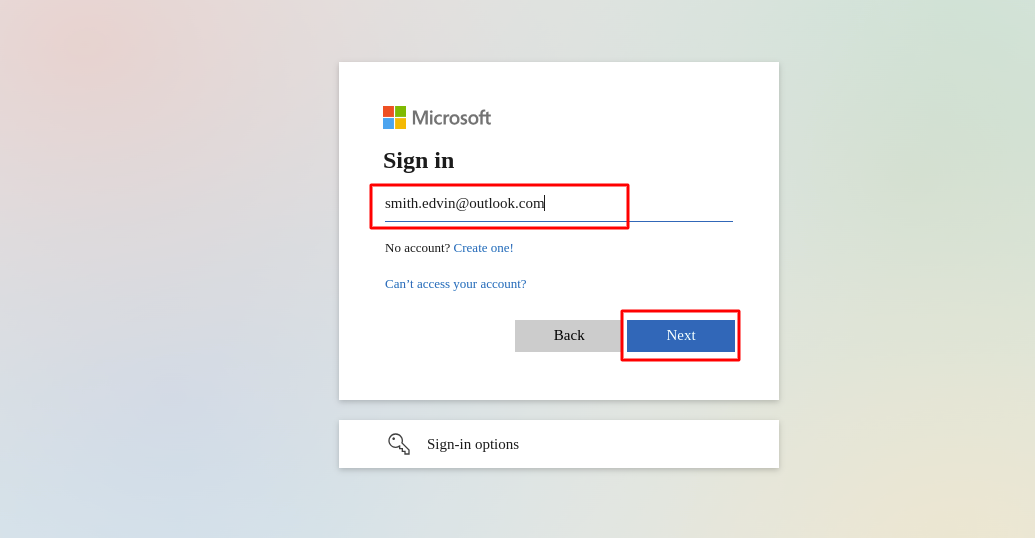
 3. Once a user clicks on the “Sign In” Button, it’ll redirect to the Outlook Login Page.
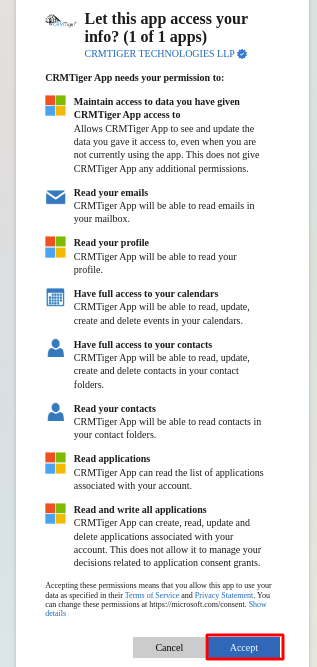
 4. Once the user selects/Enters the Outlook Account for configuring Outlook Contacts/Calendar, It’ll ask permission to allow sync Contacts/Events from vTiger to Outlook and vice versa.
Note: Sometimes, if users are non-admin users of Office365, they may receive the following message when granting permission to access contacts/calendar of their respective Office365 accounts.
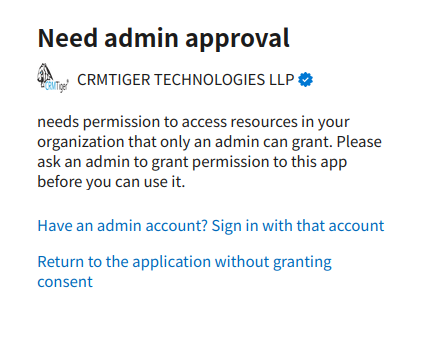
In the above case follow the steps mentioned here in Microsoft studio help.
Sync Contacts
After allowing Outlook Contact/Calendar to sync, It’ll look like the below screenshot.
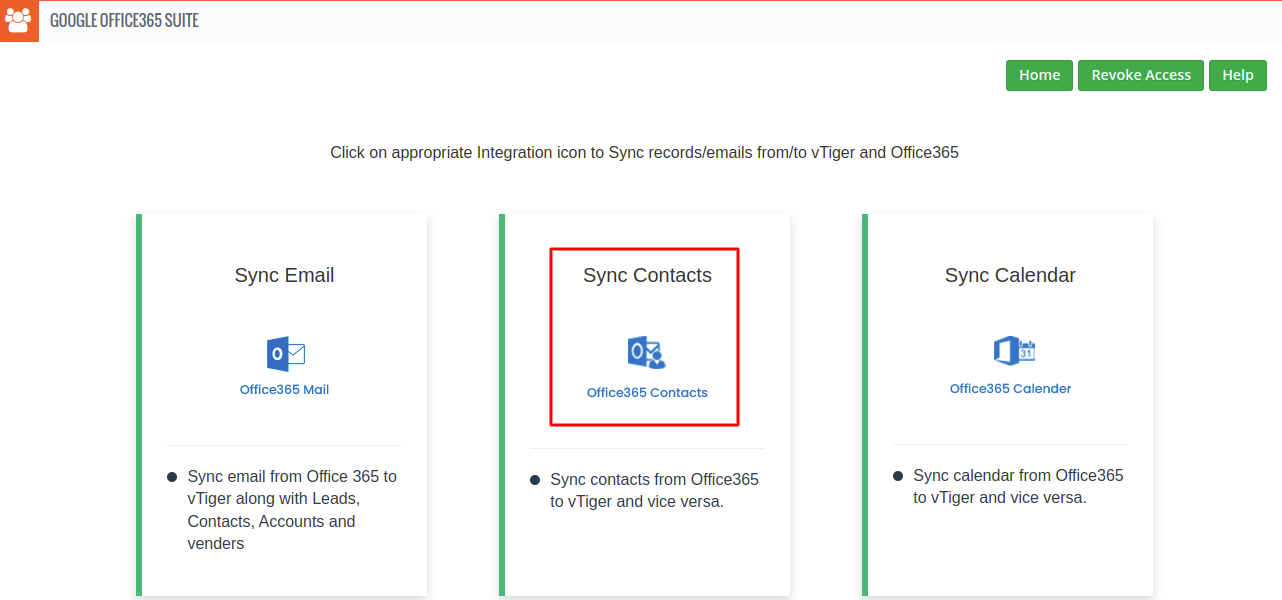 If the User Clicks on the Sync Contacts, it’ll look like the Screenshot below.
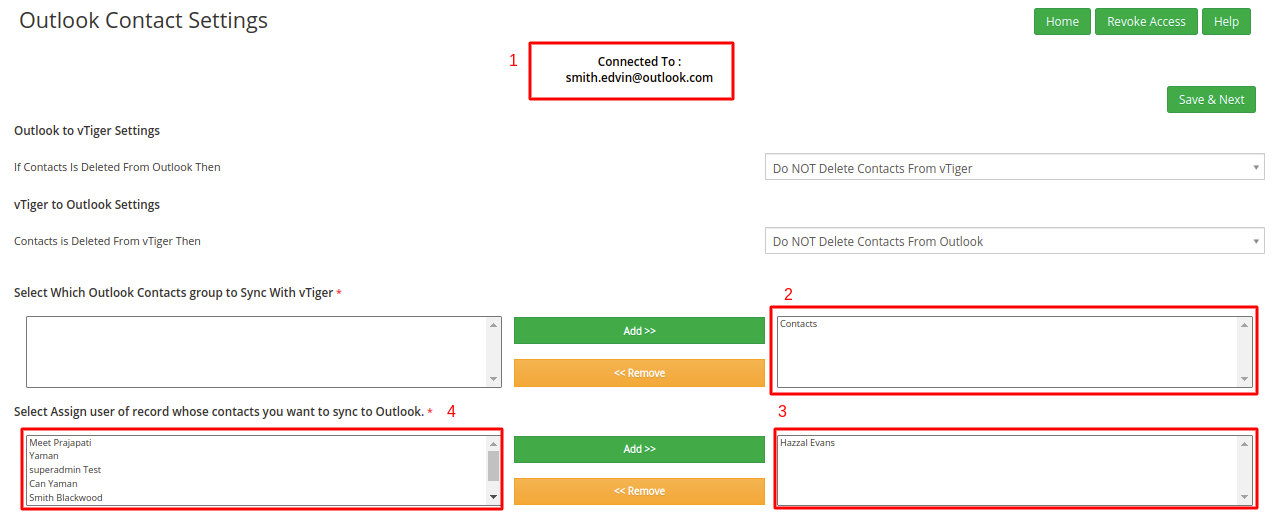
- It shows the Outlook login user email.
- It shows the default selected contact group.
- It shows the default selected user which is the CRM login user.
- It shows all CRM users.
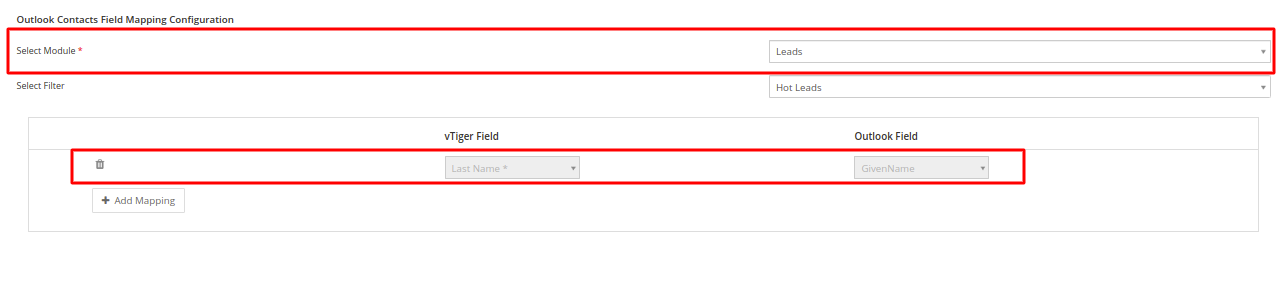
- By Default, the Leads module is selected. You can see this in the above screenshots.
- Mandatory fields showing by default.
- You can add more field mapping using the ‘Add Mapping’ button.
After Configuring all details in Outlook Contact Settings, it’ll redirect to the below screenshot where you can see the manual and auto sync for Contacts vTiger to Outlook and vice versa.
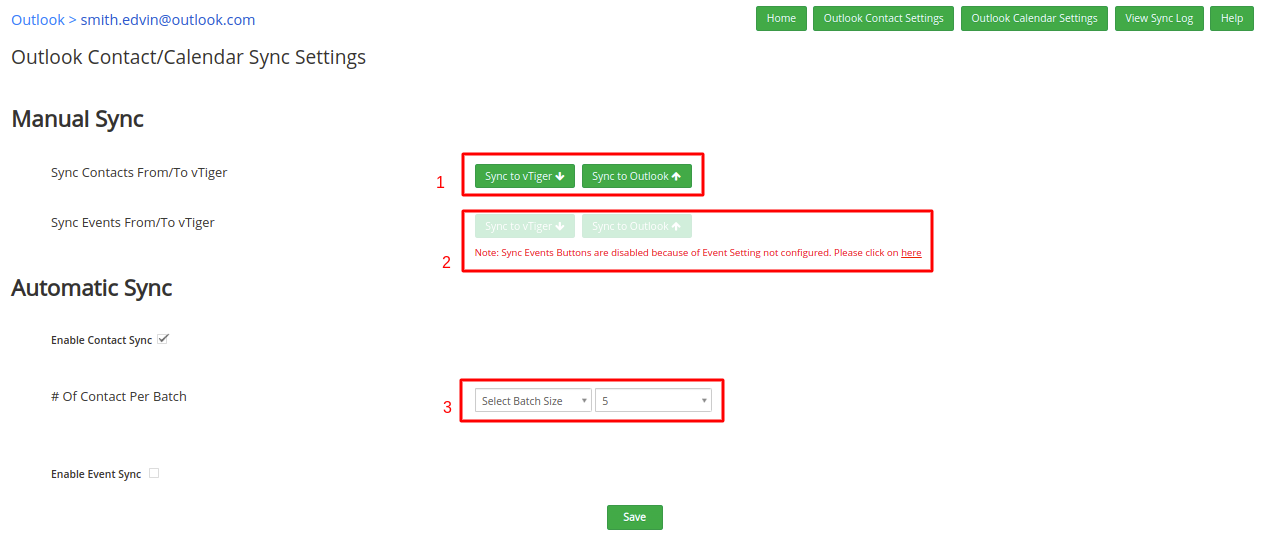
- It shows sync buttons for Outlook Contact manual sync.
- It shows disabled because event settings aren’t saved.
- When you click on ‘Enable Contact Sync’ it enables the auto-sync process for contact and also shows Batch Size and Minutes dropdown.
- Batch Size: Selecting the size of the Batch means it’ll sync the amount/size of the data mentioned in the Batch Size at a single time.
- Minutes: Select the Minutes used for the Scheduler for the trigger. Minutes Interval allows the scheduler to process data from/to the vtiger/outlook system bi-directional to avoid performance issues in your vTiger System.
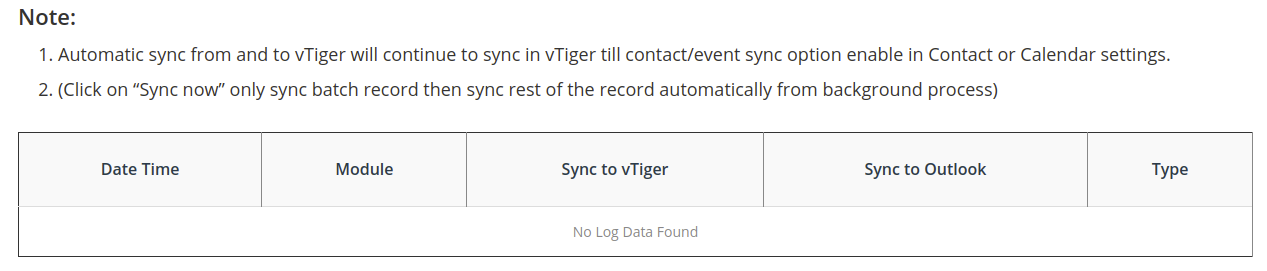
Note:
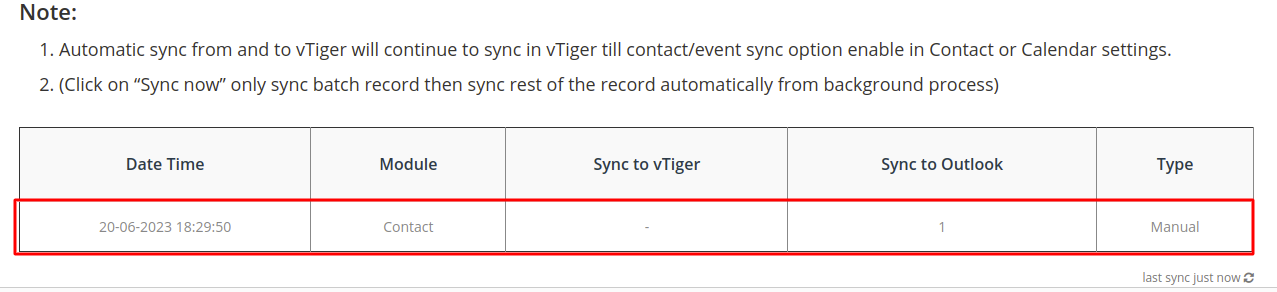
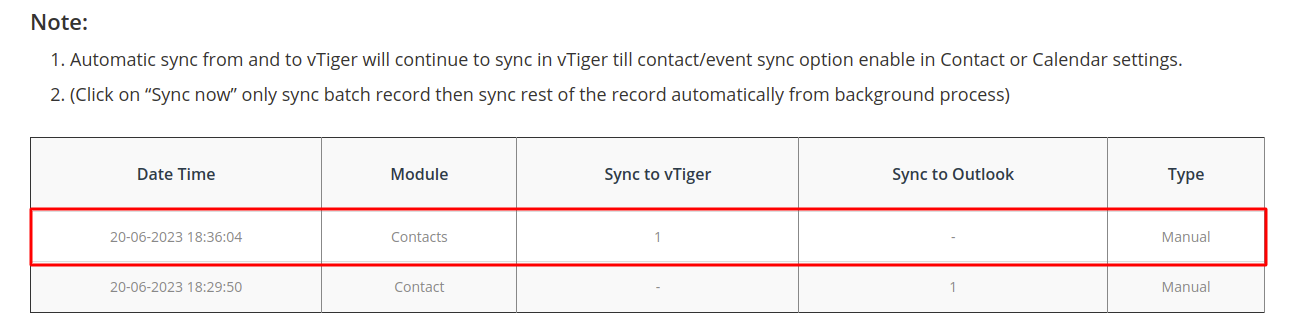
The below screenshots show some notes and a log table which is showing details of the last 10 sync data containing module name, sync time, number of record sync from Outlook/Vtiger and type of sync (auto/manual). For more sync data you can review Office365 Logs” Provide a link on Office365 Logs word.
VTiger Contacts Sync to Outlook Contact
Create a Record in the vTiger Contact/Leads/Organization like the below screenshot.

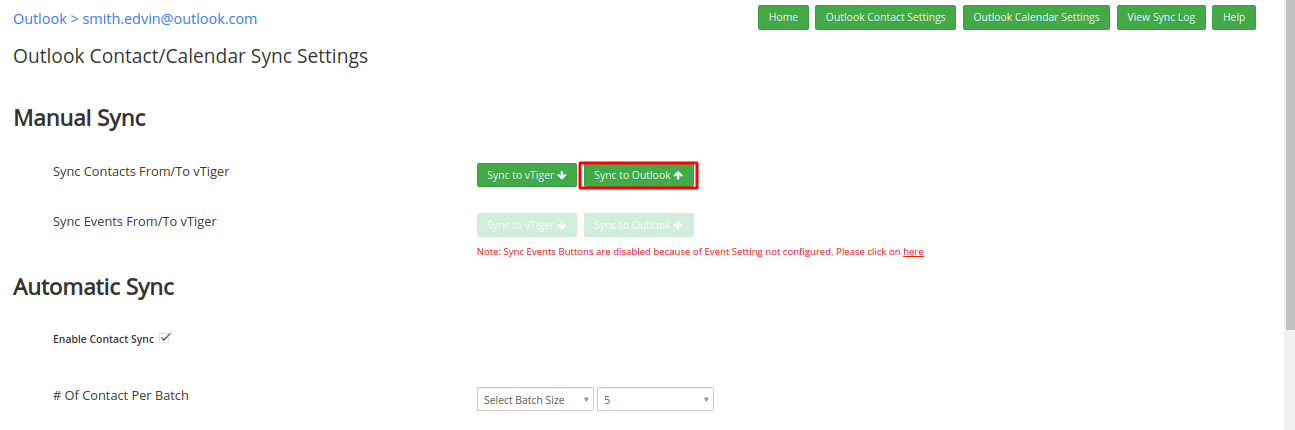
After creating Contact in vTiger you have to click on sync from vTiger.
After syncing data, you can see in Outlook Contact the Contact is synced successfully.
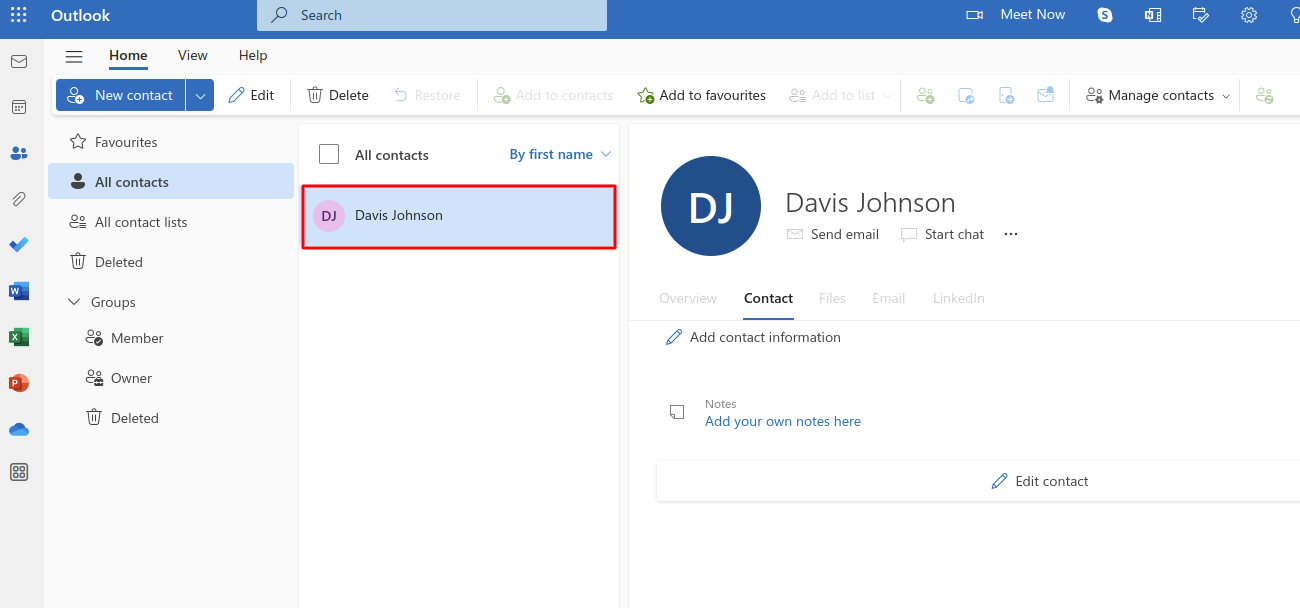
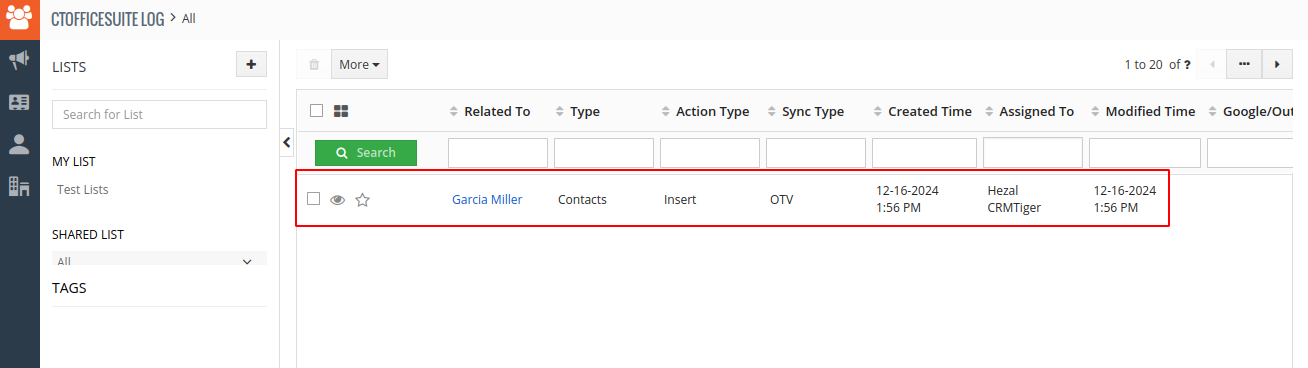
Once Sync Process is Completed, you can see the log table & It looks like the screenshot below.
Contacts Sync to vTiger
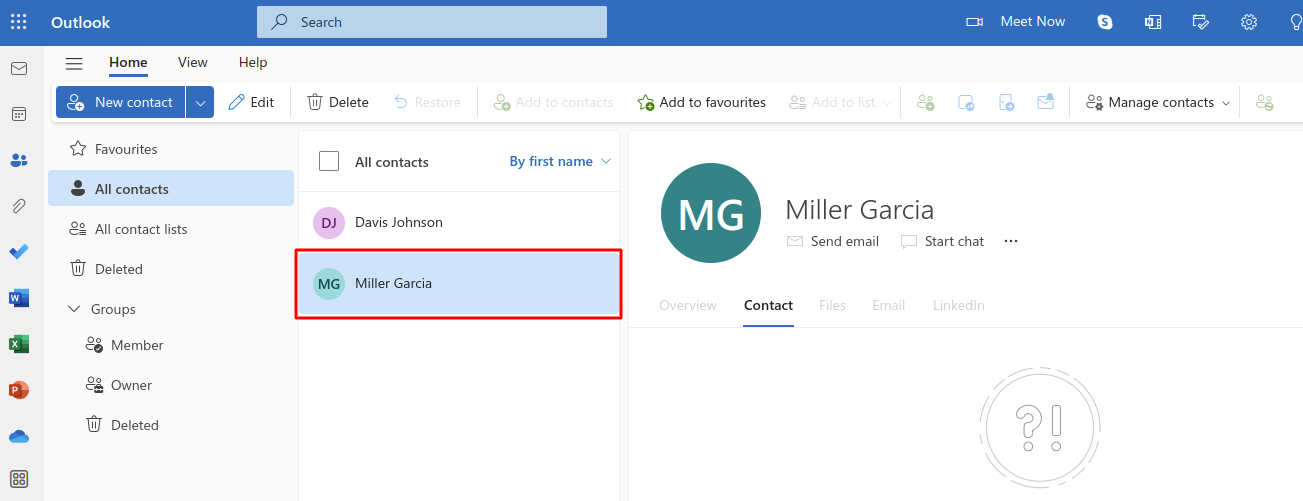
Create Contact in Office 365 Contact like the below screenshot.
Once Contact is created in Office365, Go to the Outlook Contacts sync settings page for sync Contact. Once a user clicks on “Sync To vTiger”, it will look like the below screenshot where you can see the number of records Created, Updated & Deleted.

Once the record is synced, you can see that record in vTiger Contacts Module like in the below screenshot.

Also, you can see sync records in the Log table & GoogleOffice365Suite “Sync Log”.
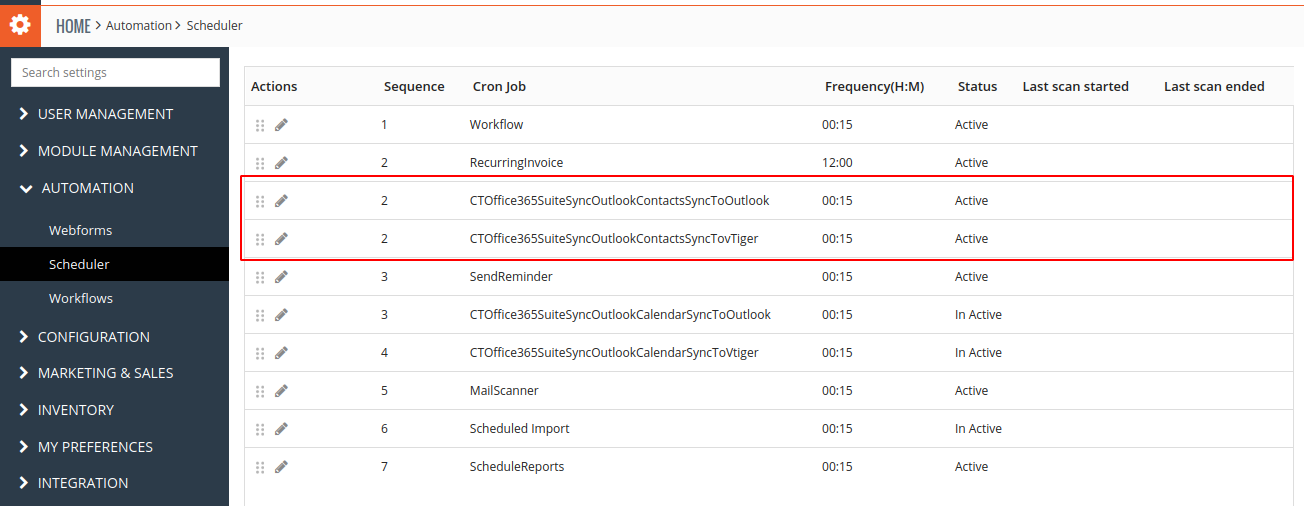
Contact Automatic Sync
For Automatic Sync of Contact, 2 Schedulers are available in the CRM Settings->AUTOMATION->Scheduler as shown in the below screenshot once the GoogleOffrice365Suite Plugin installs.
Note: For Sync Contacts automatically using Scheduler, you need to set up vTiger Cron on Server.