The Route Planner feature helps users create, organize, and manage routes efficiently by selecting records from different CRM modules and arranging them according to priority and travel sequence. Users can generate optimized routes, view them on a map, and share the complete route directly through Google Maps for smooth navigation.
How to Configure Route Planning Settings for the CRMtiger Mobile App
Before using the Route Planner functionality in the CRMtiger mobile application, the administrator must configure the required Route Planning settings and provide access to users from the CRM settings.
To enable Route Planner access for users, navigate to CRMTiger Mobile Apps → Feature Management → Route Planner Configuration.
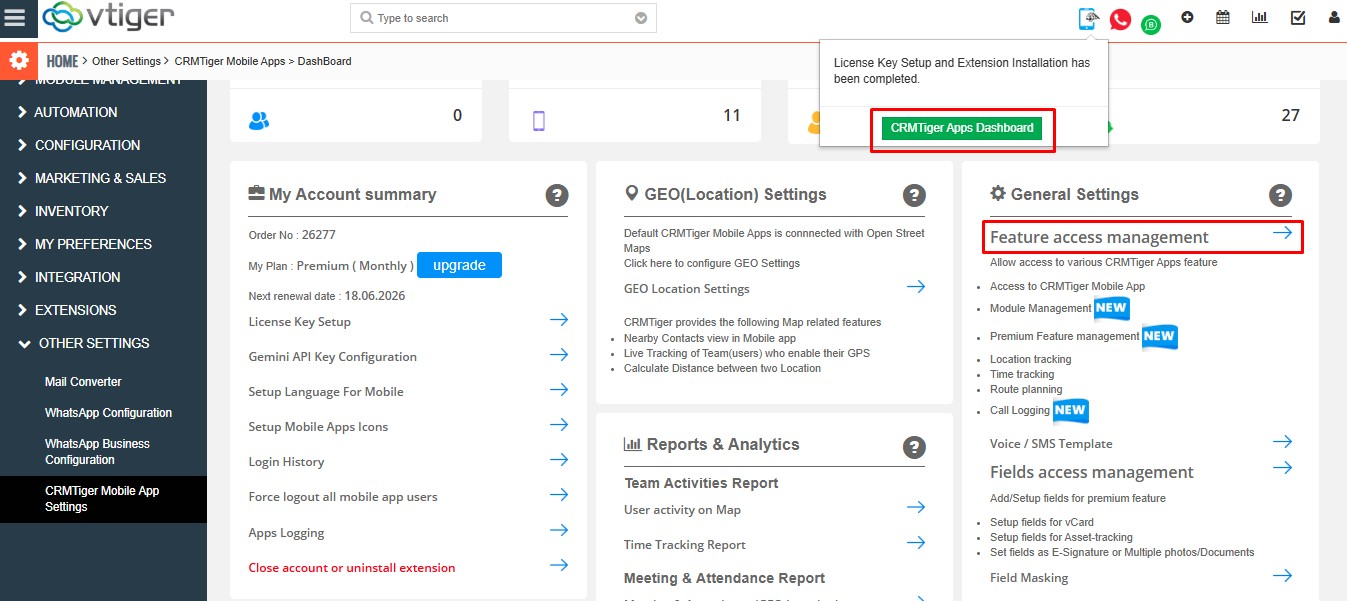 Inside the Route Planner Configuration screen, the administrator can select the users who should have permission to access the Route Planner functionality in the mobile application.
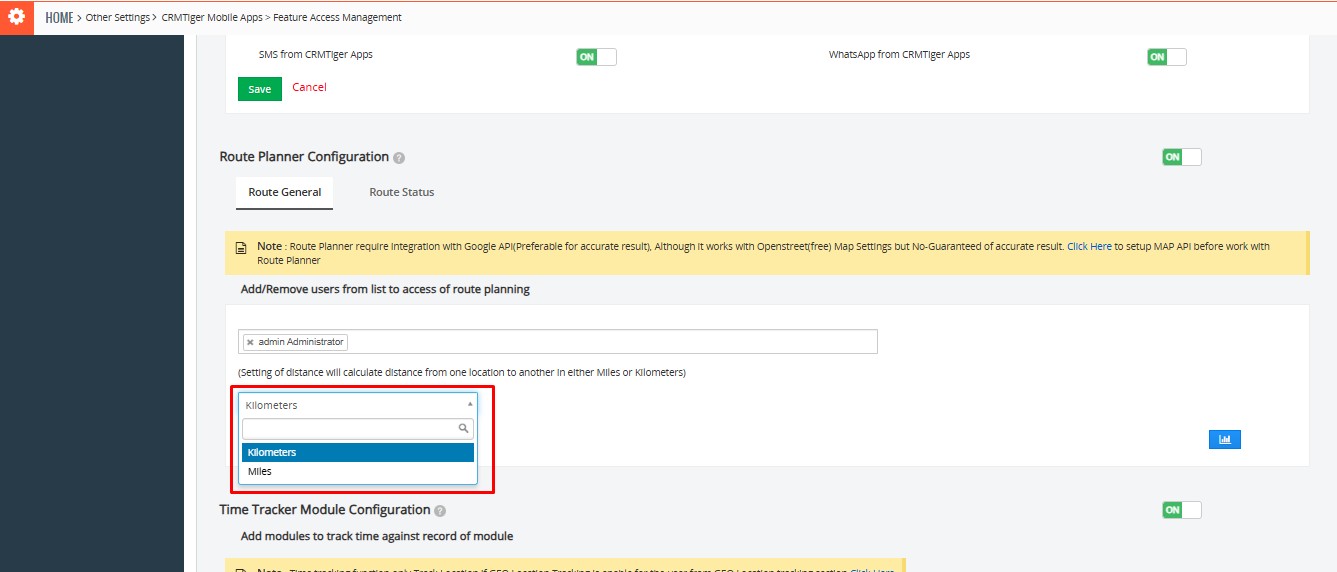
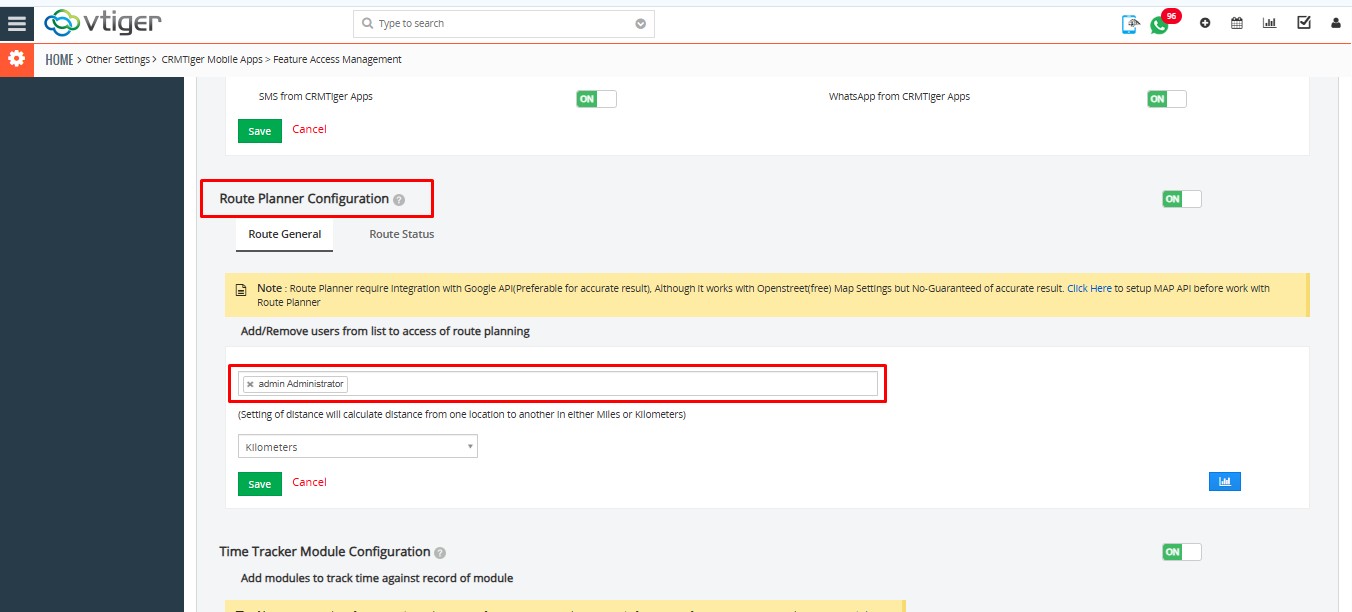 The configuration settings also provide an option to select the distance calculation format. The administrator can configure whether the route distance should be displayed in Kilometers or Miles according to business requirements.
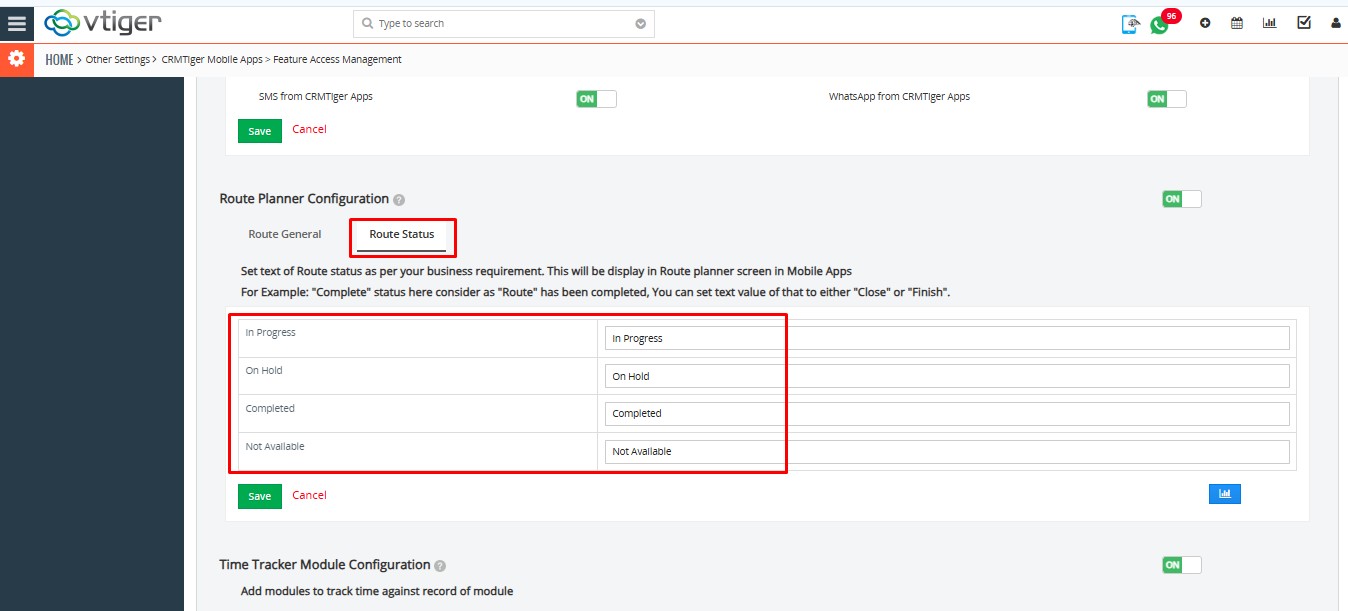
 Additionally, the administrator can customize the route status names that will appear in the mobile application. These statuses are displayed while creating or updating routes, allowing users to manage route progress according to customized business workflows.
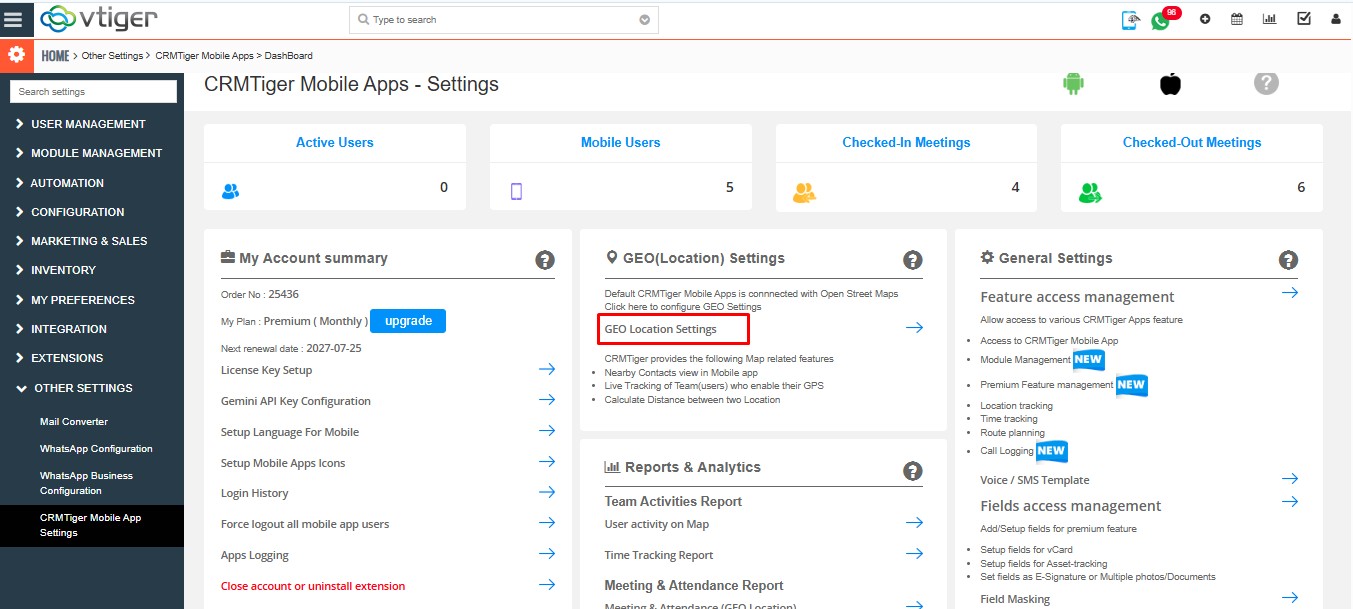
 To enable proper location tracking and map functionality, the administrator must configure the Google API Key. This API key helps the system identify accurate locations, generate routes, and track stops correctly within the Route Planner module.
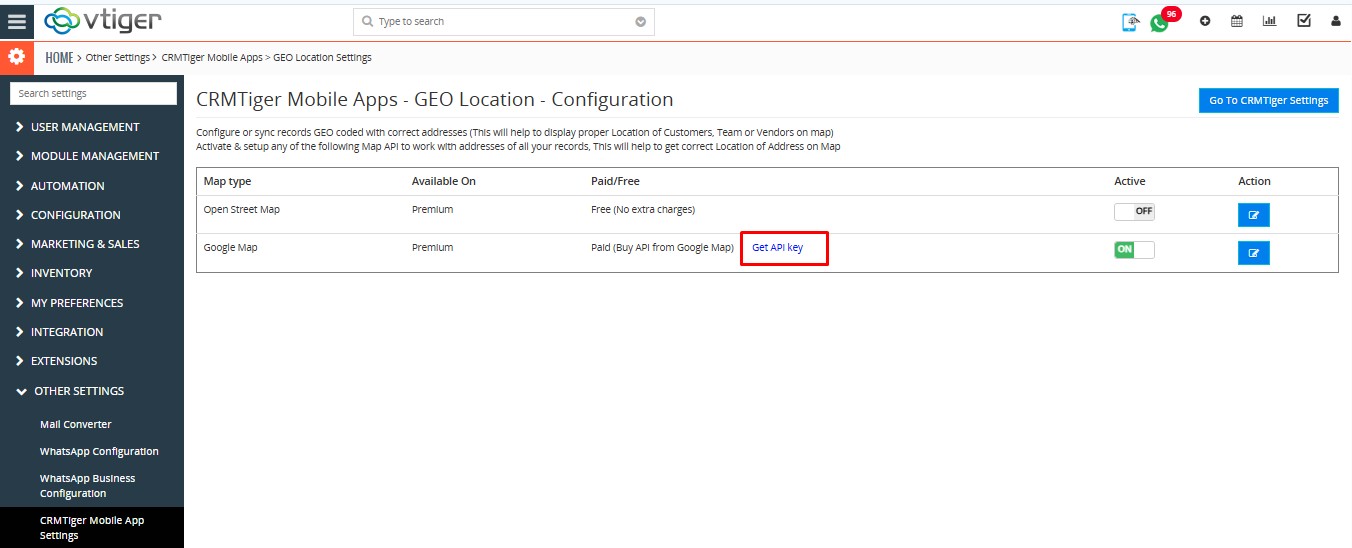
To configure the Google API Key, navigate to GEO (Location) Settings → Google Map.
 After opening the Google Map settings, click on the Get API Key option, generate the API key, validate it, and save the API key in the configuration screen.
 Once the Google API Key is configured successfully and user access is enabled, users will be able to access and use the Route Planner functionality from the CRMtiger mobile application.
How to access the Route Planner from the Administration?
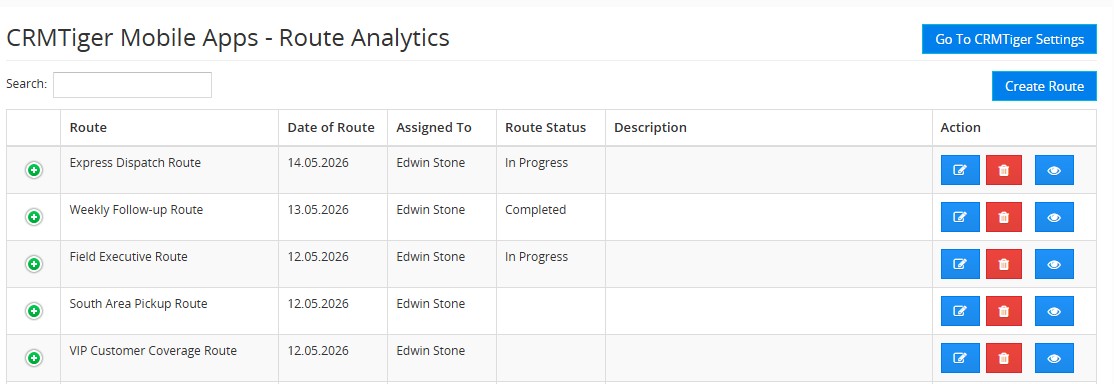
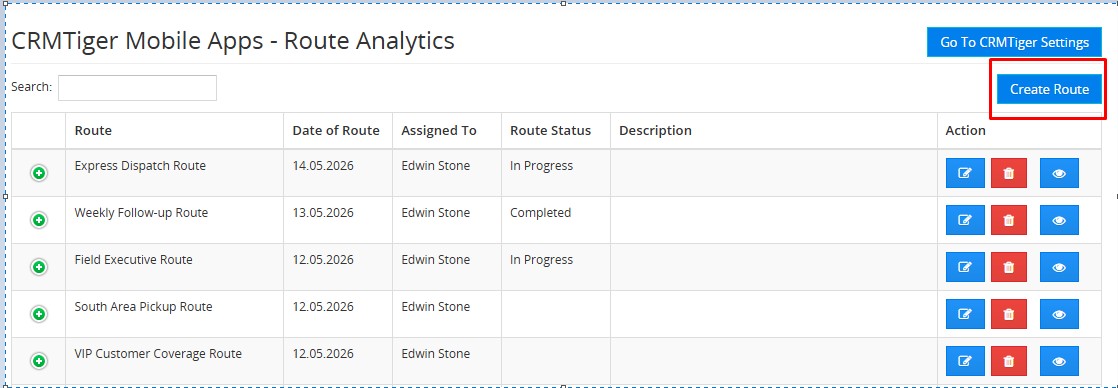
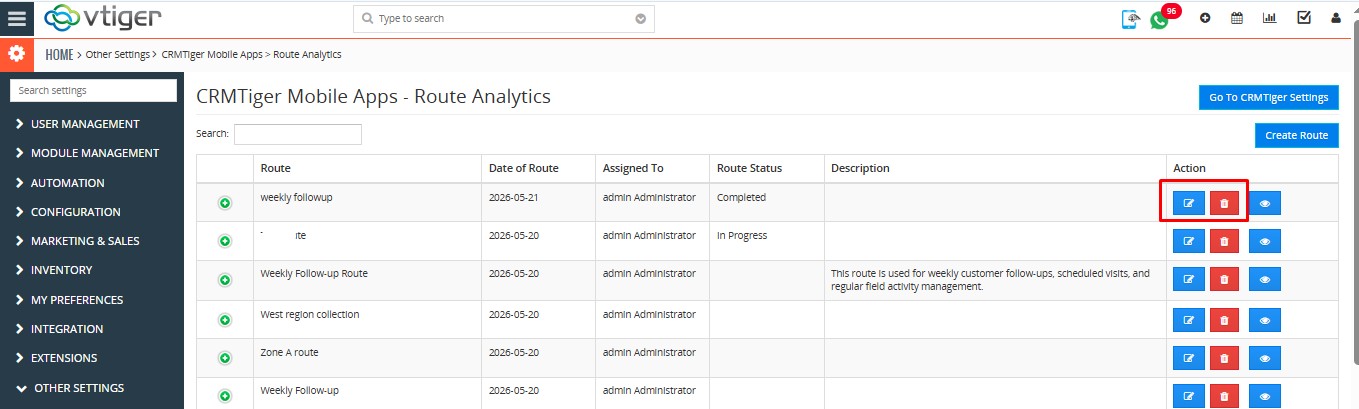
Route Planning Analytics
This report displays the following route details: Route Name, Date of Route, Assigned To, Route Status, Description, and Action.
How to Create a New Route
To create a new route, the user needs to click on the Add Route button available on the Route Planner listing page. After clicking the button, the system opens the route creation screen, where the user can enter the route details.
 The user is required to enter the Route Name, Date, and select the Assign To field to assign the route to a specific user. Once the basic details are added, the user can proceed by clicking on the Add Stops button to include route stops.
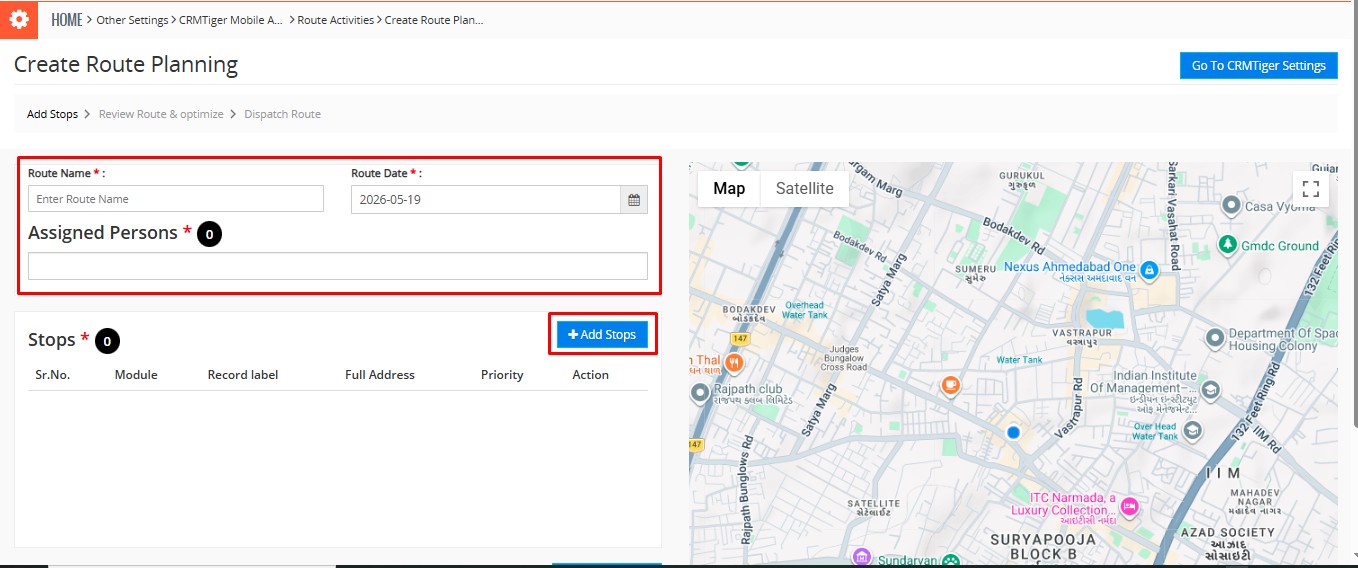
Adding Stops to the Route
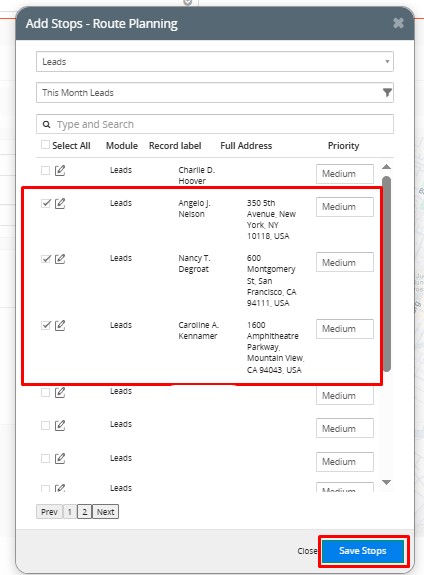
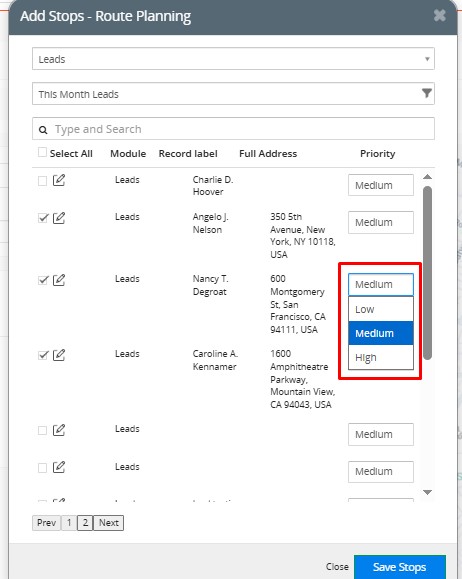
When the user clicks on the Add Stops button, a pop-up window is displayed that allows the user to select records from different CRM modules. The user can choose records from the modules, such as Contacts, Leads, or Organizations, depending on the required route planning process.
 The system also provides filter options that help the user view records based on specific conditions. By applying filters, the user can quickly find the required records and select multiple entries at the same time. After selecting the required records, the user can save them as route stops.

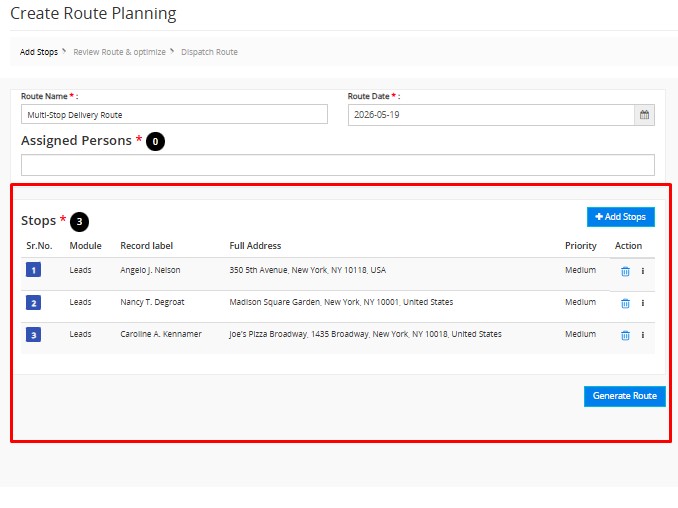
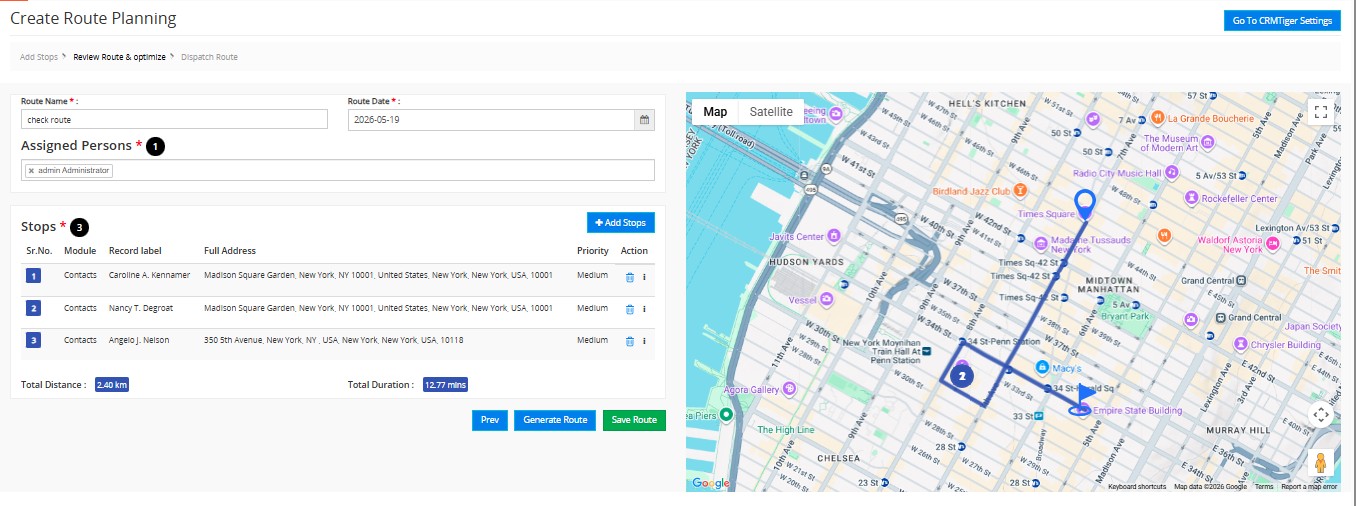
 Once the stops are added successfully, the selected records are displayed in the stop listing section of the route creation page. The user can review all selected stops before generating the route.
Managing Stop Priority
The Route Planner allows users to manage stop priorities according to business requirements. The priority can be updated either directly from the Add Stops pop-up or from the selected stop listing screen after the records are added.
Users can assign priorities such as High, Medium, or Low to each stop for better route management and planning.
Generating and Saving the Route
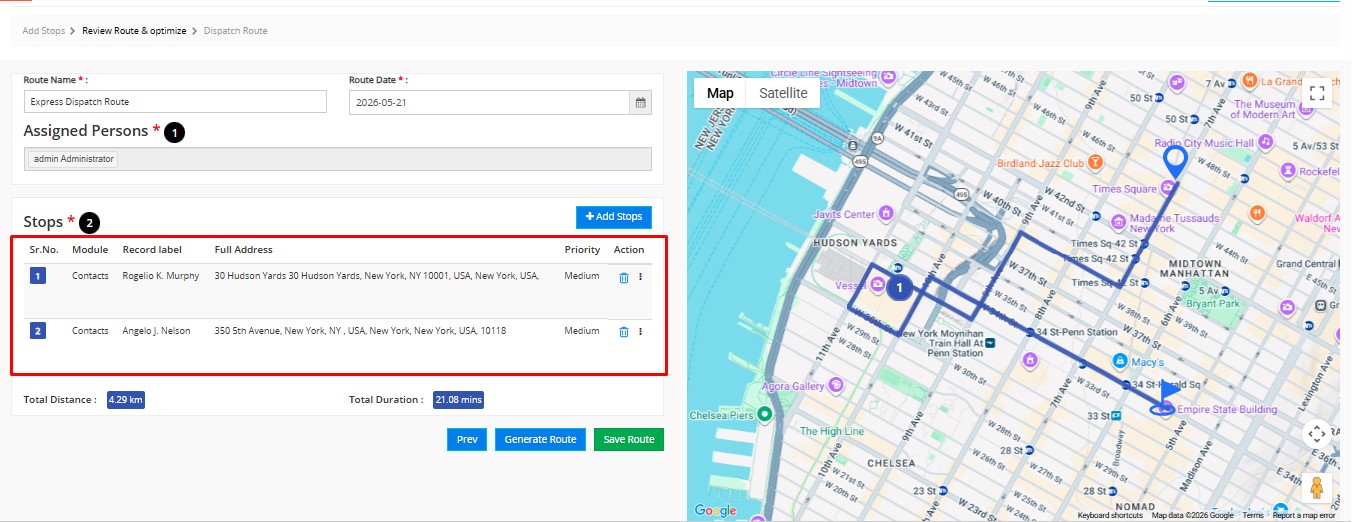
After adding all required stops, the user can click on the Generate Route button. Once clicked, the system generates the complete route and displays it on the map with all selected stops.
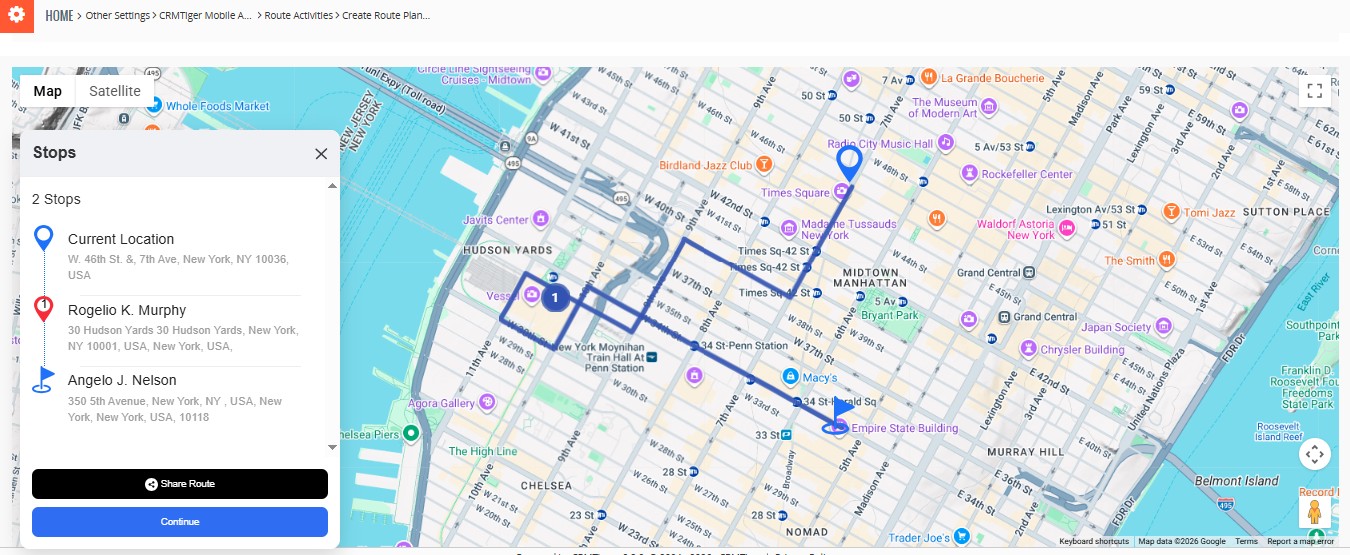
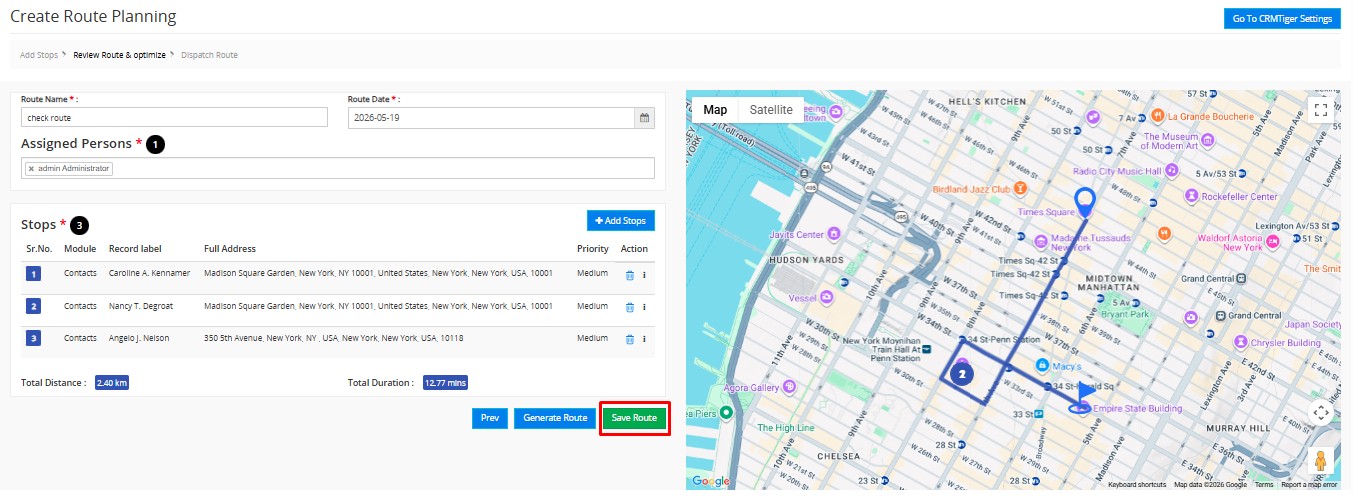
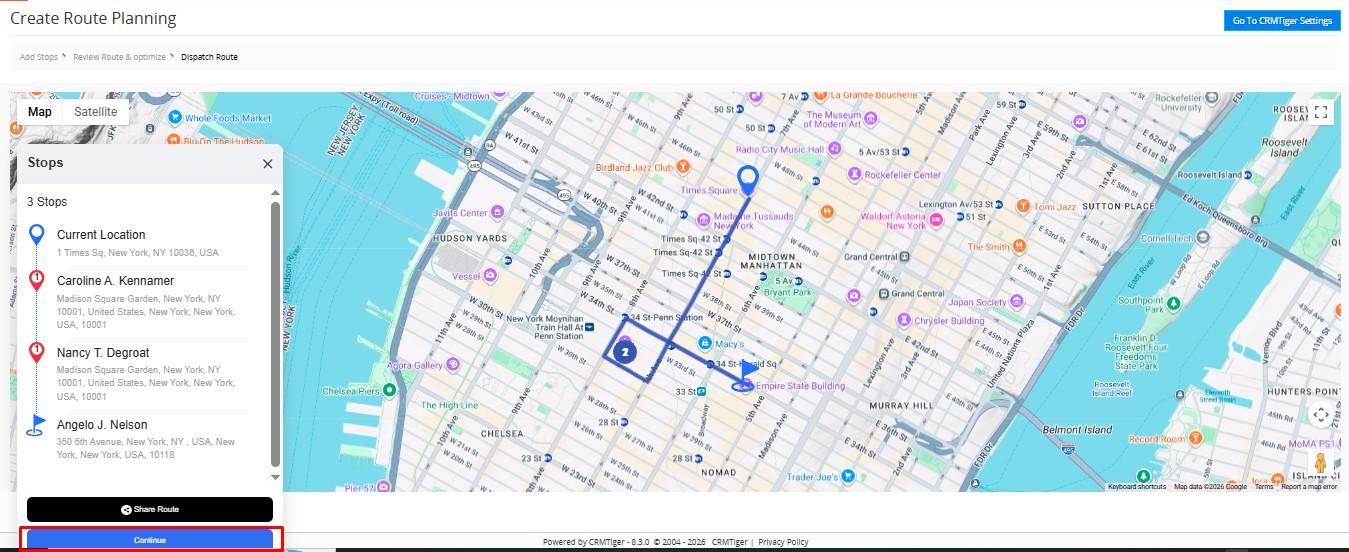
 After reviewing the generated route, the user can click on the Save Route button. The system then redirects the user to the detailed route map view. This page displays the complete route along with all stops and a side panel showing the stop sequence starting from the current location to the final destination.
Sharing and Continuing the Route
At the bottom of the side panel, two additional options are available for the user.
The first option is Share Route, which redirects the user to Google Maps with the complete route and all stops included in the navigation link. The user can copy this link and share it with anyone for easy route access and navigation.
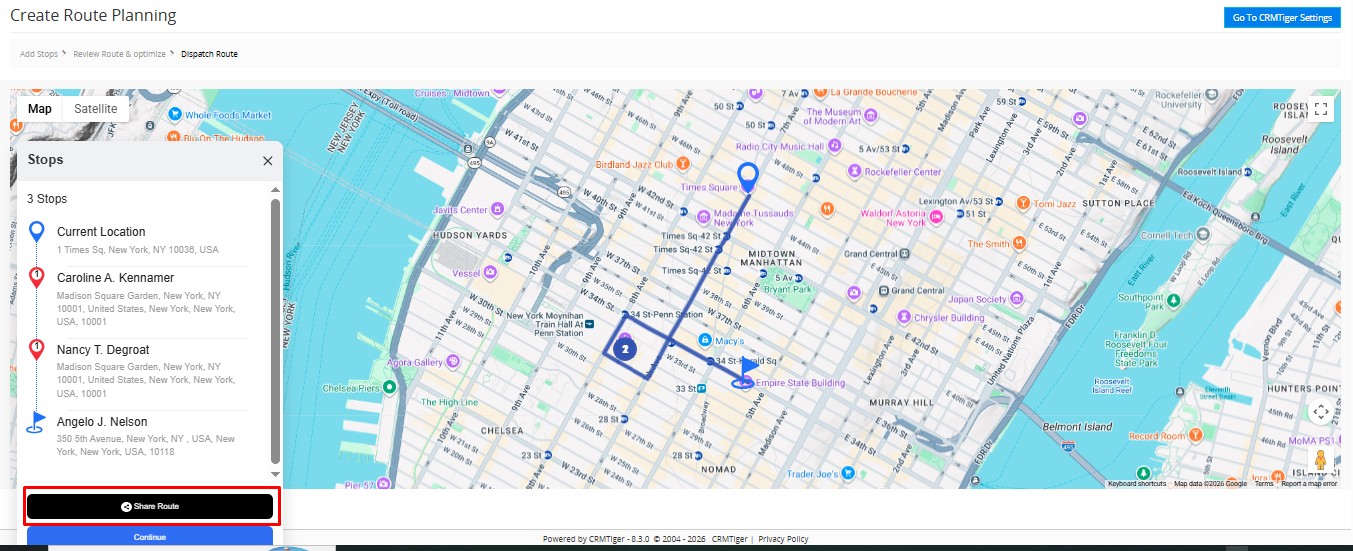 The second option is Continue, which redirects the user back to the Route Planner listing page, where they can continue managing existing routes or create new ones.
How to Create Route Planning from the CRMtiger Mobile App
The Route Planner feature in the CRMtiger mobile application allows users to create and manage routes directly from their mobile devices. Users can add multiple stops, organize stop sequences, and generate routes for daily travel planning.
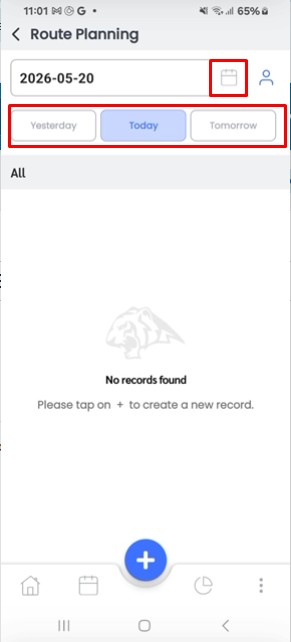
To begin, open the CRMtiger mobile application and navigate to the Route Planner section from the side menu.
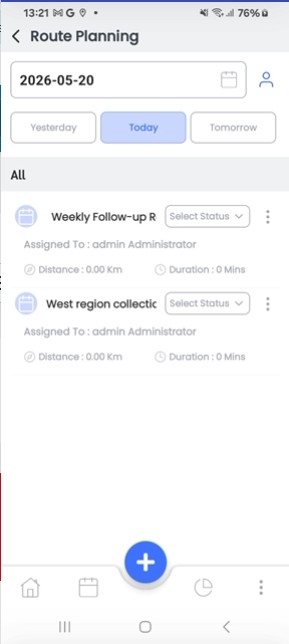
 After opening the Route Planner screen, the user can view route lists according to different days using the available options such as Yesterday, Today, and Tomorrow, or by selecting a date, the system displays the routes based on the selected date or day.
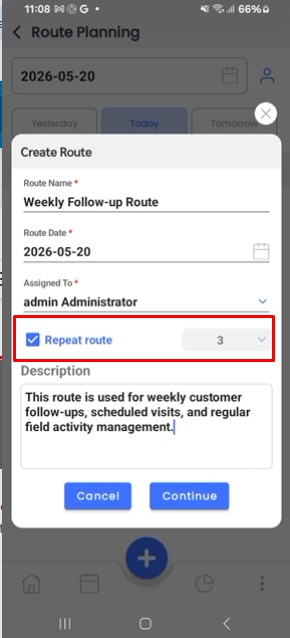
 To create a new route, click on the Plus (+) Icon available on the Route Planner screen. Once clicked, the route creation pop-up window appears.
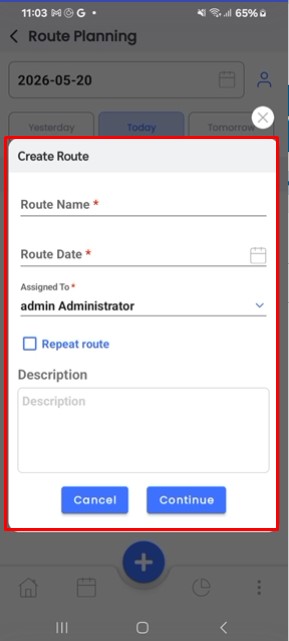
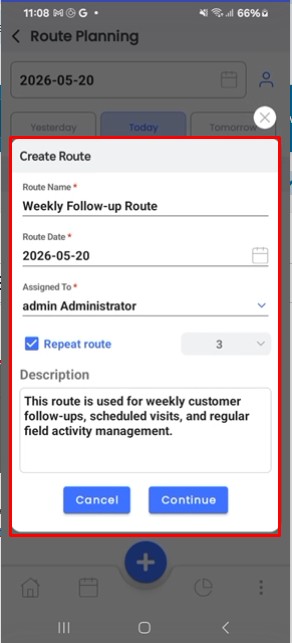
The user can enter the Route Name, select the Route Date, and choose the Assign To user. If required, the user can enable the Repeat Route checkbox to create recurring routes. After enabling this option, the user can select the days for which the route should be repeated. The user can also enter a description if additional information is needed.
After adding all route details, click on the Continue button.
Once the user clicks on the Continue button, the application redirects to the next screen where stops can be added to the route. To add stops, click on the Plus (+) Icon available on the screen.
![]() The system displays the list of CRM modules from which records can be selected. The user can select records from a single module or from multiple modules for the same route. Multiple records can be selected at the same time according to the route requirement.
The system displays the list of CRM modules from which records can be selected. The user can select records from a single module or from multiple modules for the same route. Multiple records can be selected at the same time according to the route requirement.
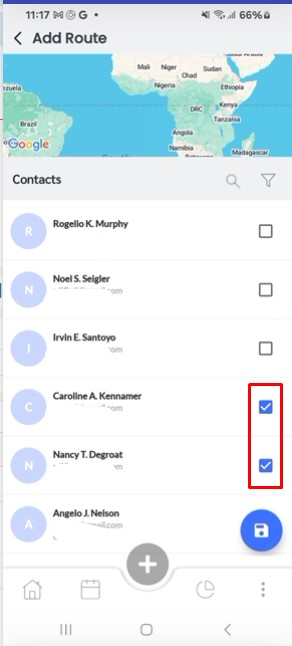 After selecting the required records, click on the Select Icon available at the bottom left corner of the screen.
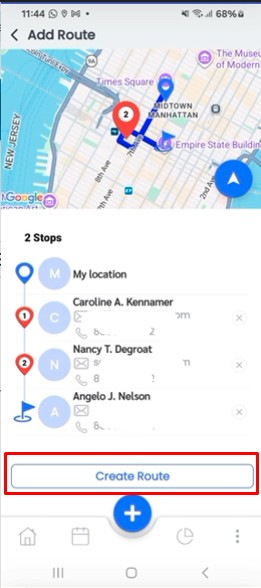
![]() After the records are selected, the user can view all selected stops along with their locations displayed on the map.
After the records are selected, the user can view all selected stops along with their locations displayed on the map.
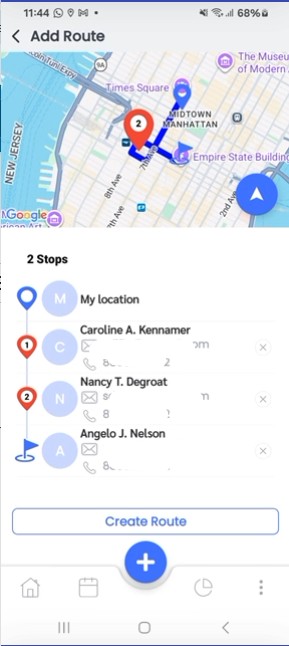 The user can also manage the selected stops by removing any stop using the Cross (X) Icon. Additionally, the stop sequence can be rearranged using the Drag and Drop functionality to change the route order according to travel requirements.
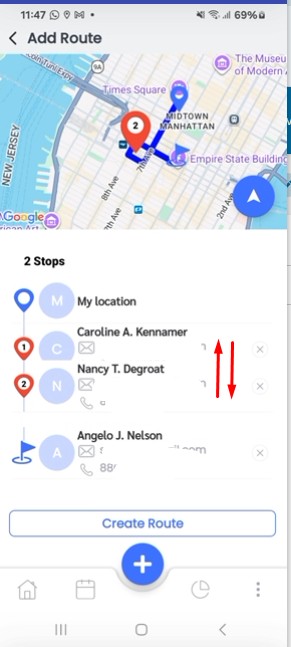
After reviewing all selected stops and arranging the route sequence, click on the Create Route button.
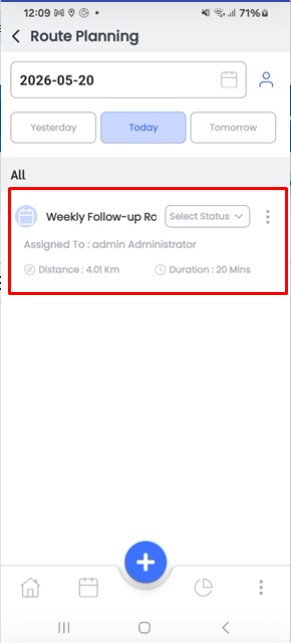
Once the route is created successfully, the application redirects the user back to the Route Planner listing page where the newly created route is displayed successfully.
How to Manage and Track Route Planning from the CRMtiger Mobile App
After creating a route successfully, users can manage, track, update, and monitor the complete route directly from the Route Planner listing page in the CRMtiger mobile application. The Route Planner provides various features such as status management, route tracking, navigation, record management, check-in/check-out functionality, and route completion tracking.
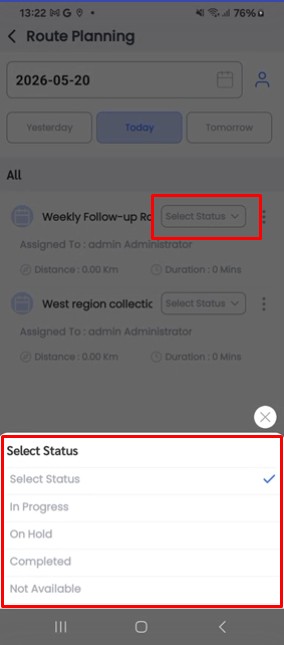
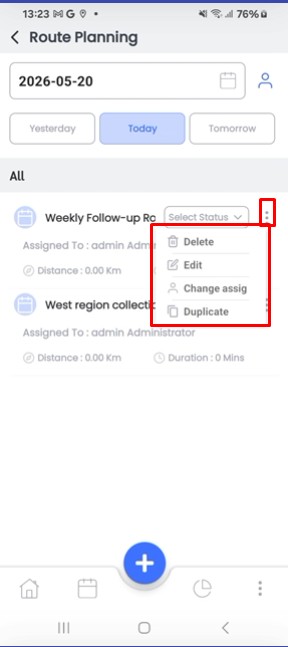
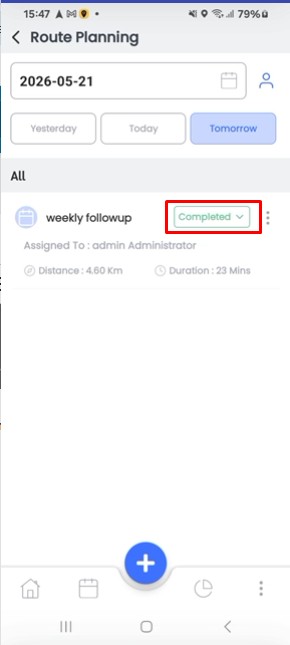
 From the Route Planner listing page, the user can directly change the route status using the status dropdown available beside each route. The status can be updated according to the current progress of the route, such as In Progress, Completed, On Hold, or other available statuses.
 Beside the status dropdown, the user can see the Three Dots Menu that provides additional route management options such as Edit, Delete, Change Assign To, and Duplicate.
- Edit – Allows the user to modify the route details and selected stops.
- Delete – Allows the user to permanently remove the route from the Route Planner.
- Change Assign To – Allows the user to assign the route to another CRM user.
- Duplicate – Allows the user to create a copy of the existing route with the same stop details.
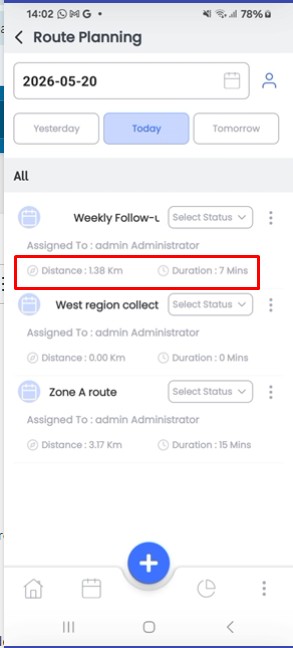
The listing page also displays the Total Time and Total Distance in Kilometers for each route, allowing users to quickly review route travel information without opening the detailed route screen.
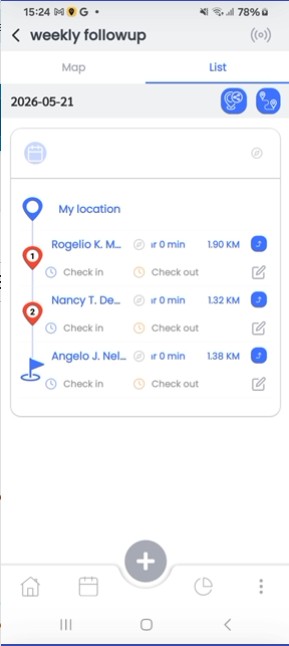
 When the user clicks on a specific route from the listing page, the application opens the detailed route view showing all records and stops that were selected during route creation.
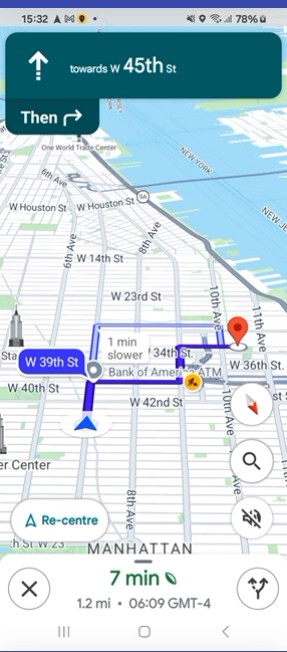
 At the top right corner of the screen, two icons are available for quick actions. One icon allows the user to Share the Route Location, while the second icon redirects the user to Google Maps Navigation to view and navigate through all route stops.
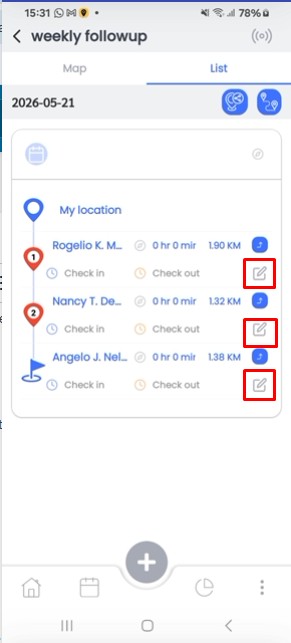
![]() If any changes are required, the user can update the record details directly by clicking on the Edit Icon available beside the selected record.
If any changes are required, the user can update the record details directly by clicking on the Edit Icon available beside the selected record.
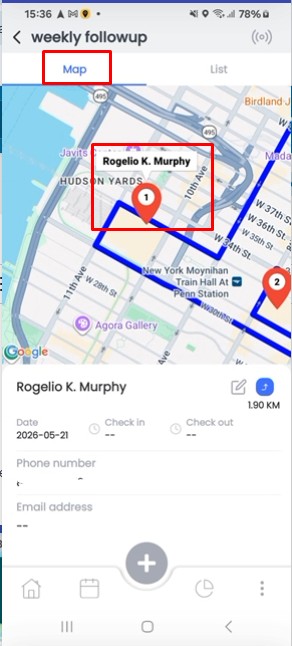
 When the user clicks on the Map View, the application displays the route map along with the record details and all associated stops on the map for better route visualization and navigation tracking.
 The user can also view record-specific stops by clicking on the icon displayed beside the record name in the route list. This helps users quickly identify stop details related to a particular record.
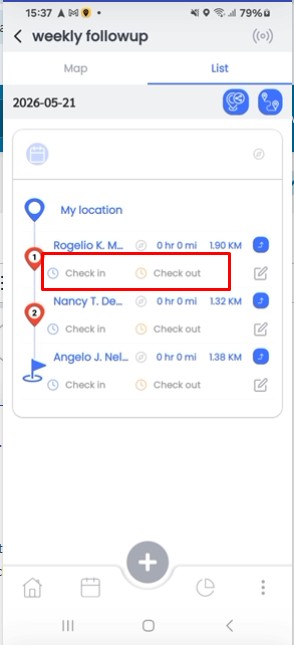
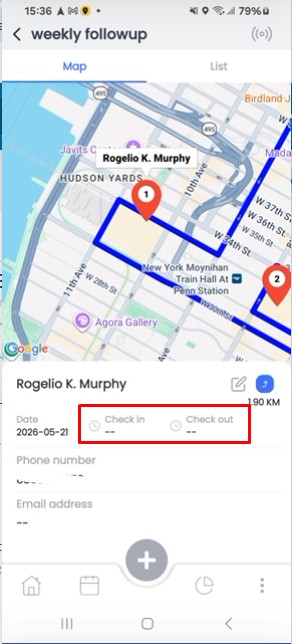
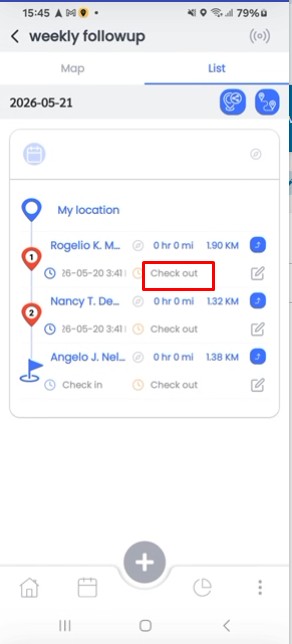
The Route Planner also provides Check-In and Check-Out functionality for route tracking. Users can perform check-in and check-out actions directly from both the listing page and the map view page.
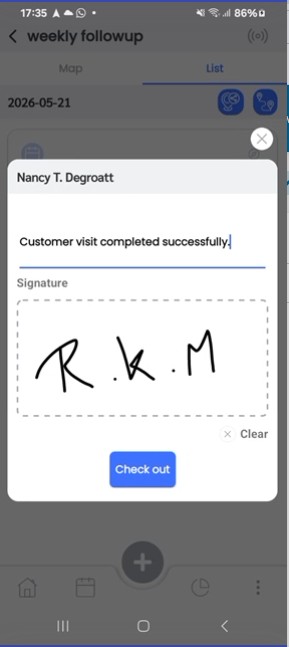
After clicking on the Check-Out option, a pop-up window appears where the user can enter notes and add a signature before completing the check-out process. Once the required details are entered, the user can click on the Save button to store the check-out information successfully.
After all route stops are successfully completed with proper check-in and check-out actions, the route status is automatically updated to Completed by default.
How to View Route Activities and Attendance Details from CRM
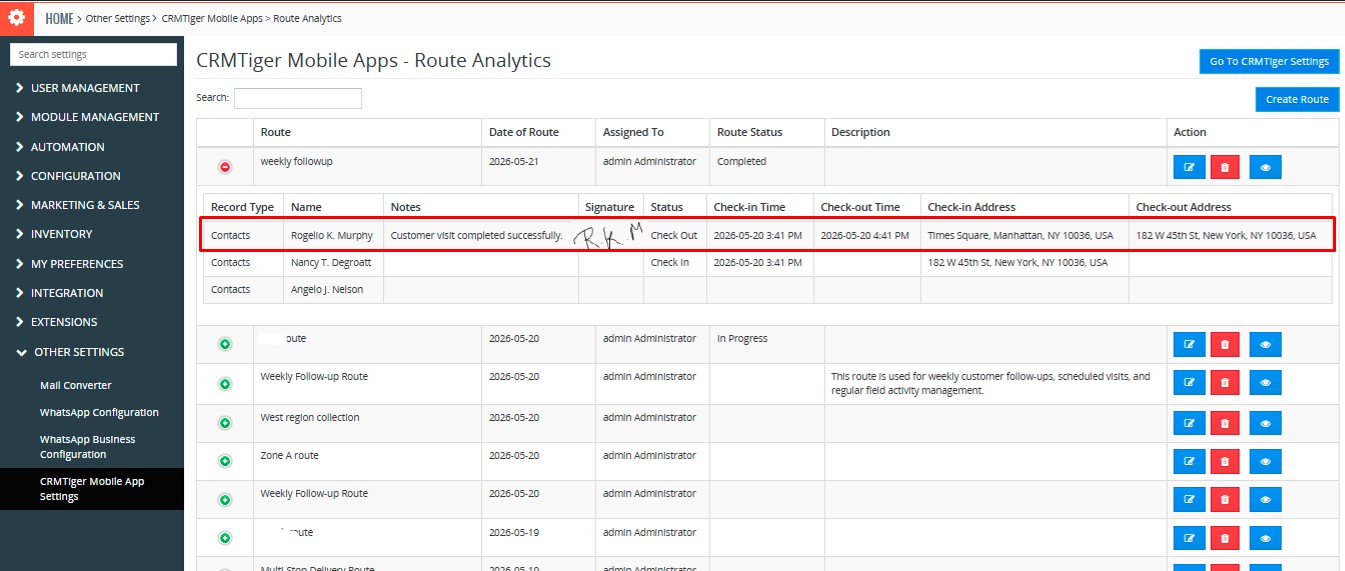
Users can monitor all route activities and attendance details directly from the CRM Route Planner module. The system stores complete check-in and check-out information, including notes, signatures, timestamps, and activity logs for each route.
The user can view all added notes, signatures, check-in details, check-out details, and other route activity information from the Route Analytics section available in the CRM.
 To view detailed information about a specific route, the user needs to click on the Eye Icon available beside the route record. Once clicked, the system redirects the user to the detailed route page.
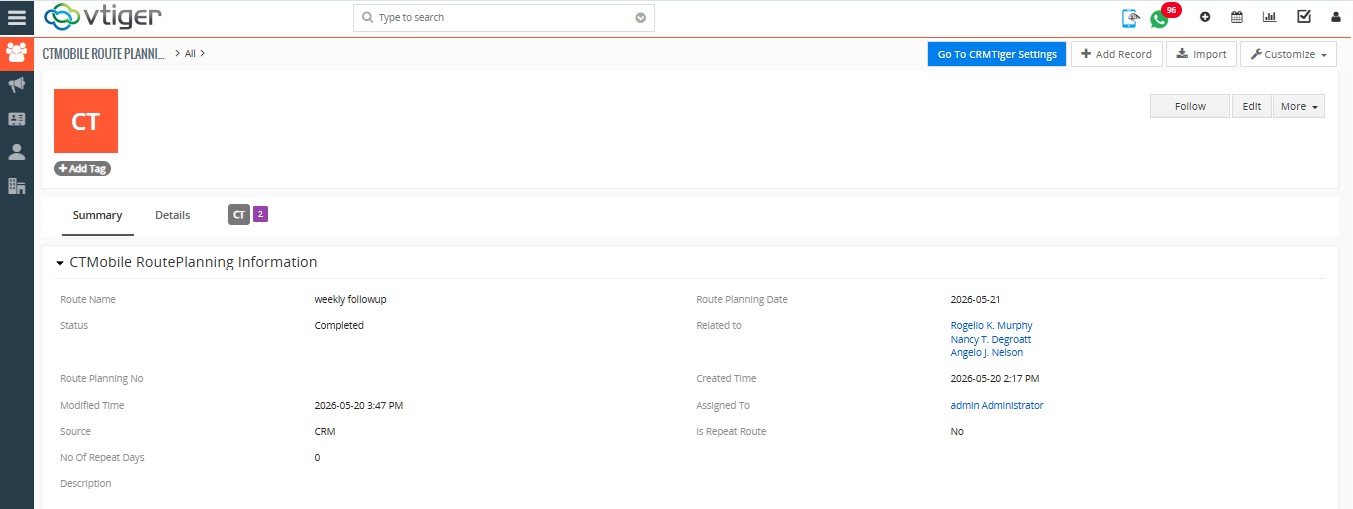
![]() Inside the route detail page, the user can access all related route information, including route logs and attendance activities.
Inside the route detail page, the user can access all related route information, including route logs and attendance activities.
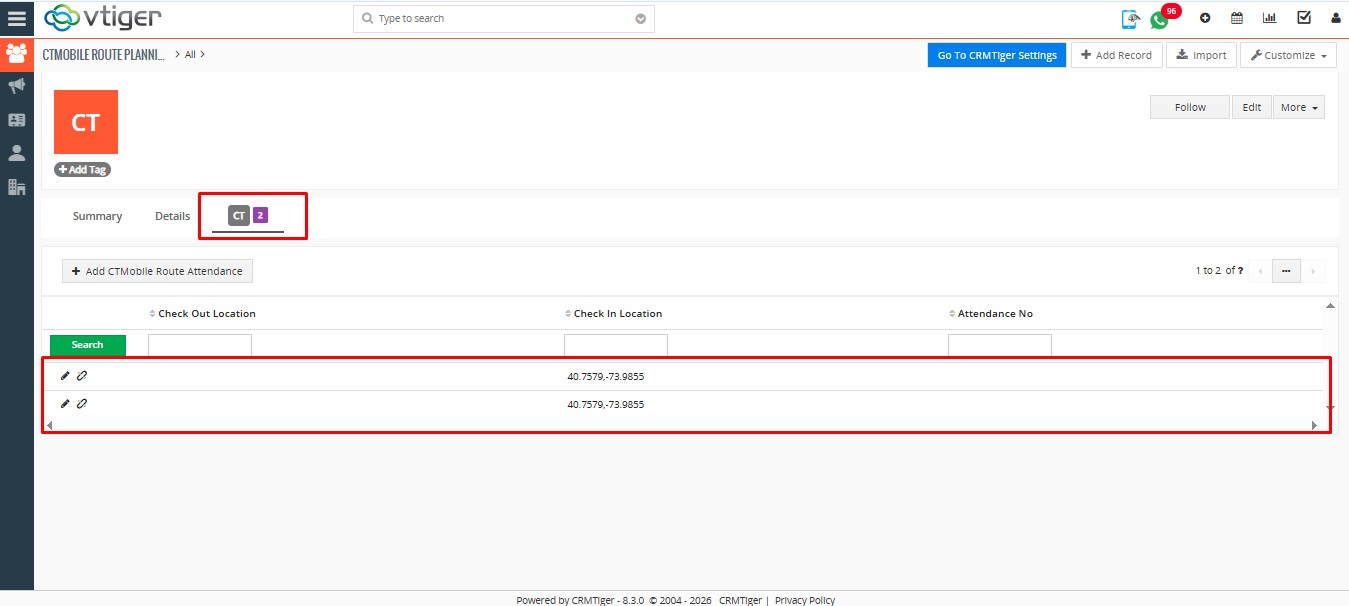
 To view the signature and specific route attendance details, the user needs to navigate to the Related Tab section and open the CT Route Attendance tab. This section displays all attendance logs related to the selected route.
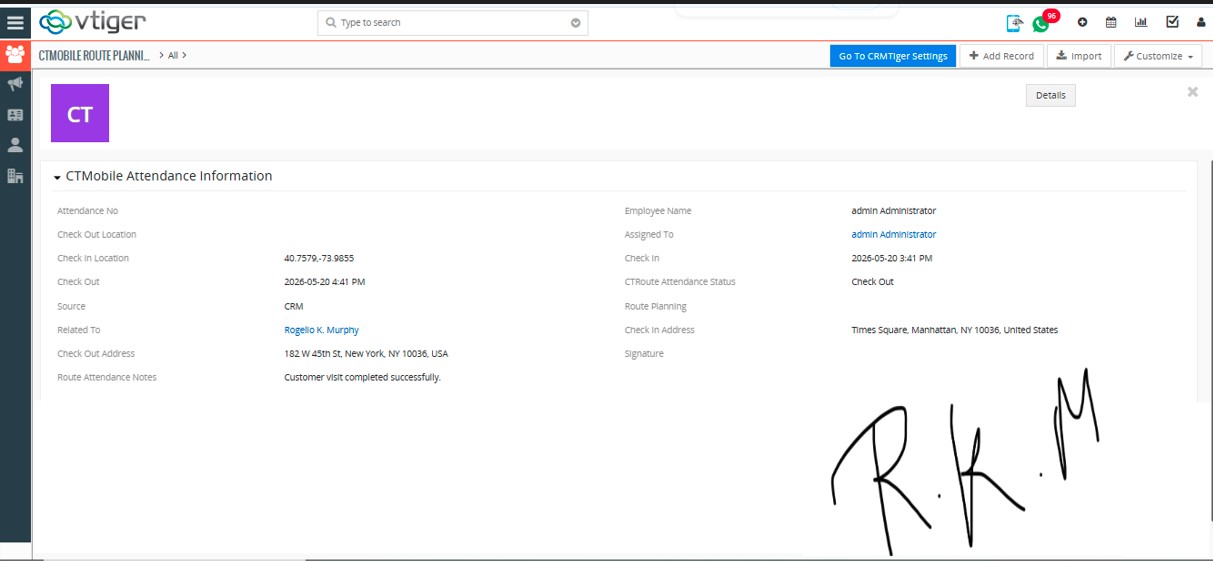
 After clicking on any attendance log, the system opens the detailed log view where the user can see complete information such as check-in time, check-out time, notes, signatures, and other attendance-related details.
 The CRM also allows users to manage routes directly from the listing page. Users can update route information by clicking on the Edit Icon or permanently remove the route by clicking on the Delete Icon.
How to Create Route Planning from Module Records
Users can directly create route planning from CRM module record listings such as Contacts, Leads, or Organizations. This feature allows users to quickly select multiple records and create a route without manually adding stops one by one from the Route Planner module.
To create a route from module records, navigate to the required module such as Contacts, Leads, or Organizations and select multiple records from the listing page.
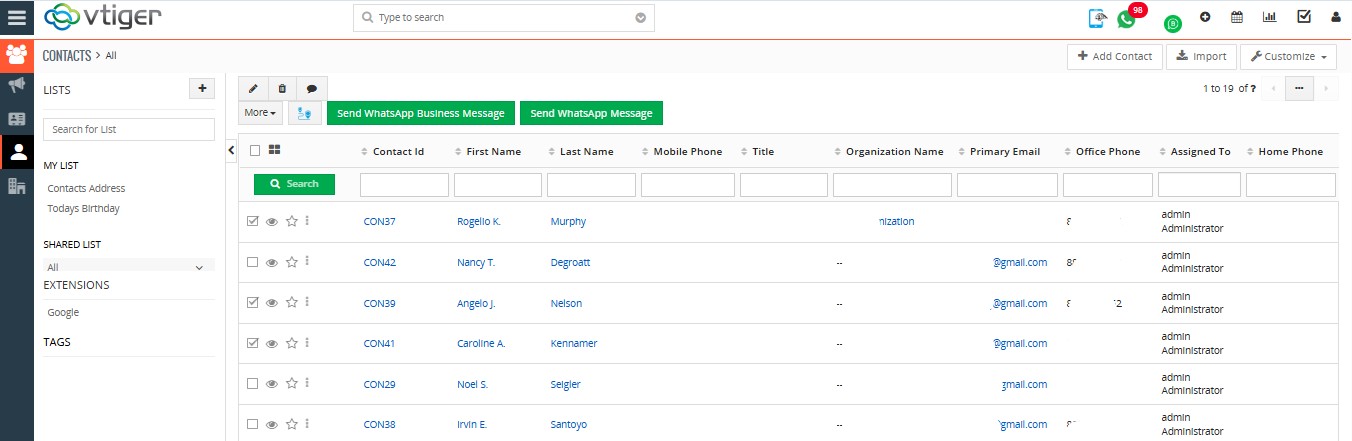 After selecting the required records, click on the Route Planner Icon available in the module actions section.
![]() Once clicked, the system automatically redirects the user to the Create Route Planning page with all selected records added as route stops.
Once clicked, the system automatically redirects the user to the Create Route Planning page with all selected records added as route stops.
 The user can then continue route creation by reviewing the selected stops, arranging the route sequence, setting priorities if required, and generating the route successfully.