
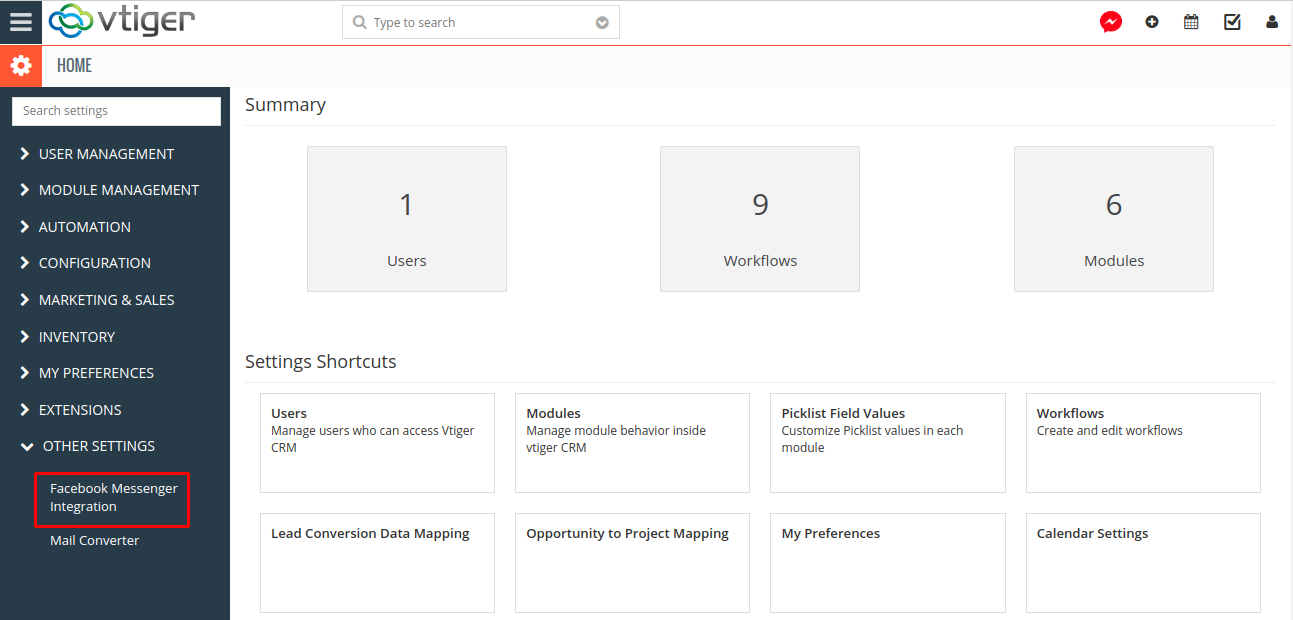
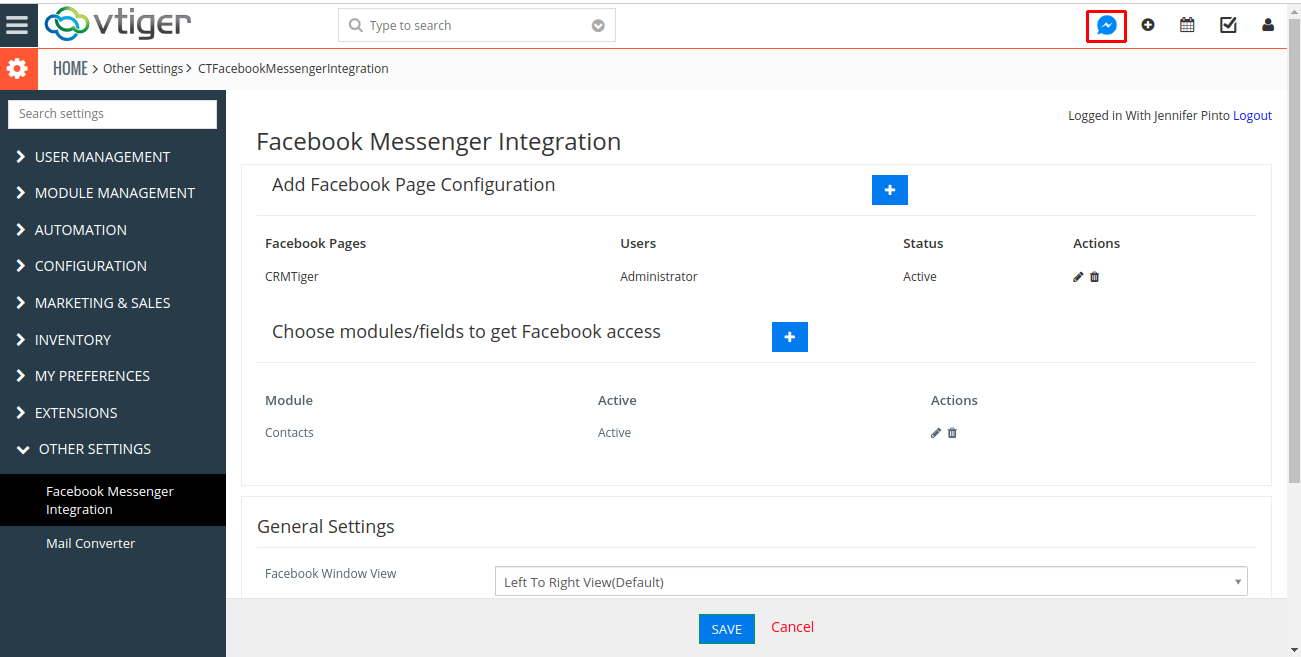
- In the CRM Settings Page → Click on OTHER SETTINGS Menu → Click on Facebook Messenger Integration Link.
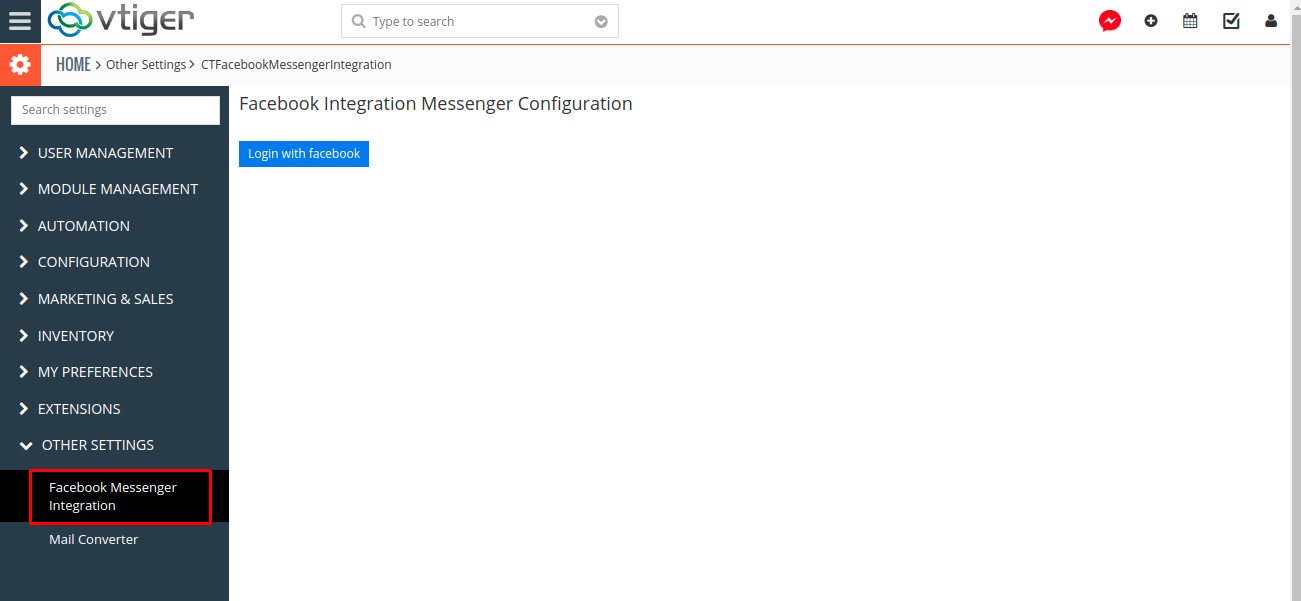
- Once You click on the Facebook Messenger Integration Link from Sidebar, the Facebook Lead Integration page will be open as shown in the screenshot below.
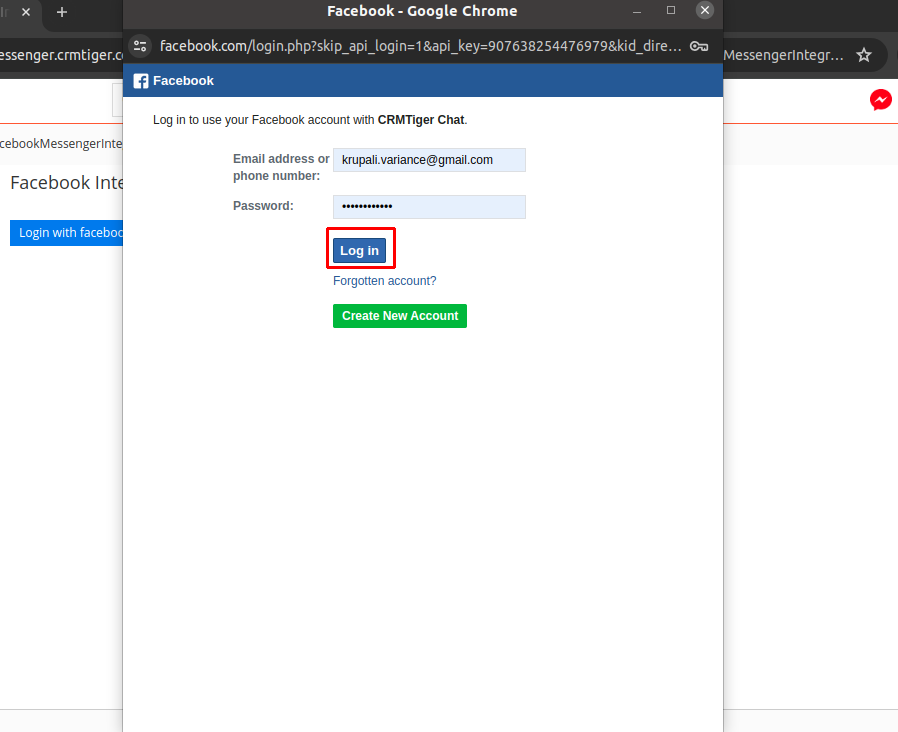
- Once click on the “Login with Facebook” Button, Below popup will open & need to enter Facebook Username and Password as shown in the screenshot below.
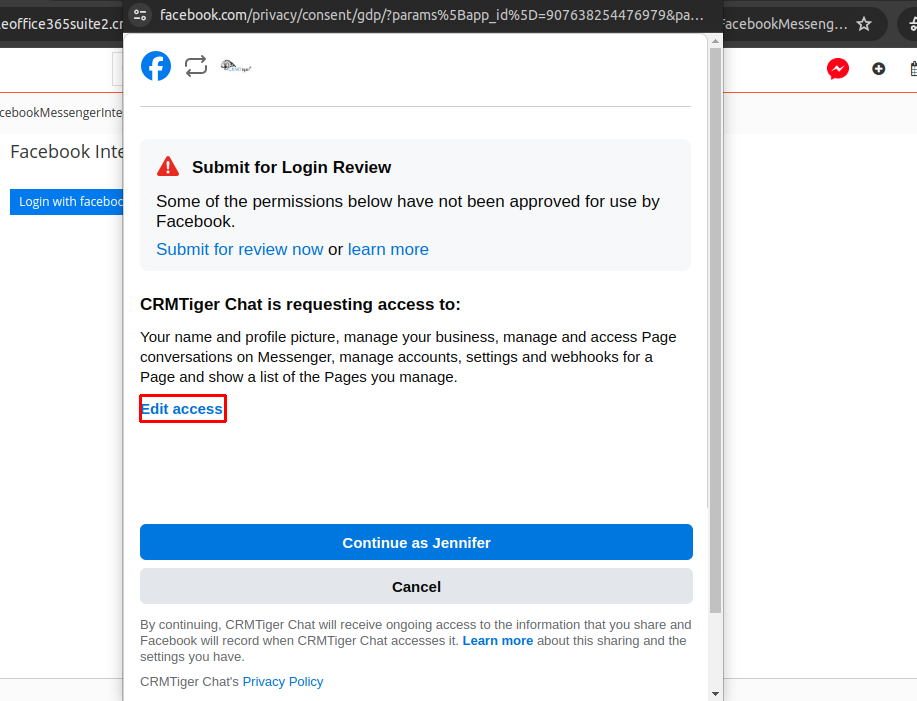
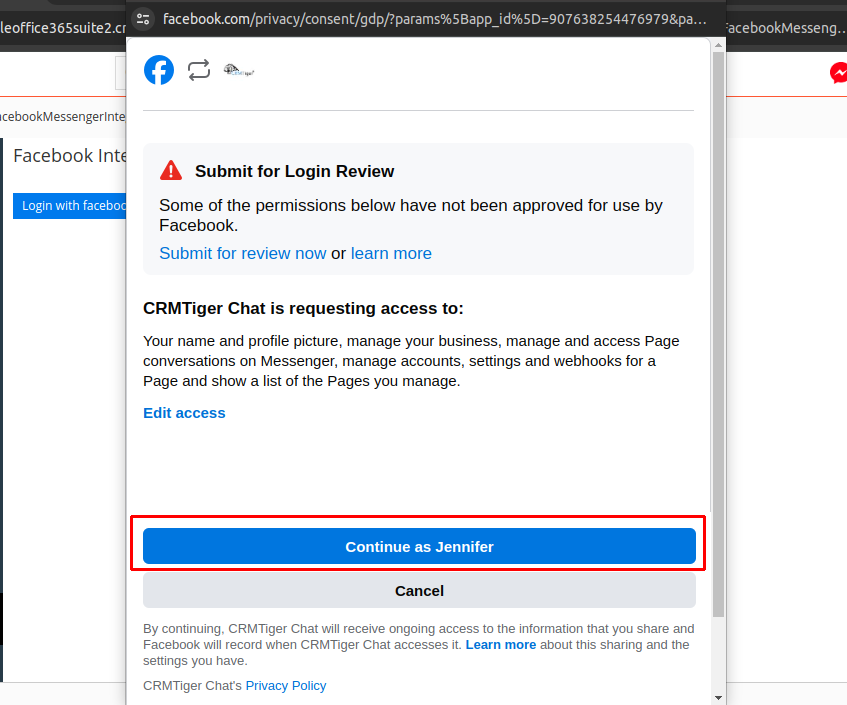
- Once clicked on Login Button after entering Username and Password, Below Popup will open for the Requesting Access. You can see the Requesting Access by clicking on the Edit Access as shown in the below screenshot.
- Once click on the Edit Access, Below Popup will display from where you can Enable/Disable the Access.

- After reviewing access, Click on the (X) as shown in below screenshot to close the Request Access popup.

- Click on the Continue Button from the Popup and it’ll authenticate successfully.
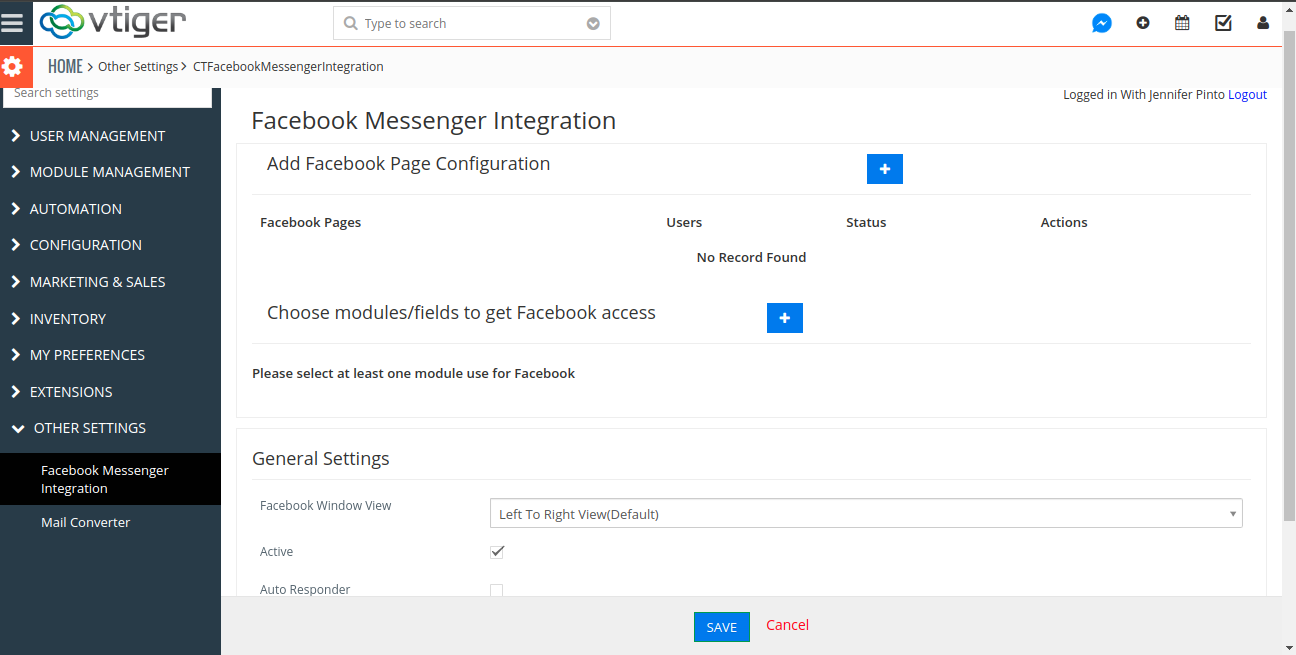
- Once you Login Successfully with Facebook. You will see the setting page of the Facebook Messenger from where you can configure the Pages, Enable Modules and General Settings. Below is the screenshot of the Setting Page.
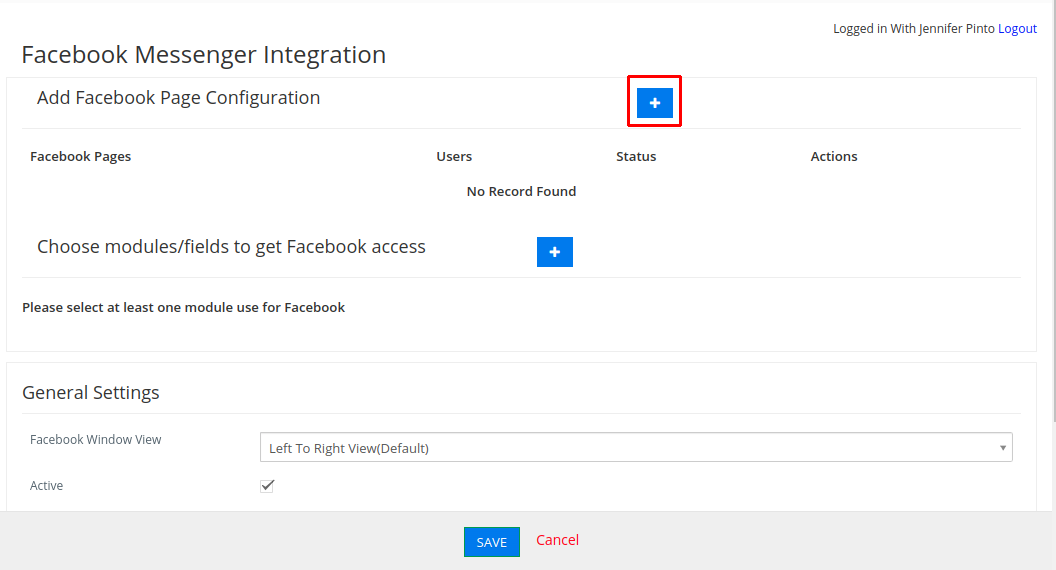
- To add Facebook Page configuration, click on the “+” icon as shown in below screenshot.
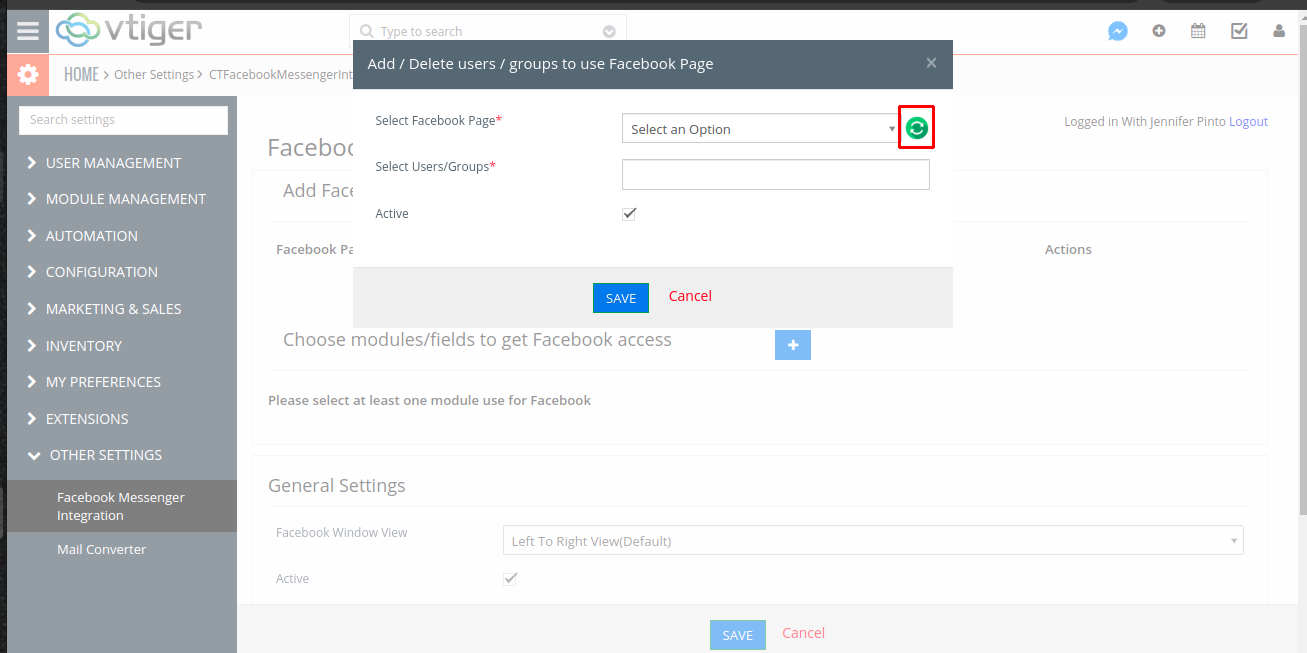
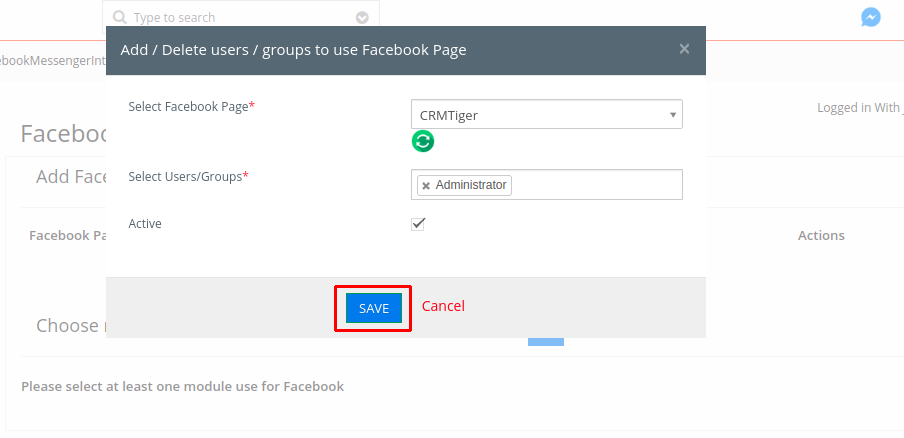
- Once you click on the “+” Icon, It’ll open the Popup like in the below screenshot.
Select Facebook Page : It contains the Facebook Pages of the Facebook Account using which you login.Select Users/Groups : It contains the Users/Groups of the CRM. You need to select the User/Group to whom you want to give access to the selected page in “Select Facebook Page”.Active : By Default Checkbox is checked. Uncheck Checkbox to In Active the Facebook Page for Send/Receive Message in CRM.In future, If you add any new page in the Facebook Account then you need to click on the Sync Facebook Pages icon as highlighted in the below screenshot to update the list.
- Fill up all the details as shown in below screenshot and click on “SAVE” Button.
- To Configure module for Facebook, click on the “+” icon as shown in below screenshot.
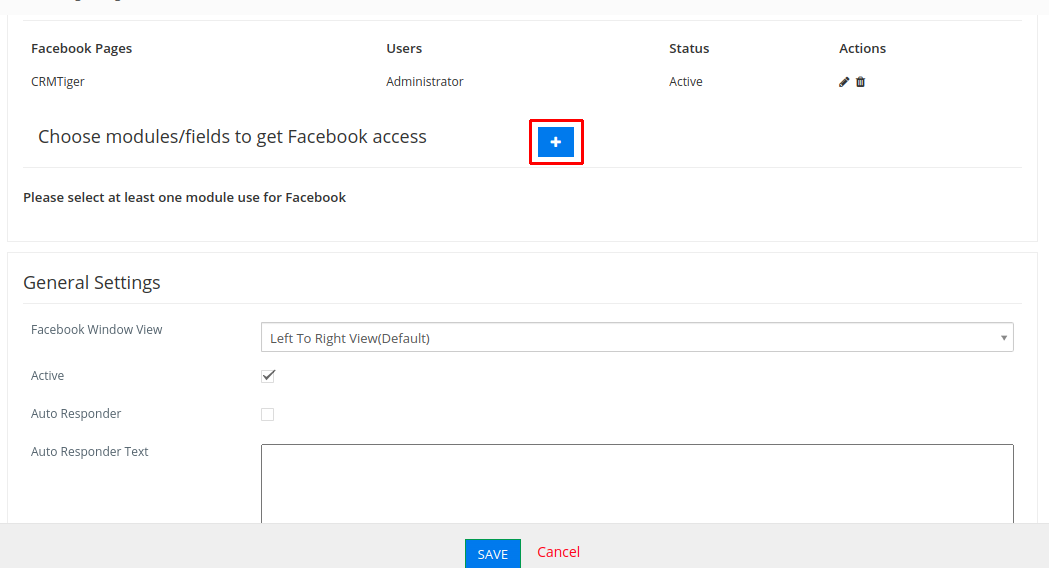
- Once you click on the “+” Icon, it’ll open the popup like below.
Allow Selected Module : It contains the list of the CRM Modules & you have to select any of the Modules. If you select the Module then the option available in the Timeline View Screen(Facebook Messenger) to create a record inside the selected Module for the Unknown Message Received from the Facebook Page.Active : By Default Checkbox is checked. Uncheck the checkbox for deactivating the module.Fill-up all details as shown in the below screenshot and click on the SAVE Button to save the Module Configuration.

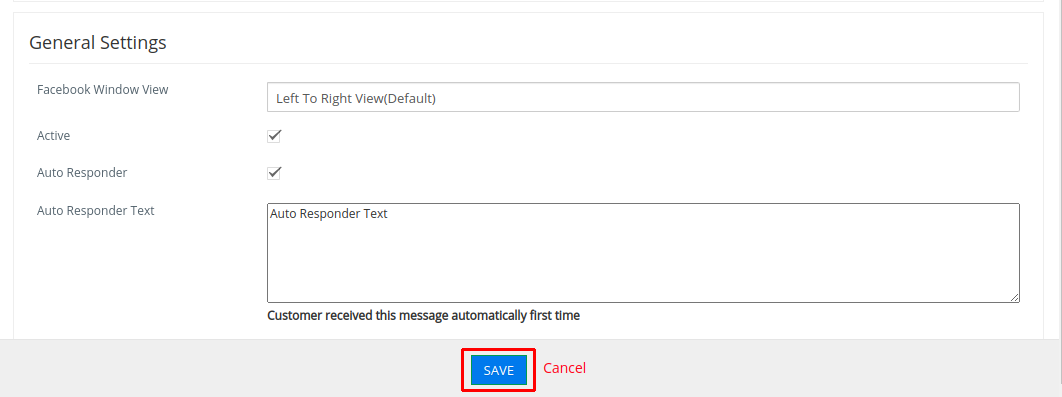
- Fill up General settings and click on the “SAVE” Button as shown in below screenshot.
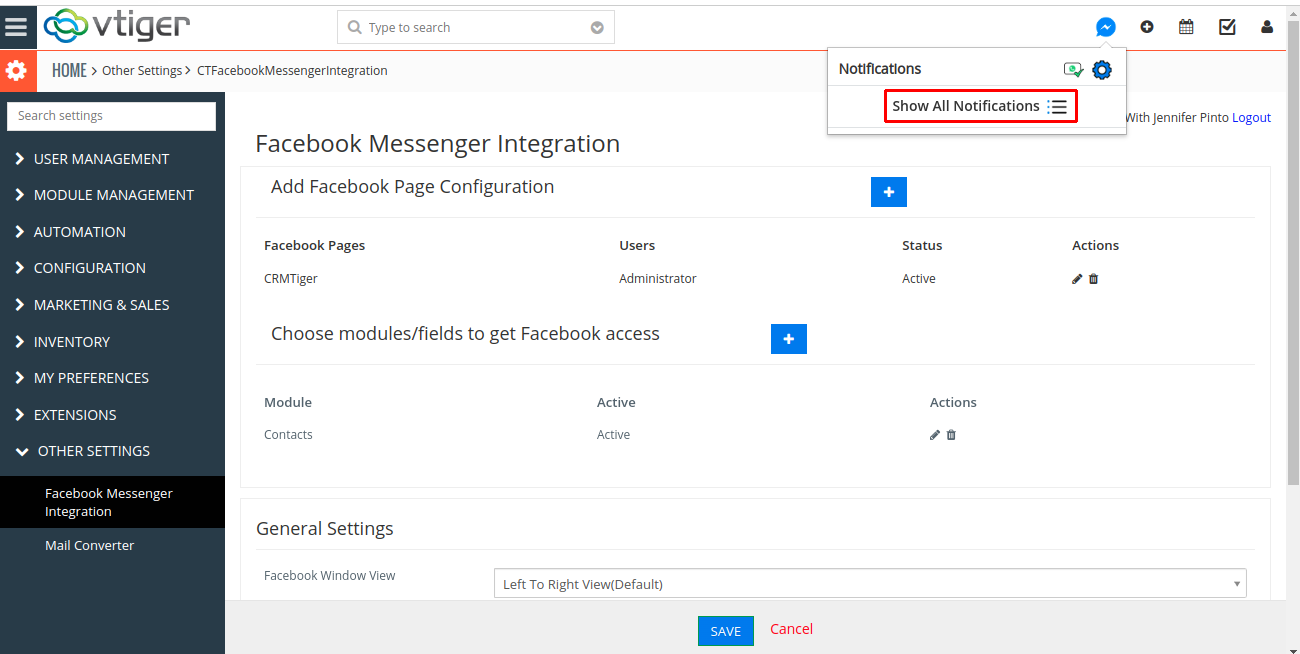
- Click on the “Facebook Messenger” icon to see the notifications as shown in the screenshot below.
- To see all chats/Timeline View of the Facebook Messenger, click on the “Show All Notifications” as shown in the screenshot below.
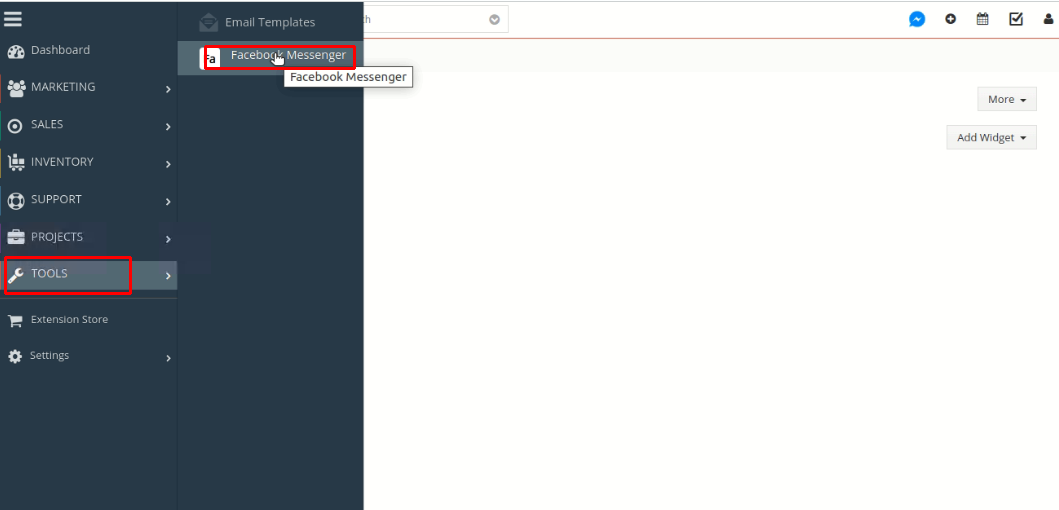
You can also open the Timeline view from the Menu. Open Sidebar Menu -> TOOLS -> Facebook Messenger as shown in below screenshot.
 Once you click on the Facebook Messenger, you will be able to see the Timeline View as per below screenshot.All Messages : It displays all the User’s Send/Receive Message.Important : It displays the Send/Received Message which you make Important/Favorite .New Messages : It displays the New Message received from Users.Unknown : It displays the messages which doesn’t convert yet Contacts/Leads in CRM.

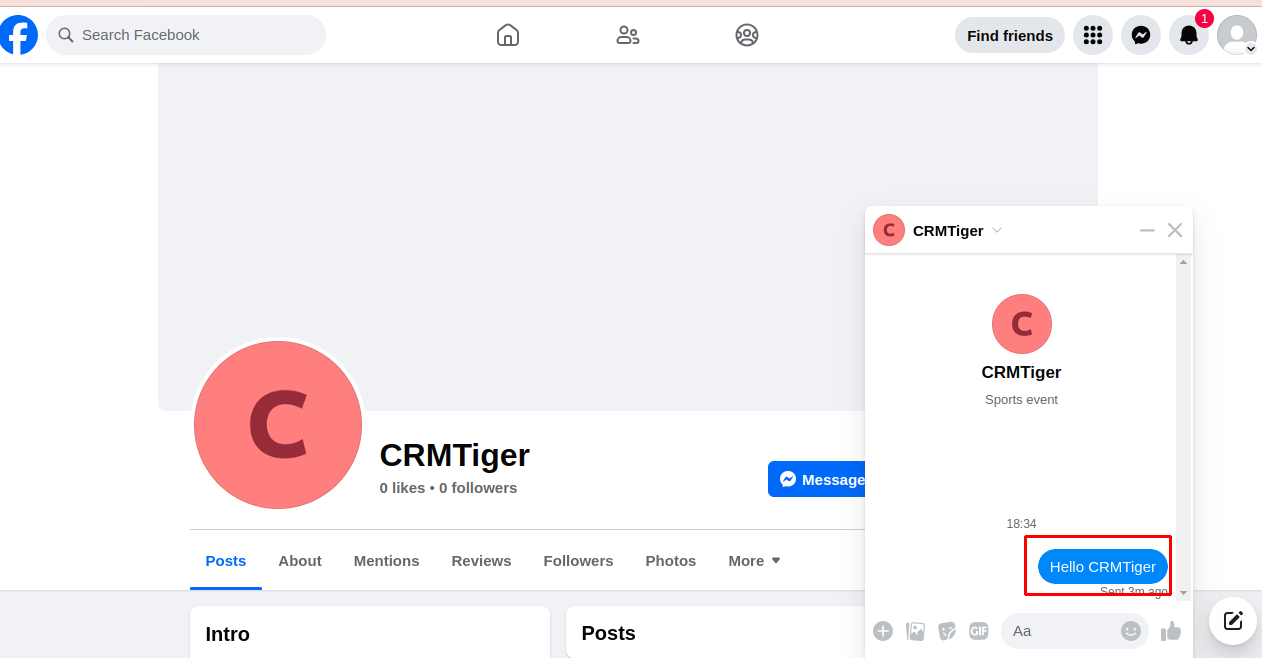
- As per the Facebook Rule, Users have to initiate Message first from the particular Facebook Page. If a user sends a message in the page which you have configured in Facebook Messenger Integration Setting Page then it will display as shown in below screenshot.
For Example: Send a message to the CRMTiger Page as shown in the below screenshot.
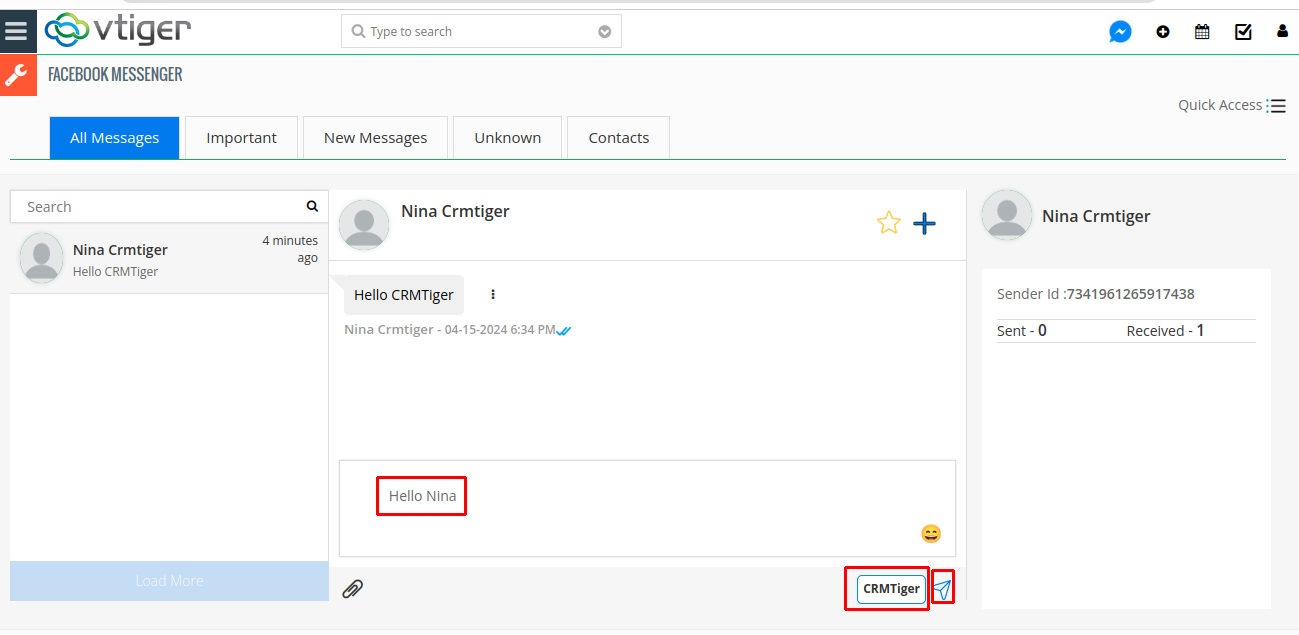
 Received Message From Nina CRMTiger in TimeLine View
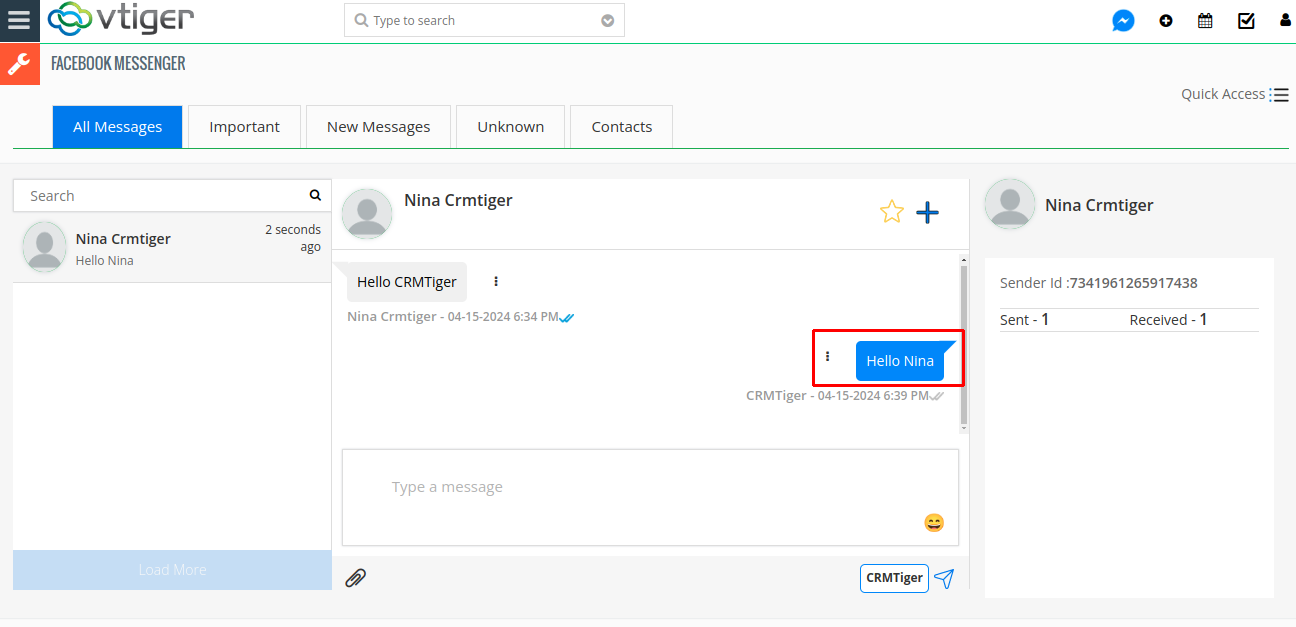
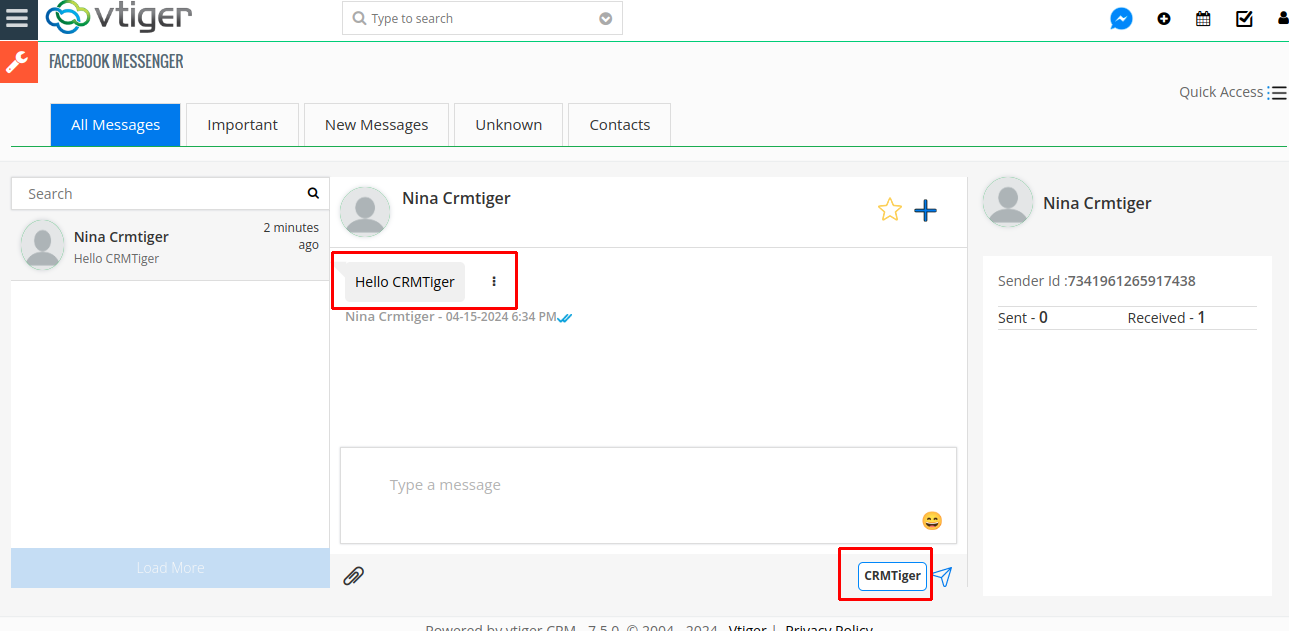 Send Message To Nina CRMTiger from TimeLine view
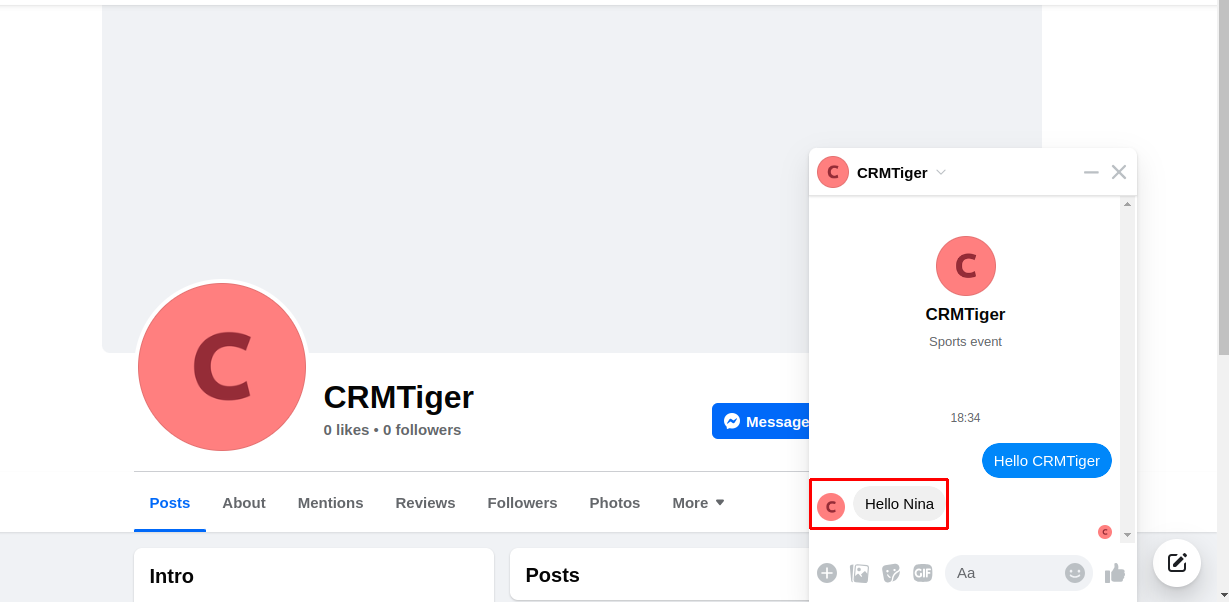
 Received Message in Nina’s Facebook in the CRMTiger Page.
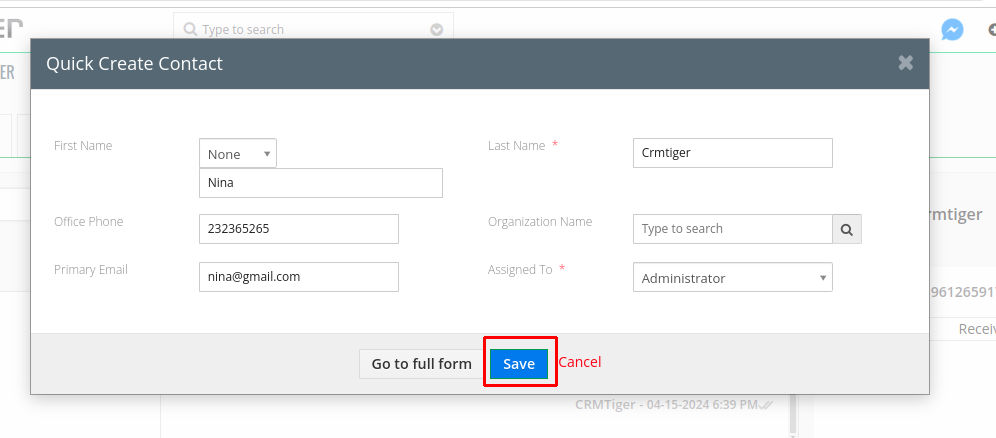
- If you want to create contact from an unknown message then need to Click on “+” icon as shown in below screenshot and click on “Create Contacts”.
 Fill-up all the details and click on the “SAVE” Button as shown in the screenshot below.
- After the Create Contacts, it will display in the Contacts tab as shown in the screenshot below.
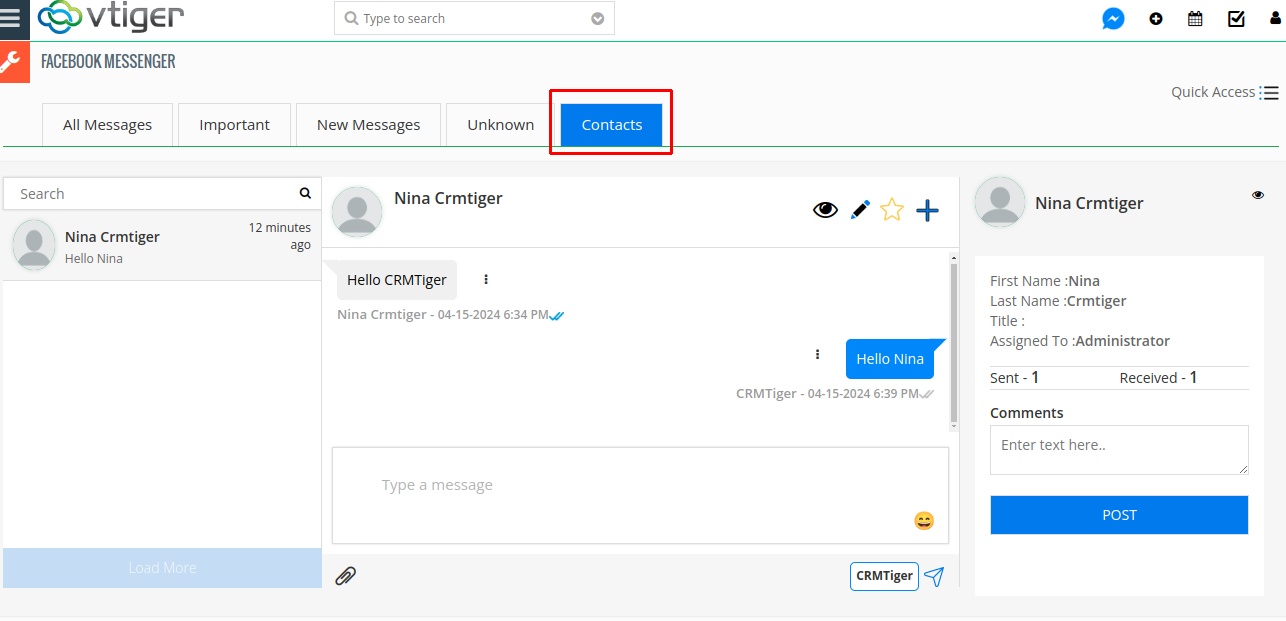
- To Open detail view, click on the “Eye” icon as shown in below screenshot.
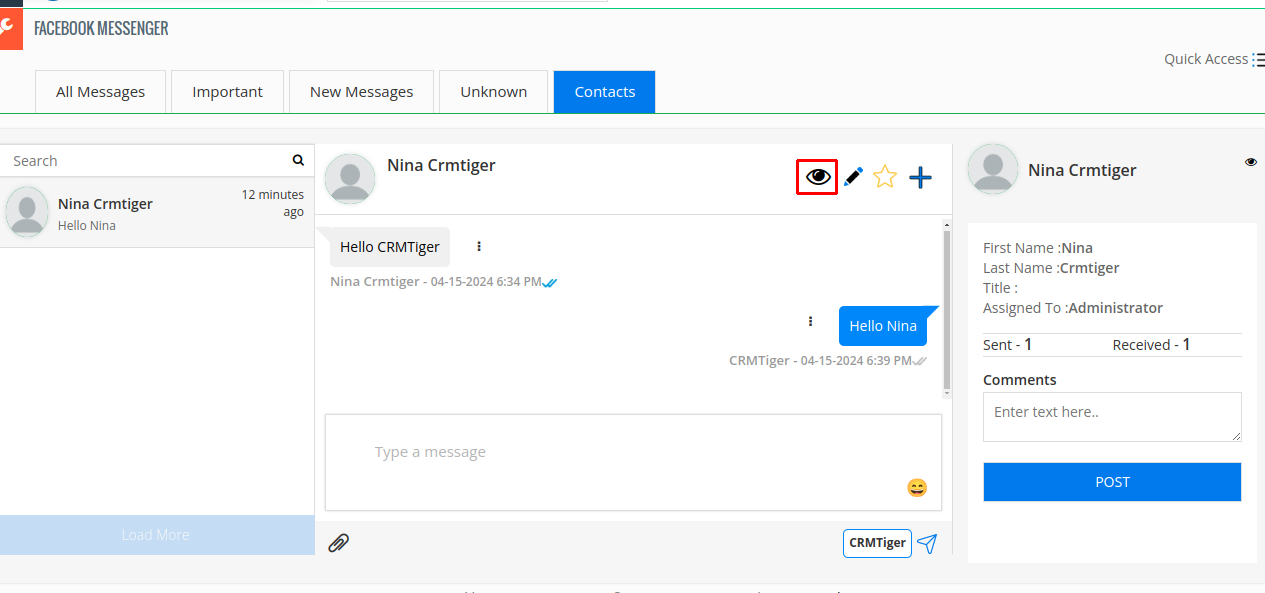 Once clicked on the “Eye” icon, open the detail view of the contact module as shown in below screenshot.
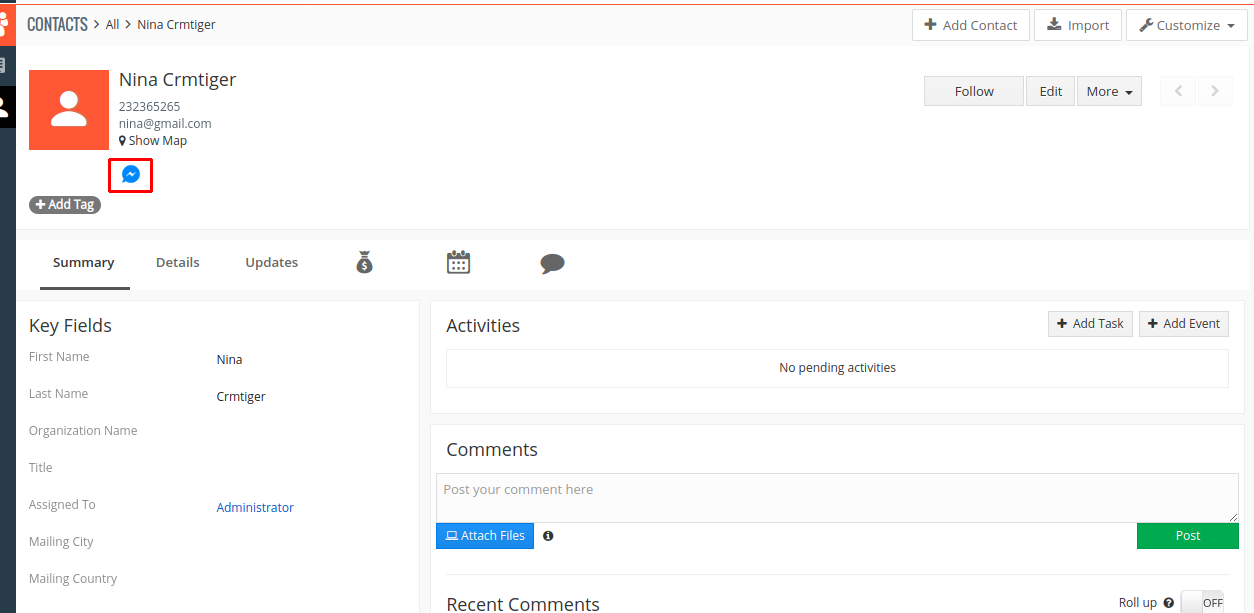
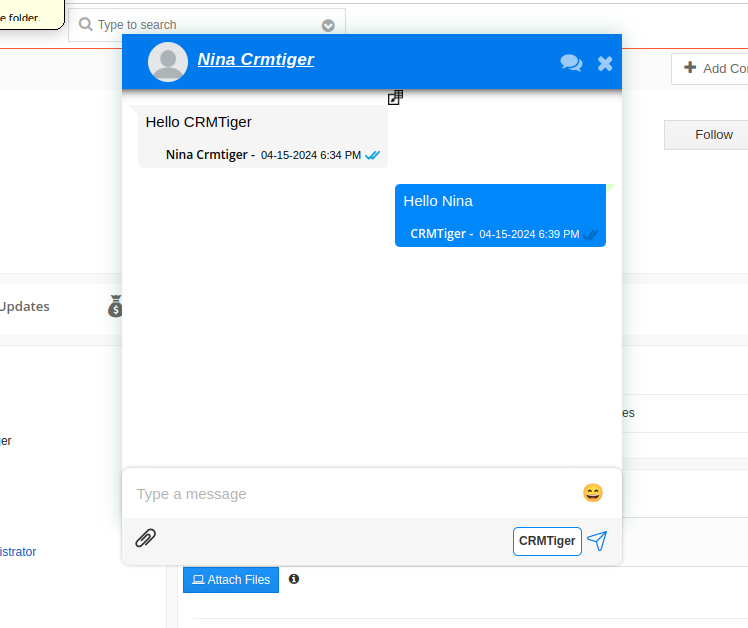
You can also send & receive messages from the record detail view. Click on the Facebook Messenger icon as shown in below screenshot & it’ll open the popup for send/receive the message.
- You can also set workflow to send Automated Facebook messages on trigger events of any module.
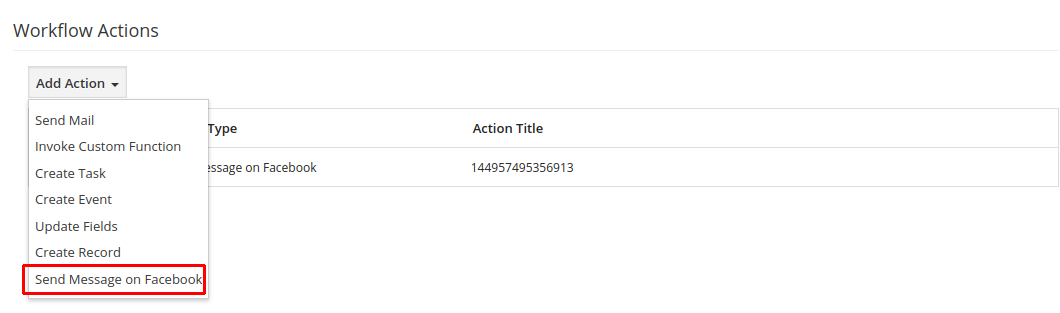
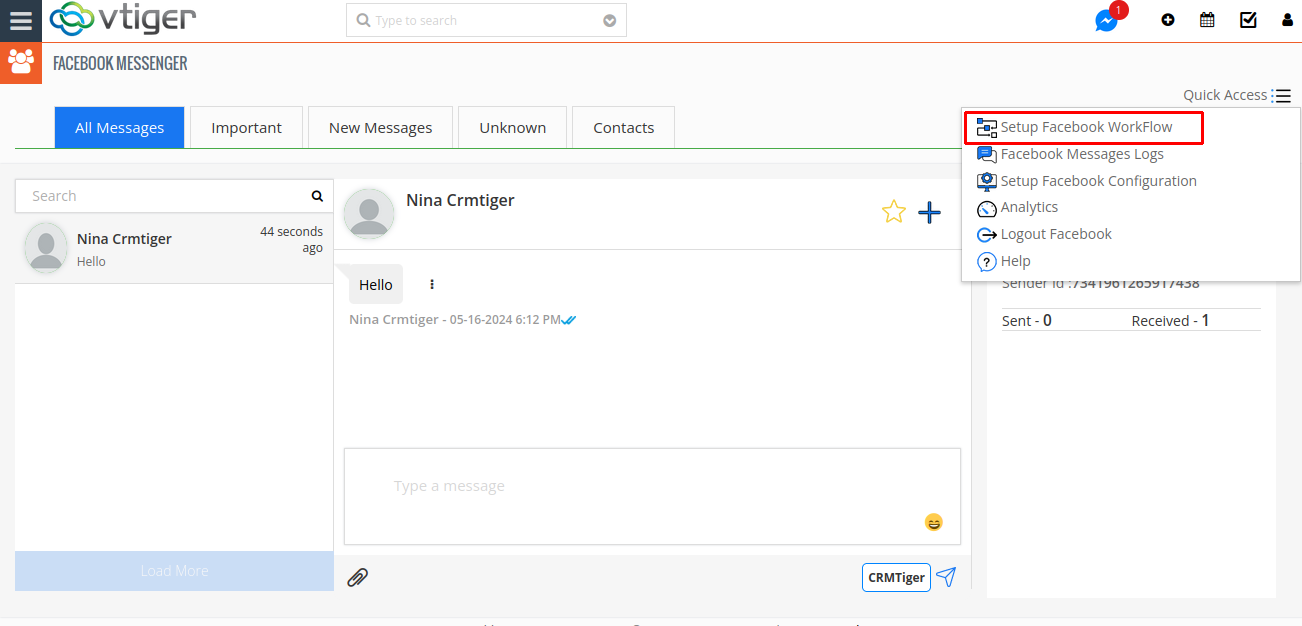 Select “Send Message on Facebook” Action as shown in below screenshot.
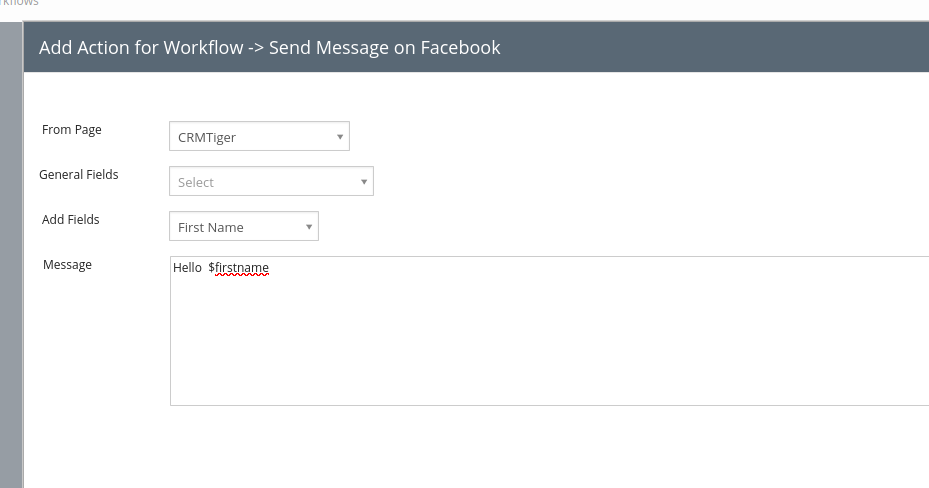
 Enter Message and Select Page as shown in below screenshot.
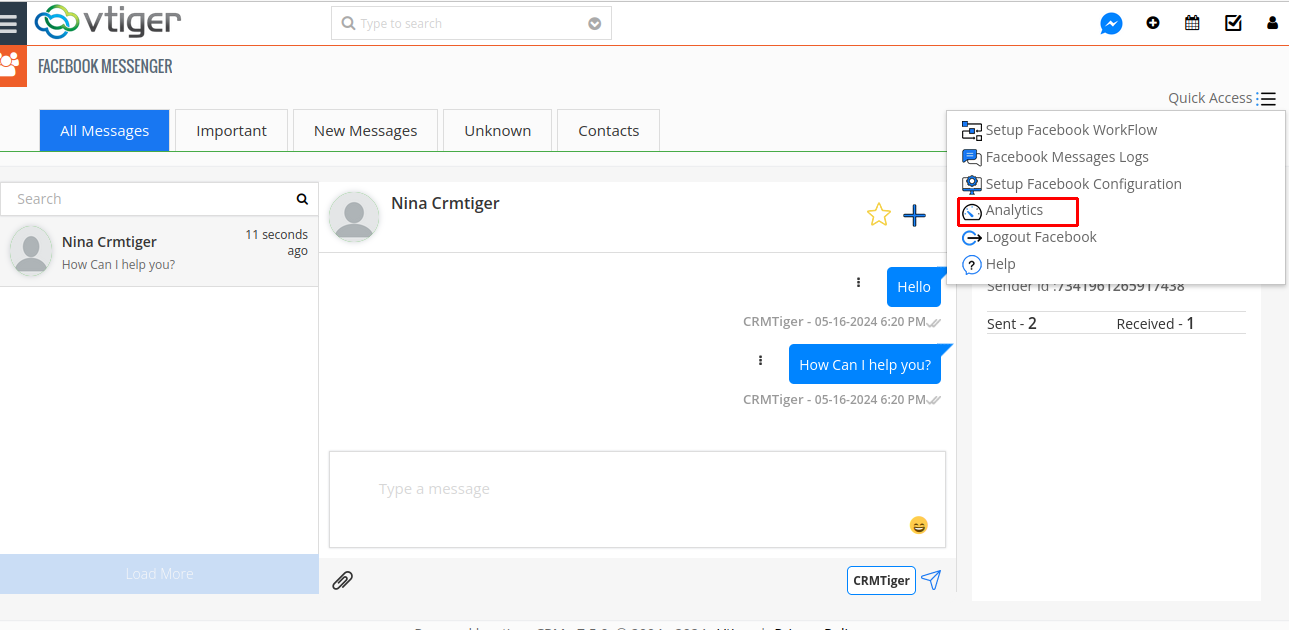
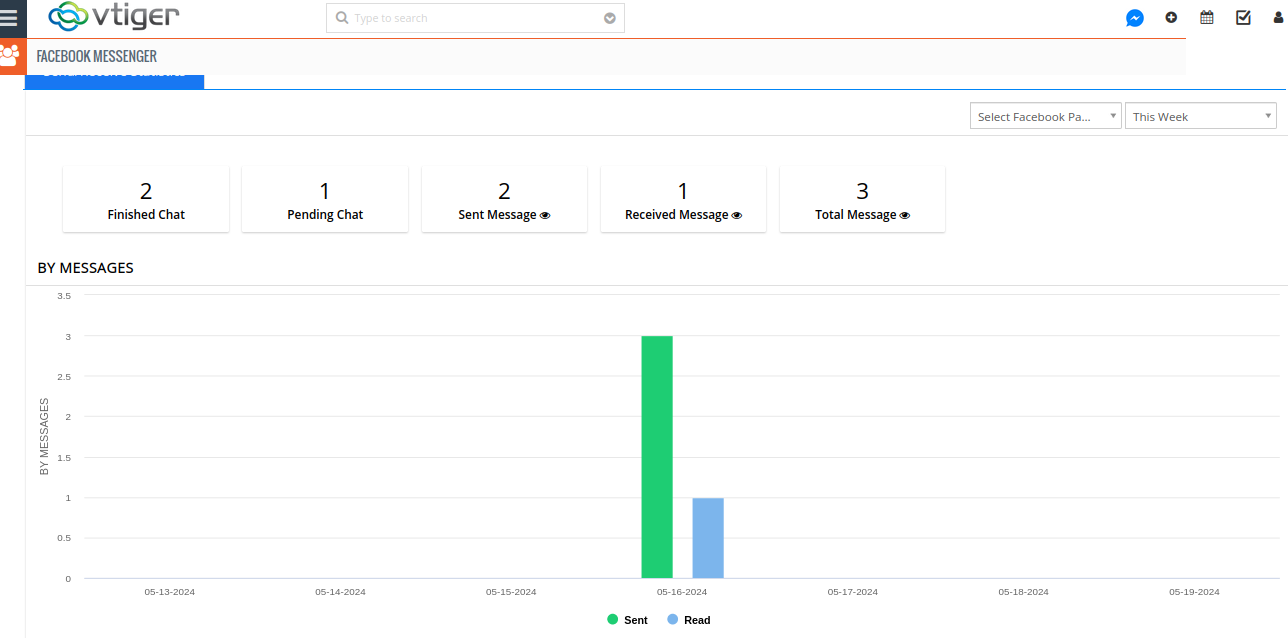
- You can see your Facebook Page Chats Analytics reports, Click on “Analytics” as shown in below screenshot.
How to use Facebook Messenger Integration?
Updated on May 17, 2024