
Overview The PDF Template extension allows administrators to design professional, reusable PDF layouts for CRM records. Using a built-in editor, you can build a template with a header, body and footer, and insert CRM field values, related-module fields, product (line item) tables and general fields as dynamic variables.
Once a template is saved, users can open a record in the selected module and export it as a PDF with a single click. The same template can also be previewed, downloaded or attached to an email.
Features The PDF Template extension provides the following features:
Custom PDF Layouts Design the PDF using a rich-text editor with separate Header, Body and Footer sections.
Module Fields as Variables Insert fields from the selected module (for example Quotes or Invoice) directly into the template. At PDF generation time, each variable is replaced by the actual record value.
Related Module Fields Pull in fields from a module related to the record, such as Contacts, Organizations, Sales Orders or Opportunities.
Product Block Support For inventory modules, insert a ready-made product (line item) table, with or without product images and with group or individual tax, along with individual product fields.
General FieldsInsert system values such as Current Date, Current Time, CRM Detail View URL, Site URL and more.
LTR / RTL PDF ViewGenerate PDFs in left-to-right or right-to-left direction, so that RTL languages such as Arabic and Hebrew are supported.
Preview, Download and EmailPreview the template while designing it, and export it from any record as a downloadable PDF or send it as an email attachment.
Steps to Configure PDF TemplateStep 1: Install PDF Template First, install the PDF Template extension from the CRM Module Manager. Go to: CRM Settings → Module Manager
Install PDF Template in the same way as any other CRM extension. Once the installation is completed, a new PDF Template option will be available in the CRM menu.
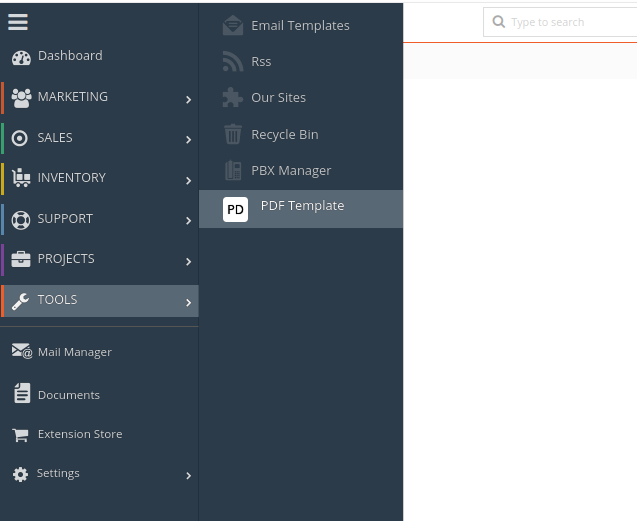
Step 2: Open PDF Template Open Menu → TOOLS → PDF Template
Click the TOOLS group in the main menu, then select PDF Template from the sub-menu.
 Step 1 – Install the mPDF LibraryThe first time you open PDF Template, the page shows a message that the mPDF library must be installed in your CRM before PDF files can be generated.
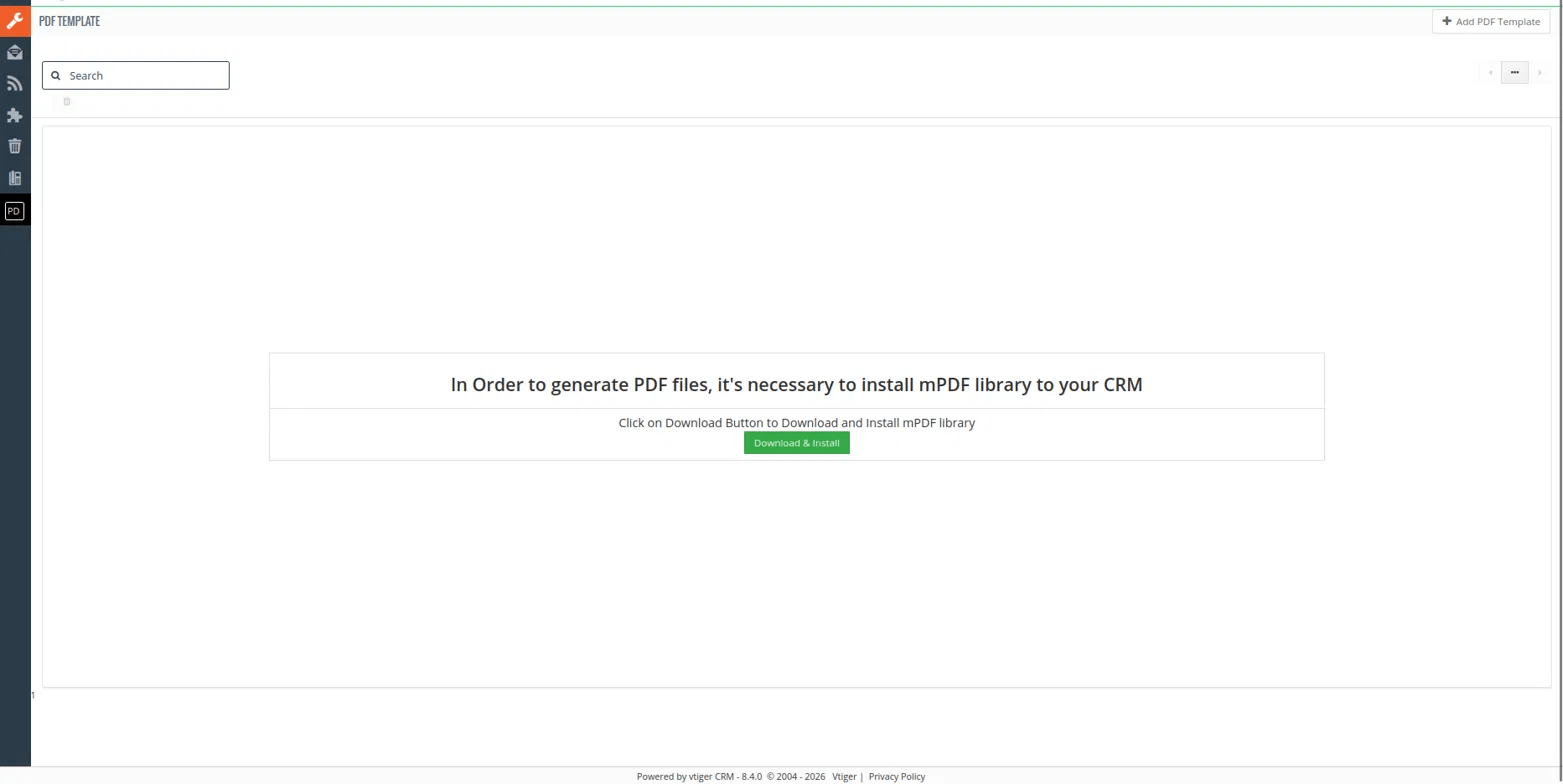 To install the library:
- Click the green Download & Install button.
- Wait while the CRM downloads the mPDF library from the remote server and extracts it automatically.
When the installation is completed, the PDF Template list page is displayed with the Add PDF Template button available.
Note: This is a one-time setup. If the download fails, the CRM shows an error such as “There is some error to Download mPDF from Remote Server” (or a problem unzipping mpdf.zip). In that case, check that your server has internet access and that the CRM folder is writable, then click Download & Install again.
Step 2 – Add a New PDF TemplateAfter the mPDF library is installed, the PDF Template list view is displayed. It lists all saved templates with the following columns:
- Template Name
- Description
- Module Name
- PDF View (LTR / RTL)
- Template NameAssigned To
- Created Time
To create a new template, click the Add PDF Template button at the top right of the page. Step 3 – Basic Information
After clicking Add PDF Template, the creation page opens. The top section, PDF Template, contains the basic settings of the template. 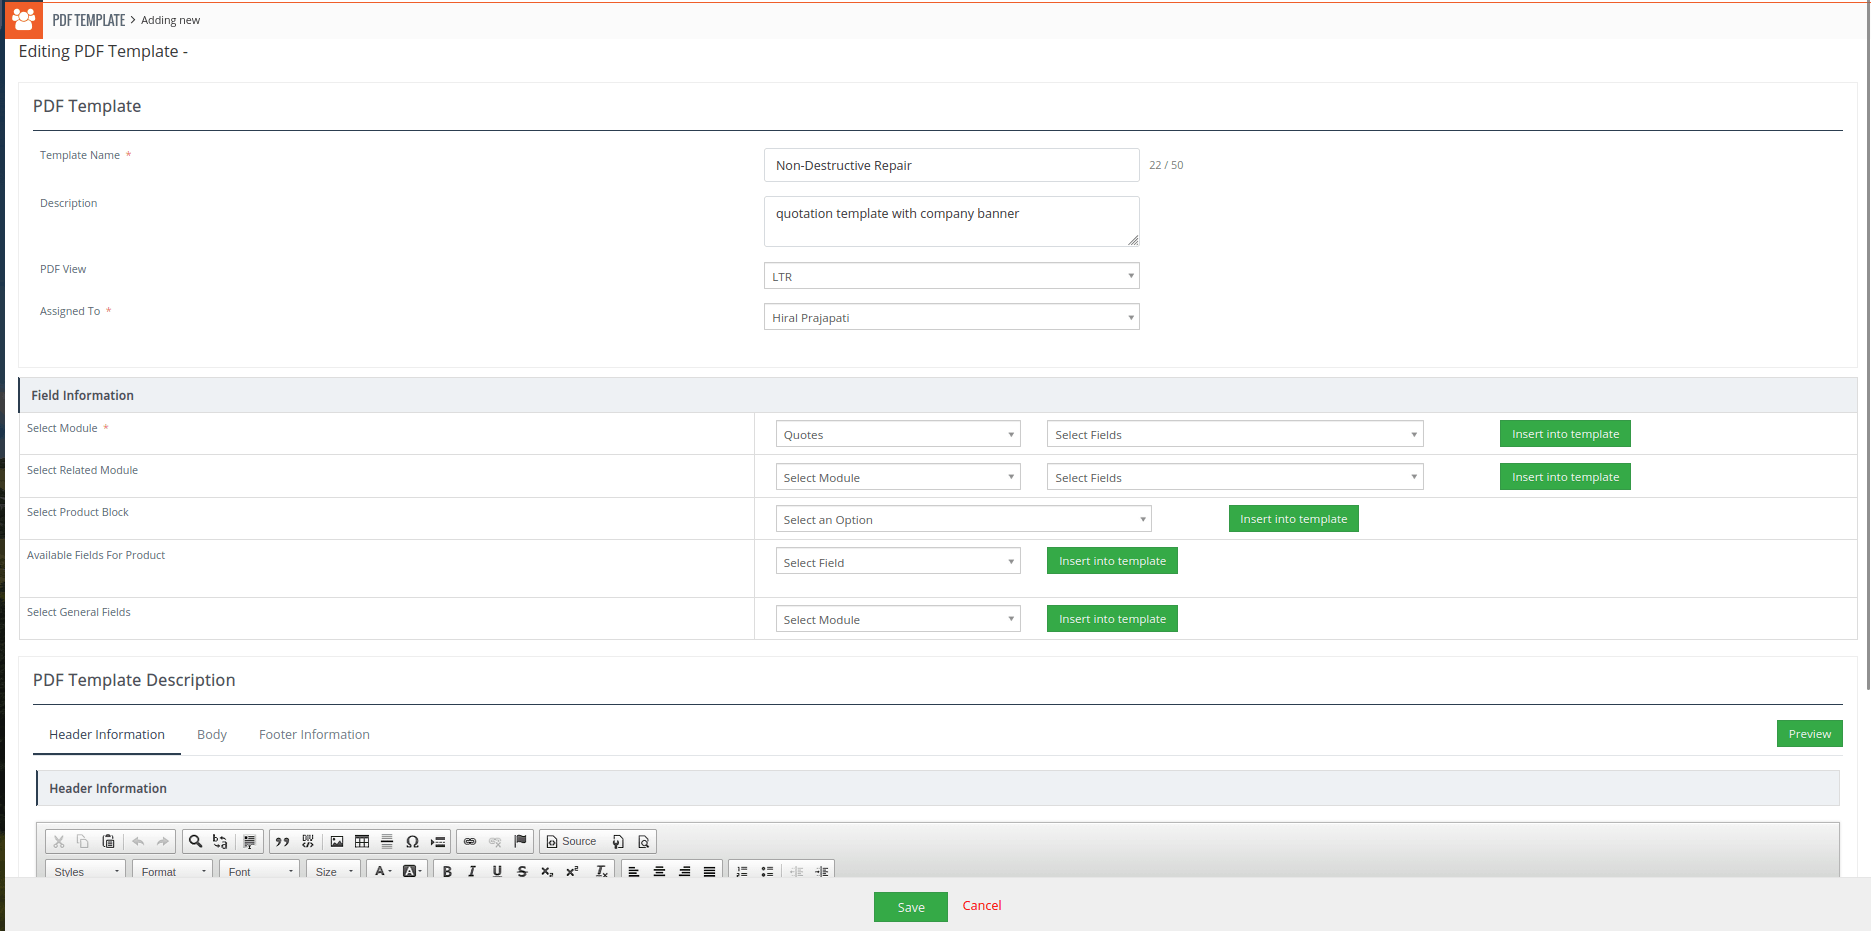
| Field | Description |
|---|---|
| Template Name * | Mandatory. Enter a name to identify the template (maximum 50 characters). |
| Template Name * | Optional. A short note about the purpose of the template. |
| PDF View | Select LTR (left-to-right) or RTL (right-to-left) for the PDF direction. |
| Assigned To * | Mandatory. The CRM user that owns the template. |
Step 4 – Field Information
The Field Information section is used to insert dynamic variables into the template. Each row has a dropdown to choose the item, and an Insert into template button that places the variable at the current cursor position in the editor below.
Tip: Click inside the Header, Body or Footer editor first so the variable is inserted exactly where you want it.
Select ModuleSelect the CRM module for which the template is created. This is a mandatory field. The supported modules are Invoice, Quotes, Purchase Order and Sales Order.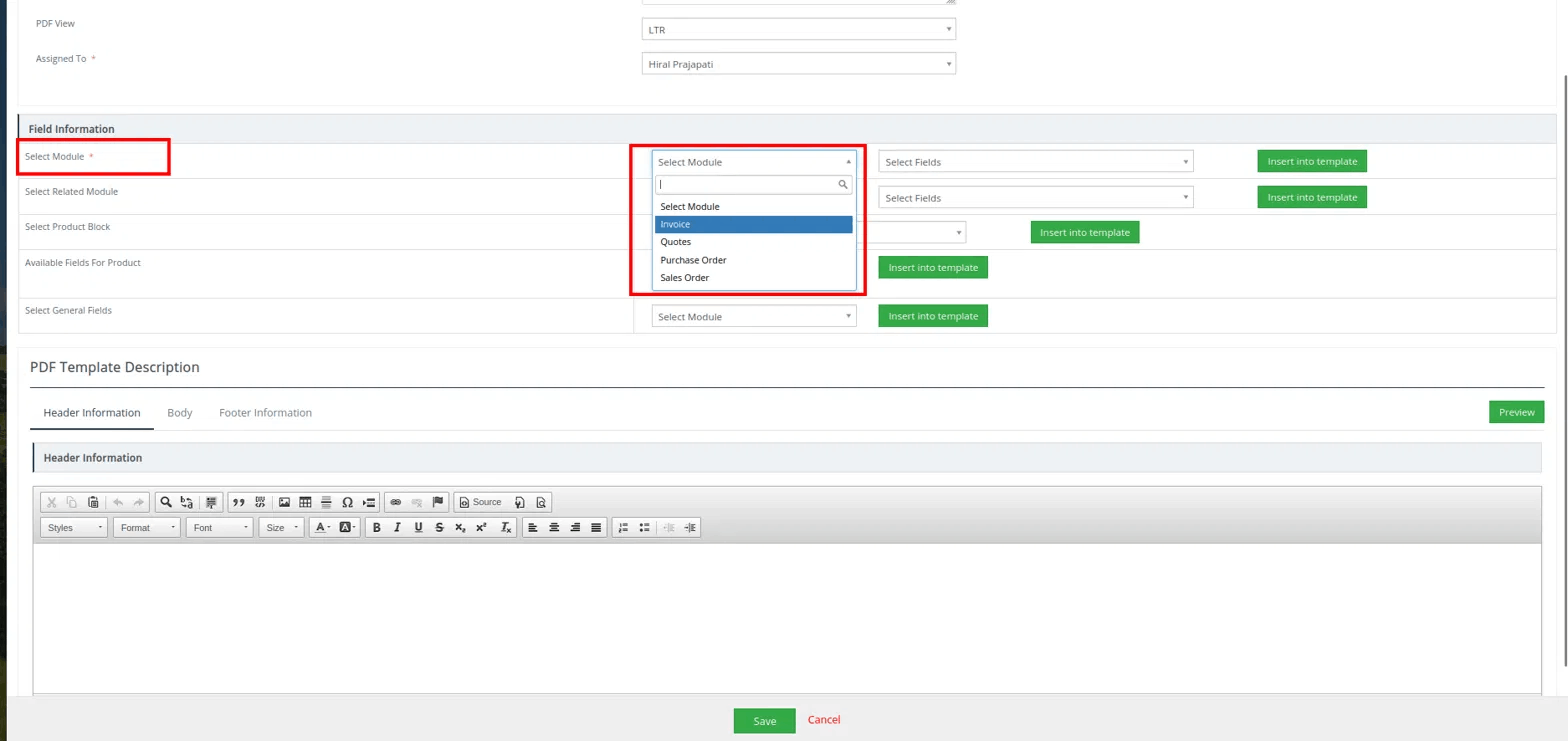 After selecting the module, use the Select Fields dropdown next to it to choose a field (for example Subject) and click Insert into template. The field is added as a variable which is replaced with the record value when the PDF is generated.
Select Related Module Use this option to add fields from a module related to the selected module. For example, for Invoice the available related modules are Sales Orders, Contacts, Organizations and Opportunities. Choose the related module, choose a field in the Select Fields dropdown and click Insert into template.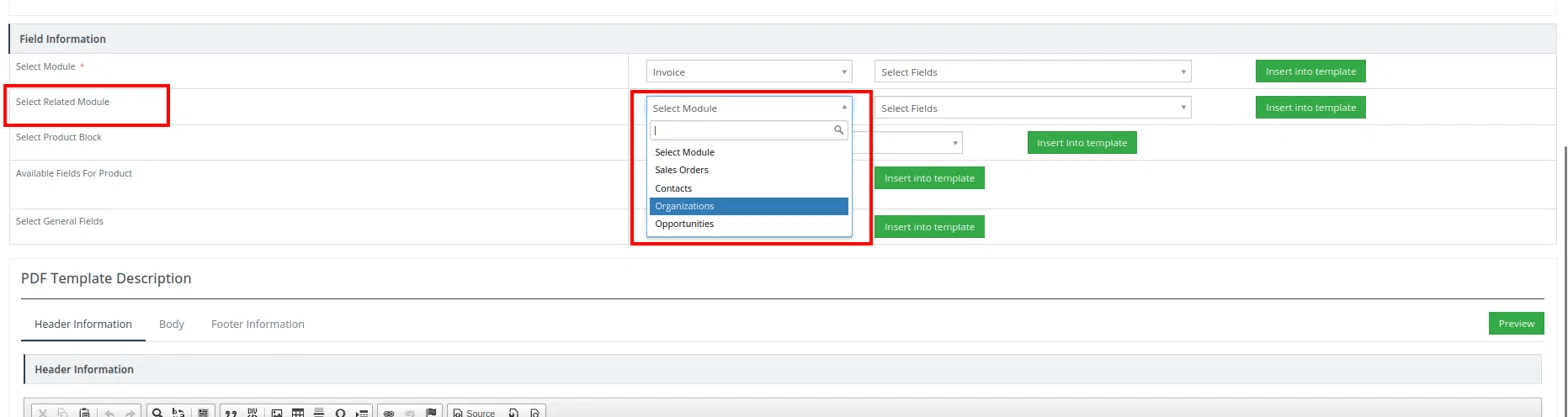 Select Product Block Use this option to insert the product (line item) table for inventory modules. Four product block layouts are available:
- Product block for group tax – tax is calculated for the group of items as a whole.
- Product block for individual tax – tax is calculated for each product individually.
- Product block With Image – the line item table includes the product image.
- Product block Without Image – the line item table has no product images.
Select the required block and click Insert into template. The complete product table is added to the Body tab of the editor.
Available Fields For Product Use this option to insert individual product fields, for example when you want to design your own product table instead of using a ready-made block. Fields are grouped under Item Details and include Product No/Service No, Position, Currency, Currency code, Currency symbol, Name of product/service, Description, Quantity, Unit, List price, Discount, Total price, Tax and more.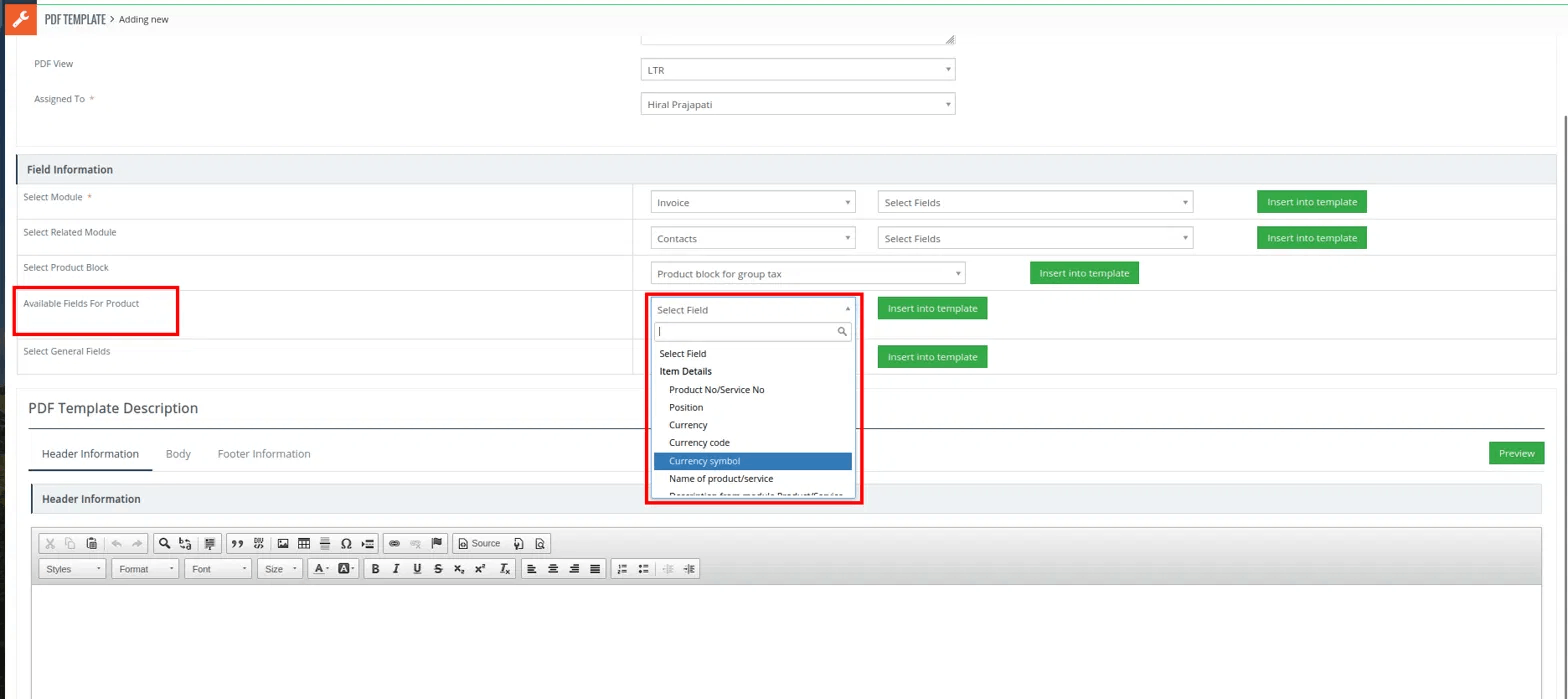 Select General Fields Use this option to insert system-level values that are not tied to a particular module field. Examples:
- Current Date and Current Time
- View in browser
- Product block With Image – the line item table includes the product image.
- CRM Detail View Url and Portal Detail View Url
- Site Url and Portal Url
- Company details such as the company name
Step 5 – Design the Template
The PDF Template Description section contains the editor where the template is designed. It has three tabs:
| Tab | Purpose |
|---|---|
| Header Information | Content shown at the top of the PDF, for example the company logo or banner. |
| Body | The main content of the PDF, such as record details and the product table. The Body is mandatory. |
| Footer Information | Content shown at the bottom of the PDF, such as contact details or terms. |
The editor toolbar provides the usual formatting options: text styles, font and size, bold / italic / underline, colors, alignment, lists, tables, images, links and a Source button to edit the HTML directly.
Note: Do not edit the variable names (the text written between $ signs, or between #PRODUCTBLOC_START# and #PRODUCTBLOC_END#) – they are replaced with real data when the PDF is generated. You can freely change the layout, text, fonts, colors and borders around them.
Header Information Click the Header Information tab and add the content that should appear at the top of the PDF. In this example, the company banner (Nova Pipe Technologies Ltd.) is inserted as an image using the editor’s Image button.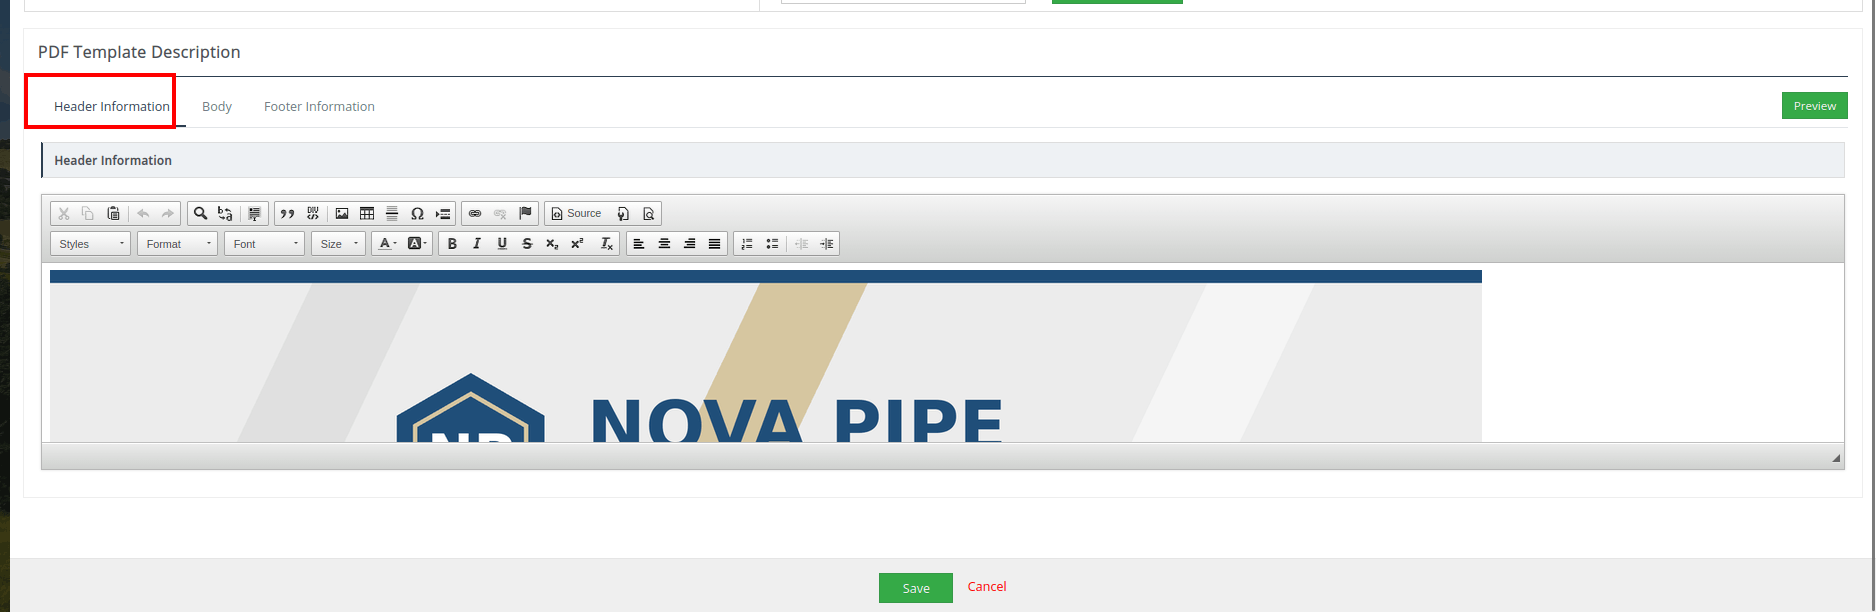 Body Click the Body tab to design the main content. In this example, Quotes fields such as $QUOTES-SUBJECT$ and related Contacts fields ($CONTACTS-R_FIRSTNAME$, $CONTACTS-R_LASTNAME$, $CONTACTS-R_FAX$, $CONTACTS-R_MOBILE$, $CONTACTS-R_EMAIL$) are placed next to their labels, followed by the product block with the line items (for example $LINEITEMS-$SEQUENCE_NO, $LINEITEMS-$PRODUCTID$, $LINEITEMS-$QUANTITY) and the totals section ($TOTAL-TOTALWITHOUTVAT$, $TOTAL-TOTALDISCOUNT$, $TOTAL-VAT$, $TOTAL-TOTAL$).
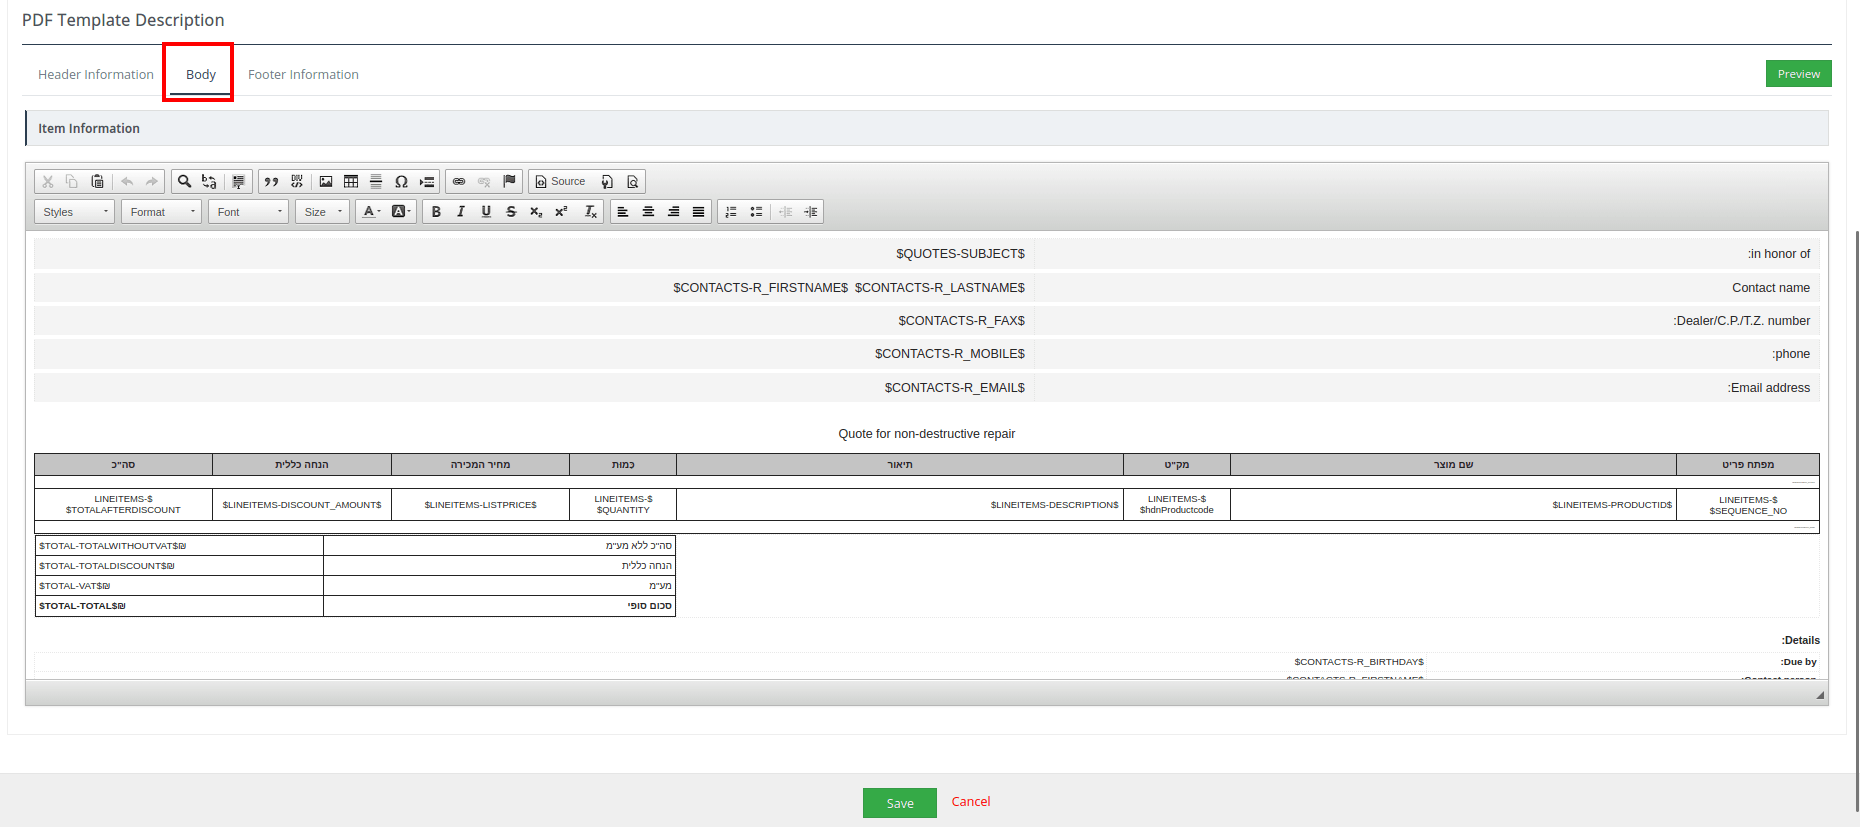 This example also shows an RTL-style layout, where labels are written in Hebrew and variables are placed in a table; any language supported by the PDF font can be used in the template.
Footer Information Click the Footer Information tab and add the content that should appear at the bottom of the PDF, such as company address, phone, email, website and a short consent or terms statement.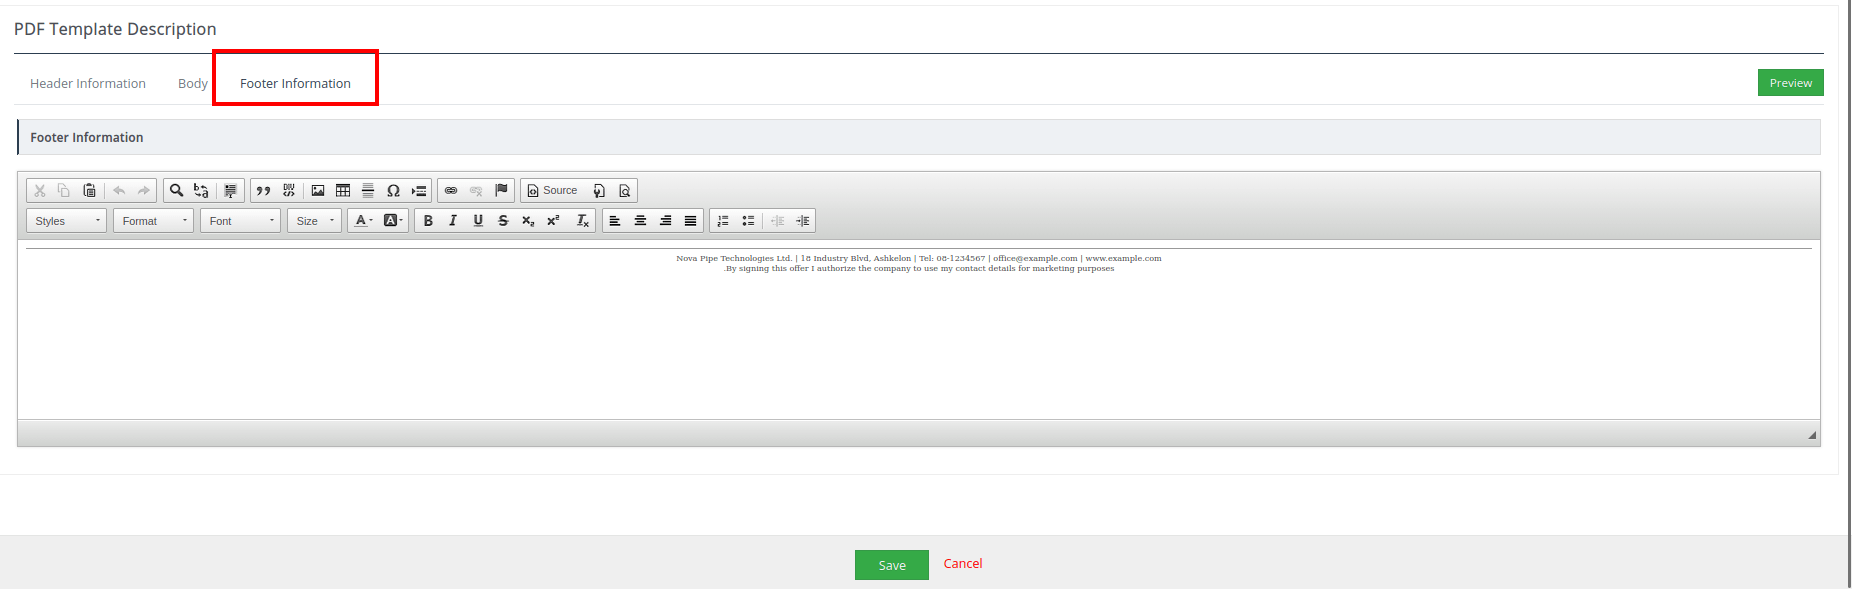 Step 6 – Preview and Save
Preview Click the green Preview button above the editor to see how the template looks as a PDF before saving it.
Save When the design is complete, click Save at the bottom of the page.
After saving, you are redirected to the PDF Template list view where the new template is listed. Click Cancel to leave the page without saving.
Manage Existing Templates From the PDF Template list view (administrators only), click the three-dot menu on a template row to:
- Details – view the template information and content.
- Edit – change the template design or settings.
- Delete – remove the template.
 You can also select several templates with the checkboxes and delete them together, or use the Search box to find a template by name.
Template Details Clicking the template name (or Details) opens the detail page. It shows the General Information (Preview the PDF Name, Module Name, PDF View, Assigned To, Description, Created Time and Modified Time) and the Template Content (Header, Item/Body and Footer information). Use the Edit button at the top right to change the template. 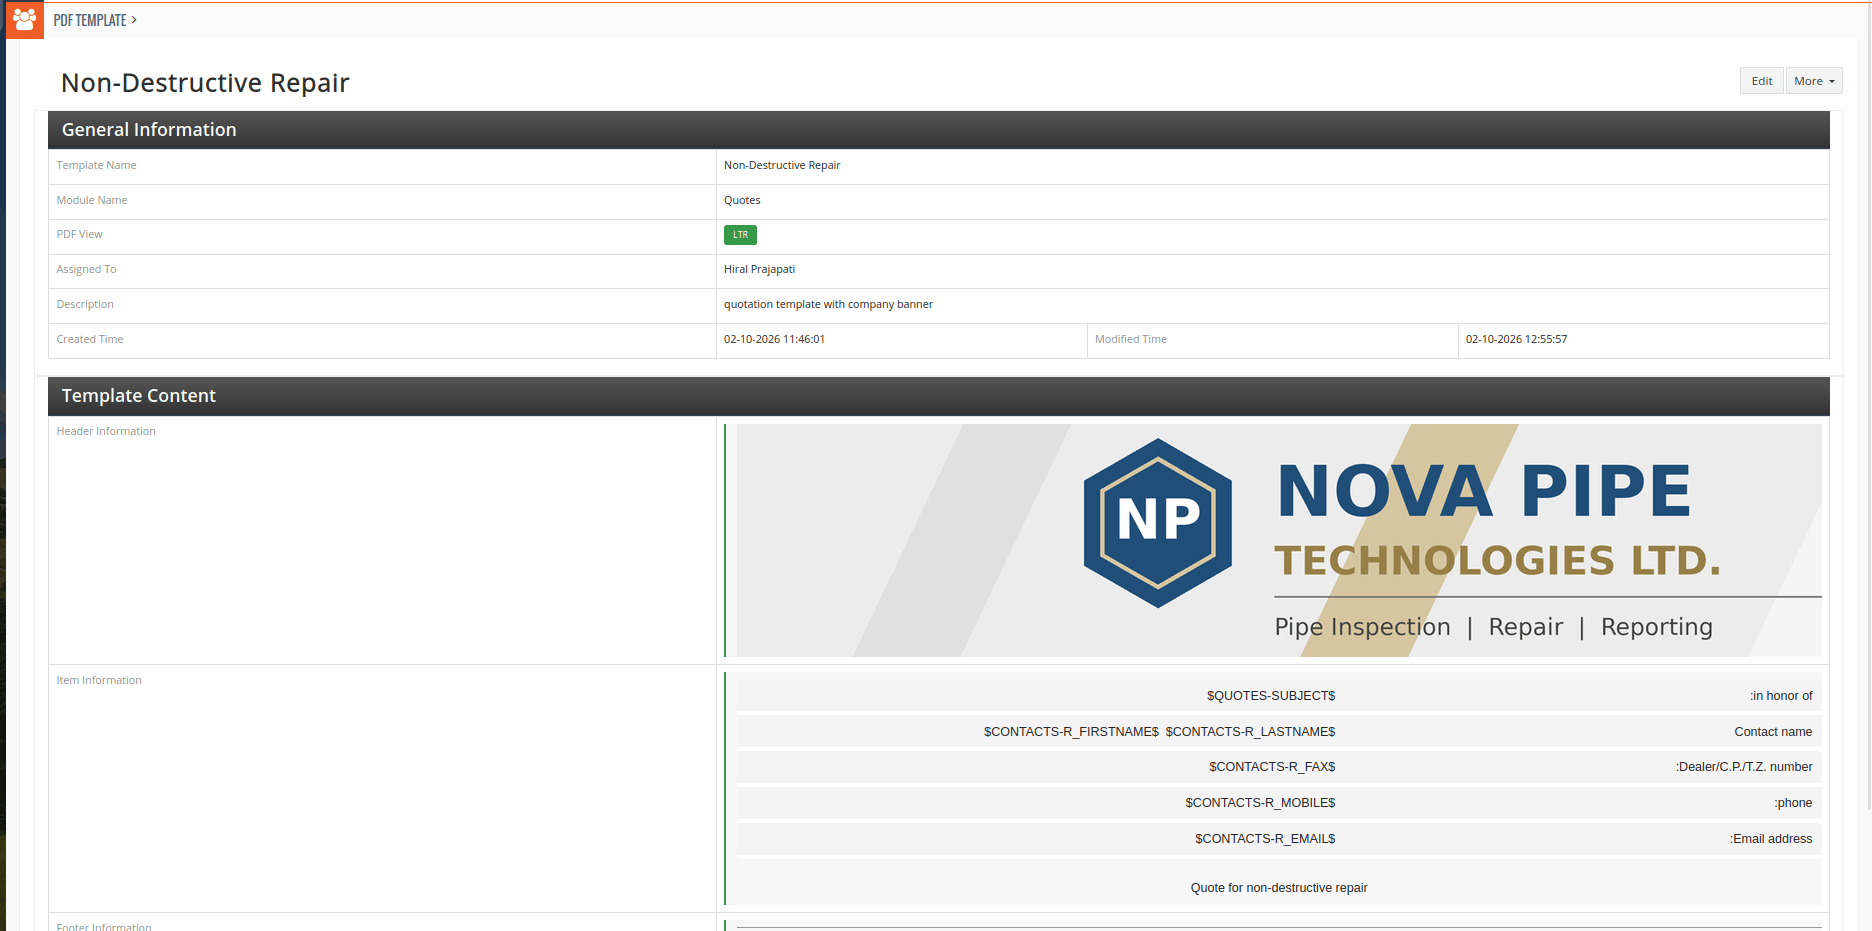 Generate a PDF from a Record After the template is saved, open a record of the configured module. In this example the template was created for Quotes, so open any Quote record:
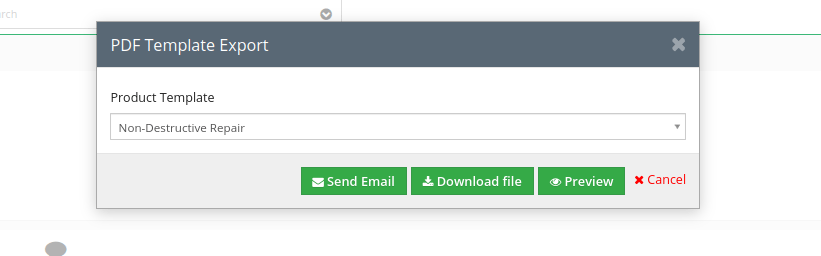
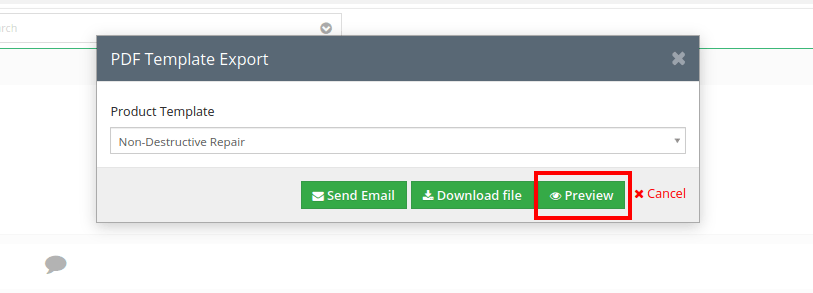
Quotes → open any Quote record An Export to pdf button is shown in the record header. Click it to open the PDF Template Export window. 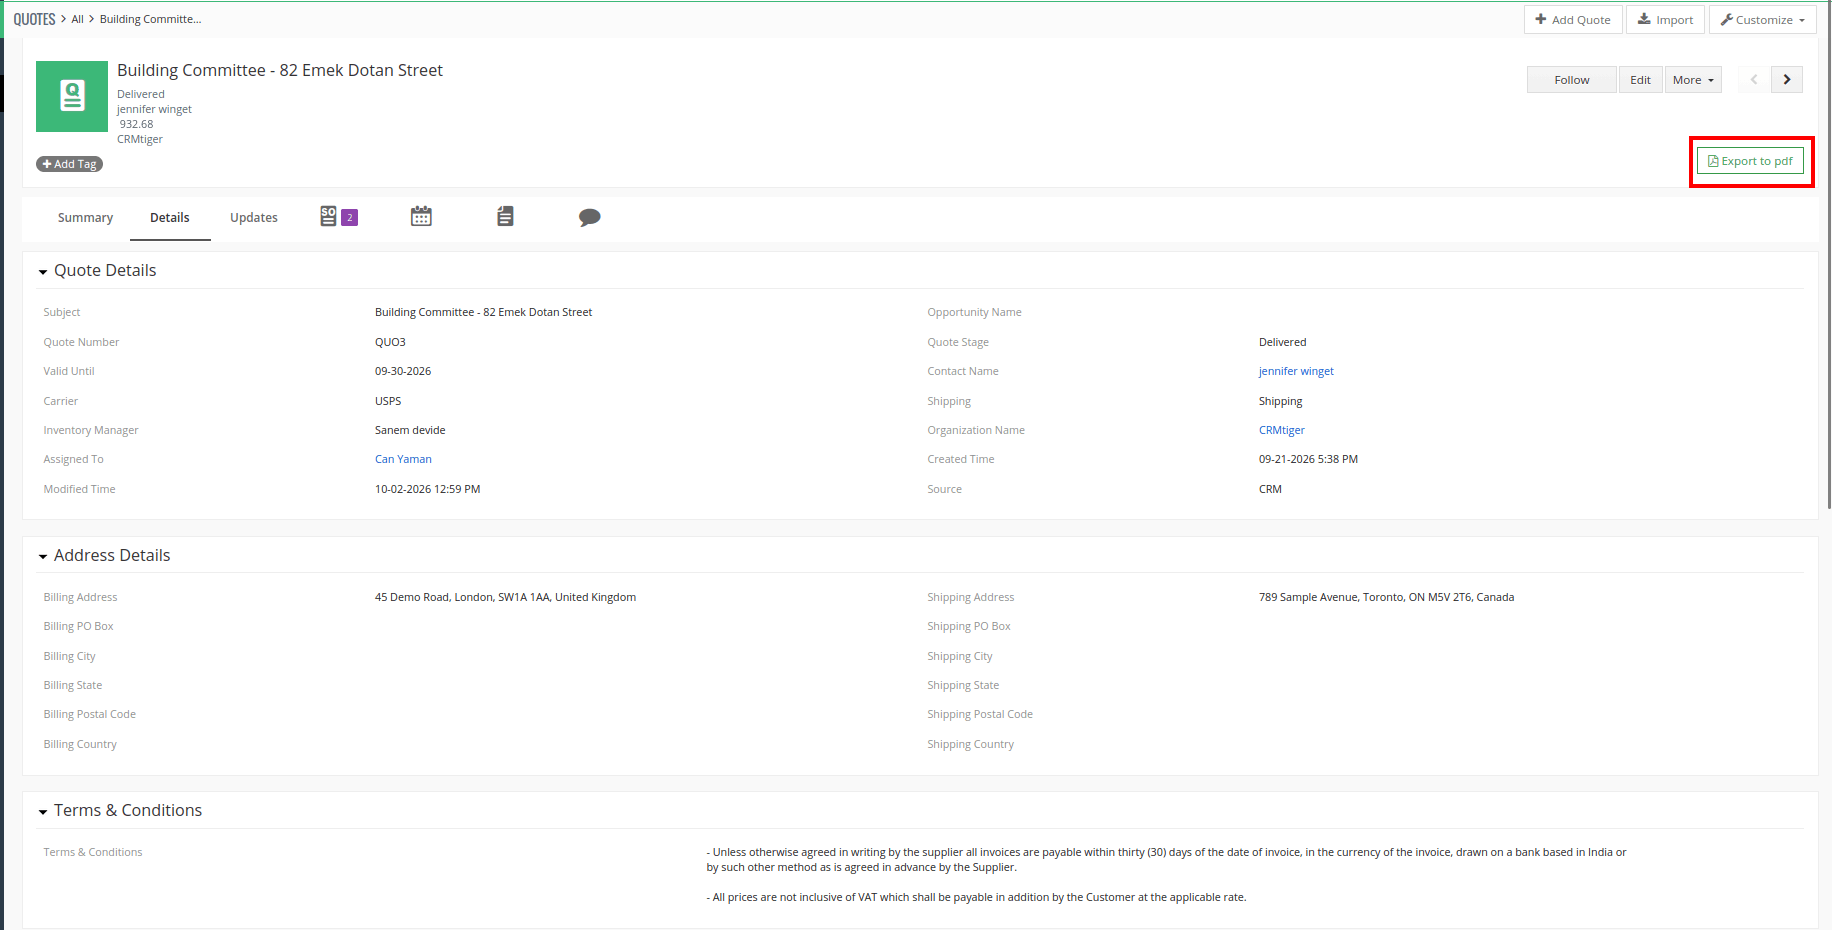 In the PDF Template Export window, select the required template from the Product Template dropdown. Three actions are available:
- Preview – shows the PDF in the CRM before downloading.
- Download file – generates the PDF and downloads it to your computer.
- Send Email – opens the Compose Email window with the generated PDF attached.
 Preview the PDF
Select the template and click Preview. The generated PDF opens in a preview window, with the variables replaced by the actual values of the selected record (for example the Quote’s contact details, line items, totals, payment terms and the user who produced it).
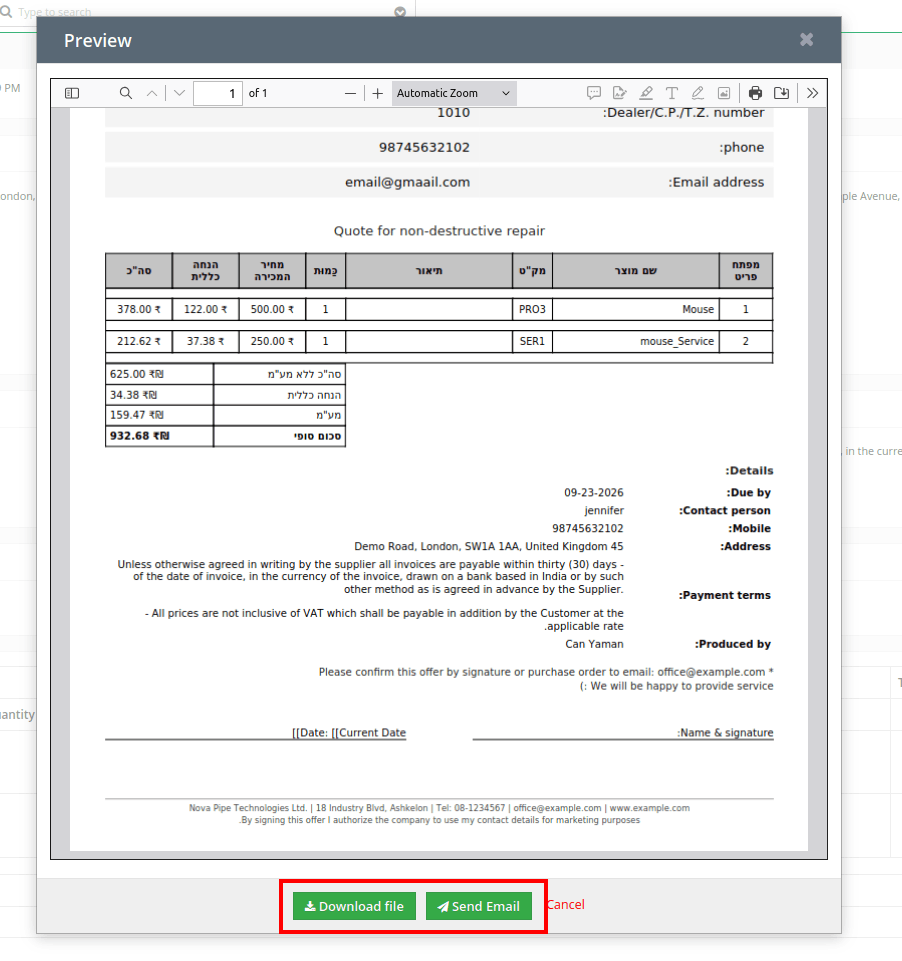 From the preview window you can also click Download file or Send Email directly, without going back to the previous window.
Send the PDF by Email Select the template and click Send Email . The Compose Email window opens with the generated PDF already attached (for example Non-Destructive Repair.pdf). Enter the recipient and subject, edit the message if needed and click Send Email . 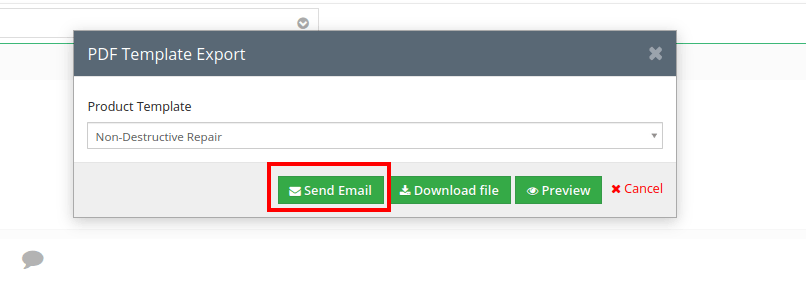 Select the template and click Send Email . The Compose Email window opens with the generated PDF already attached (for example Non-Destructive Repair.pdf). Enter the recipient and subject, edit the message if needed and click Send Email .
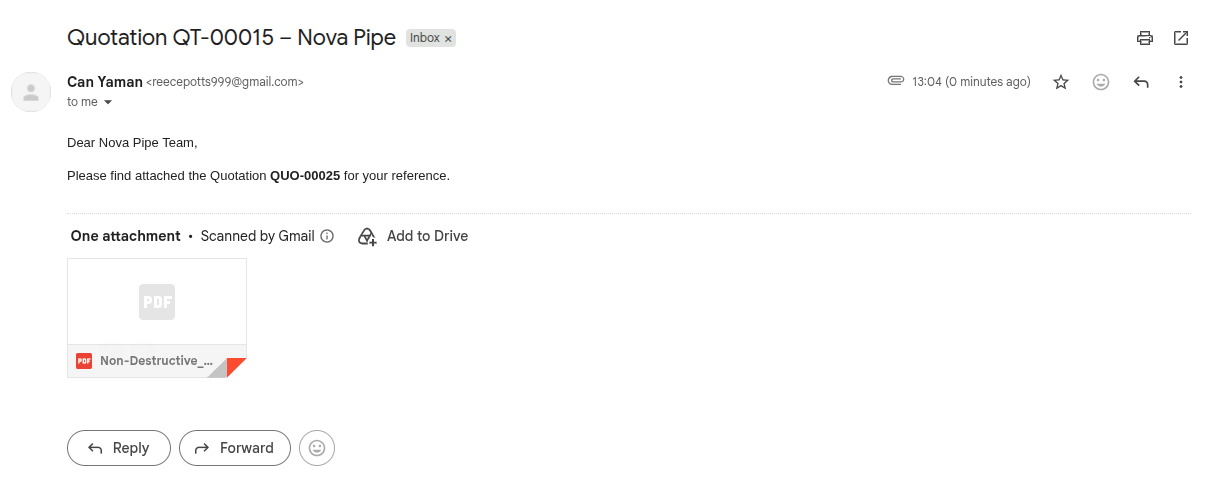
 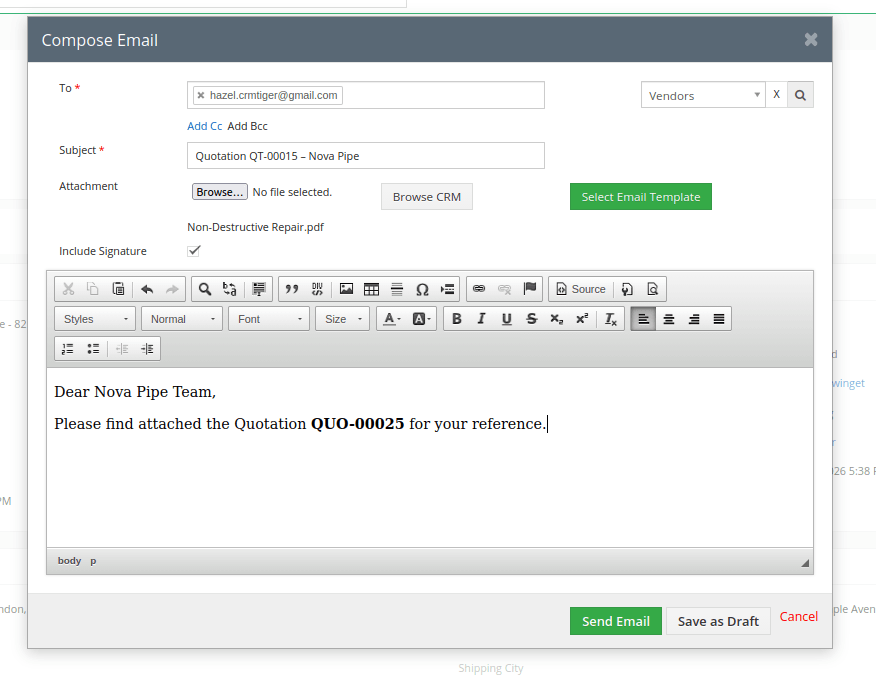 The recipient receives the email with the PDF attached.
  Download the PDF Select the template and click Download file . The PDF is generated and downloaded to your computer. Summary PDF Template provides administrators with a flexible way to design branded PDF documents for CRM records without any coding. Administrators can configure:
- Custom header, body and footer layouts
- Module and related-module fields as dynamic variables
- Product tables with group or individual tax, with or without images
- General fields such as current date, time and URLs
- LTR or RTL PDF direction
Once configured, users can generate, preview, download or email a PDF from any record of the selected module with a single click.