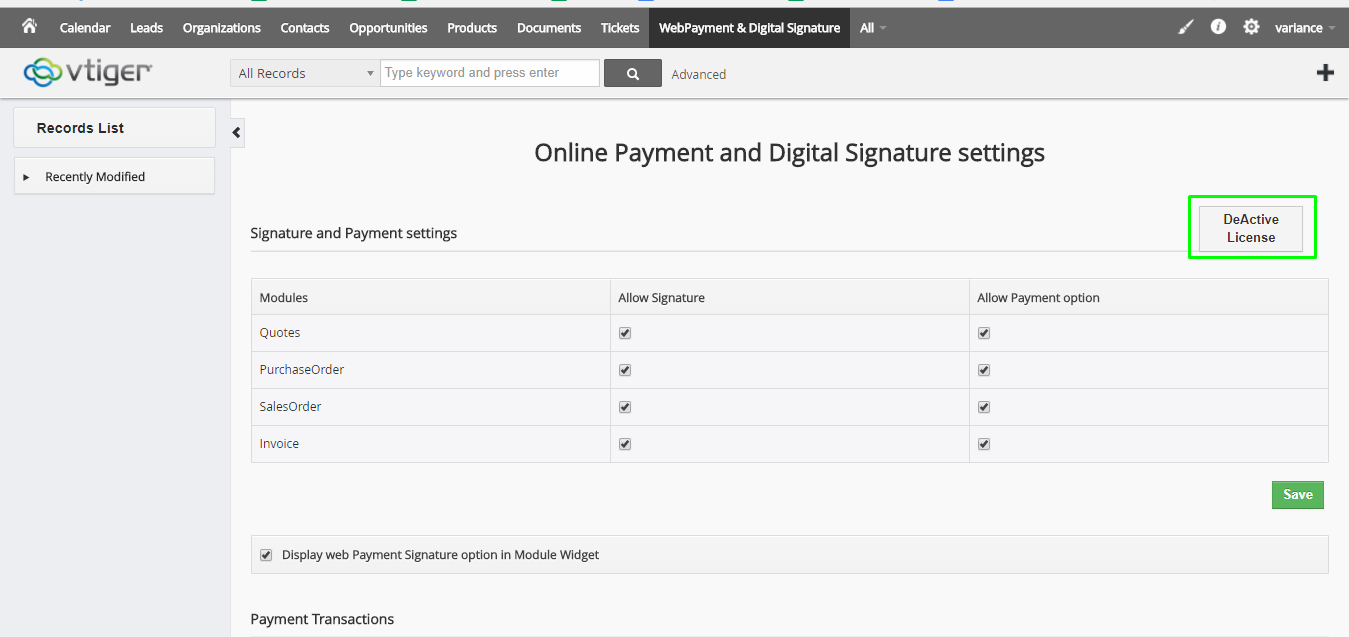
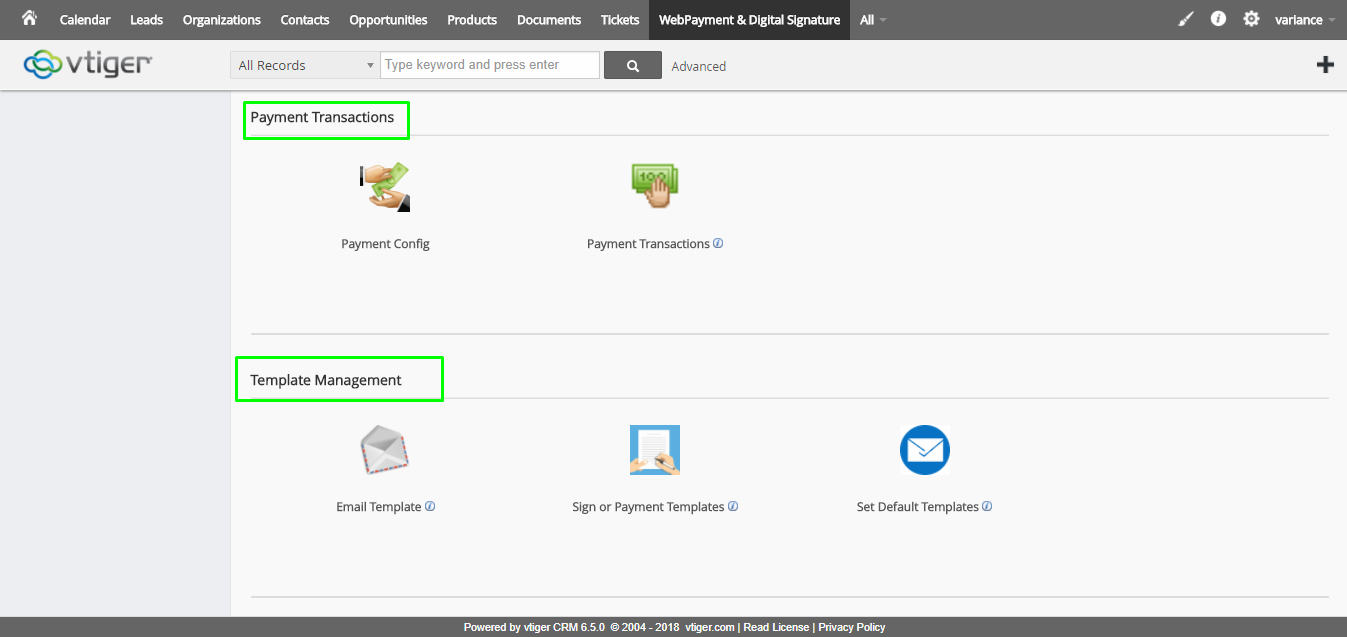
3.Webpayment & Digital Signature settings page
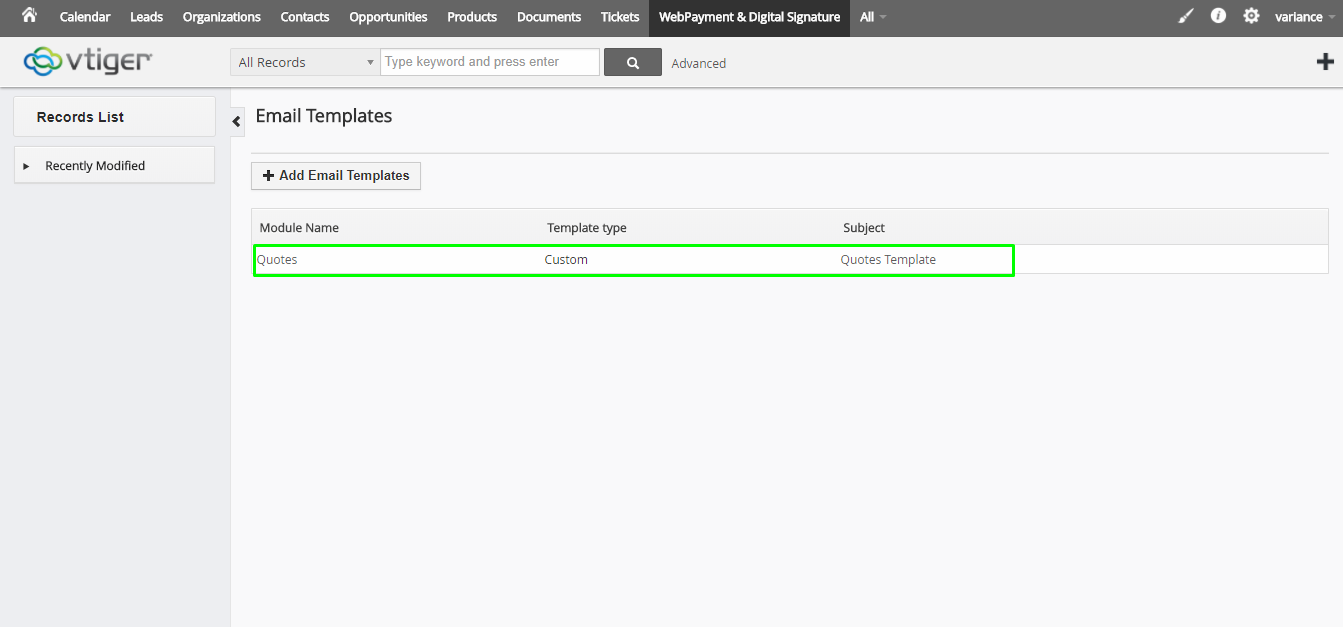
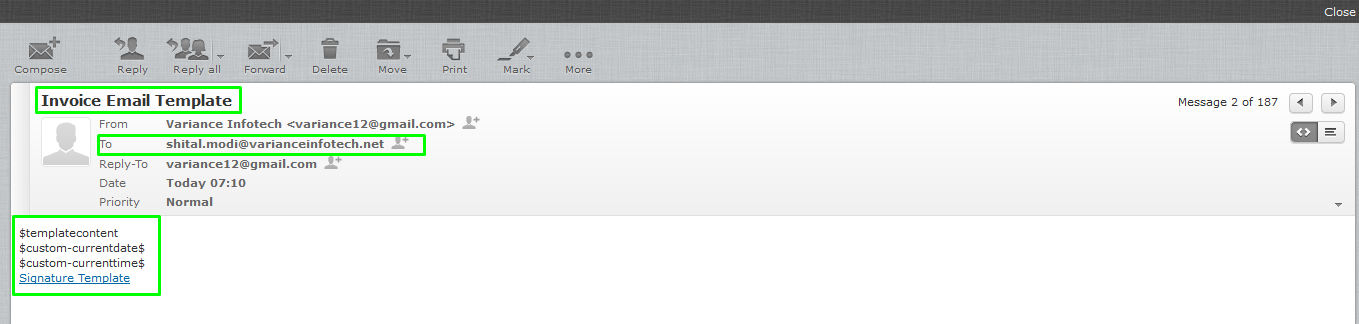
4.Template Management – Email Template
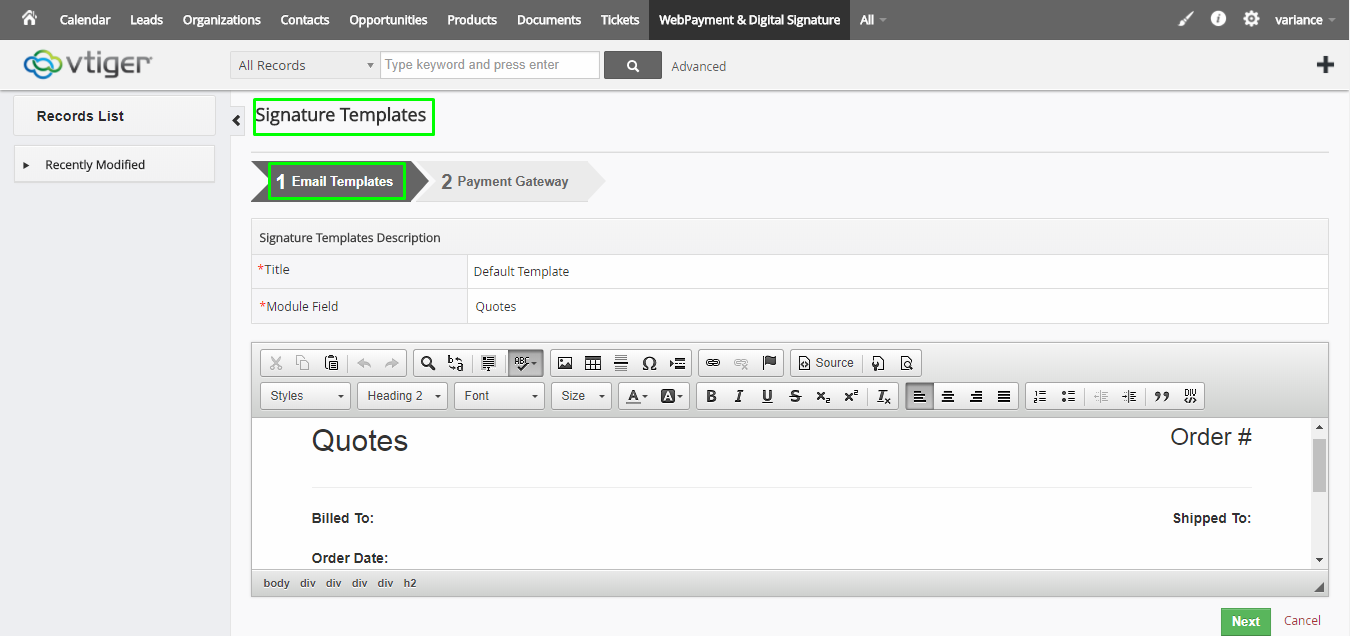
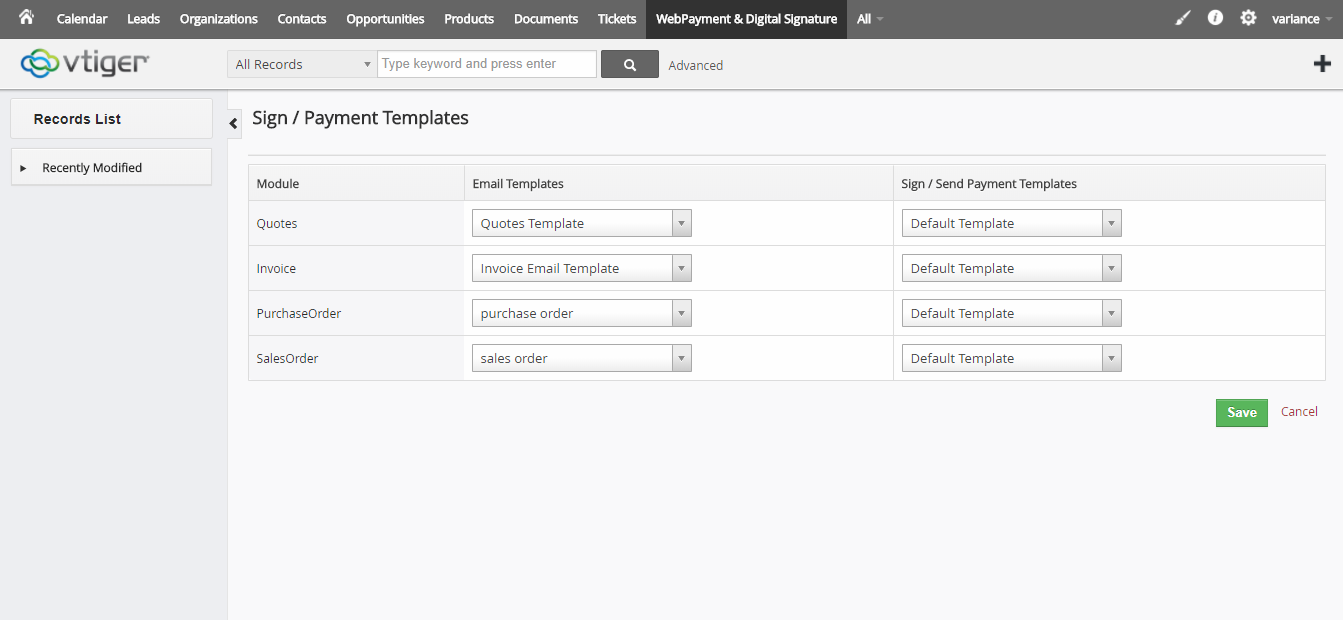
5.Template Management – Sign Or Payment Templates
6.Template Management – Set Default Templates
7.Payment Transactions – Payment Config
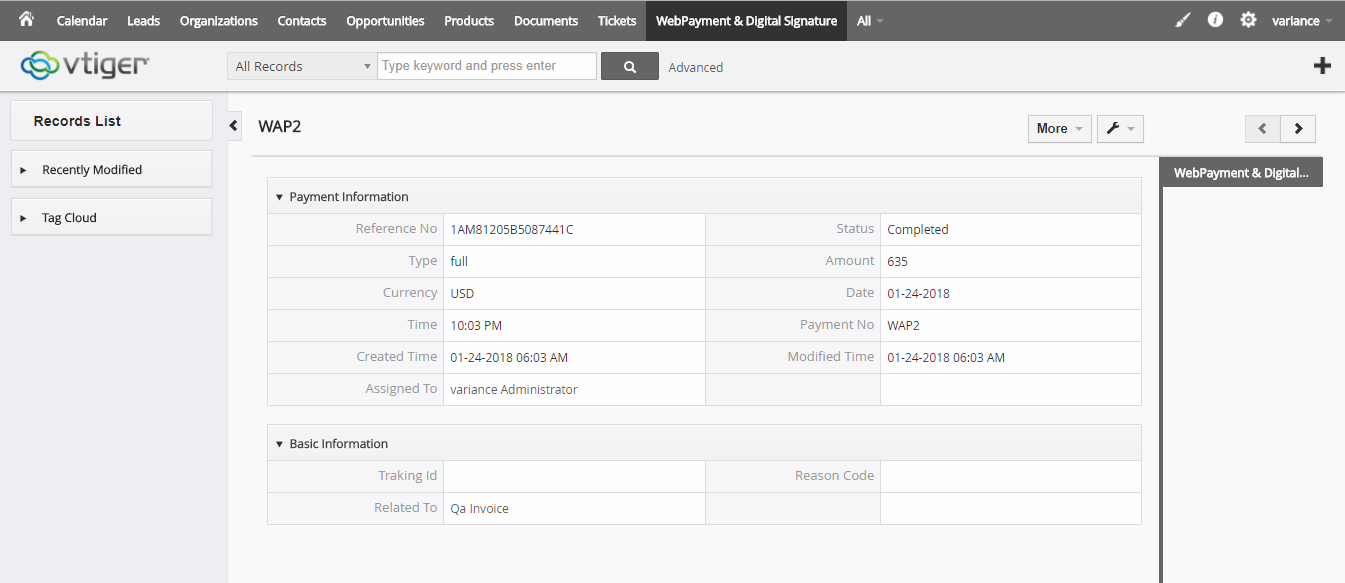
8.Payment Transactions – Payment Transactions
10.Send Email when Create Record
11.Enable Sign & Payment option from Settings
12.Disable Sign & Payment option from Settings
13. Enable Sign & Payment functionality Affected on Payment page
14. Disable Sign & Payment functionality Affected on Payment page
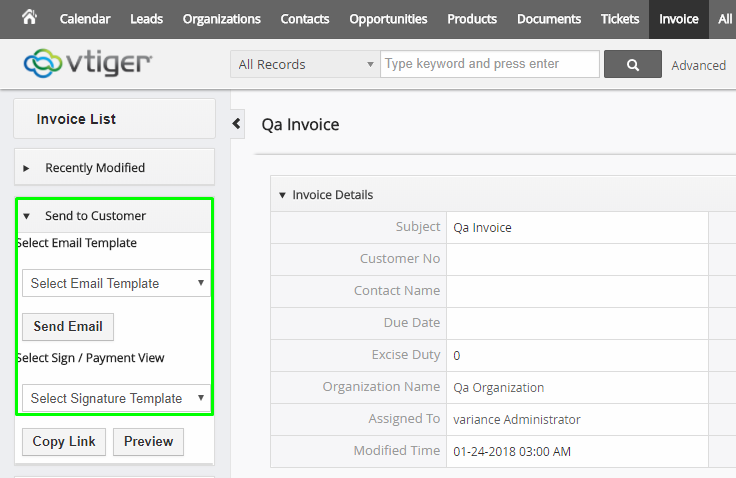
15. Email Templates display on Module details page
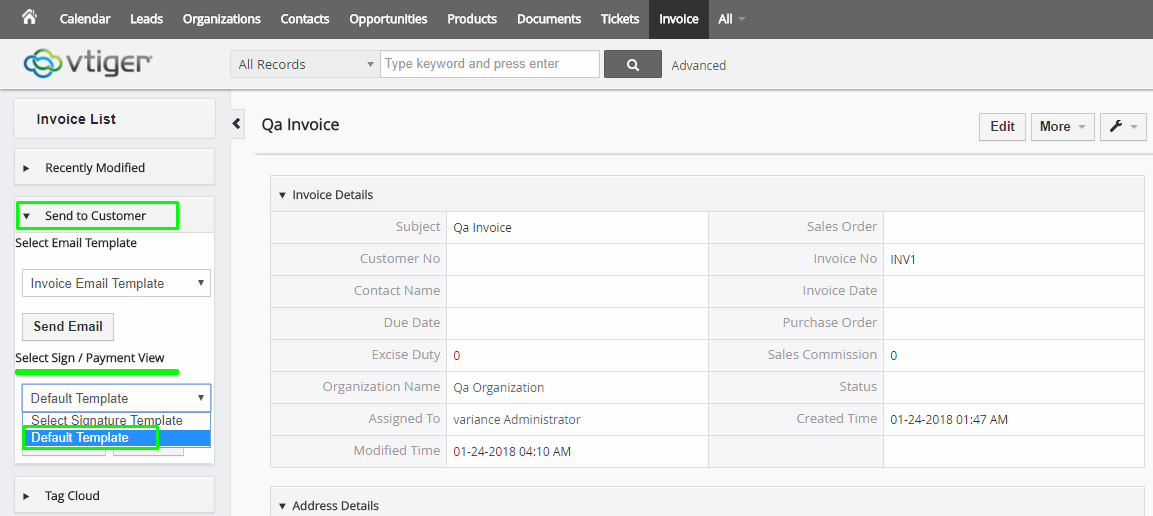
16. Send Email from Send to Customer section
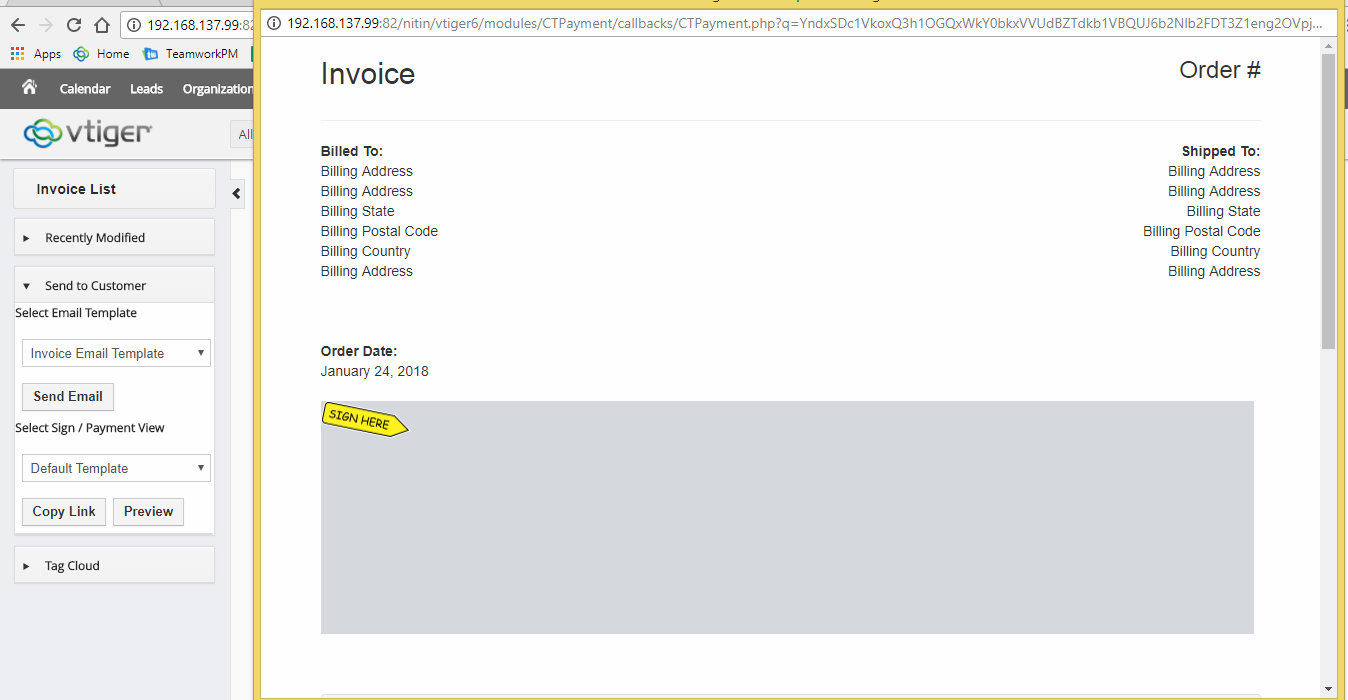
18. Open payment preview page from Send to Customer section
19. Display payment page in new tab when click Copy Link
20. View Payment page when Signature is disable from settings
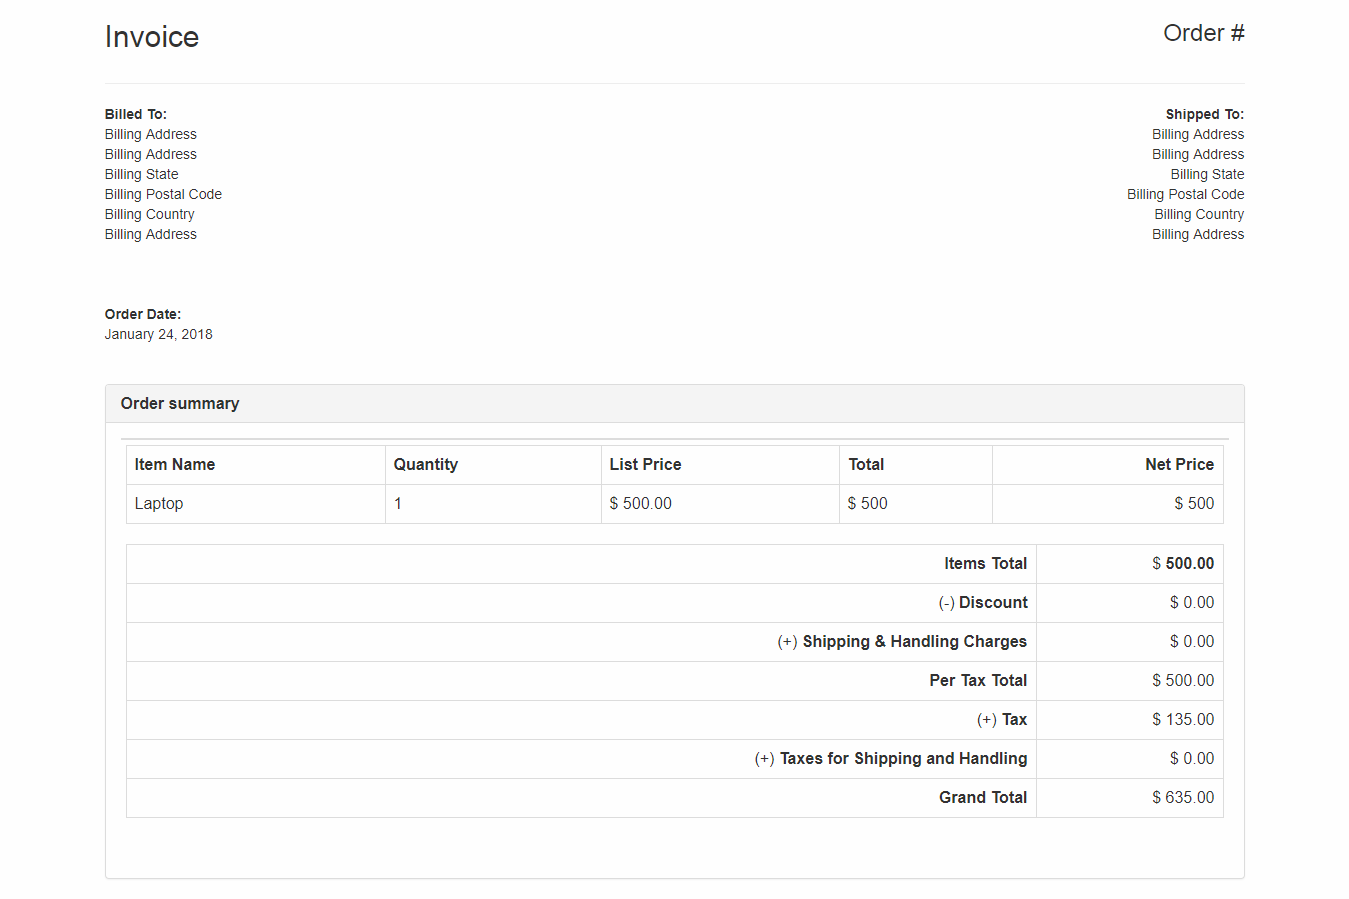
21. View Payment page when Payment Gateway is disable from settings
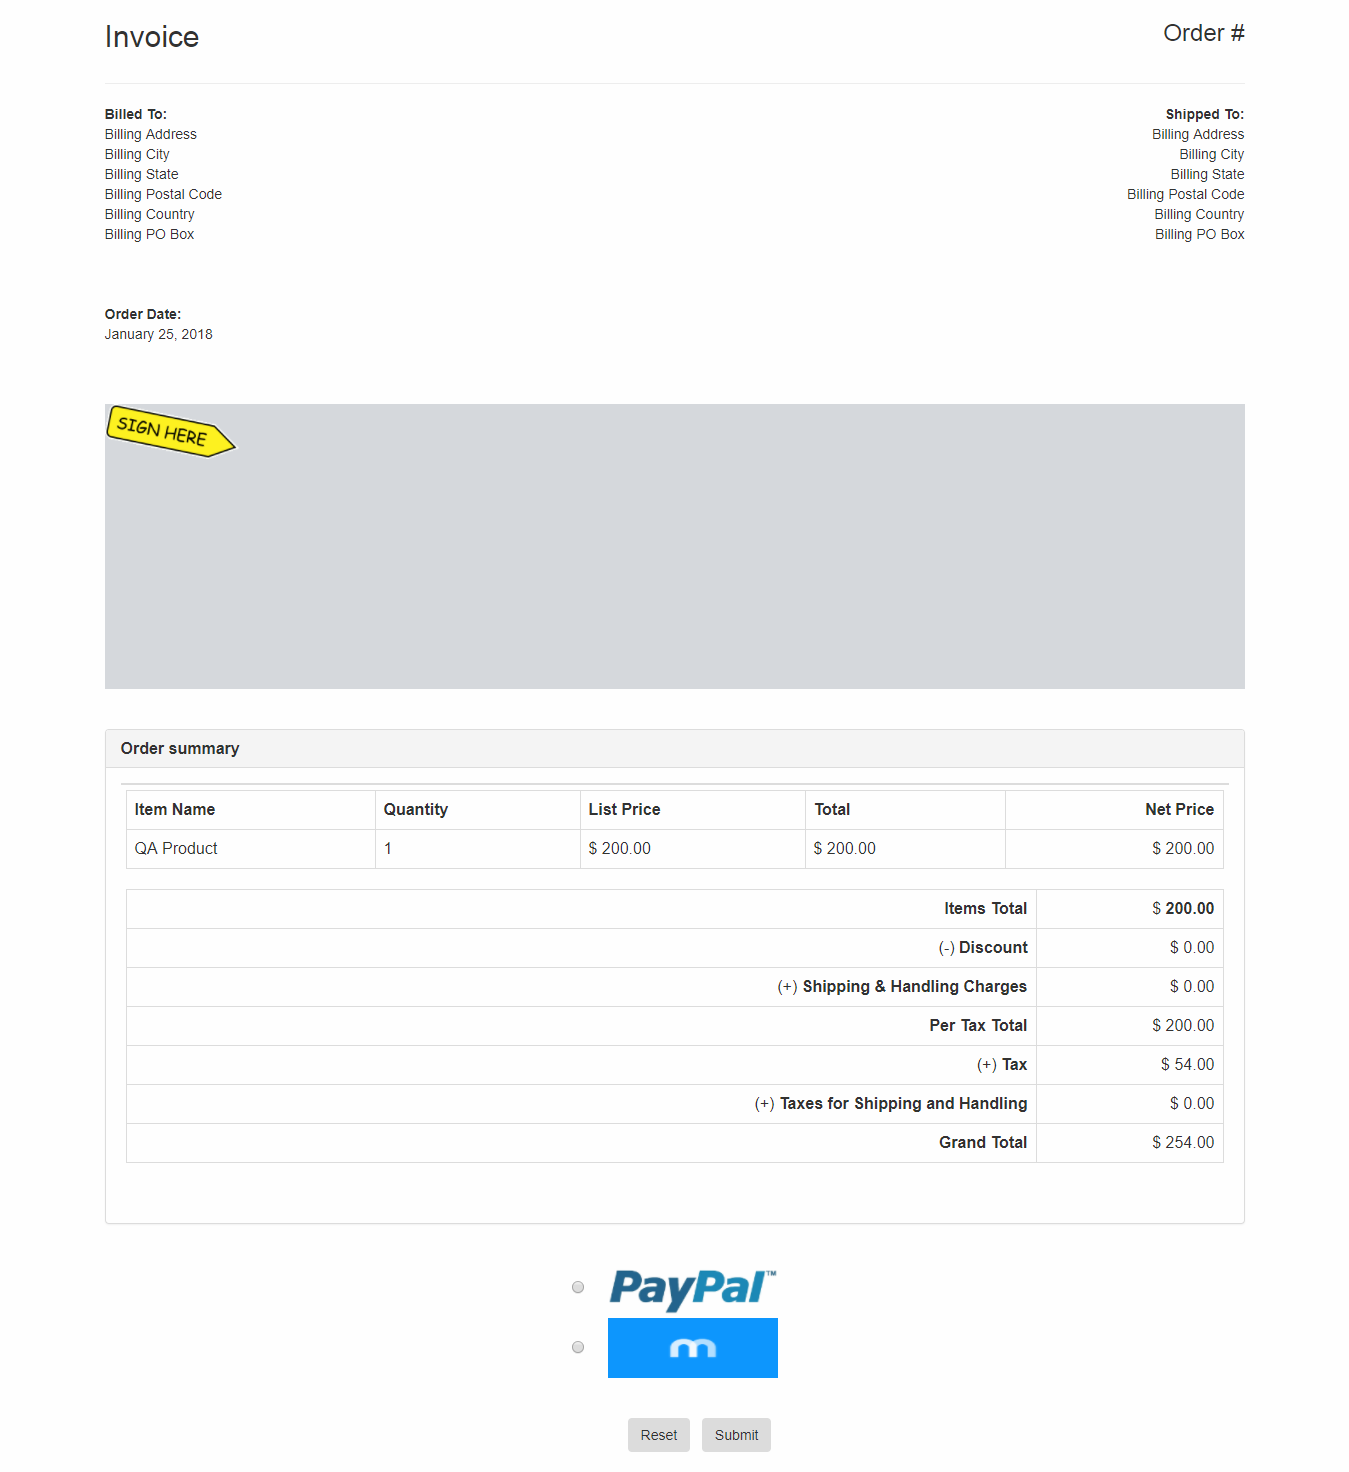
22. View Payment page when Signature & Payment Gateway is Enable from settings
23. Page is navigate on Payment Transaction page after made signature and choose payment gateway
24.Payment successfully completed after PayNow
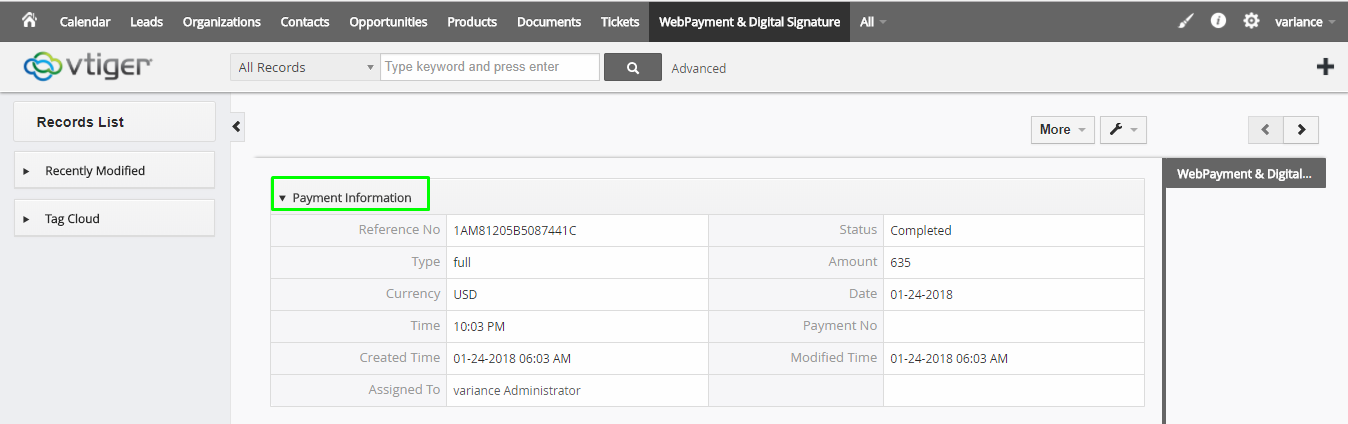
25.Generate Order details on Payment Transaction page
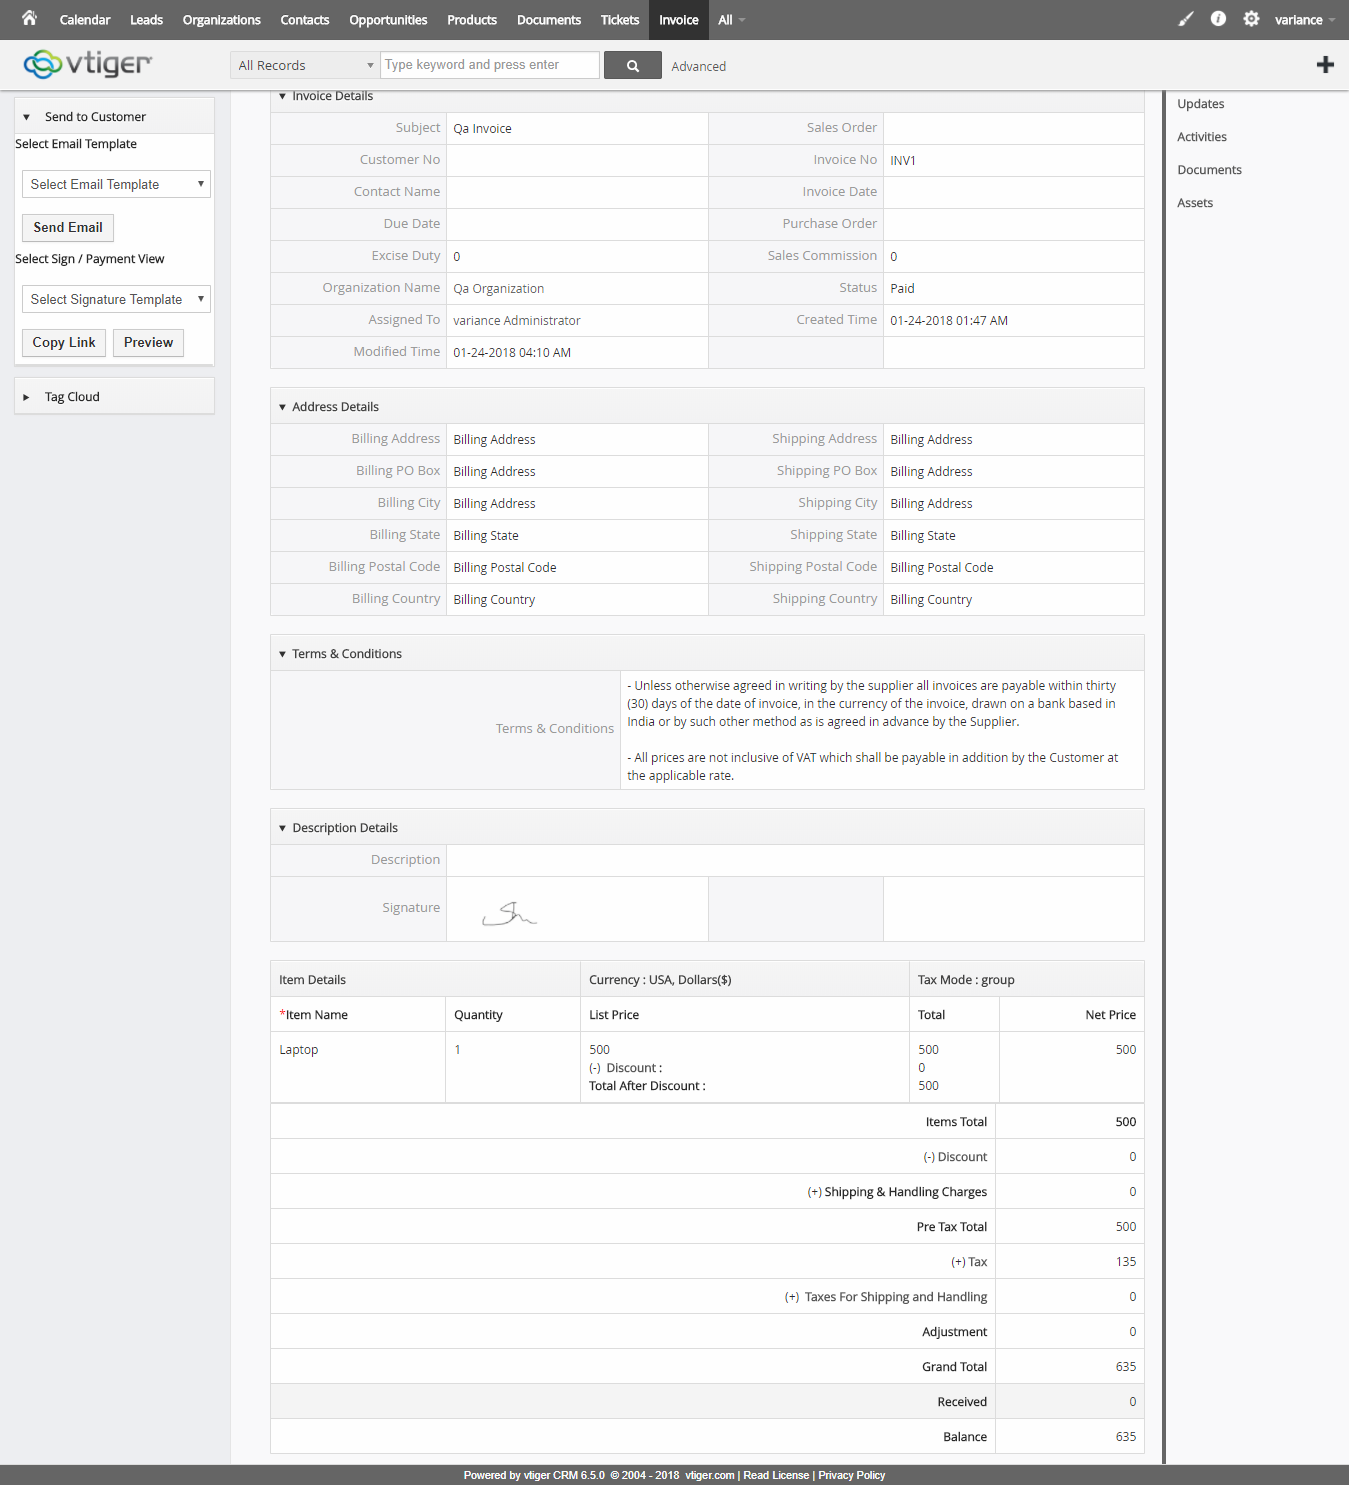
26.View Status and Signature on record details page after complete Payment
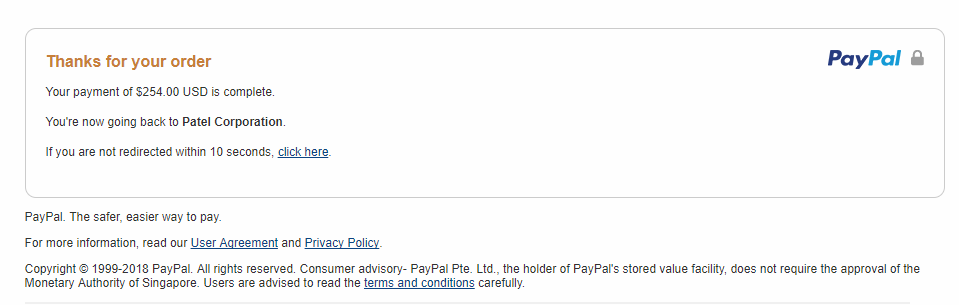
27.Getting THANK YOU Screen when open payment page who is completed payment
ABOUT CRMTiger
We are Technology Consulting company with expertise on Enterprise Softwares offering Development, Integration, Business Process Management and Implementation with Training.
CRMTiger team is expert to provide different types of the service related to vTiger® CRM. following is the services we offered to the trusted customers.
CRM Tiger offers
● Customization for vTiger®
● Migration for vTiger®
● Support
● Implementation/Deployment of vTiger®
● Integration of vTiger® with Telephony,Accounting,E-Marketing etc.. applications
We passionately enjoy helping Startups and MSMEs to Market leaders and Large Corporates in making themTech Enabled
WebPayment
I ) Introduction :
Web Payment is designed by CRM tiger.
II ) Requirements :
vTigerCRM version.
III ) Assumptions:
Webpayment update details successfully from settings page then User can see those changes on related module which they made changes.
IV ) Features :
● Easy to update field
● User friendly
1.On Successfully Login you will be presented with screen as below.
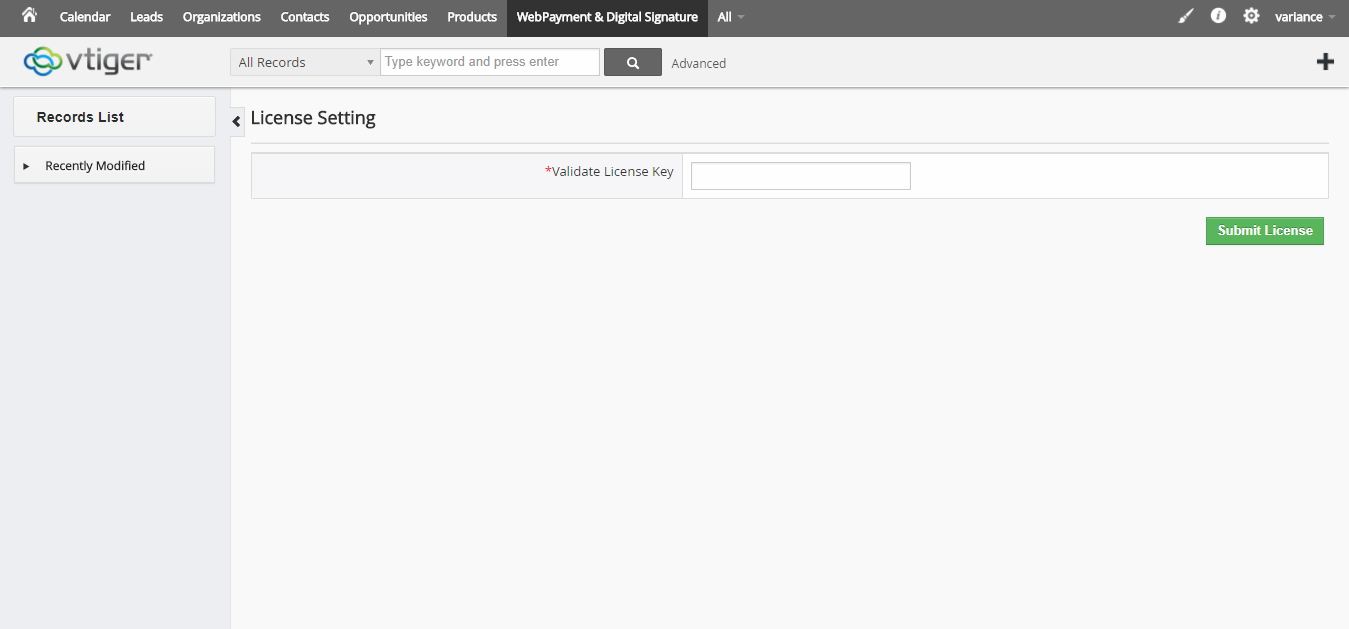
2. Enter Valid License Key which you get.
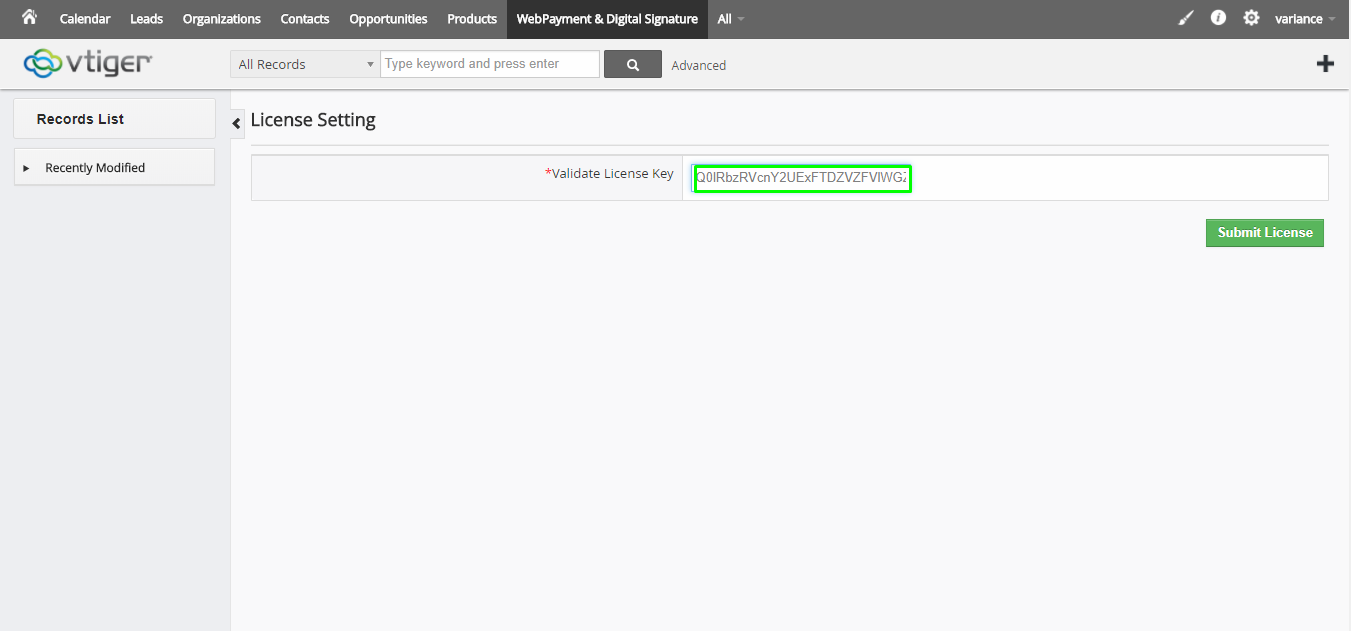
3. Open the WebPayment & Digital signature settings page after Enter valid License key
3.1 Signature and Payment Settings
3.2 Payment Transactions & Template Management –
4. Template Management – Email Template

4.1 Add Email Template which you want to display on module. Email Template functionality available for below module.
1) Quotes
2) Purchase Order
3) Sales Order
4) Invoice
5. Template Management – Sign Or Payment Templates
5.1 Add Signature Template and Payment Gateway which you want to display on module.
6. Template Management – Set Default Templates
6.1 Set default template after added Email Templates and sign templates.
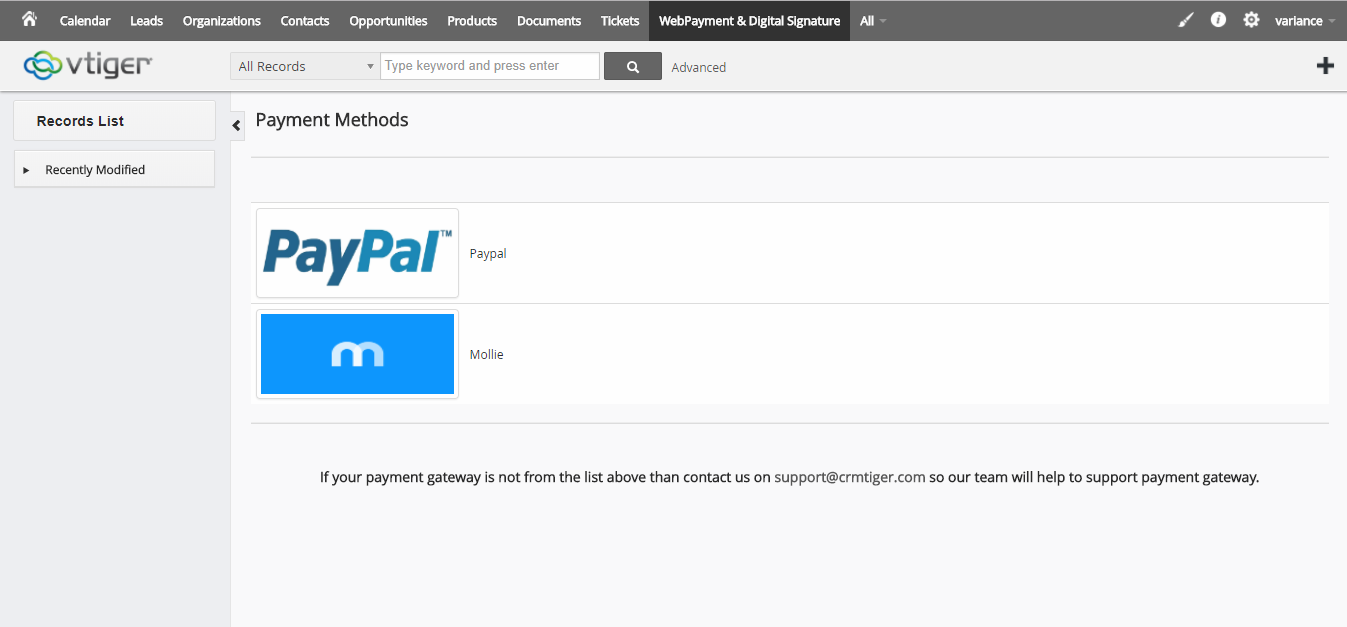
7. Payment Transactions – Payment Config
7.1 Payment Gateway available on Payment Methods page.2 types of payment gateway listed here..
1)Paypal
2)Mollie
8. Payment Transactions – Payment Transactions
8.1 Payment details is listed here when users do payment.
9. If you create record of module is invoice / Quotes / Purchase order / Sales order then User has to make workflow on settings page before adding record.
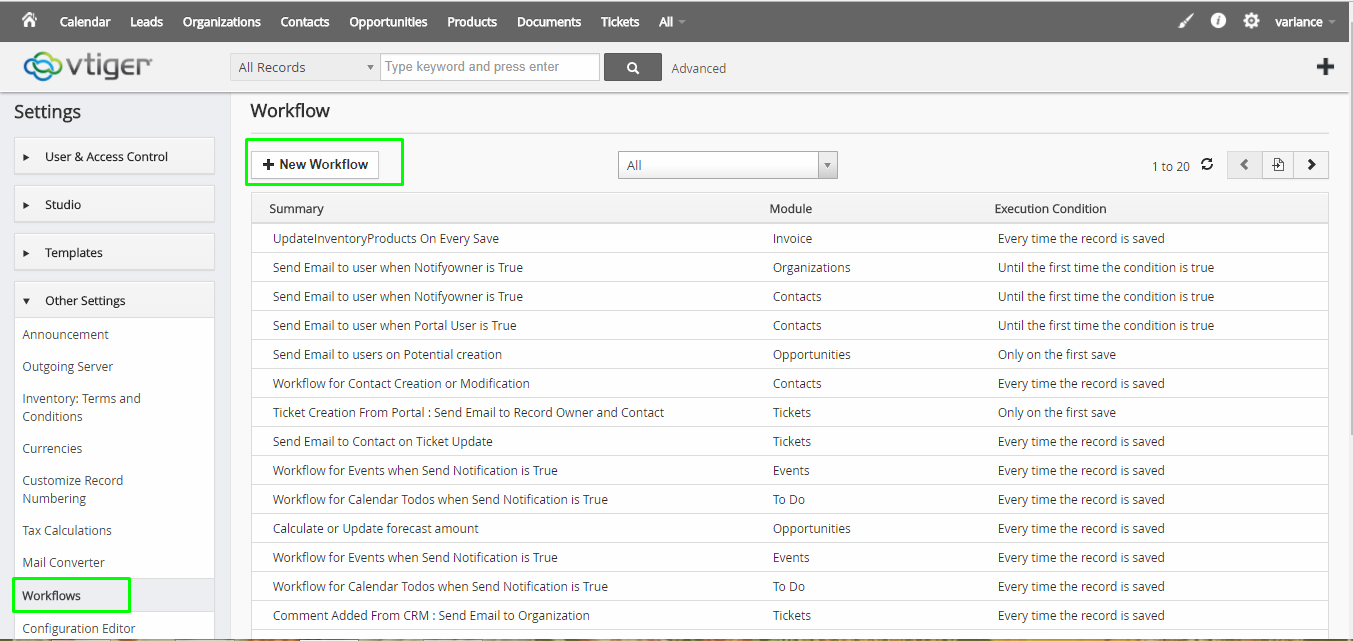
9.1 New Workflow + Enter Workflow Name + Select Target module + Choose Workflow Trigger
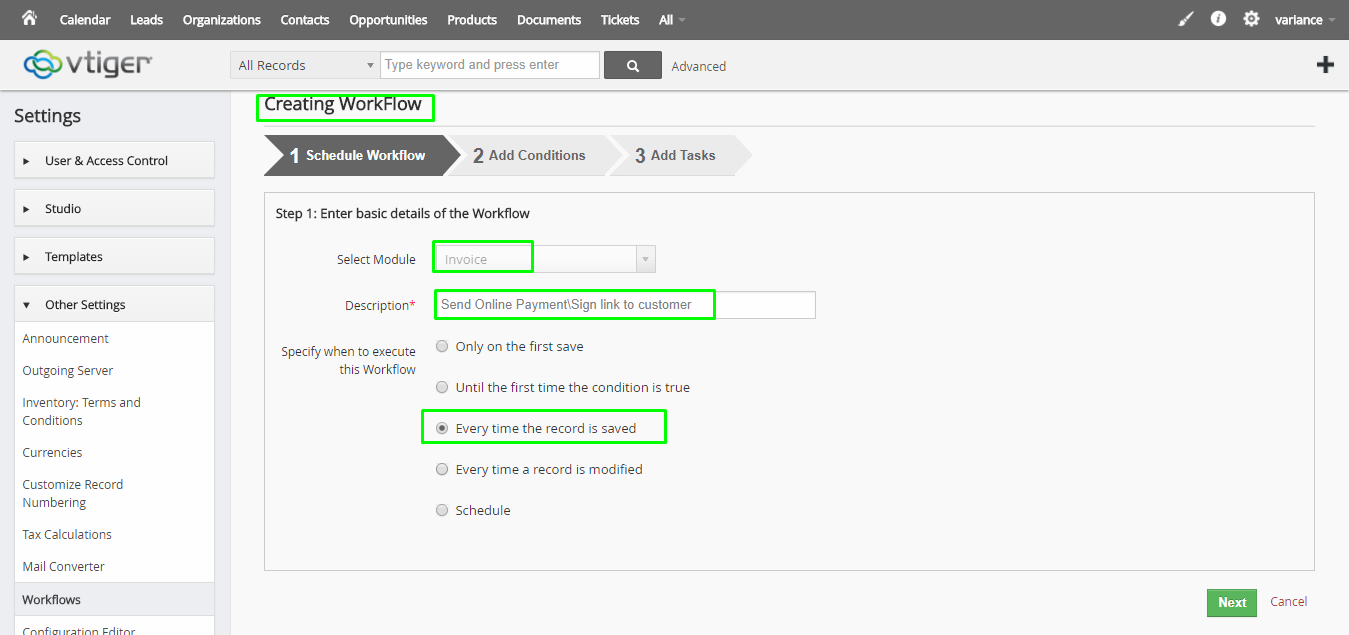
9.2. Not Required to add workflow condition
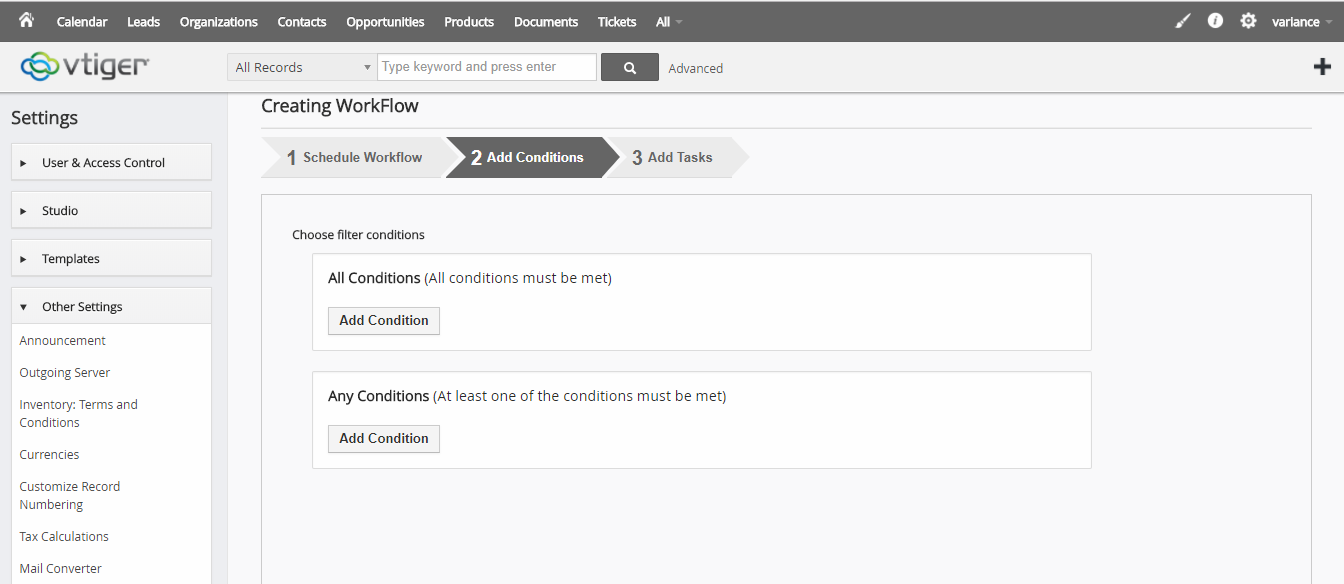
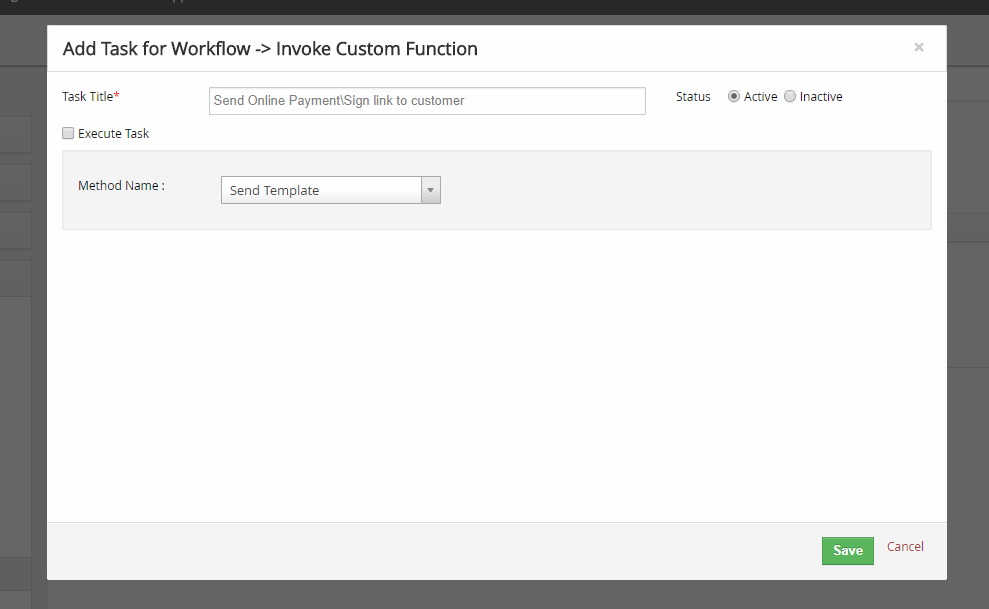
9.3 Choose Invoke Custom Function option under Add Action from Workflow Actions
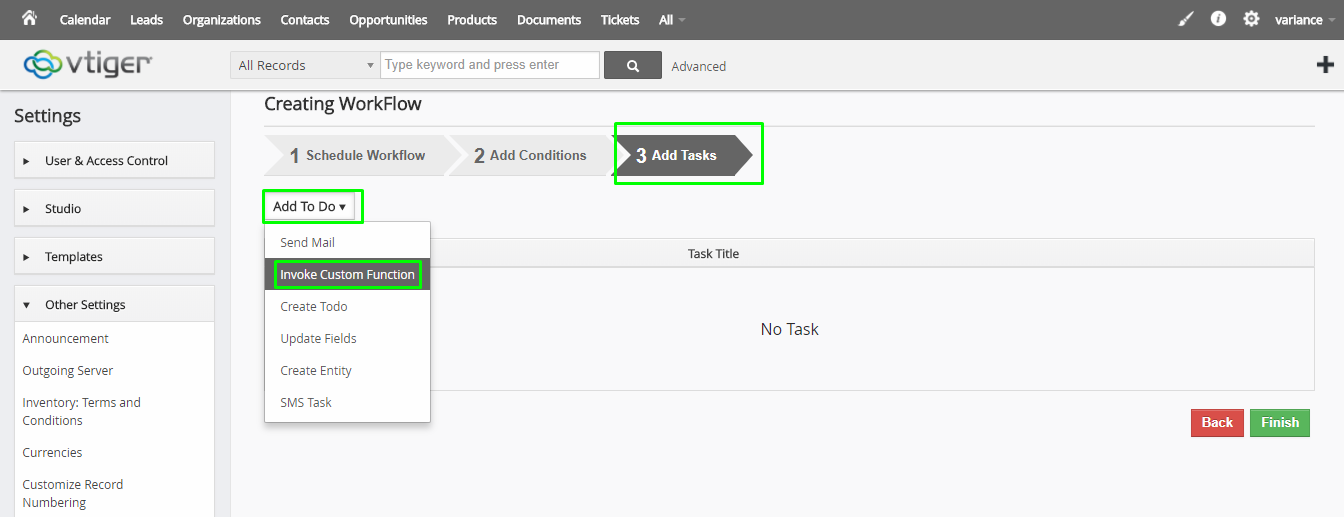
9.4 Enter Action Title and choose Method of “Send Template” + Save
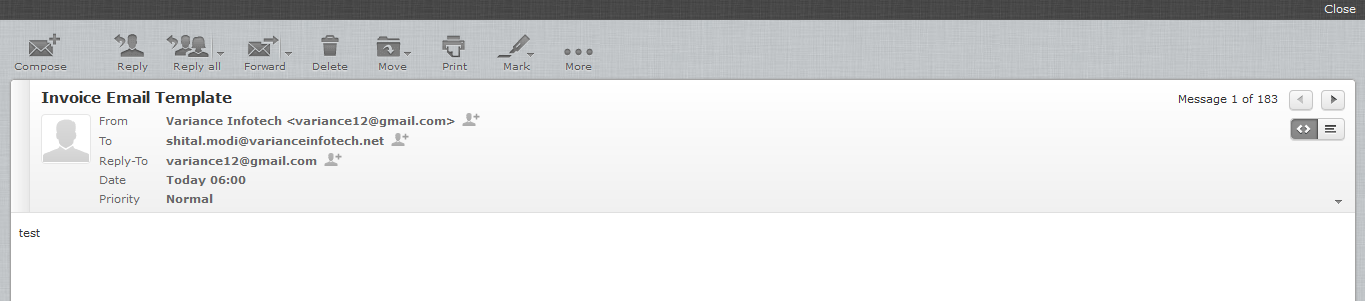
10. After Workflow made successfully, When users create invoice / Quotes / Purchase order / Sales order record then Email has been sent on appropriate choosed Related to field email address.
11. If further checkbox is checked on webpayment & Digital signature settings page then Related Send to Customer option is must be display on Module details view under MORE option
12. If further checkbox is Unchecked on webpayment & Digital signature settings page then Related Send to Customer option should be not display on Module details view under MORE option.
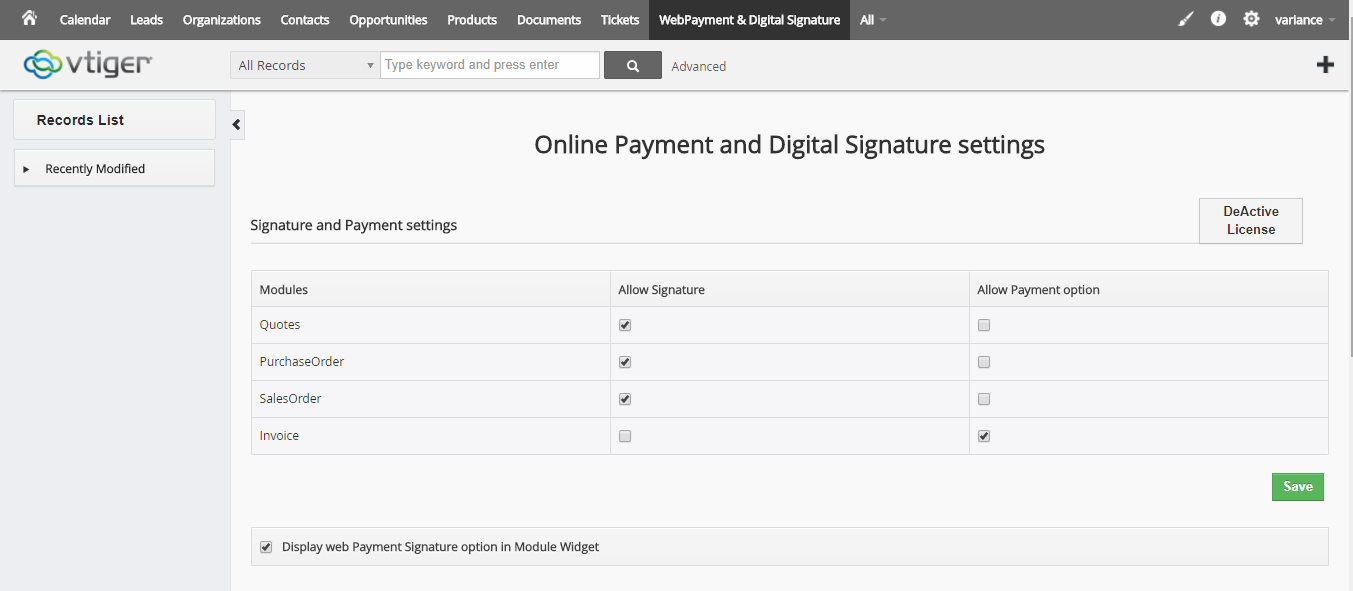
13. If Signature and Payment Method option is checked Means Allow then related options must be display on Payment view page.
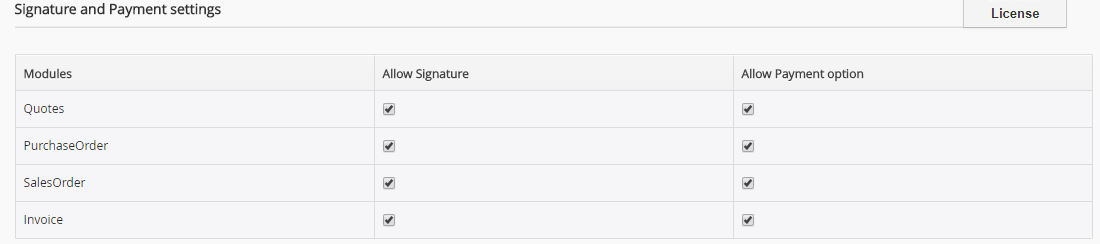
14. If Signature and Payment Method option is Unchecked then related options should be not display on Payment view page.

15. Added Email templates display on module details view under section of Send to Customer left hand side
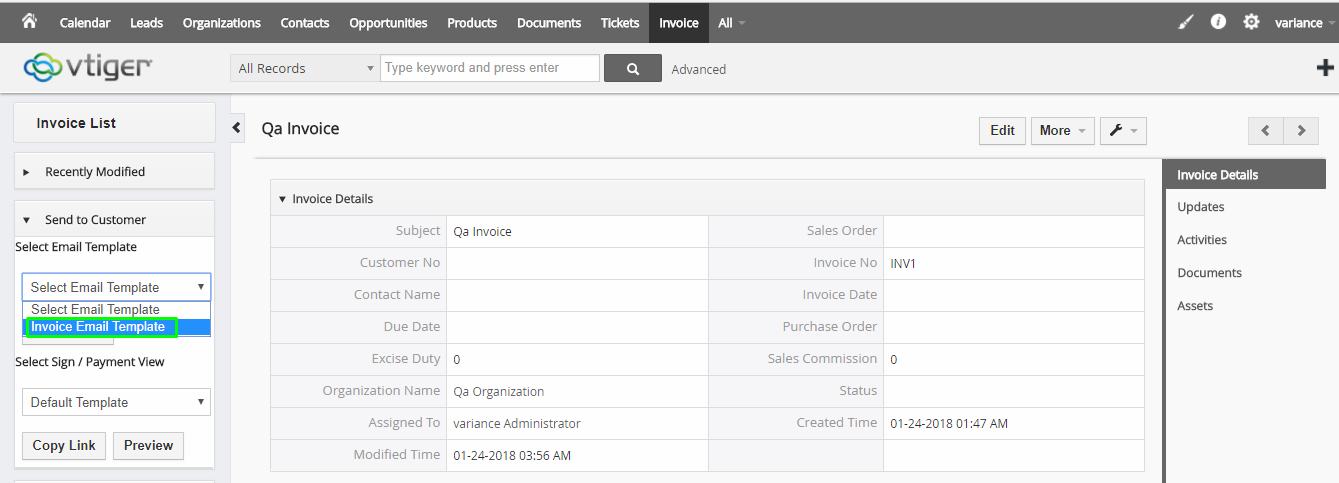
16. Select Email templates with Send Email then open the Compose Email popup and getting me details of Mail as per added in templates.

17. Got Email after click Send Email button from module details view.
18. When User choose Sign / Payment View from Send to Customer section and click Preview button then open the Payment preview page.
18.1 Preview Page view –
19. When User choose Sign / Payment View from Send to Customer section and click Copy Link button then Link is copied and go to new tab with open the Payment page.
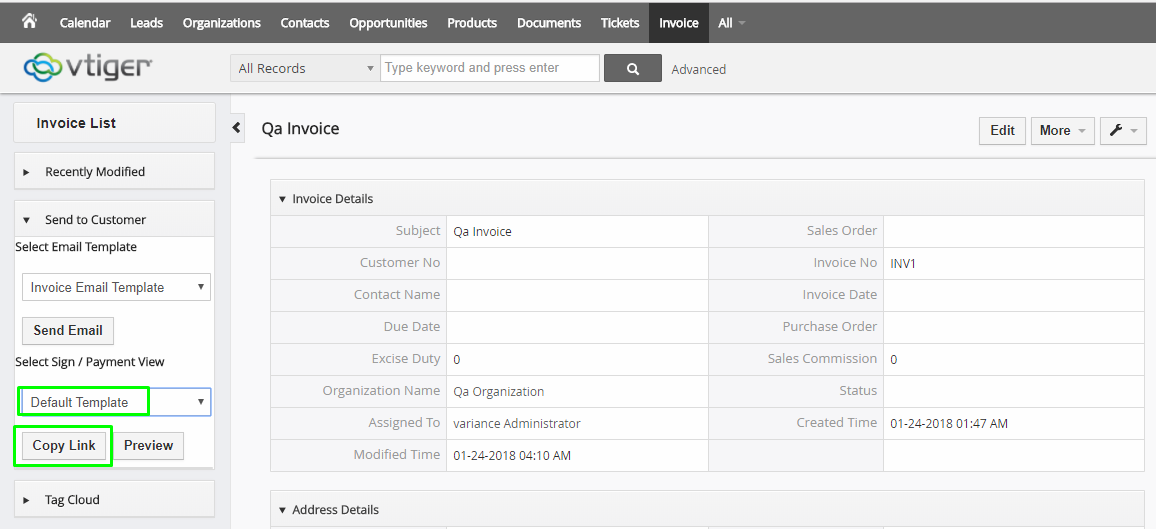
19.1 Copy Link Payment view –
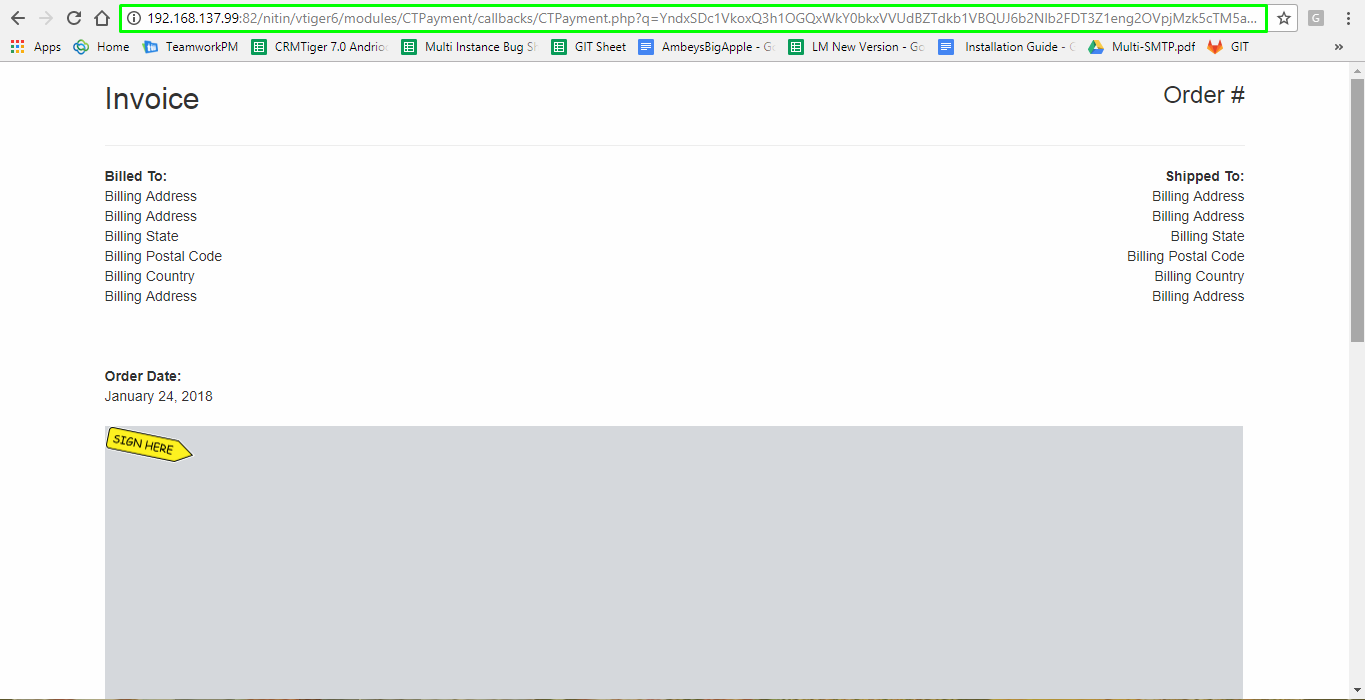
20. If Signature option is Uncheck

on Webpayment & Digital Signature page then Payment page will be not seen Signature box.
20.1 Payment View when signature is Disable from settings.
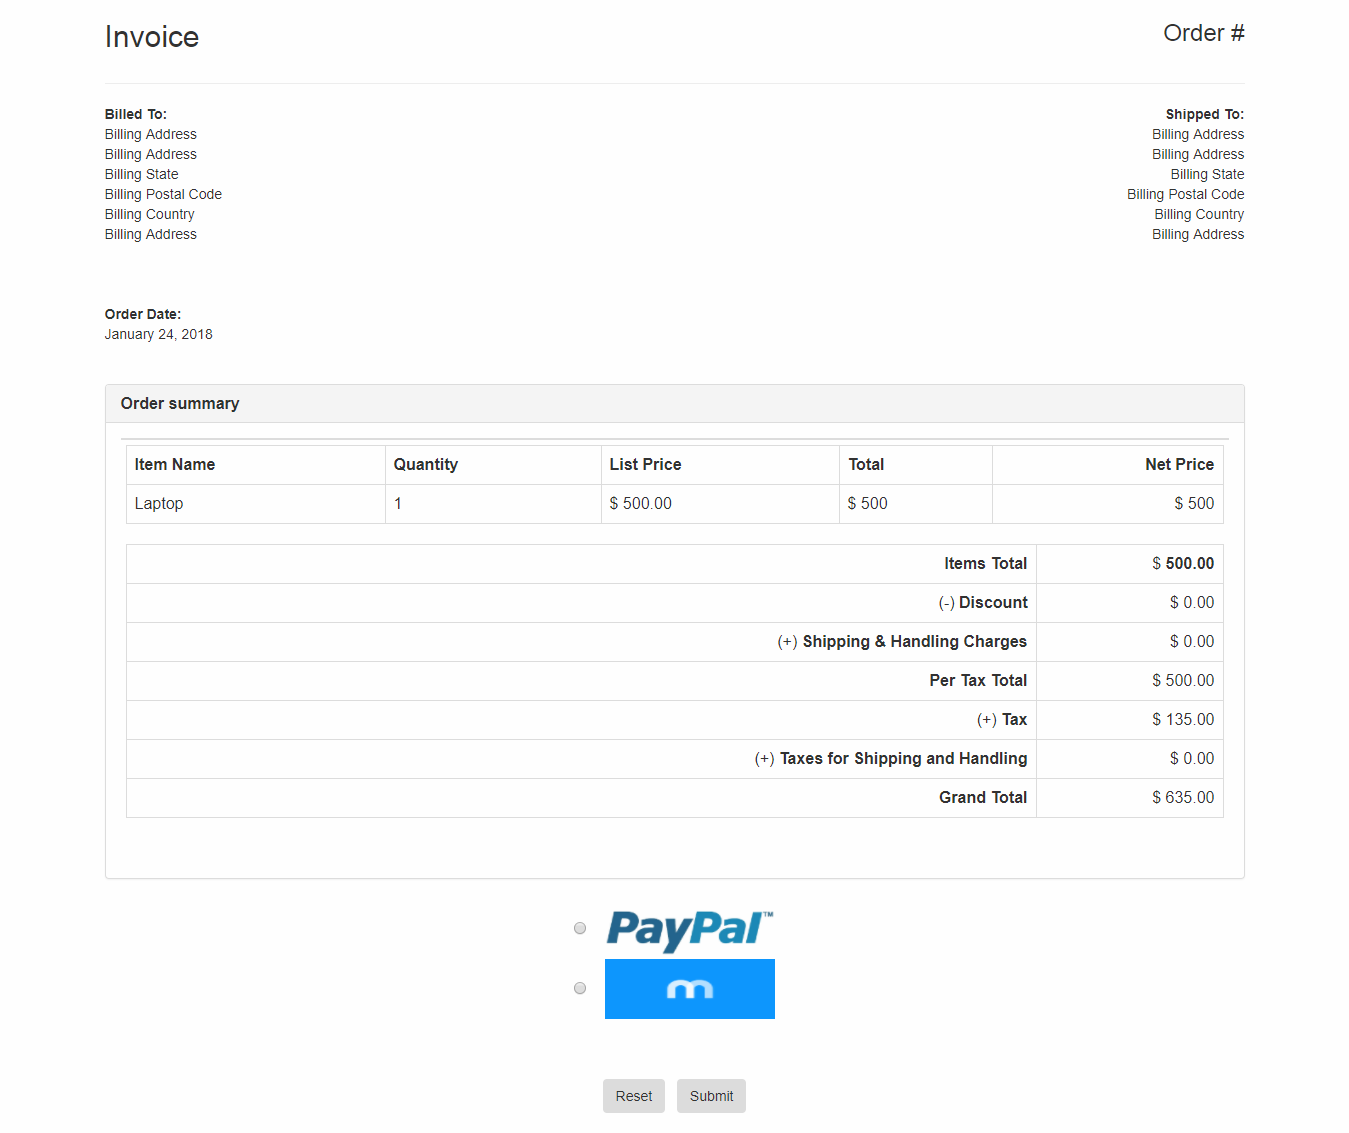
21. If Payment option is Uncheck

on Webpayment & Digital Signature page then Payment page will be not seen Payment Gateway option.
21.1 Payment View when Payment Gateway is Disable from settings.
22. When Signature & Payment option is checked

22.1 Payment View when Both options are Enable from settings.
23. On Payment page, Make Signature with choose Payment gateway option and click Submit button then page will be navigate on Payment Transaction page.
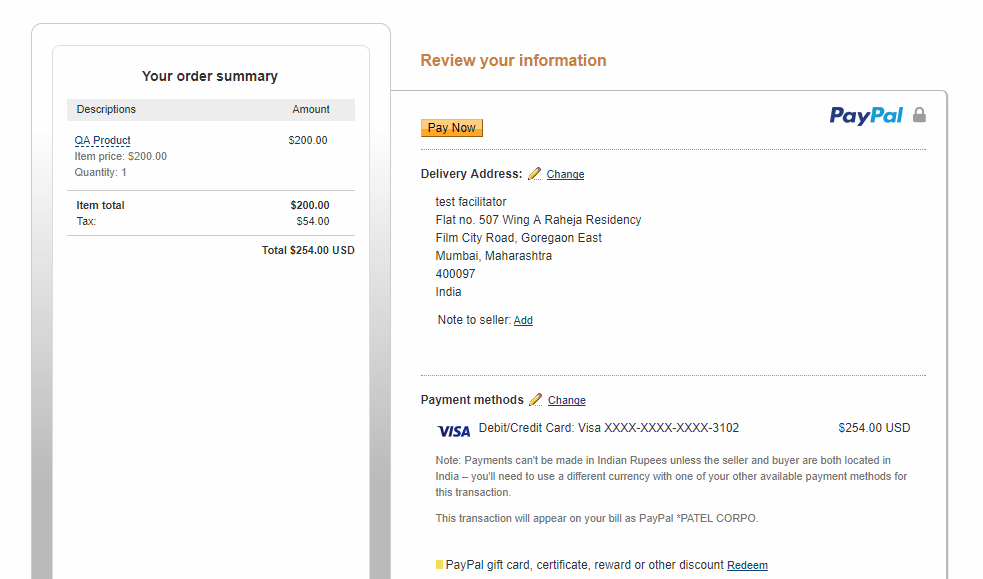
24. When click Pay Now on Paypal screen then payment has been successfully completed.
25. After Payment, Go to Payment Transaction page and generate Order details
26. After Successfully Payment, Go to those module details page which you have made payment and See details of status and Signature which is made by end user.
27. End user has made successfully payment, after then go on those module and again click Copy link OR Preview button then will be get THANK YOU Screen Means End user do not pay again which has been already done.

28. If end user want to use this License key on other places then they has must be click DeActive License button on current location.