
WhatsApp Business TemplateOverview :
WhatsApp Business Template helps users to create/manage WhatsApp business templates to send template messages using our extension.
Features :
- You can add a message template in a specific language when creating a template.
- You can create templates with the “Marketing” or “Utility” or Media Card Carousel category.
- You can create templates with various text, media, and interactive components, based on your business needs.
- You can also see Template Message Preview.
- When you send template create requests, Facebook immediately validates its category using Templates Guidelines.
Create WhatsApp Business Template
Users can create a WhatsApp Business Template in two ways.
- Facebook Developer page
- WhatsApp Business Create Template page
Create WhatsApp Business Template From Facebook Developer pageUser have to go and login to the developer’s Facebook page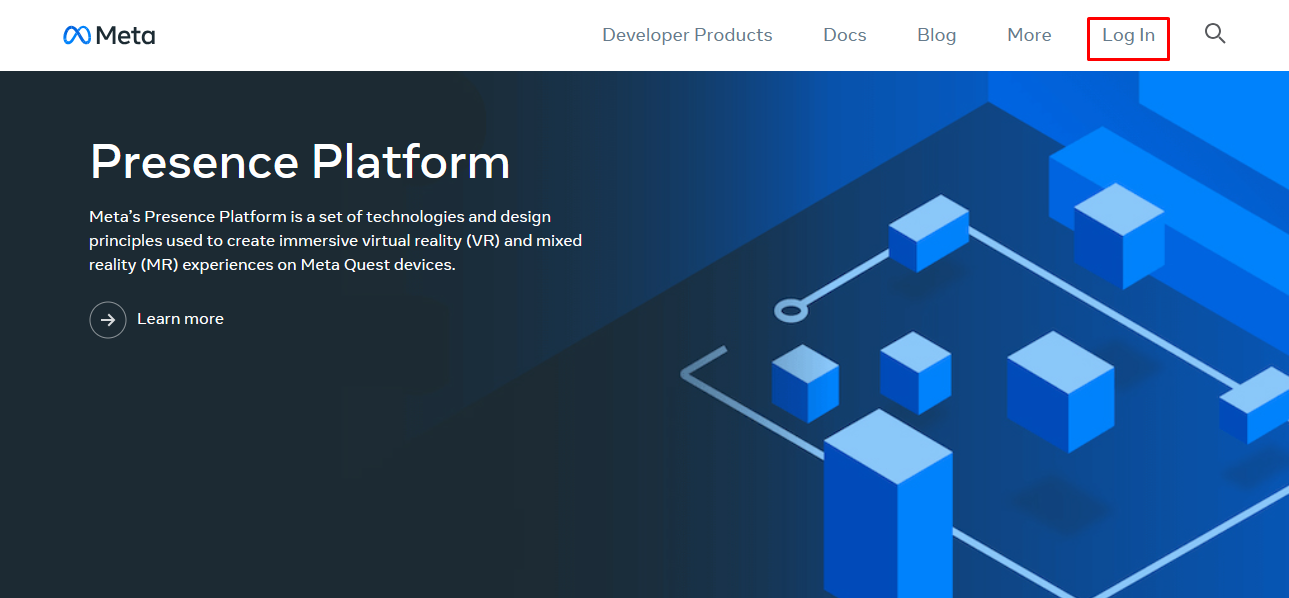
Once you login the page click on My App
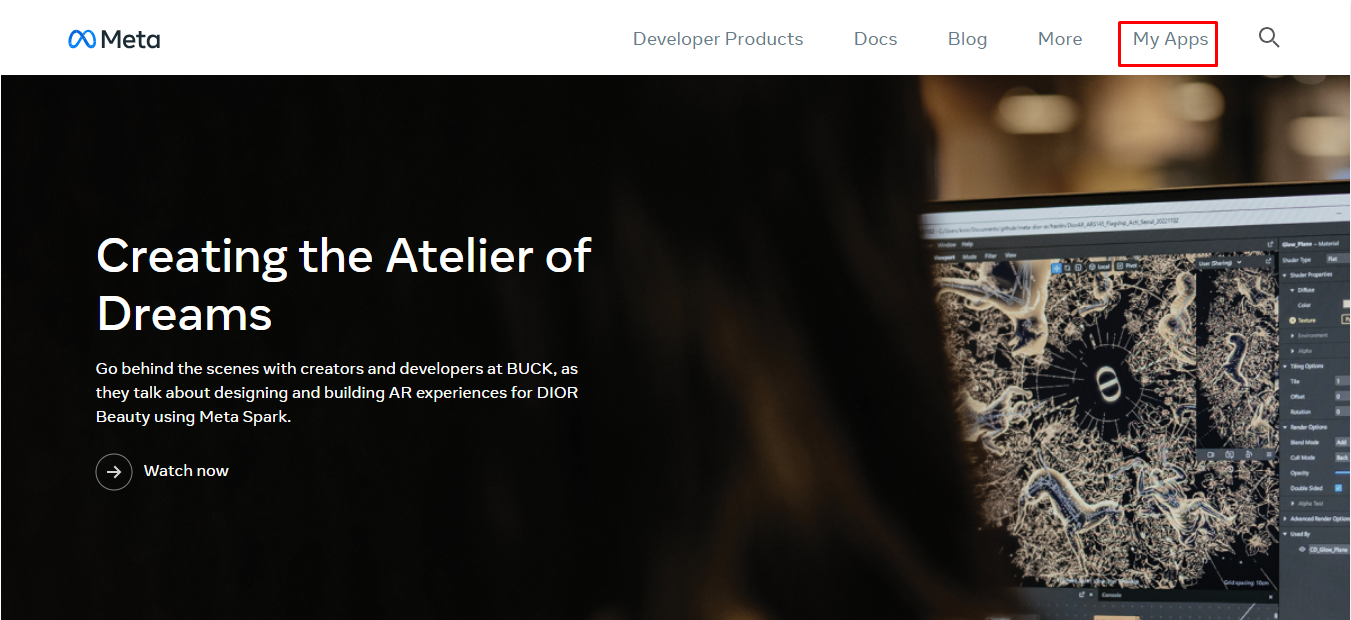
Once you click on My App the page will look like below screenshot, Click on your vTiger App
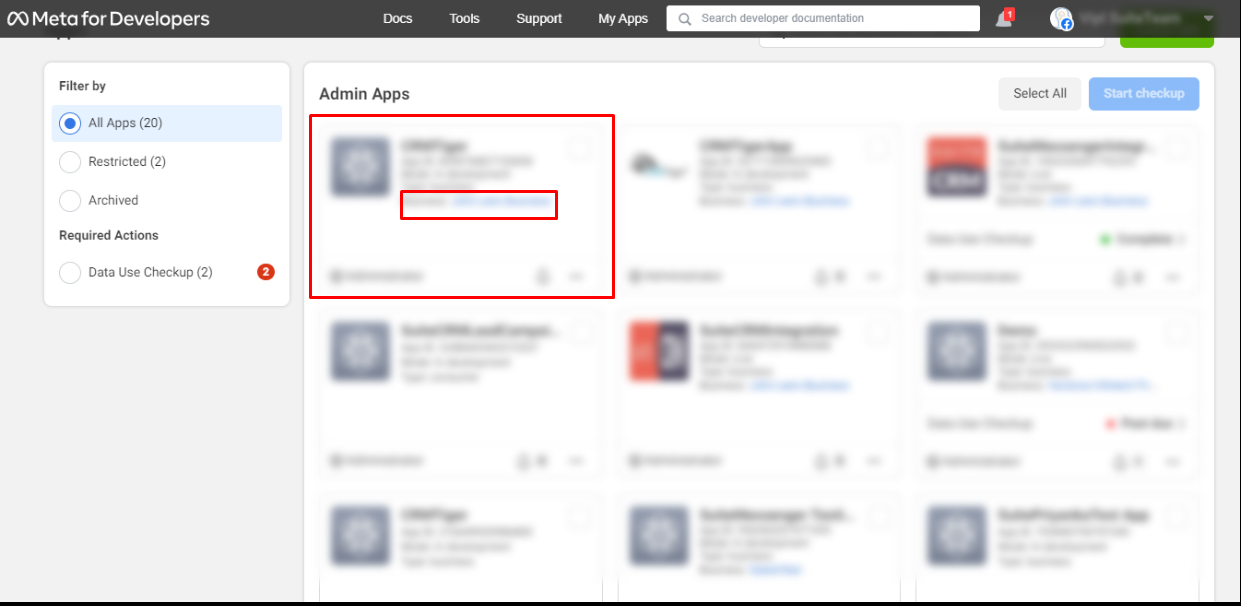
Once user click on vTiger app it will redirect to the App Dashboard, users have to click on WhatsApp in the sidebar > API Setup
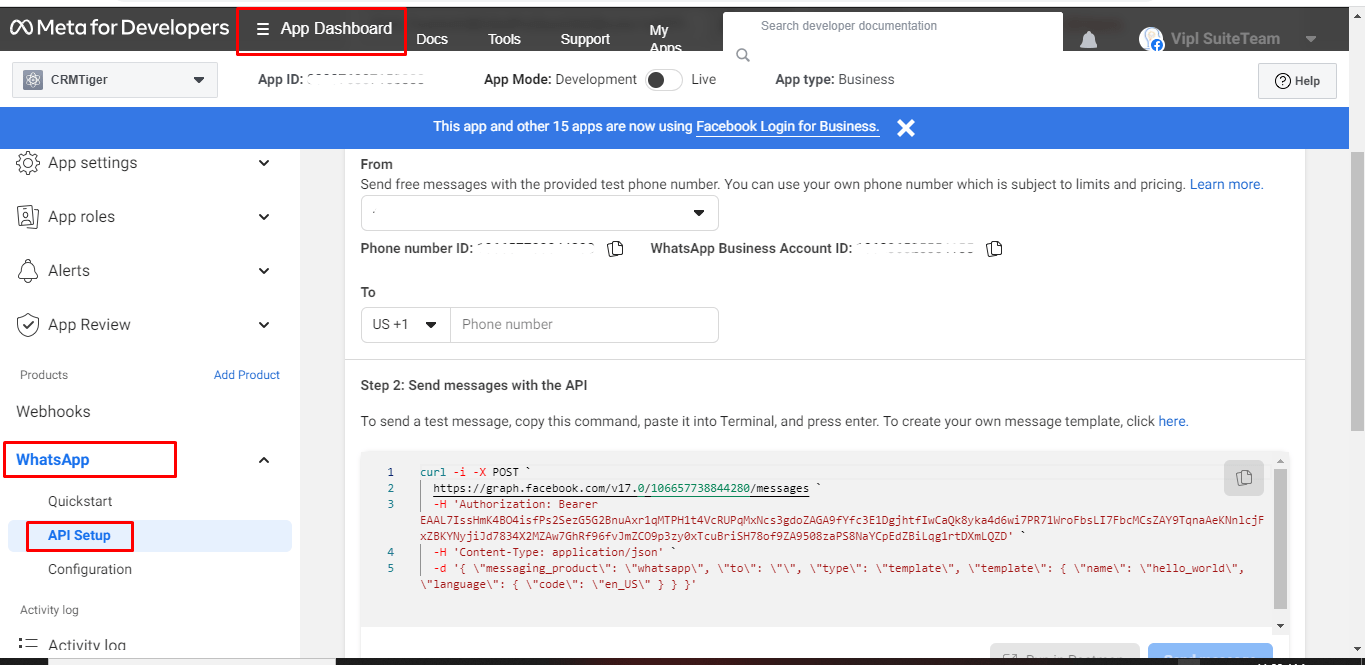
Once user click on vTiger API setup it will take user to the API setup page, scroll down to step 2 – To create your own message template click here
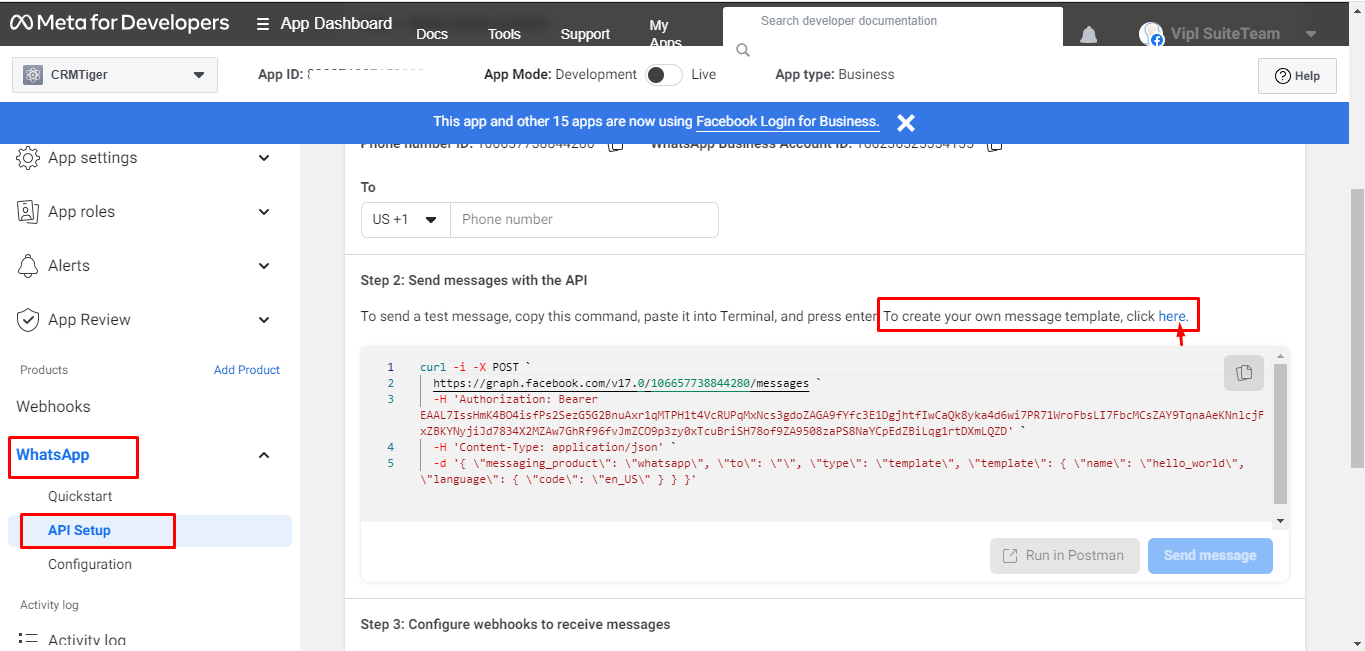
After clicking on the link, it will open the page displaying a list of the created templates.
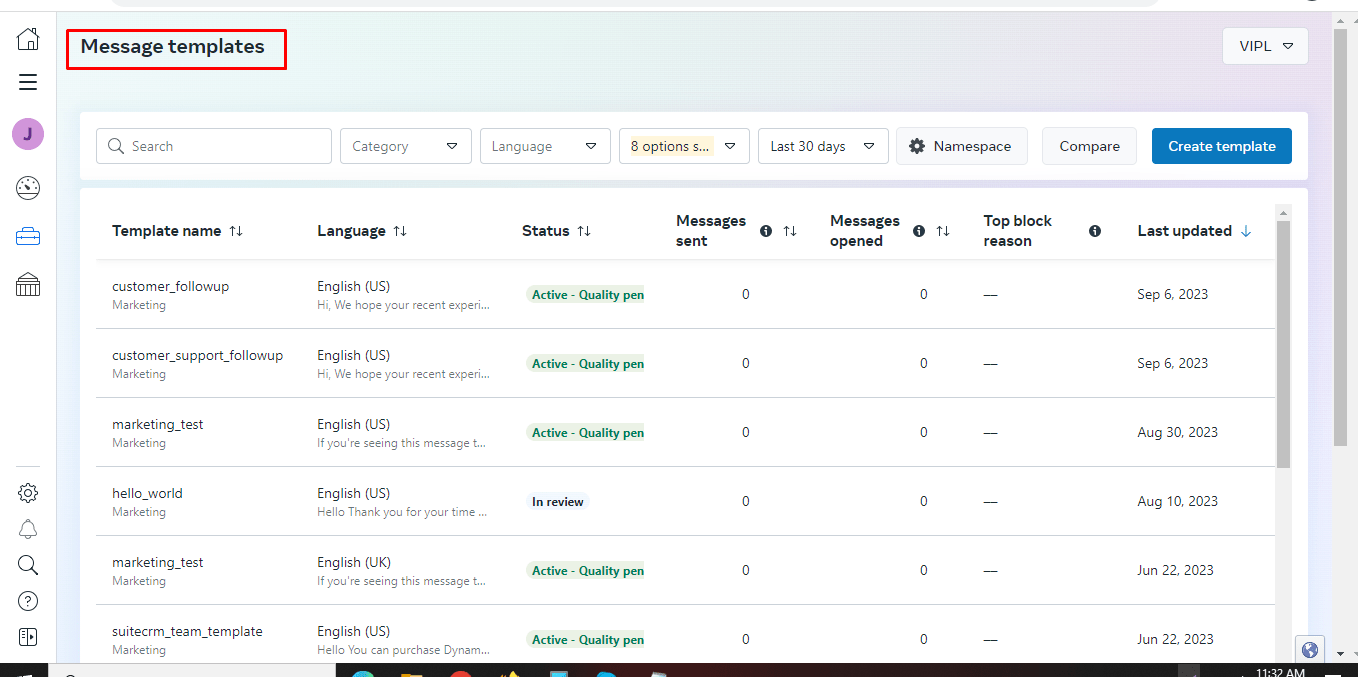
Click on create template button
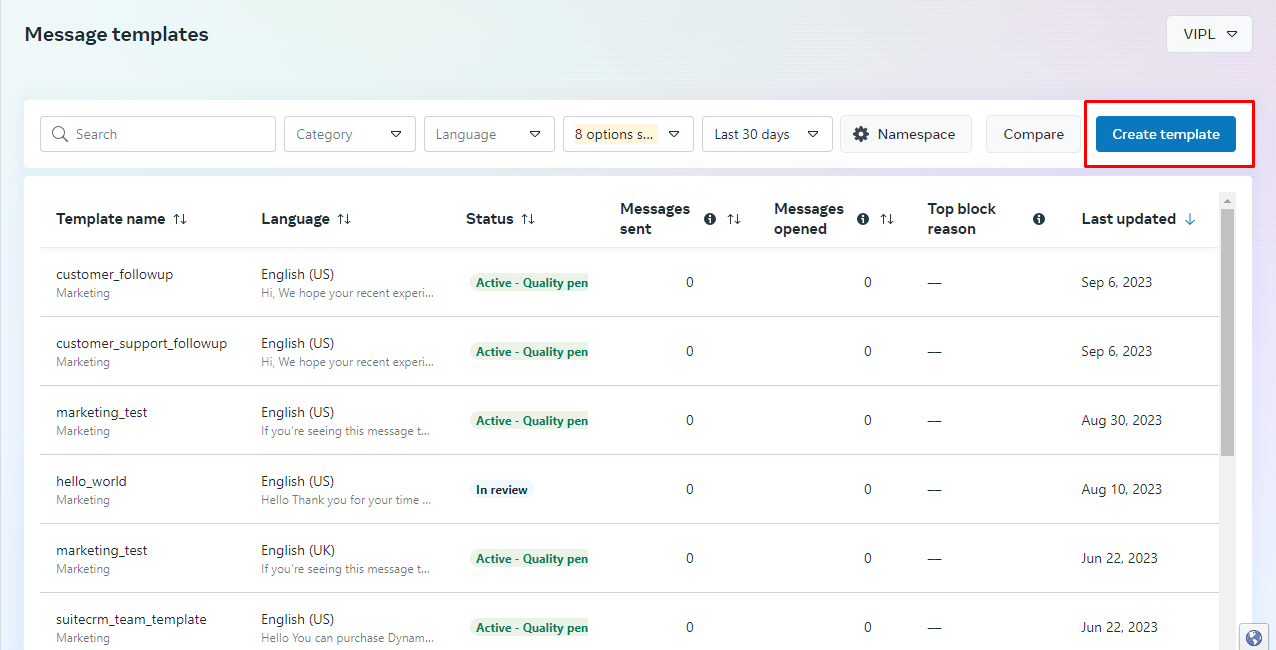
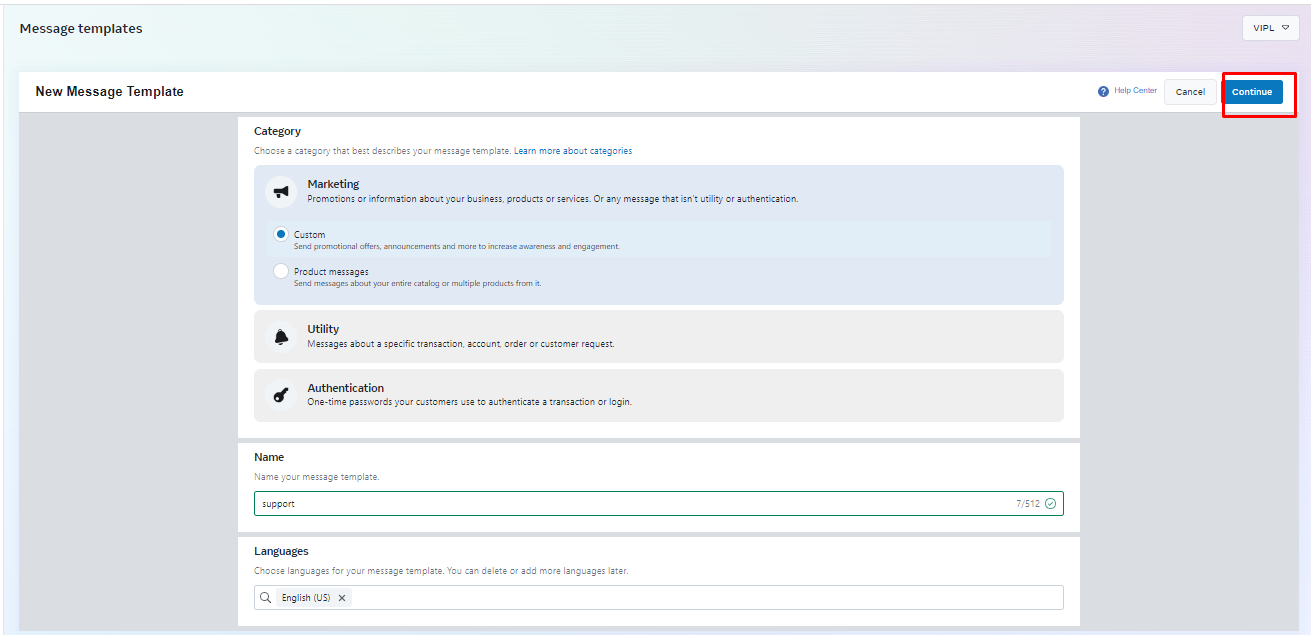
Users have to select the category, name and language of the Creating template.
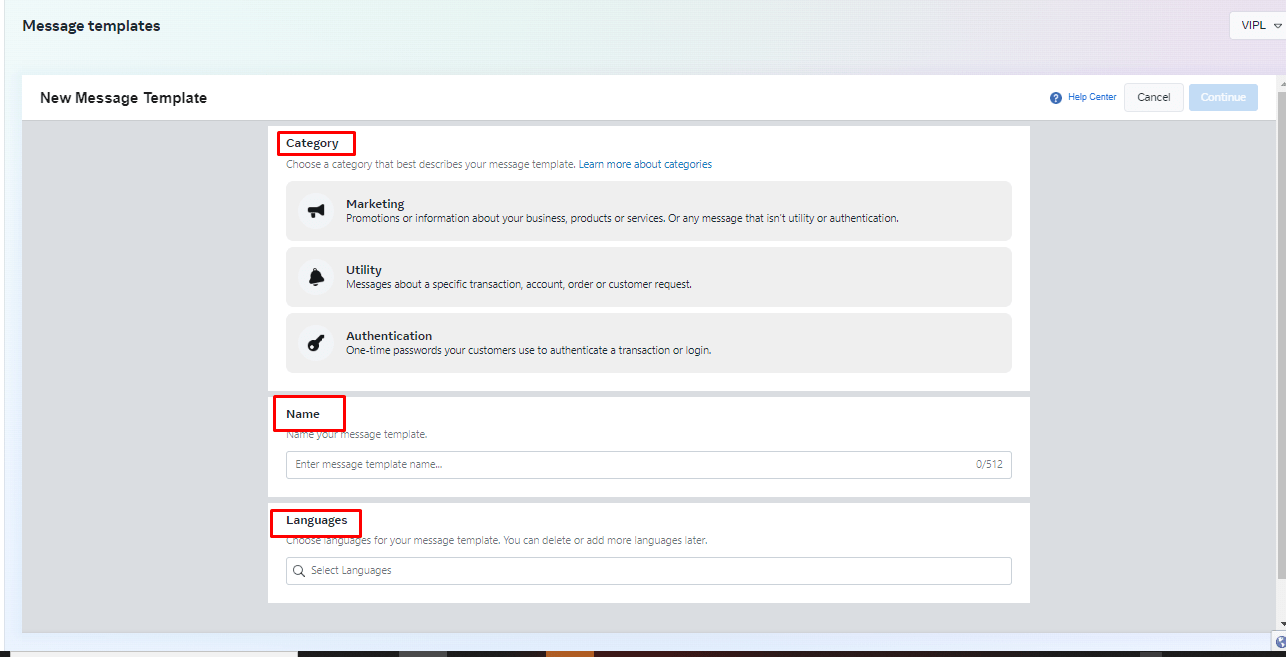
After selecting the category and language, and entering the template name, the ‘Continue’ button will be enabled, and the user will have to click on the ‘Continue’ button.
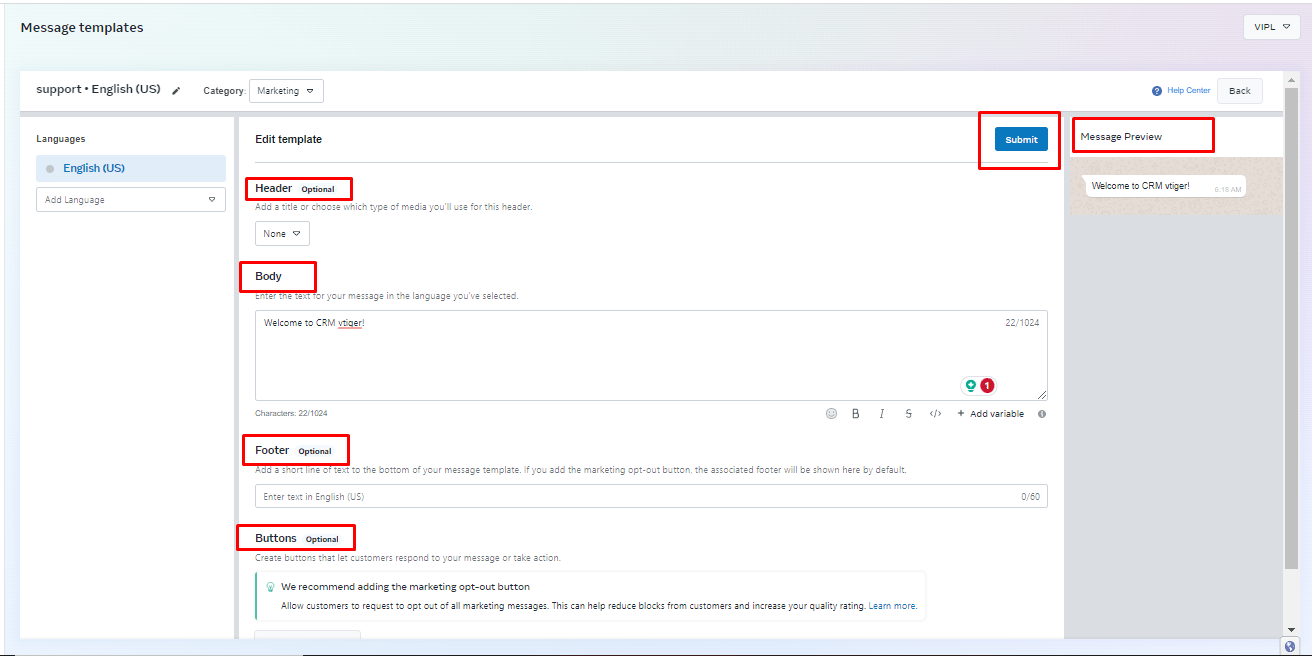
After the user clicks on ‘continue,’ they will be taken to the following page where they can add a header, body, footer, and buttons to the template.
Users can also preview how the message will be displayed. And at last By clicking the ‘submit’ button, the template will be created
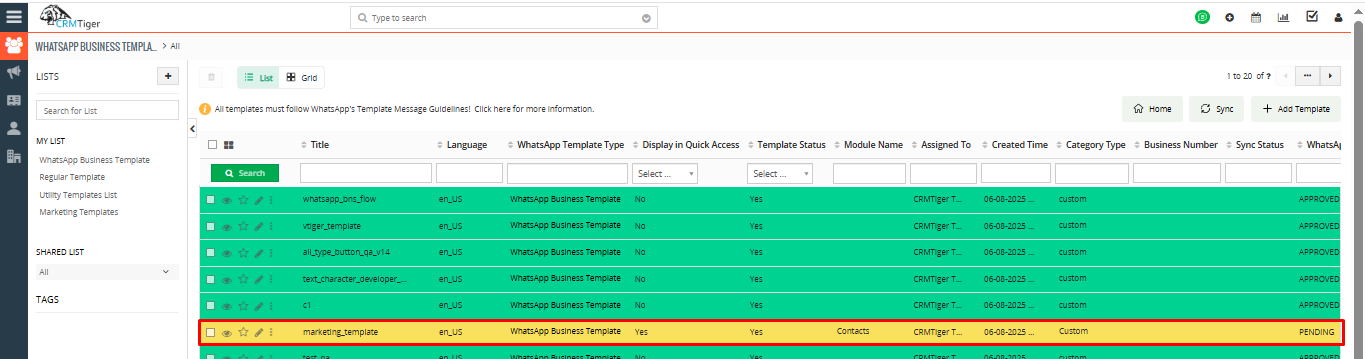
Once the template is created, it will be submitted to Facebook for approval, and users can view the status of the created template on the list page under the ‘Status’ column.
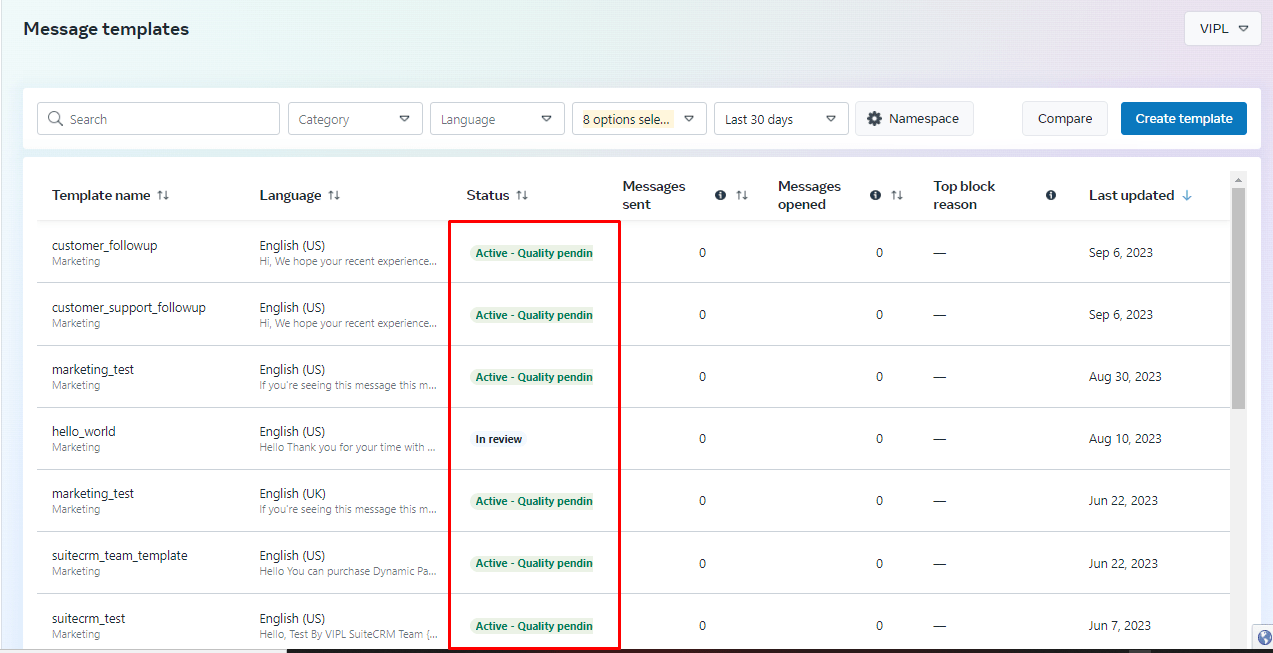
Once the template is approved by facebook, Template will automatically sync to the CRM WhatsApp Business Template list.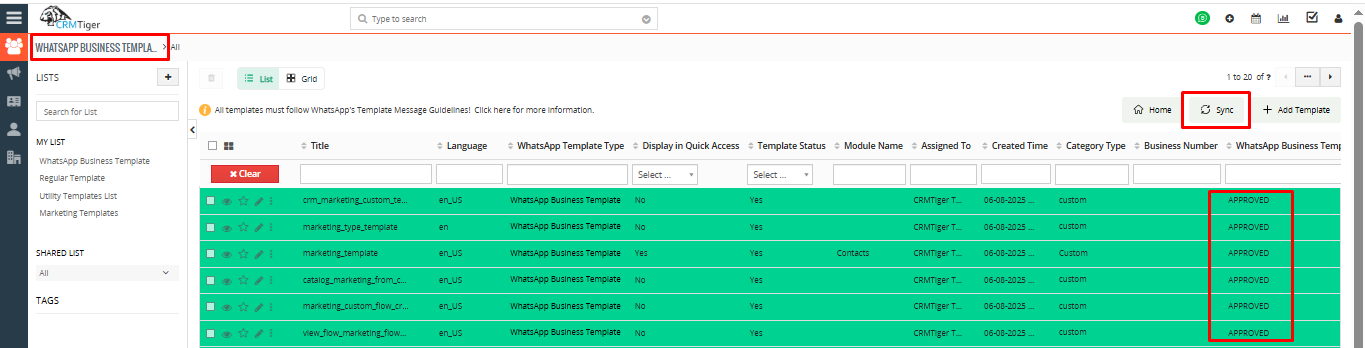 Category ValidationWhen submitting a template creation or edit request via API, you must specify a category based on the provided guidelines. The system will validate your selection and assign one of the following statuses:
APPROVED
Indicates that the category is correct, and the template has passed review. The template is now available for use in messages. A message_template_status_update webhook will be triggered with the event set to APPROVED
PENDING
Indicates that the category is correct, but the template is under review. The outcome will be communicated via a message_template_status_update webhook, which will update to either APPROVED or REJECTED.
REJECTED
Indicates that the category is incorrect A message_template_status_update webhook will be triggered with the event set to REJECTED and the reason specified as INCORRECT_CATEGORY.
Next Steps if Rejected
- Submit a new template with the correct category.
- Update the category manually.
- Request a review.
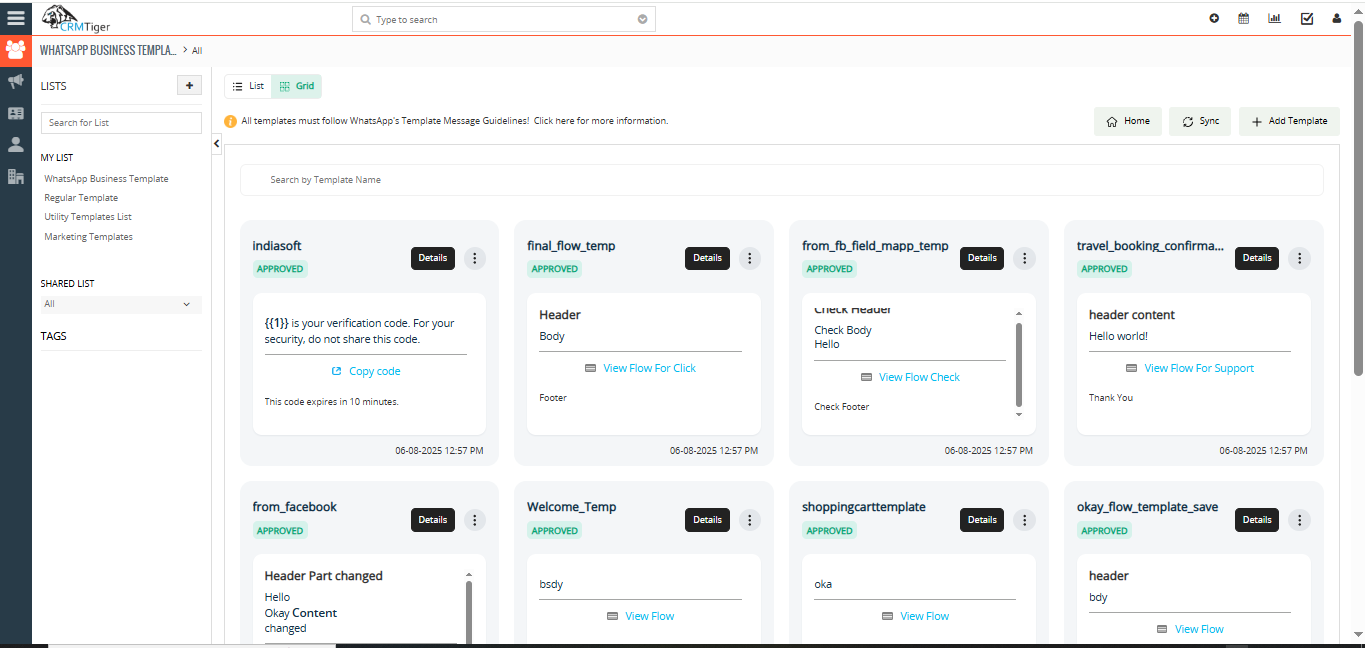
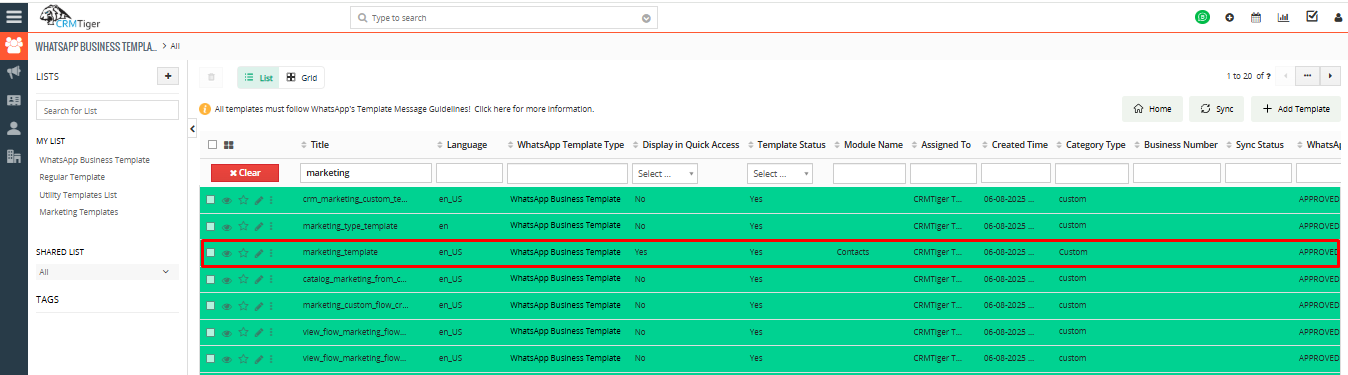
WhatsApp Business Template viewUsers can view WhatsApp Business Templates in two different formats:
- List View – Displays templates in a vertical list format for easy scanning.
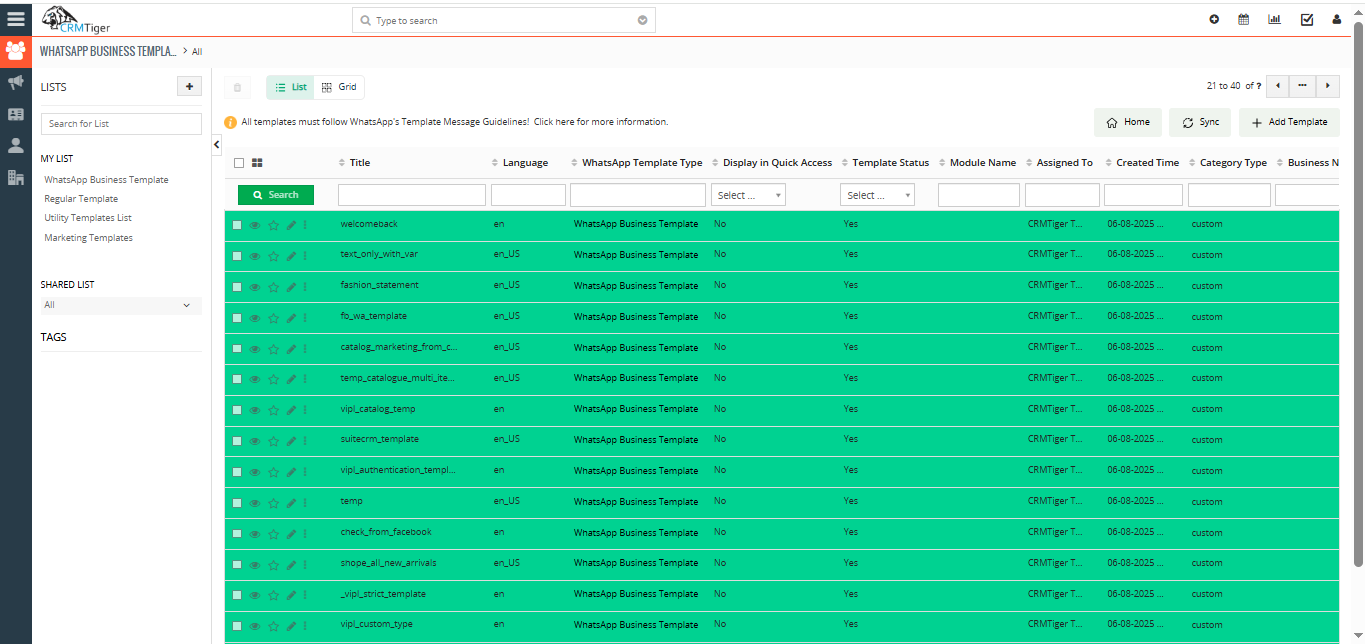
- Grid View – Displays templates in a card/grid layout for a visual overview
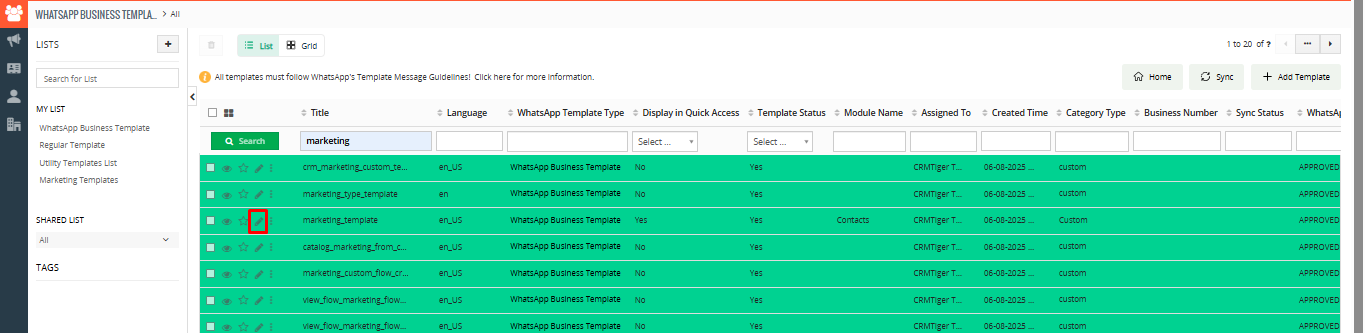
 The user can view Template details, edit Templates, and delete templates as shown in the screenshot below
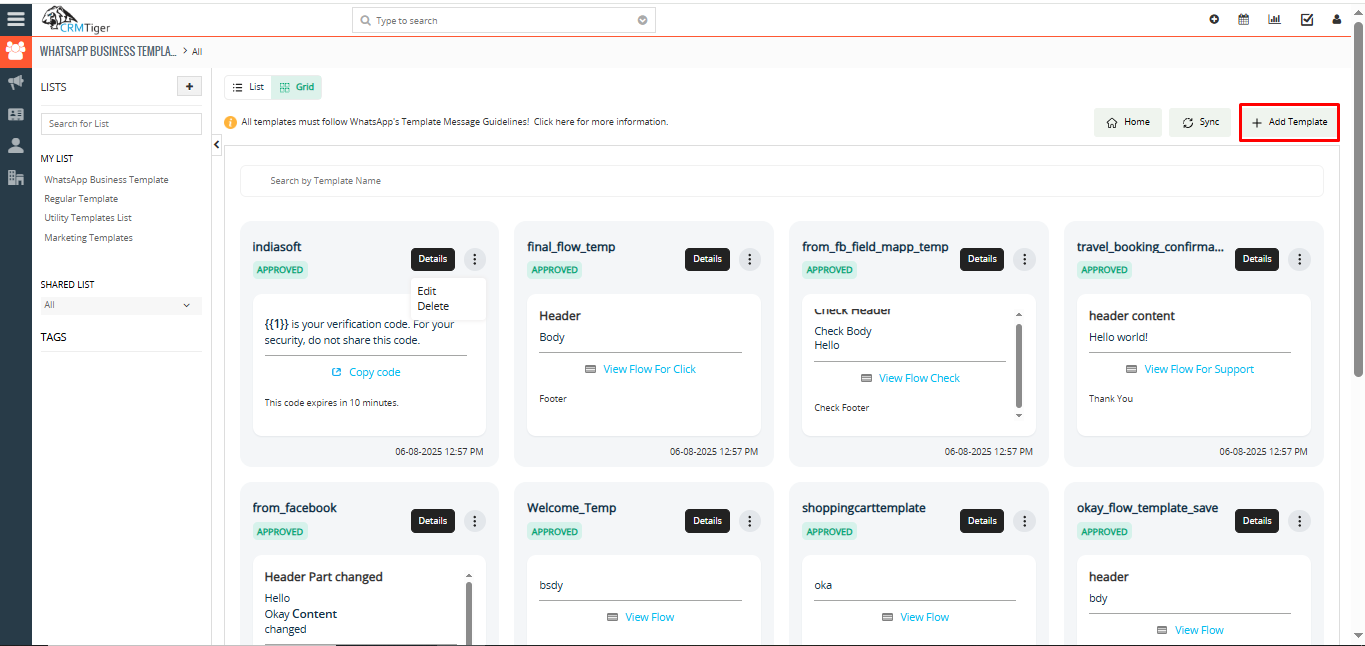
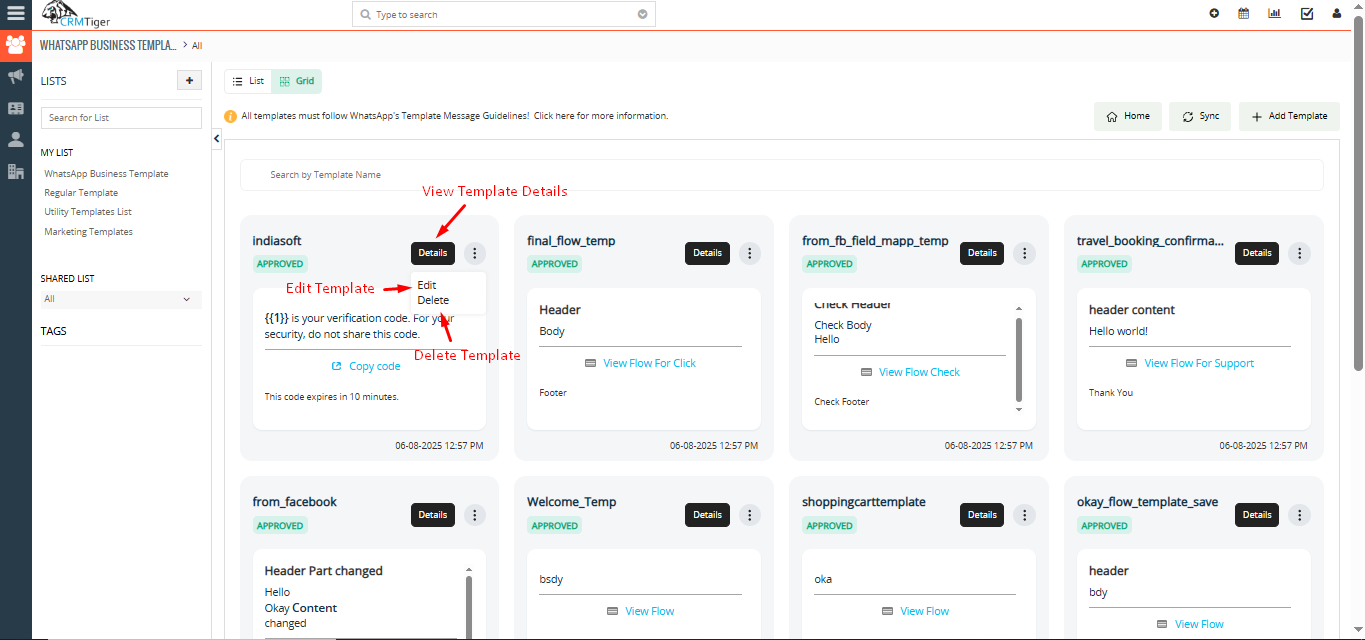 Create a WhatsApp Business TemplateClick on ‘Add Template’ as shown in the screenshot below to create a WhatsApp Business template
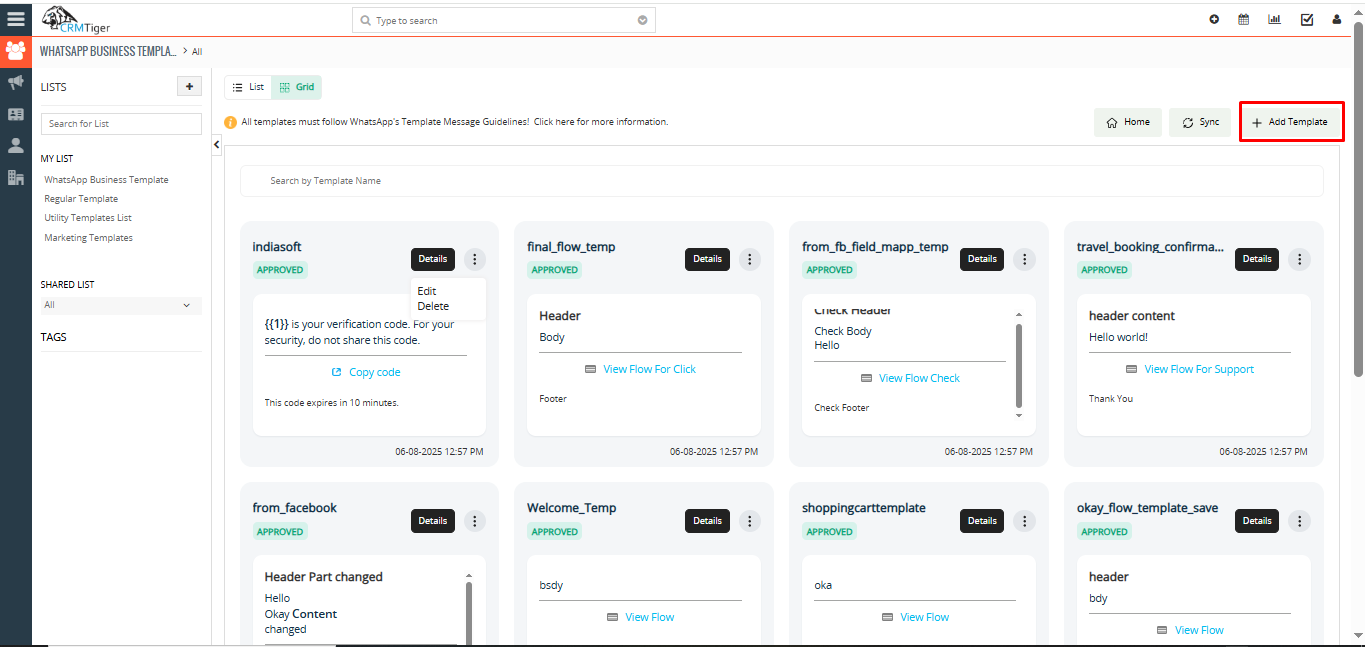
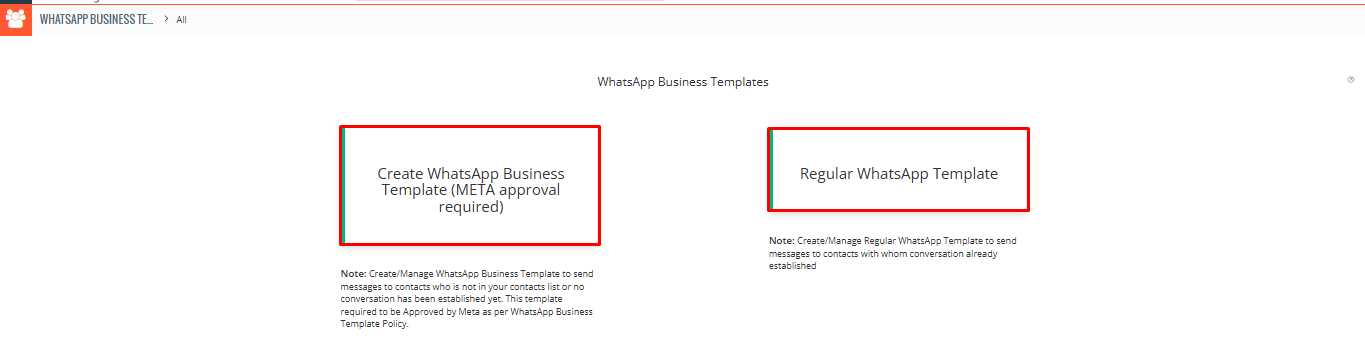 WhatsApp Business TemplateWhatsApp Business template used to send template messages to contacts in which conversations have not been established. It means you’ve to first approve templates with WhatsApp and it will take 1-5 days time by WhatsApp to approve templates.
Once the template has been approved by WhatsApp then only you can send template messages to unknown contacts.Regular TemplateRegular template used to send template messages to contacts in which conversations have been established.
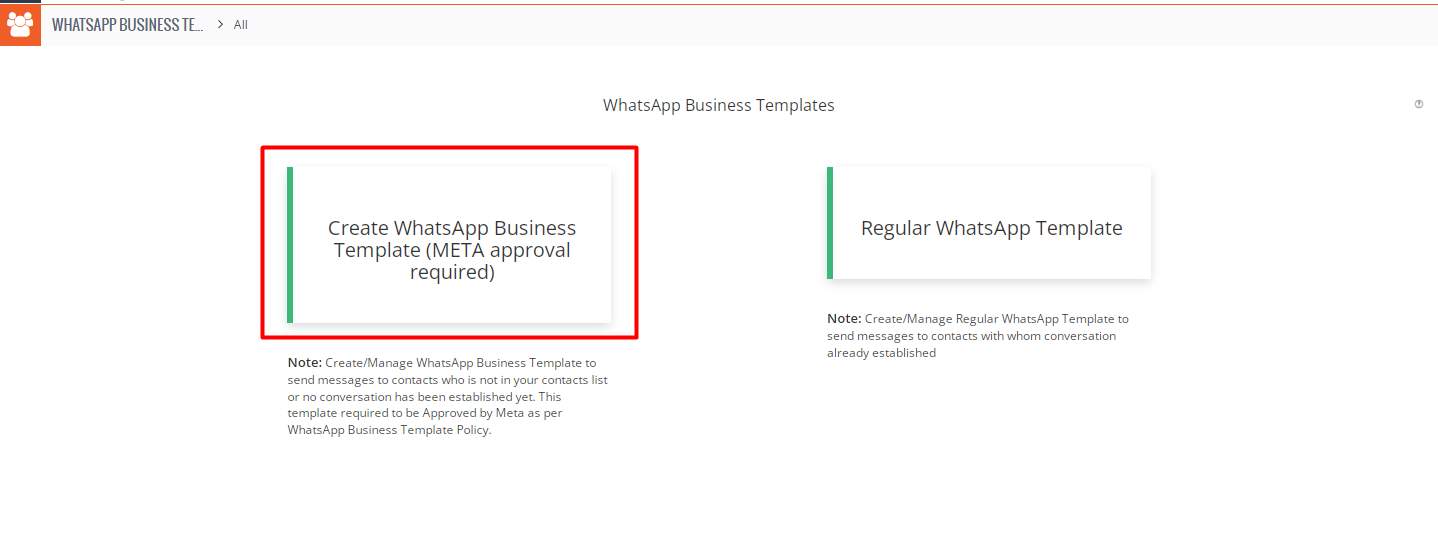
You can send any templates with text, media or video to promote your business / services / products to contacts to their WhatsApp number.Setup Regular WhatsApp TemplateTo add Regular Template click on the “Regular WhatsApp Template” widget as shown in the below screenshot. To create WhatsApp Business Template click on “+ Add WhatsApp Templates” button as shown in below screenshot. Click on “Create WhatsApp Business Template(META approval required)” widget as shown in below screenshot.
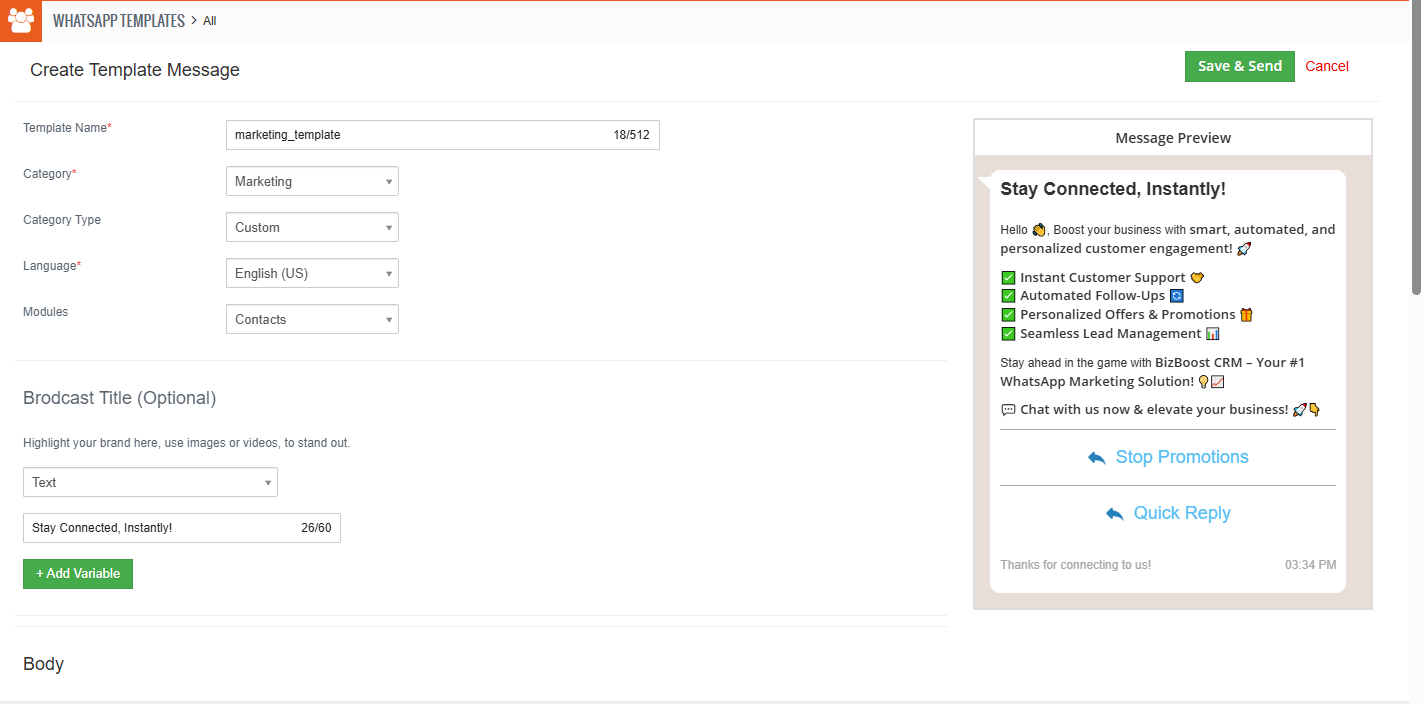
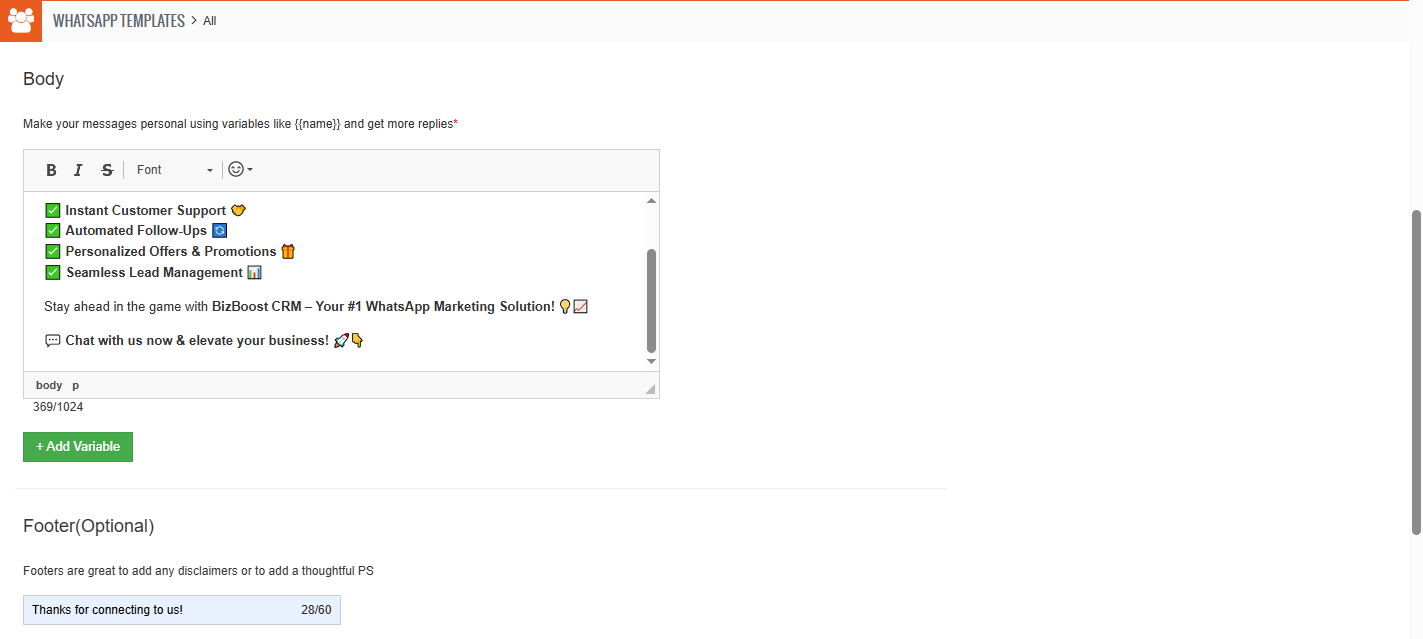
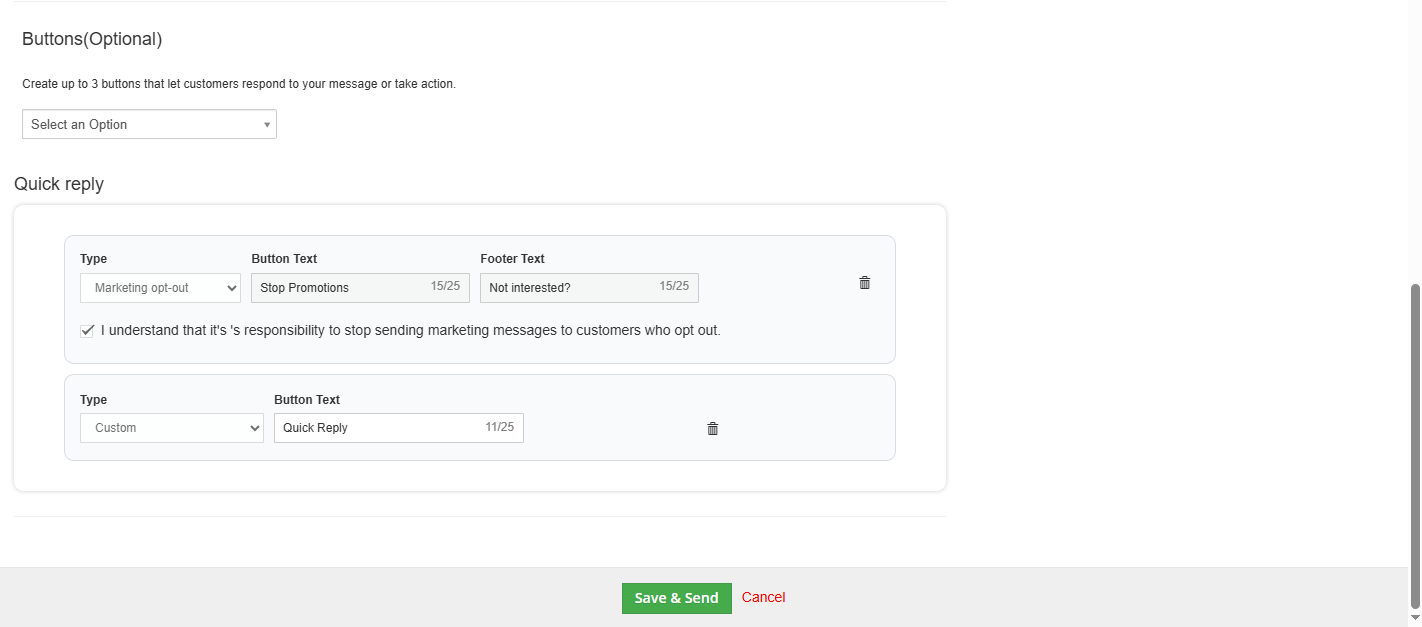
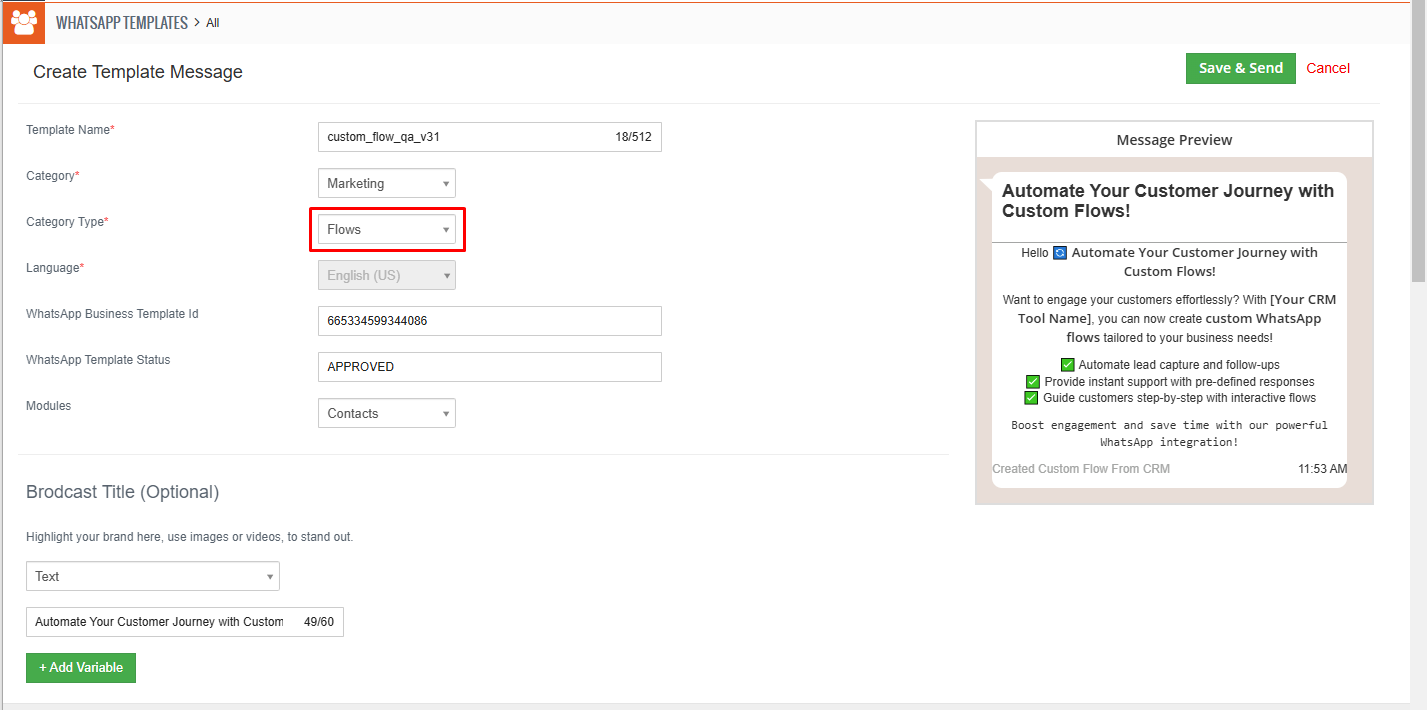
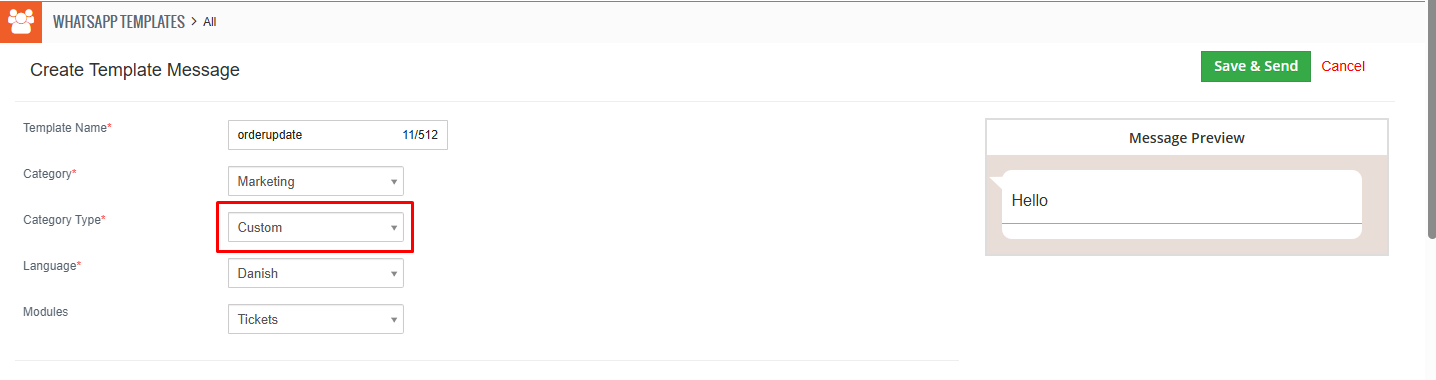
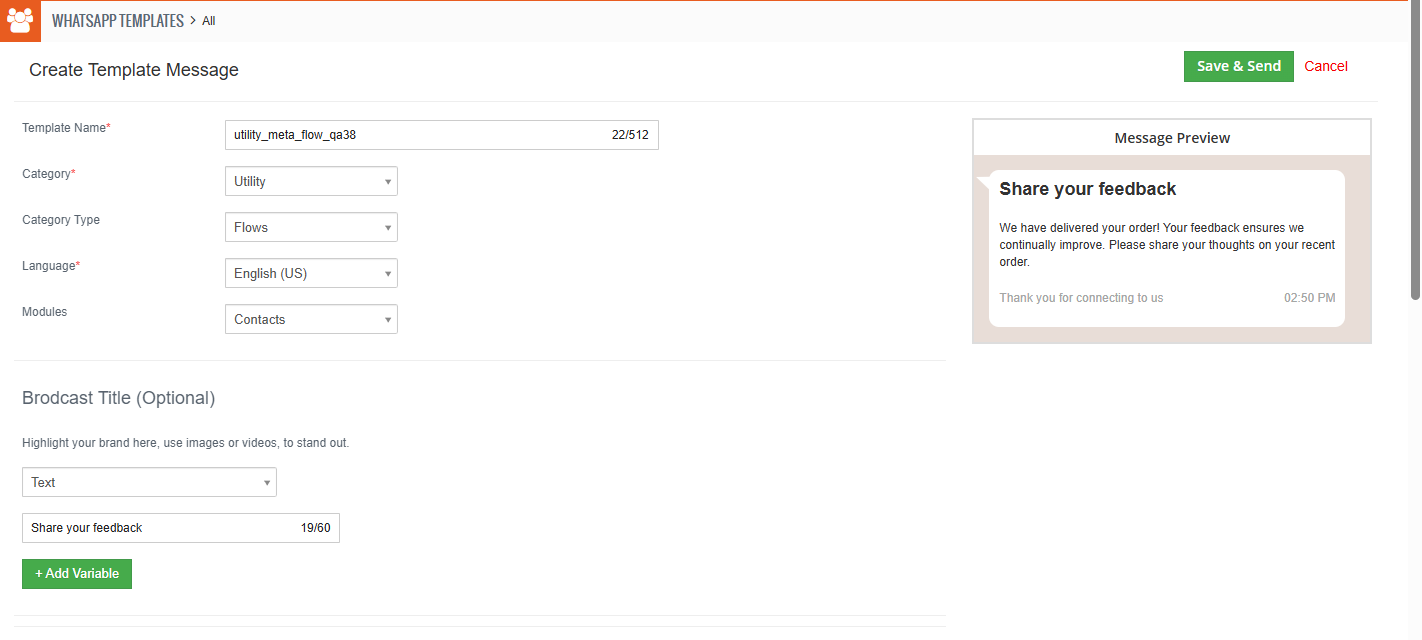
Enter all details as shown in the below screenshot. Template Name: Enter the template name with lowercase, numbers, and underscores. Category: Select template category. Language: Select template specific language. Broadcast Title:Headers are optional components that appear at the top of template messages. Header Type: Select header type for template. Body: Add body text with variables. To Add Variable in body click on “+ Add Variable” button. Footer: Enter Footer text. Footers are optional that appear immediately after the body component. Buttons: Select buttons from button type dropdown. Buttons are optional. It’s an interactive component that performs specific actions when tapped. Limitations: MarketingThe marketing category in WhatsApp Business templates is used for business-initiated interactions to promote products or services. These templates can help businesses increase awareness, drive sales, and more
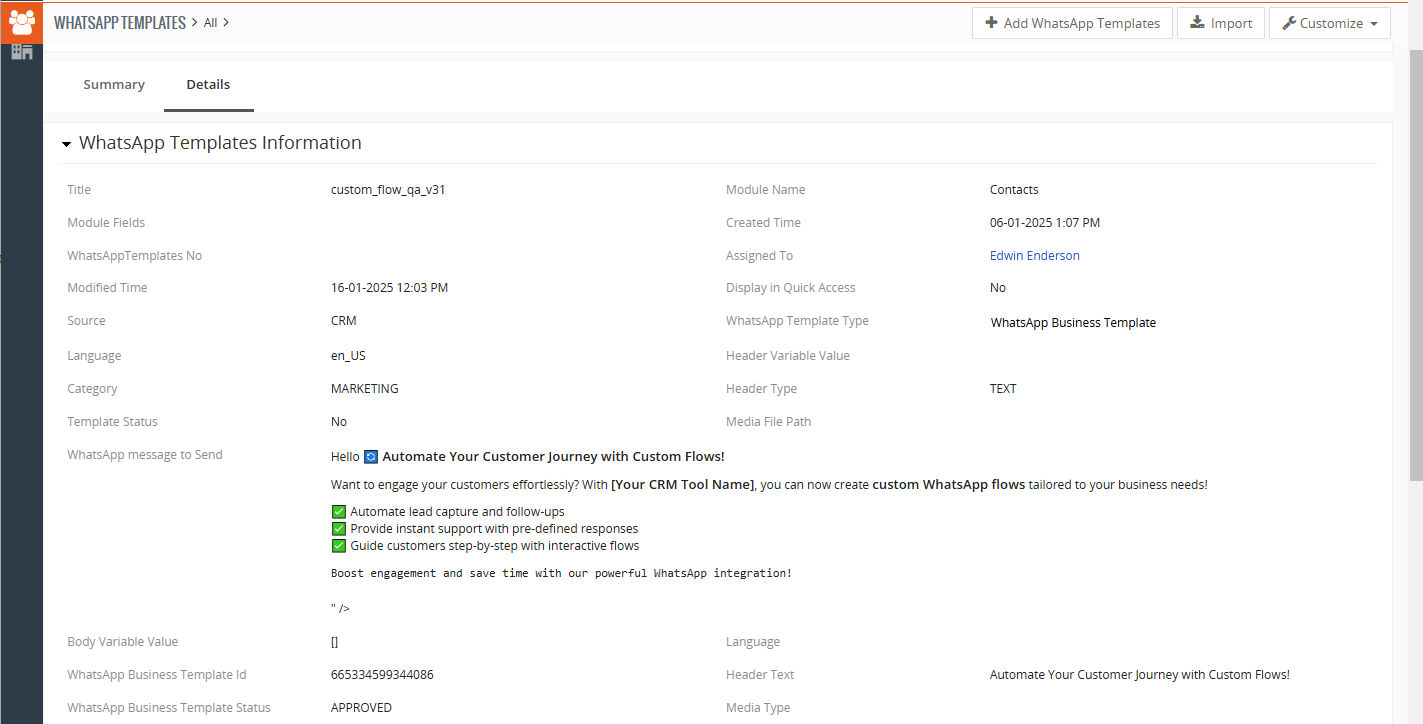
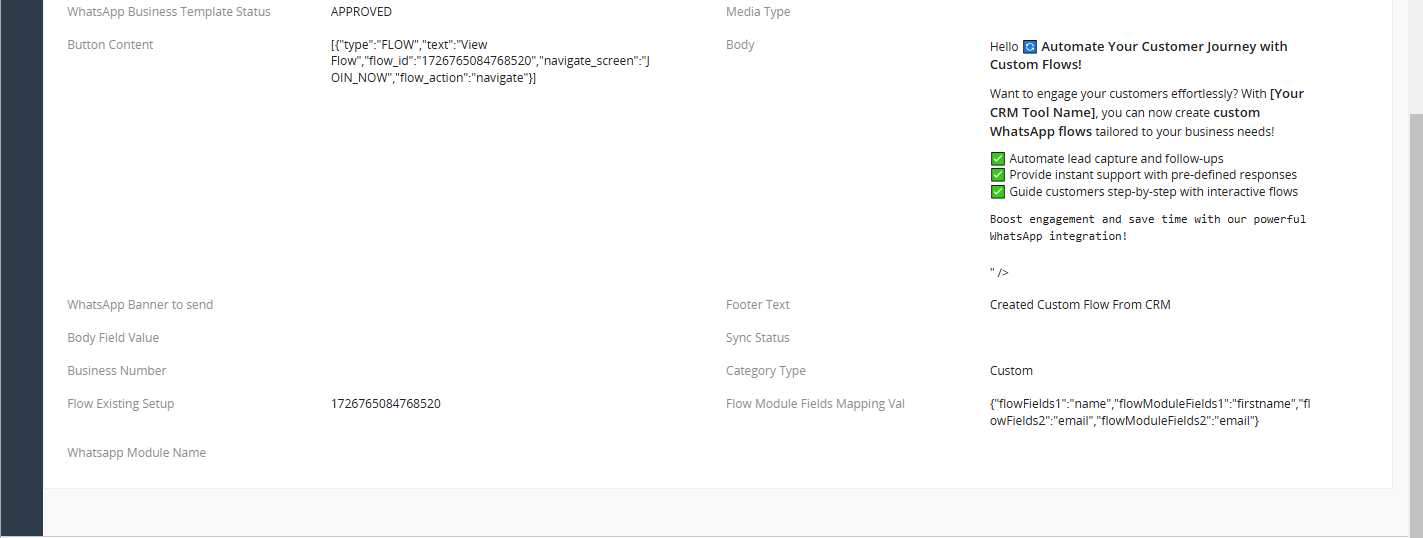
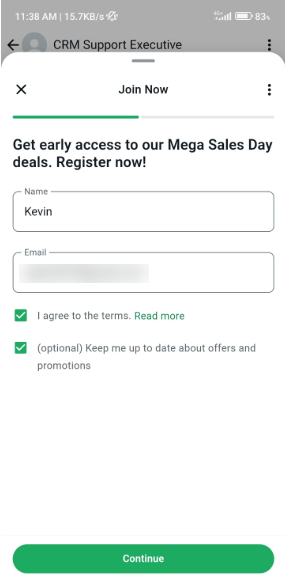
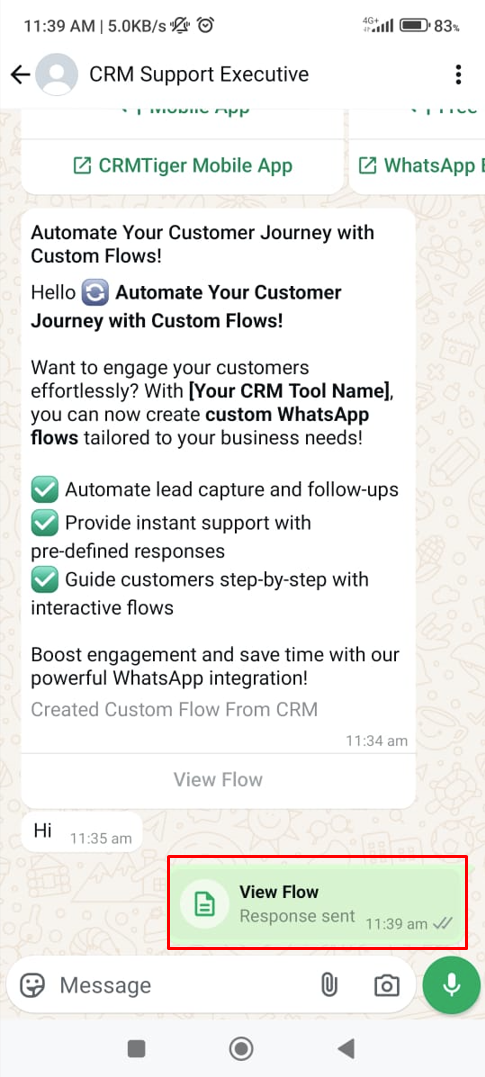
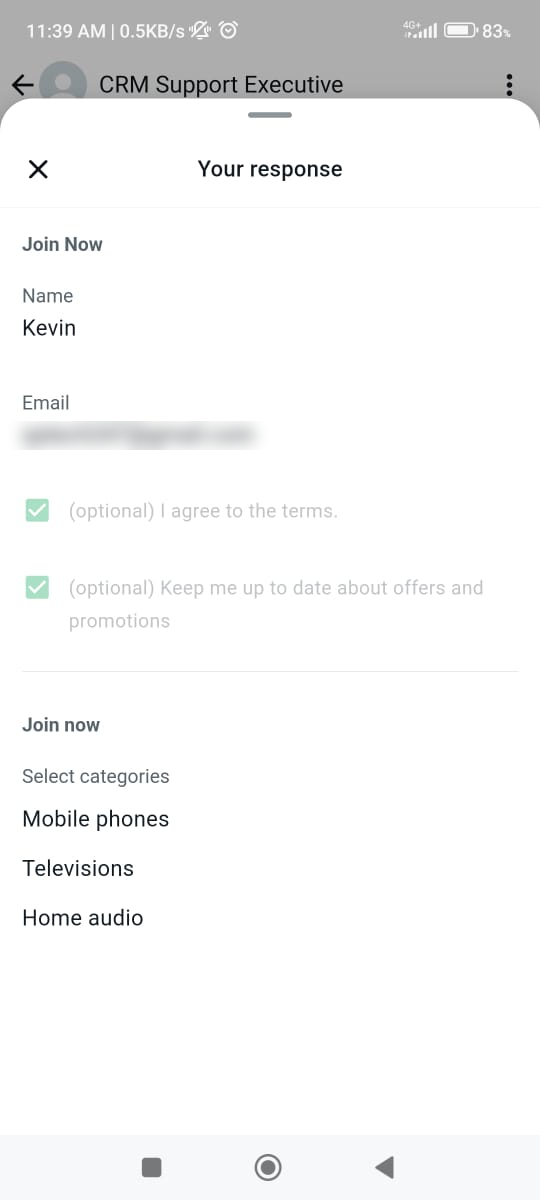
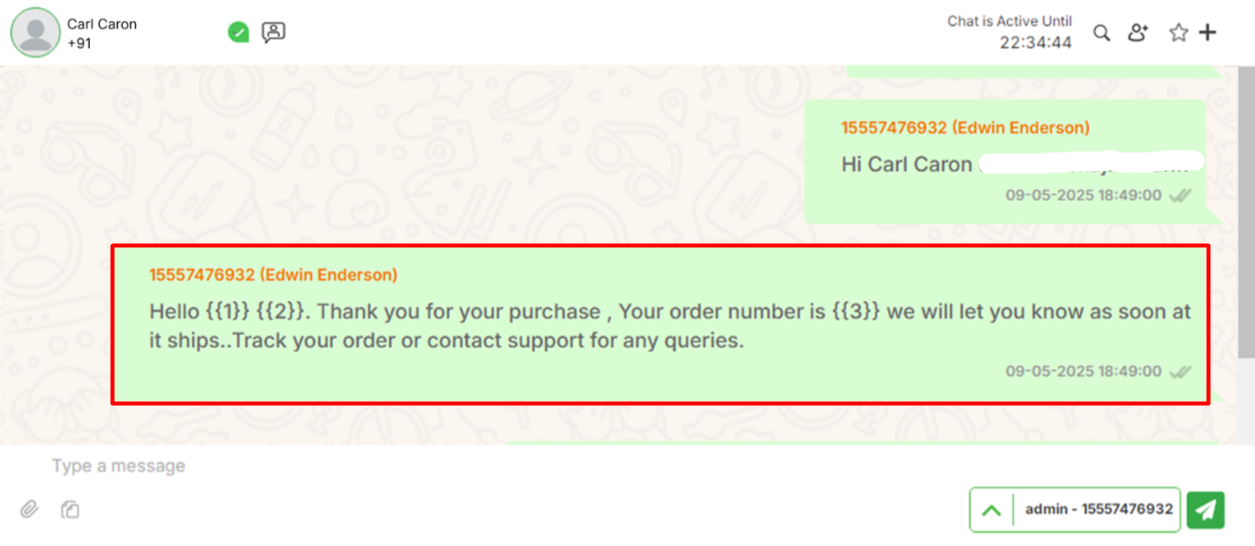
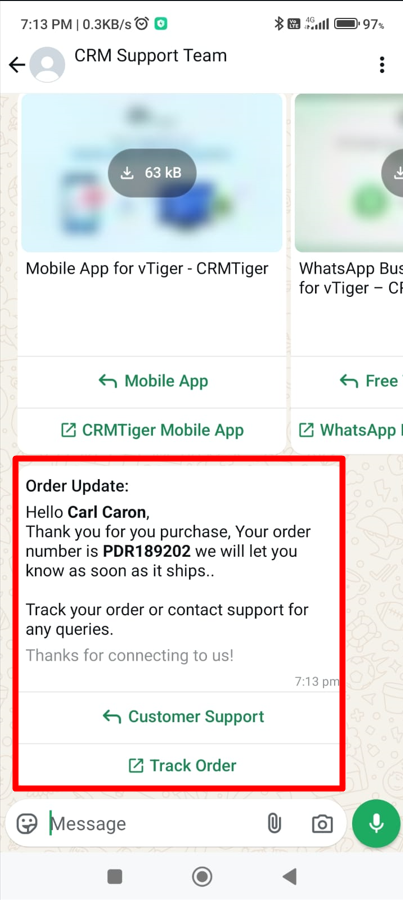
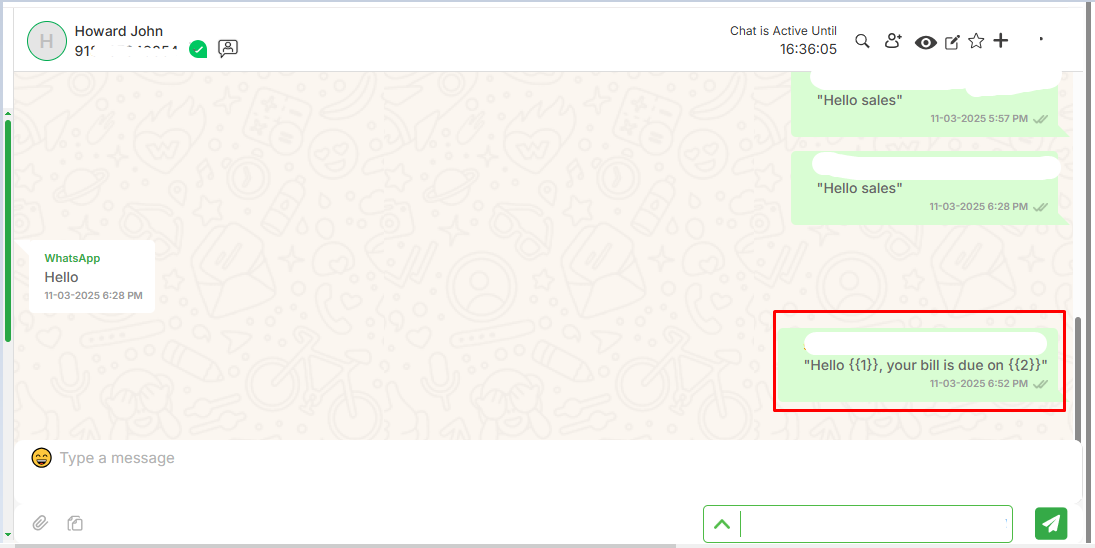
Here in the marketing category there are two category types . CustomCreate Custom Template : During the creation of flow templates, certain fields must be completed to ensure proper configuration. These fields include: Steps to Create a New Marketing Template using custom template type. Message Preview will be displayed as mentioned in below screen. To send template create requests on Facebook side click on “Save & Send” button as shown in below screenshot. Once you click on ‘Save & Send,’ a request will be sent to meta for template approval. Until it is approved, the status will be shown as ‘Pending. Once it is approved by Meta, the status will be updated to ‘Approved.’ You can also edit the template from listview as shown in the screenshot below. You can view the template if it has been rejected by Meta, as shown in the screenshot below. These fields are integral to structuring an effective and user-friendly flow template. In the screenshot below, the detailed view of the flow is displayed. This view showcases all the information entered by the user during the flow creation process. It includes key details such as the message body, recipient fields, and any specific parameters or customization added. This summary provides a comprehensive overview, ensuring that the flow setup aligns with the intended configuration. The highlighted message corresponds exactly to the message content displayed in the “Body” section and the “WhatsApp Message to Send” fields in the detailed view of the WhatsApp template. This ensures consistency between the template details and the actual message received in the chat. The recipient can view the intended message as formatted and structured during the template creation. The received flow template message will appear on the recipient’s side in a clear and structured format. It will display all the relevant information as entered by the sender, ensuring easy readability and accessibility for the recipient. The design will maintain consistency with the sender’s message flow while adapting it for seamless viewing on the recipient’s end. As displayed in the screenshot above, there is a button labeled ‘View Flow’. By clicking on this button, the user will be directed to the screen shown below. On this screen, the user will be required to fill in their details, including Name and Email. Once the information is entered, the user can proceed by clicking on the ‘Continue’ button to move to the next step. This ensures the system captures essential user details for further interaction or communication. After clicking the “Continue” button, the user will be directed to the next screen, as shown below. Once the user clicks on the “Confirm” button, the system will generate a response in PDF format. This PDF will contain all the details submitted by the user in the form, organized in a clear and professional layout. The content of the PDF will match the data displayed on the confirmation screen, ensuring accuracy and completeness. The user can then download or view this PDF as shown in the accompanying screenshot. The response will display the information entered by the user in the form. This includes all the fields filled out by the user, such as name, email,and interested areas provided. The displayed details will be formatted in an organized manner, reflecting the exact entries made during the form submission process. This ensures transparency and allows for review or confirmation of the submitted data. Note: Flow category type message only be displayed in mobile WhatsApp, it will not be displayed in Web WhatsApp view.
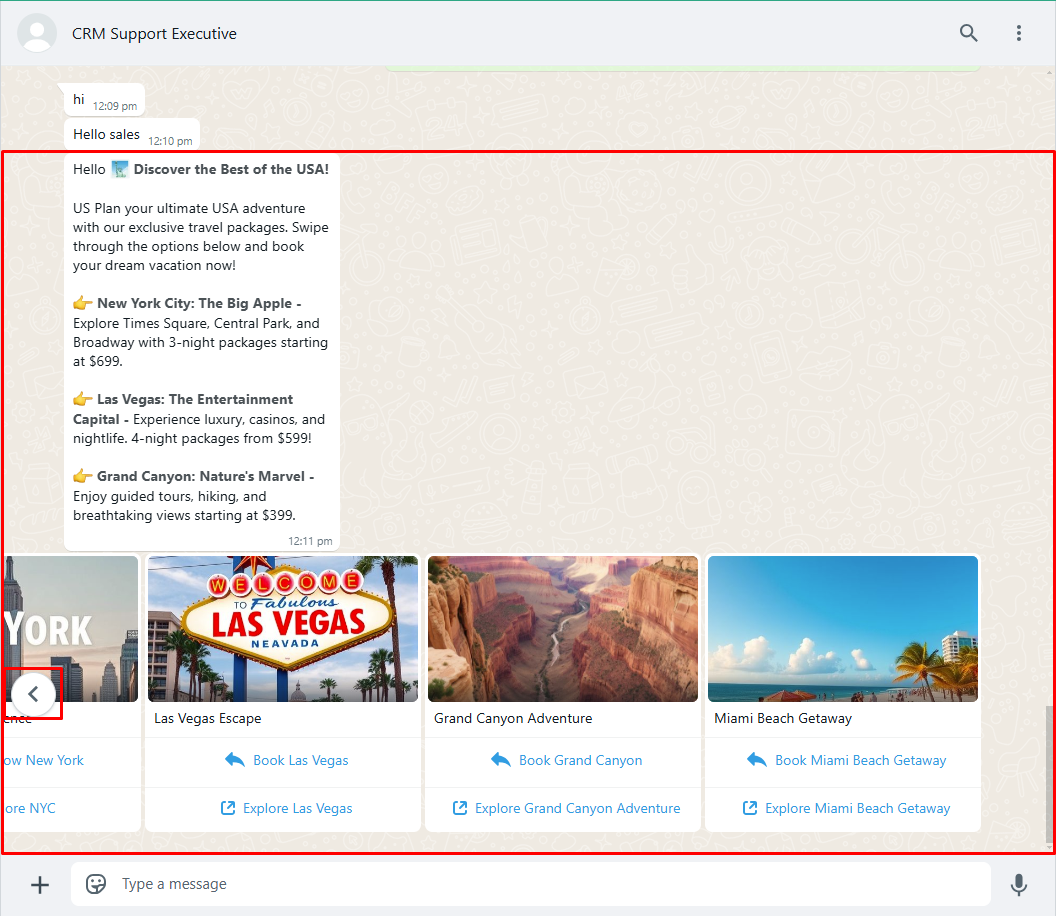
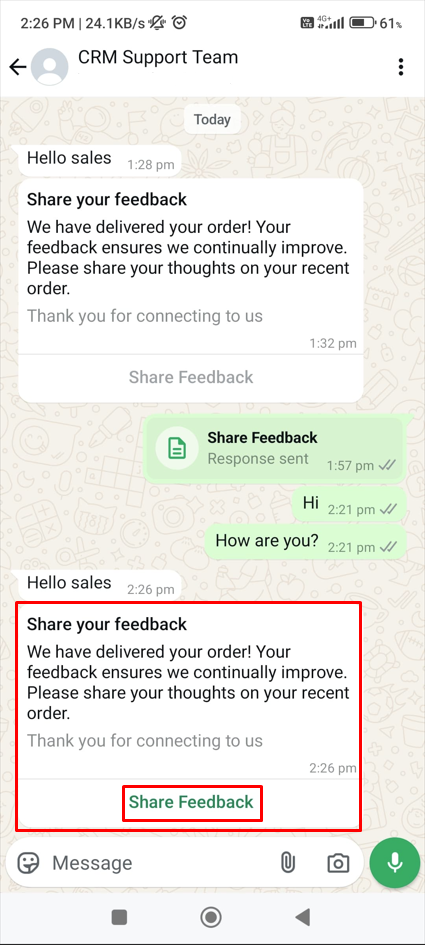
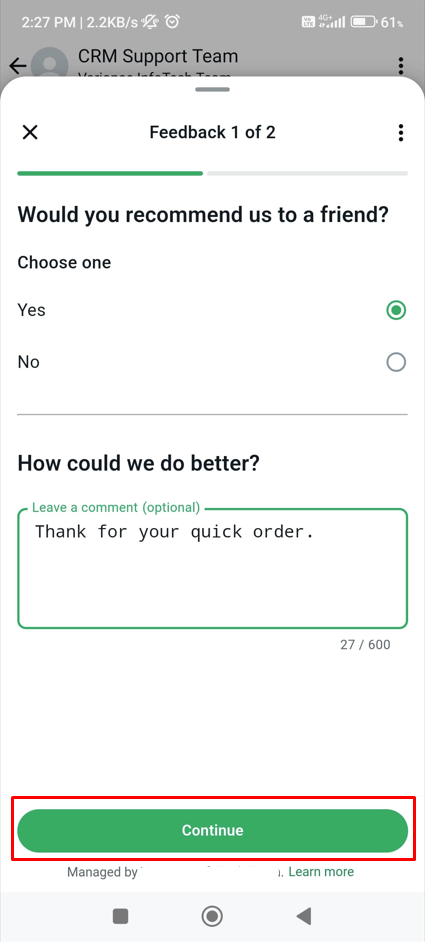
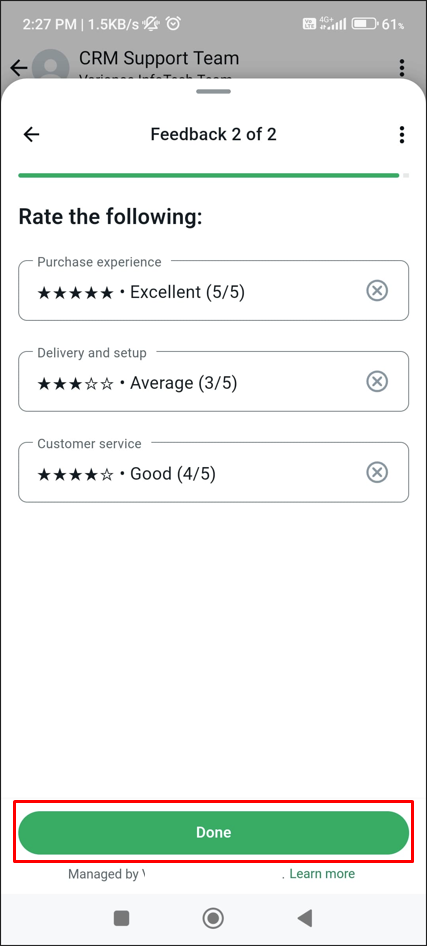
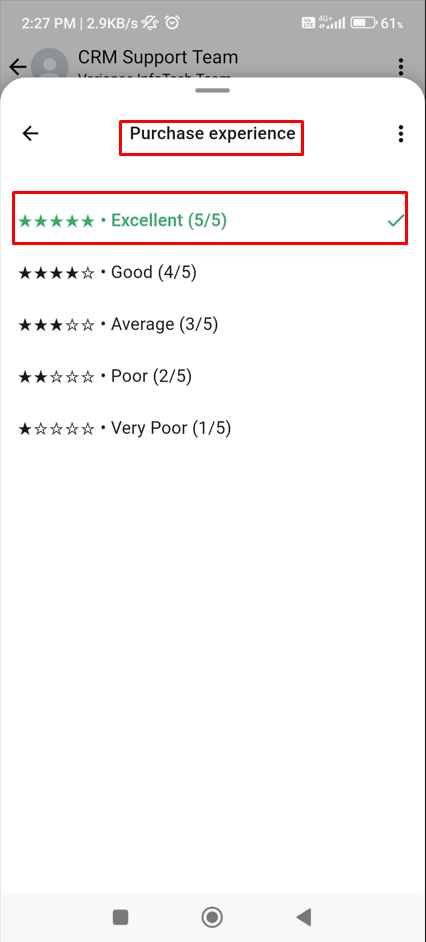
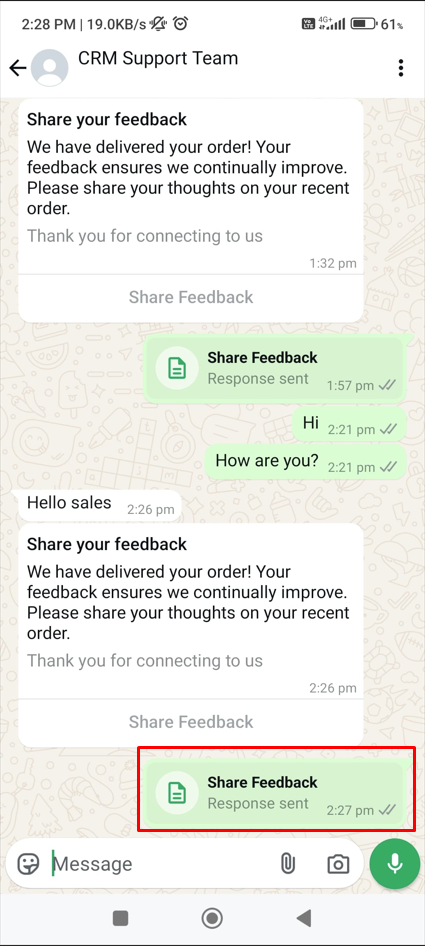
After the user enters the details in the flow, the data is saved to the CRM, and a new record is automatically created in the designated module of the template. The goal of this setup is to create a highly interactive and engaging experience for WhatsApp users, allowing them to click on buttons, view images, and interact with content dynamically. Key features of this interaction include: This design ensures an interactive and seamless browsing experience for users to explore multiple offers within the same chat interface. This guide provides step-by-step instructions on how to create and submit a Carousel Template message. Once submitted, Meta will review and approve the template within a few seconds. Steps to Create a New Media Card Carousel Template: When a user receives the message, it will be displayed as shown in the screen below. Here in the Utility category there are two category types . Custom The highlighted message demonstrates the Utility category with a Custom message type. Flow Note: The utility flow does not allow users to edit a template once it has been created and saved, in accordance with WhatsApp Business rules. To create a custom WhatsApp message template in the Utility category, follow these steps: Steps to Create a Utility Custom Template: And the received message will be displayed as shown below. Steps to Create a Utility Flow Template: To create flow type utility template messages, users have to create flow in meta , once it is published from meta user can use existing flow. To Send Utility flow type message, the user has to click on template “WhatsApp Business Icon” to select template and send. Sent Utility flow type will be displayed as mentioned in below screen. When a customer receives a utility flow type to share feedback, a message will be displayed as below screen. Users can enter detail in feedback form and click on continue to next feedback for rating. The following screen demonstrates the selection of ratings. Selected ratings will be highlighted with green text. Once feedback is submitted, it will be displayed as below. When the user clicks on the “Share Feedback” button, it will show submitted feedback. 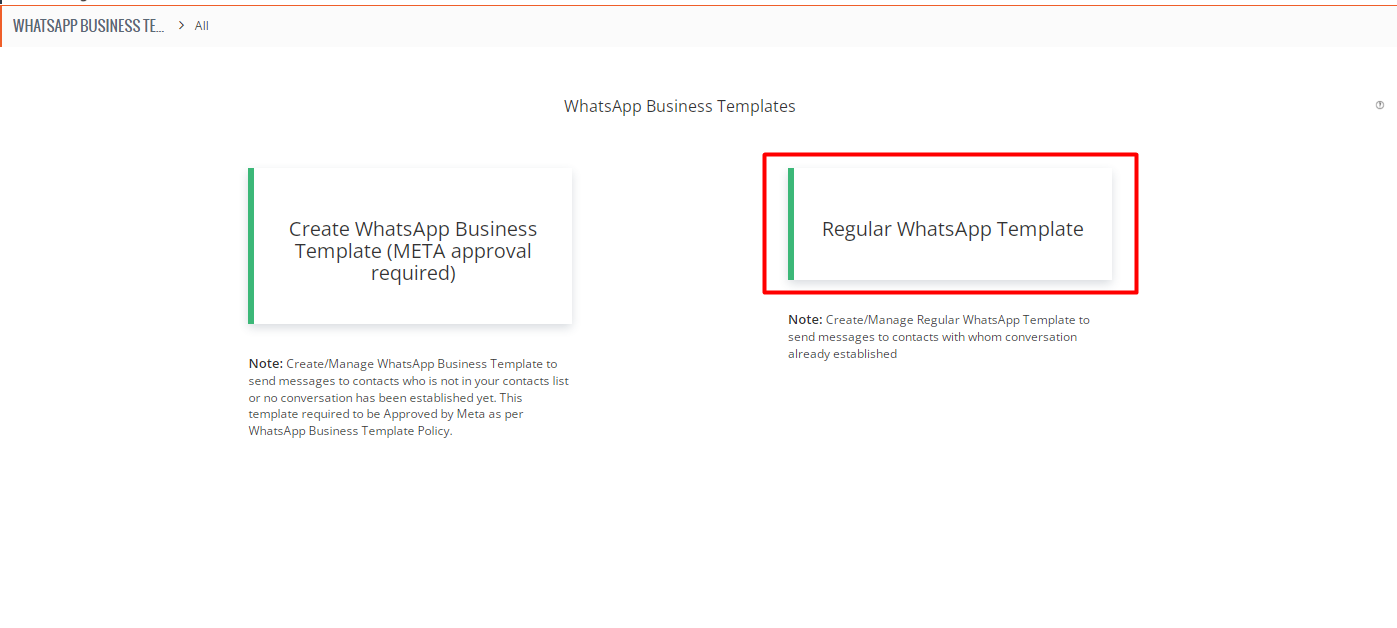 Fill up all the details for the Regular template & click on the “SAVE” button as shown in the below screenshot.
 Setup WhatsApp Business TemplatesWhatsApp Business Template Category


 Flow Steps to Create a New Marketing Template using Flow template type.


In this screen, the user will be prompted to select their areas of interest by checking the boxes next to their preferred topics. Once the user has selected their interests, they can click the “Confirm” button to submit their response. This step ensures that the user’s preferences are captured for personalized recommendations or further actions.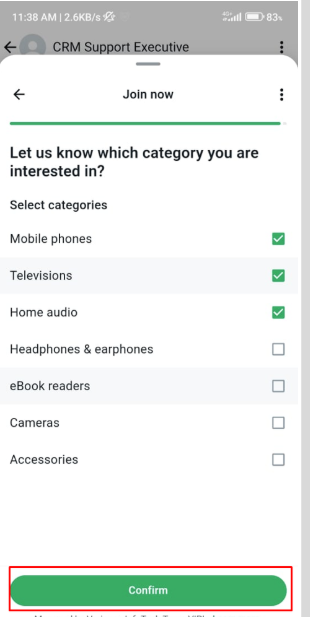
 Media Card CarouselA WhatsApp Carousel Template lets businesses showcase multiple products, offers, or services in a scrollable format. Each card includes an image, title, description, and call-to-action (CTA) buttons (e.g., “Buy Now” or “Visit Website”), making it easy for users to explore options and take action. It’s perfect for displaying different product angles, variations, or collections, creating an engaging and seamless shopping experience within WhatsApp.
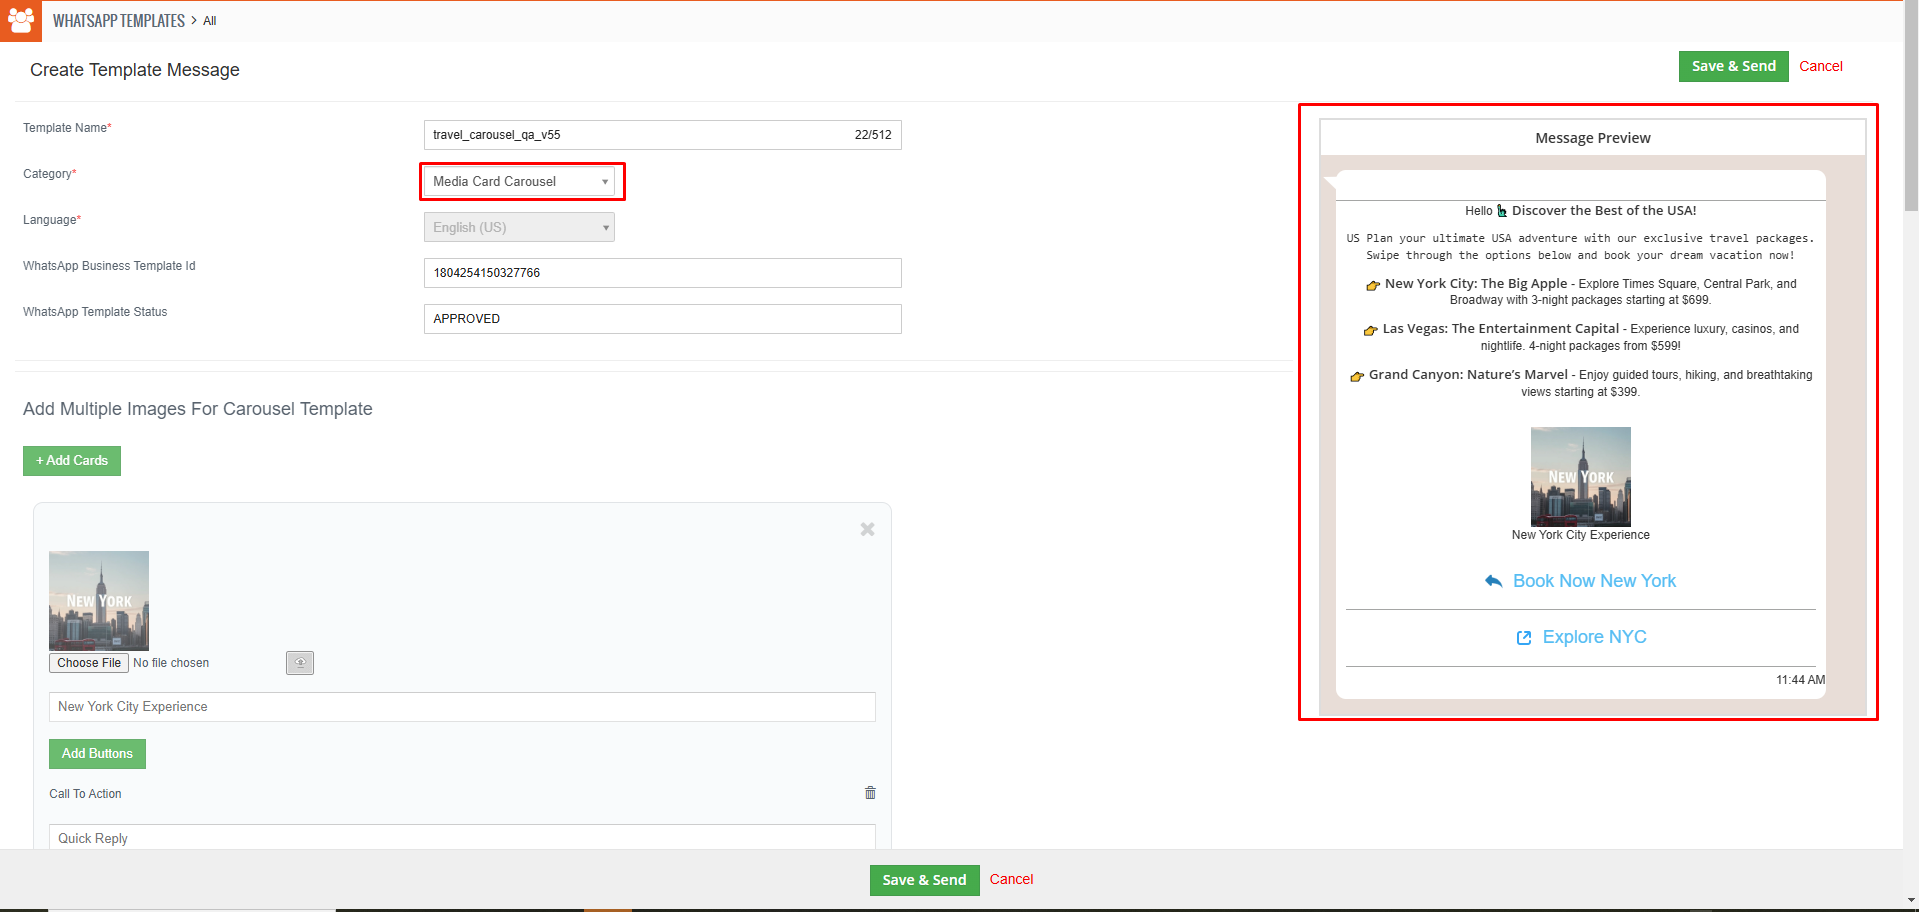
Send Media Card Carousel Template Message Preview as shown in the screen below.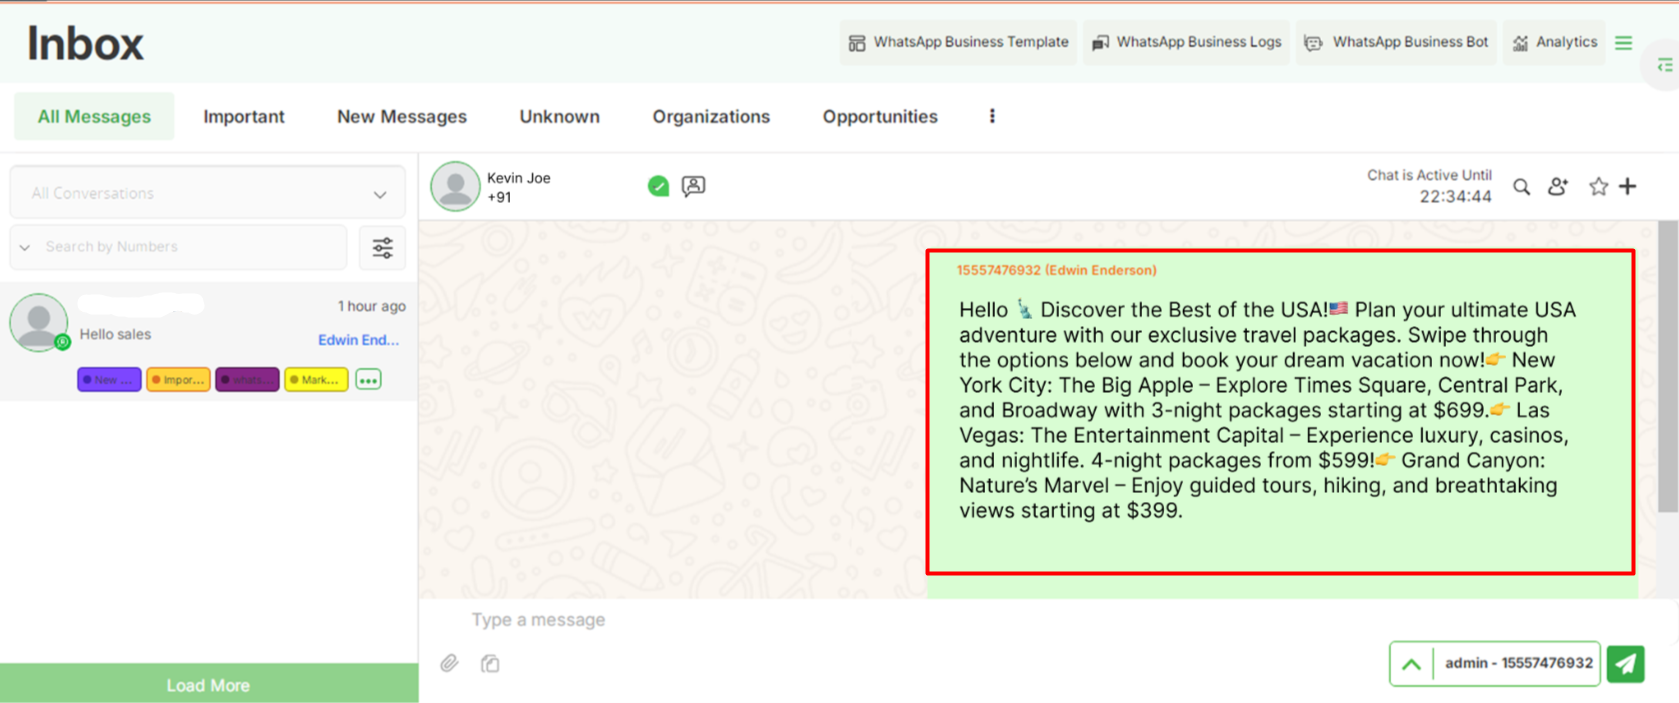
 Utility
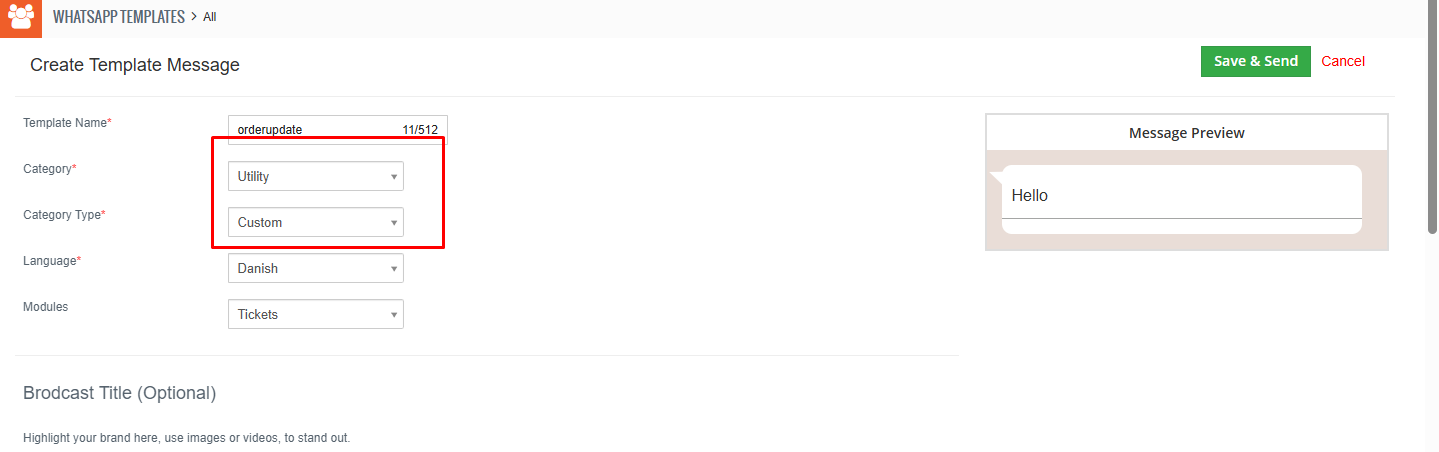
 To create an effective WhatsApp message template for the Utility category with a flow type, follow these steps:


Interested to Try WhatsApp Business Integration ? Click Here