
- WhatsApp Business Integration with vTiger gives you the flexibility to send WhatsApp Business messages to your customers.
- You can send WhatsApp Business messages to multiple records in one shot(obviously you’ve to follow WhatsApp business guidelines for the same).
- In addition to manually sending out messages, you can also forward automatic notifications triggered by workflows in Vtiger CRM.
Recommendation on Sending WhatsApp Business Messages
- Since Watsapp is very skeptical about numbers that do bulk mailing, the following are recommendations:
- Send no more than 5-10 messages per minute, i.e. send messages in batches, not all at once.
- The presence of links in messages increases the likelihood of a ban.
- WhatsApp has no physical limit on the number of messages, as per their policy but there is a recommendation not to exceed certain messages per day. Again this will be as per the WhatsApp Policy, if the number of incoming and outgoing messages is about the same, then you can send a little more than 6000.
- Use the device on which there were no earlier bans.
- Receive incoming messages. The more incoming messages, the better. Incoming messages are not counted in the recommendation not to exceed 6000 messages.
Important WhatsApp Features
WhatsApp Business Integration with vTiger comes with various nice features.
WhatsApp Business message management
NotificationHere we can see the new arrival messages count when any new message comes.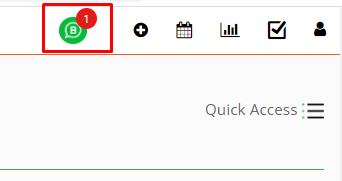 When we click on this icon it shows the last 5 users messages in the popup.
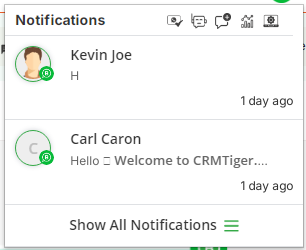
When you click on “Unread” message  icon, it will mark all WhatsApp Business unread messages as read.
When you click on “Bot icon” ![]() it will take to the Whatsapp bot page
it will take to the Whatsapp bot page
When you click on “New Message”  icon, it will open a popup to send message to a new WhatsApp number.
When you click on “Analytics”  icon, it will redirect to WhatsApp Business Analytics interface.
When you click on “set up whatsapp business”  icon, it will redirect in WhatsApp Business Configuration page.
If you want to go to timeline view click on Show All Notification  icon
icon
Note: WhatsApp Business Platform Pricing (Effective July 1, 2025)
- Charges apply per message sent by businesses
- Message pricing is based on message type (Marketing, Utility, Authentication) and recipient’s country code
- Free-form and utility messages are free within a 24-hour customer service window triggered by a user message
- Messages sent during a 72-hour free entry point (from ads or Facebook Page) are not charged
- Template messages sent outside the free windows are charged
- Charges apply only when messages are delivered
Send/receive messagesHow to Initiate WhatsApp Conversation?In accordance with WhatsApp Business policy, a conversation session can only be initiated once the end user sends the first message to the business account. Upon receiving this message, the business is then permitted to respond using a pre-approved message template, which formally initiates the WhatsApp conversation window. 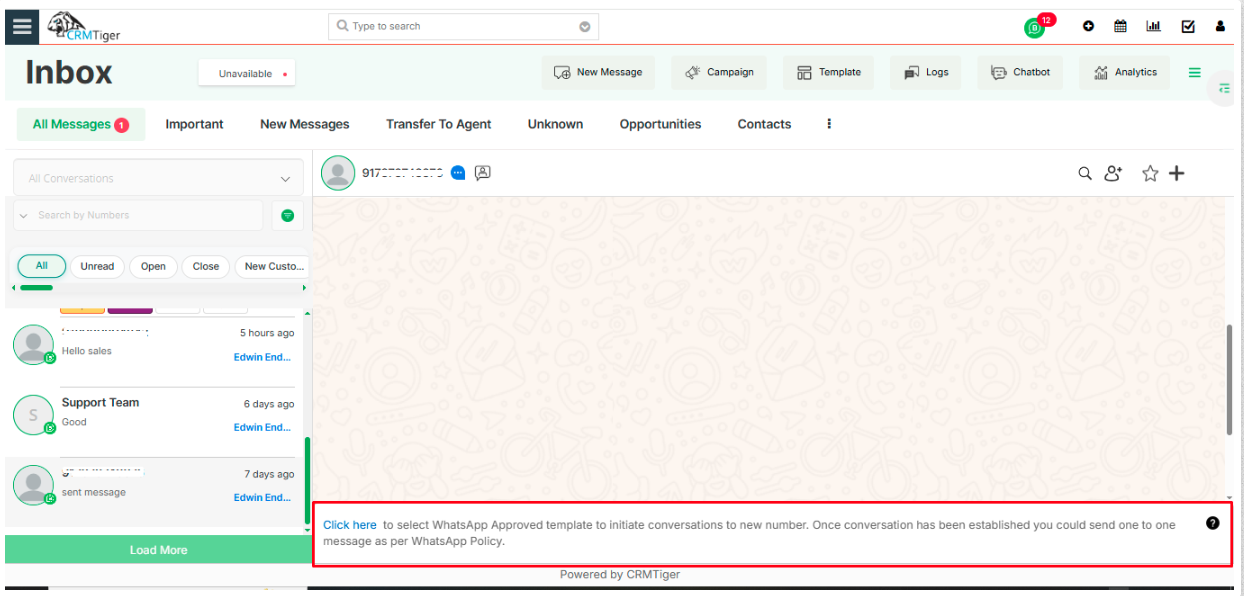 To initiate a WhatsApp conversation from the contact’s or any other module detail screen, follow these steps: Click on ‘particular Module,’ then ‘GoTo Record List,’ and open the record in view. You will find an option to access the ‘WhatsApp’ icon. Click on the WhatsApp icon to open the WhatsApp Business conversation chat box
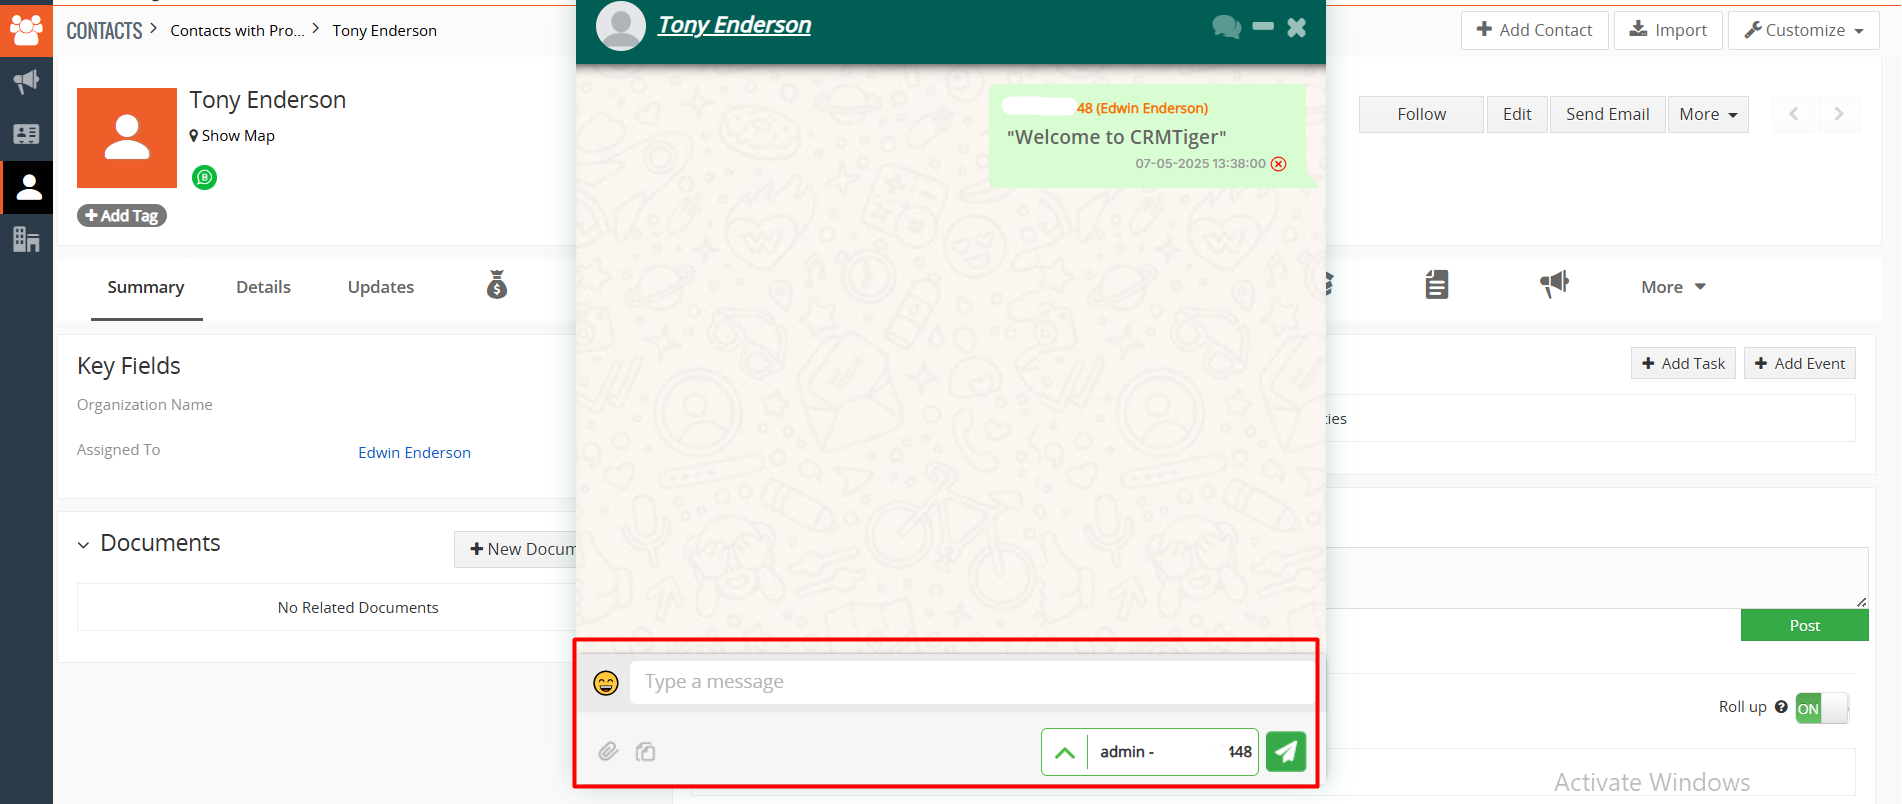 After receiving the user’s message and sending a template response, the chat session is officially initiated, enabling further communication.
Note: As per WhatsApp’s 24-hour policy, businesses can only start a new conversation after the user messages. If 24 hours pass without a user message, replies require a template. Within the 24-hour window, responses are unrestricted
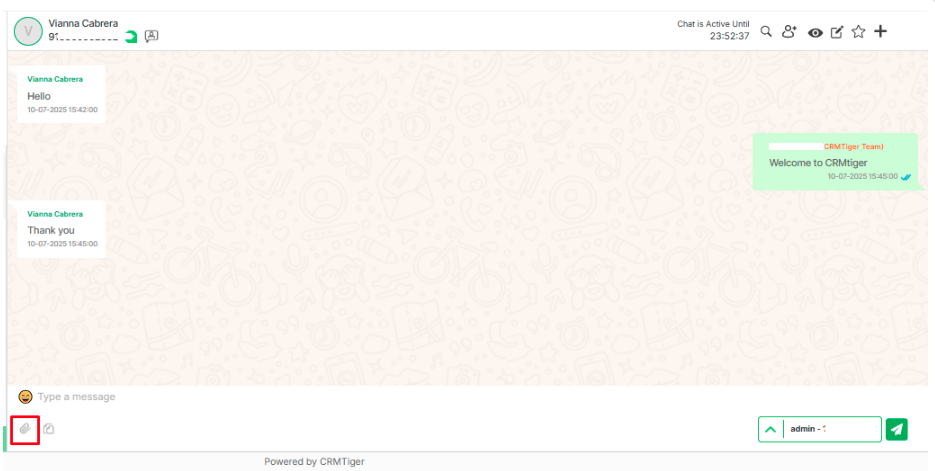
Send/Receive message from recordClicking on the WhatsApp icon will open the Chat window to communicate between the contact and user.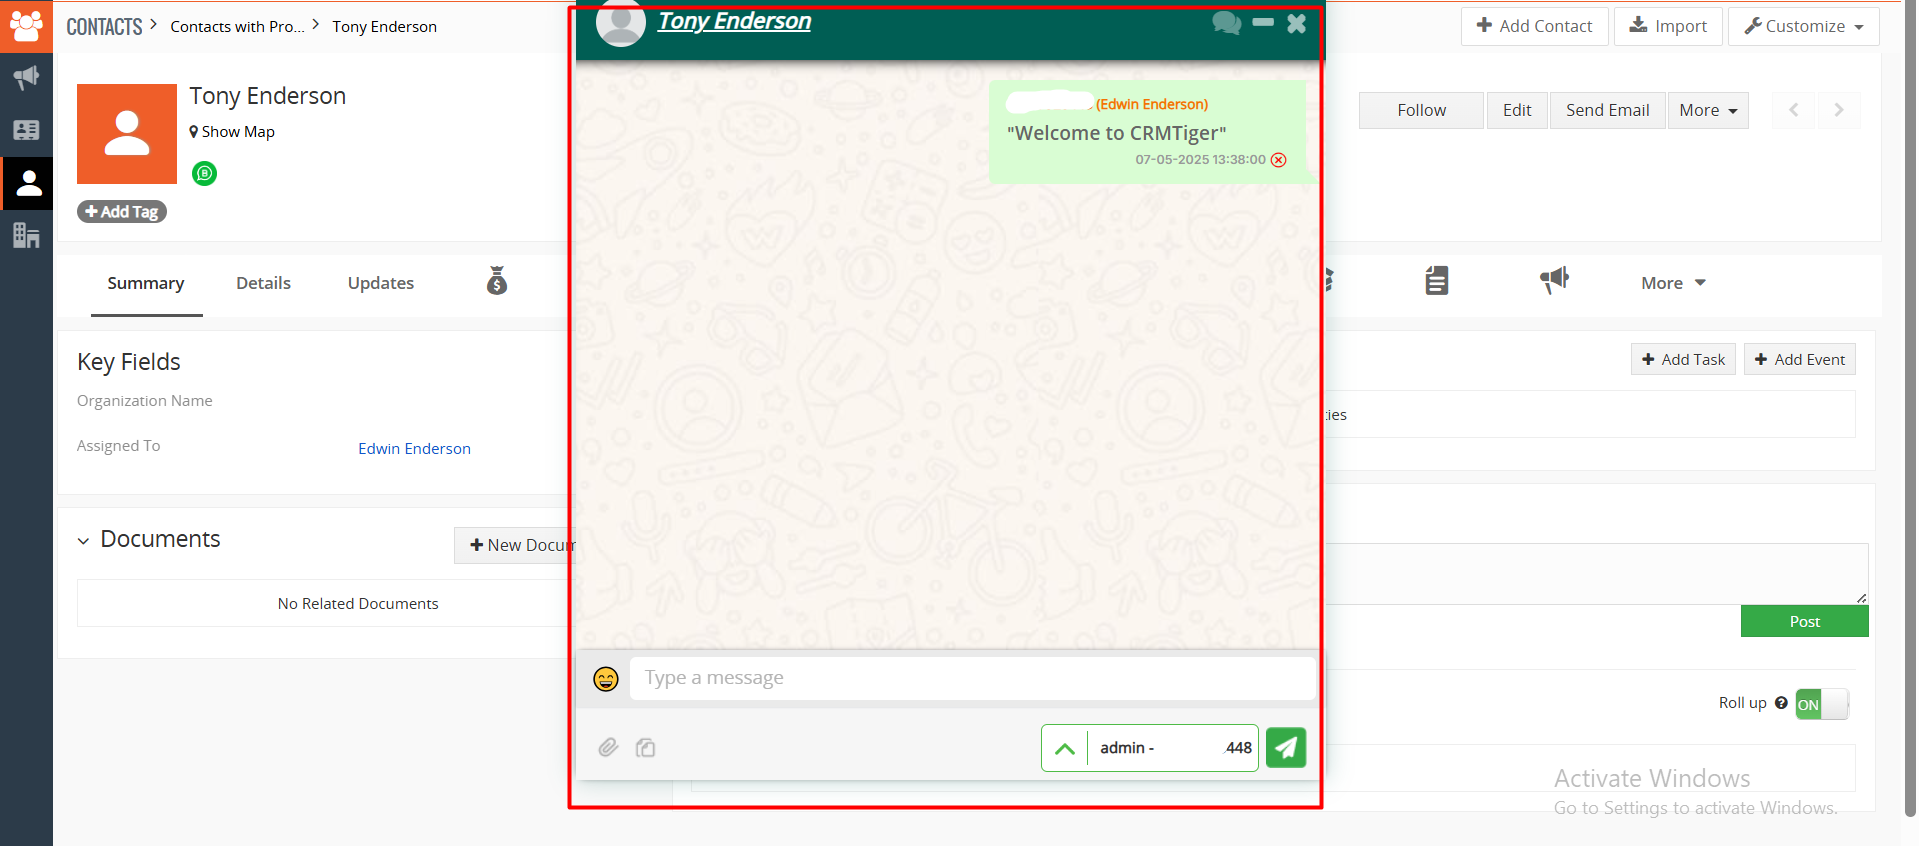
- Through WhatsApp Business integration you can send,Text messages Files,Images (Up to limited Size based on our file upload limit)
- You can communicate with customers only if the phone number entered in the record must be a WhatsApp number of the customer. Also “WhatsApp Business # field” specified correctly in “WhatsApp Business Configuration” settings
- “WhatsApp” uses numbers with country code so please follow the instructions mentioned in the “WhatsApp Business Configuration” section about country code.
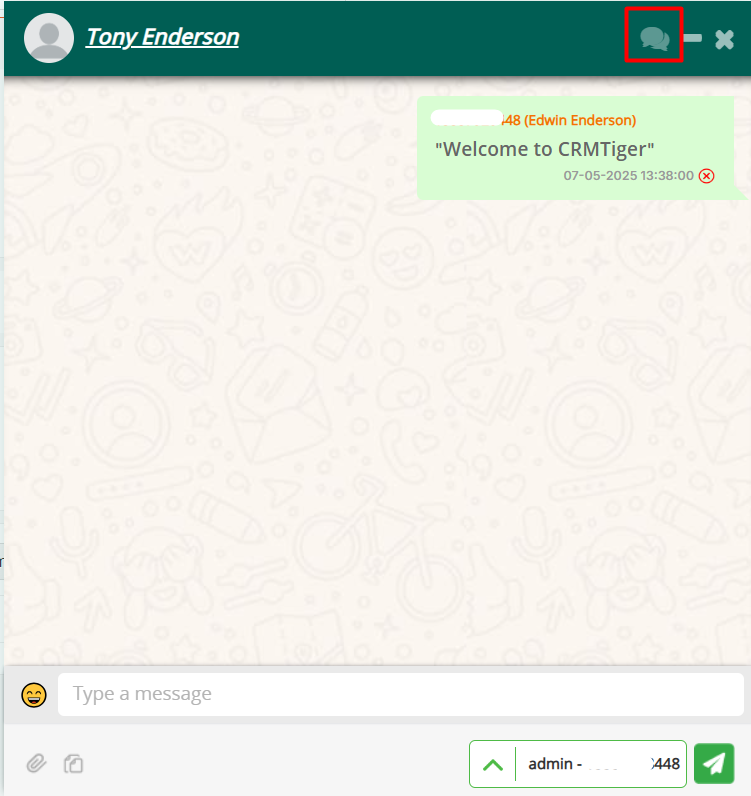
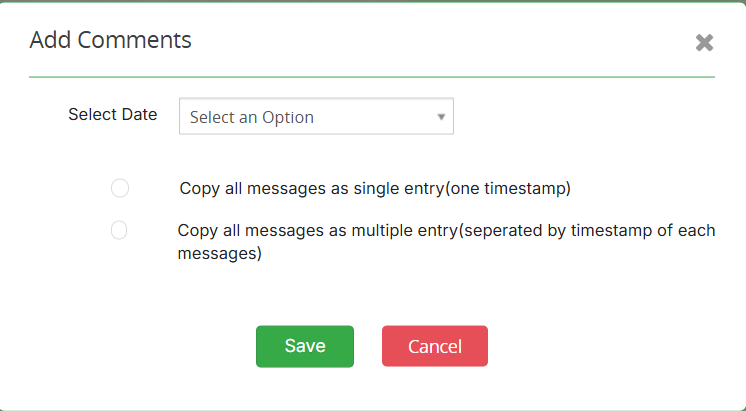
- “Add Chat as Comment” In the chat window there is the feature to add all the chat as comment in that record in CRM as single entry(one timestamp) or multiple entry(separated by timestamp of each message)
 Send/Receive message from Timeline view
WhatsApp Opt-Out
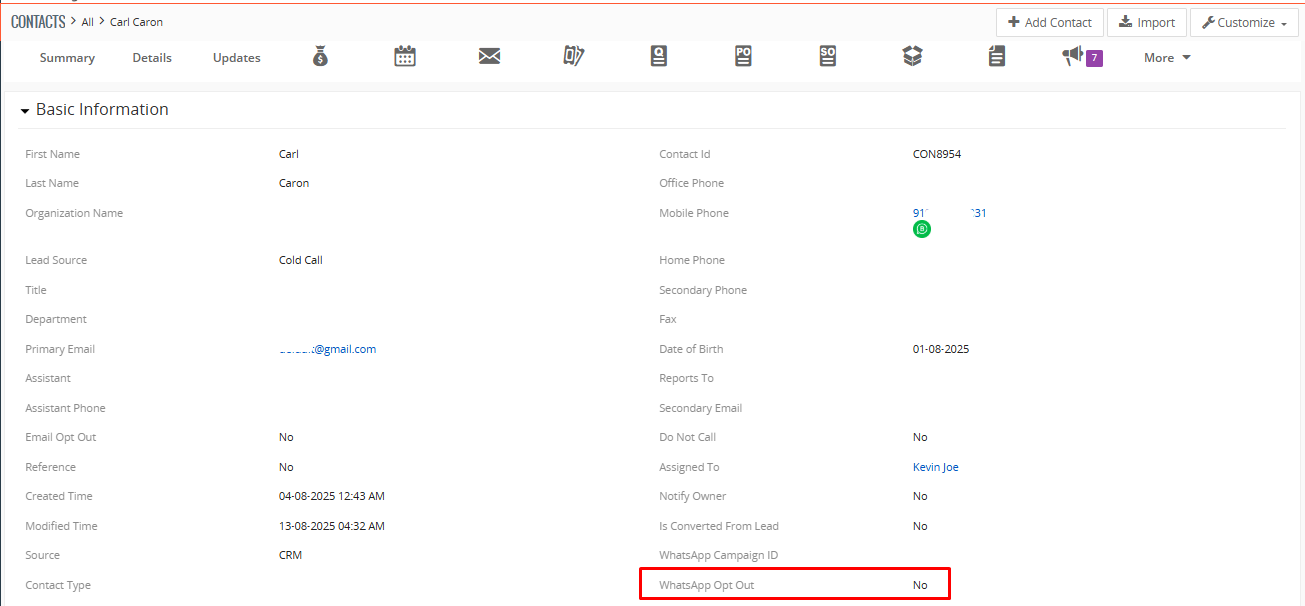
- The WhatsApp Opt-Out feature allows customers to stop receiving promotional or marketing communications from your business through WhatsApp. This ensures compliance with WhatsApp’s policies while respecting customer preferences.
- When a customer opts out:
- They will no longer receive one-to-one promotional or mass campaign messages.
- The opt-out status is automatically recorded in the CRM, and the corresponding checkbox (shown in the screenshot below) will be enabled or disabled accordingly
 The opted-out records will also appear in the Timeline page under the Opt-Out filter list, as shown below.
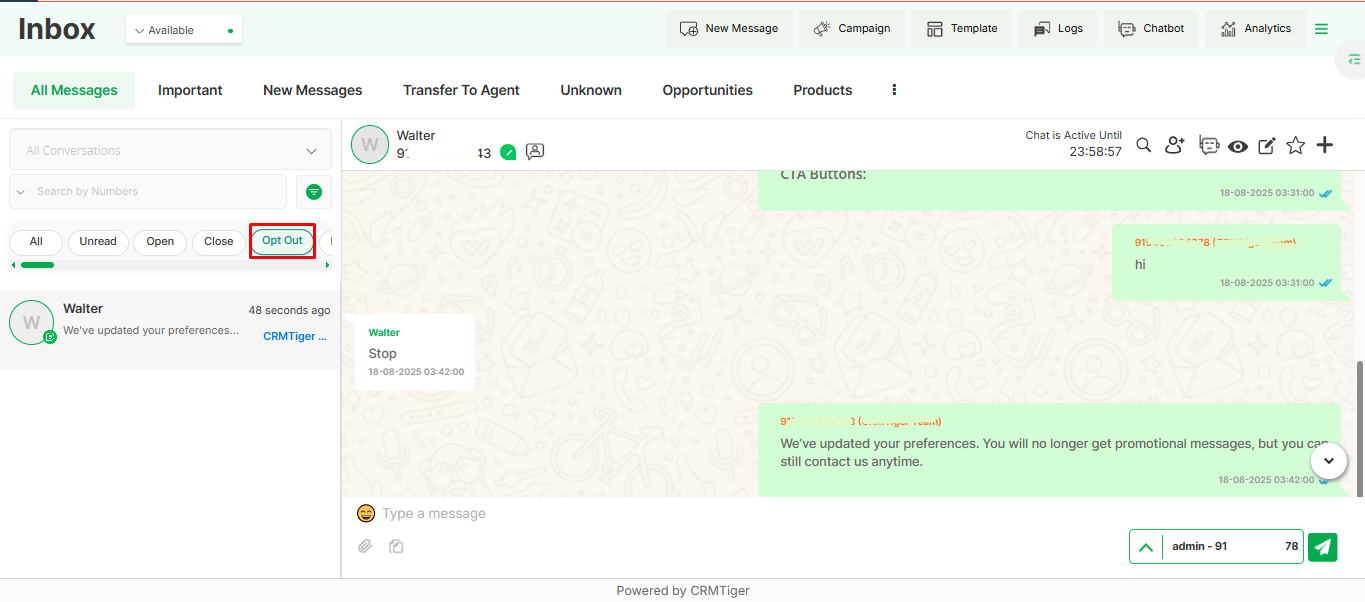
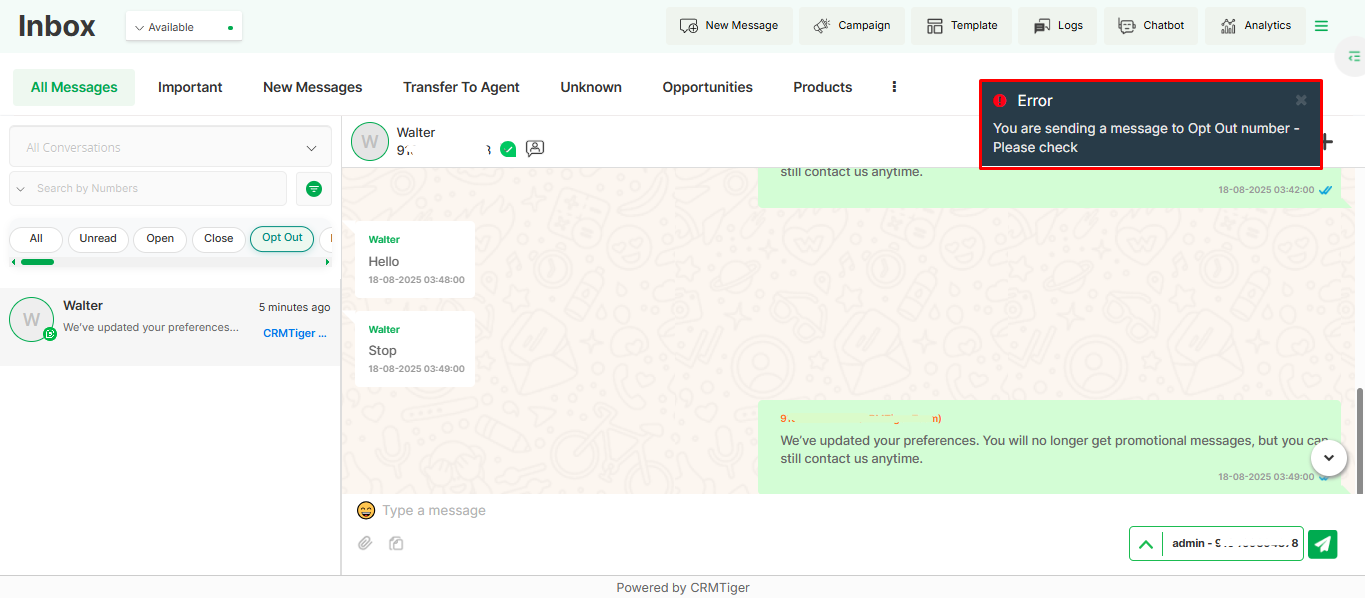
- If a record is opted out, a validation message will appear while attempting to send a message, as shown in the screenshot below.
 Ways a Customer Can Opt-Out
- Opt-Out Button in Template Messages
- Some WhatsApp templates include a predefined button (e.g., “Stop Promotions”) that customers can click to unsubscribe.
- Manual Keywords
- Customers may reply with keywords such as “STOP”, “STOP PROMOTION”, “Unsubscribe”, “Cancel”.
- The CRM detects these keywords and marks the customer as opted out.
- Chatbot Template/ Choice Question Nodes
- If the chatbot flow includes an Opt-Out option in a template node, the customer can select it to unsubscribe directly within the conversation.
- When presented with a multiple-choice message, the customer can choose the option linked to opt-out keywords Like – (Stop Promotions).
The CRM will automatically process the choice and apply the opt-out
- Mass Messages and Campaign Messages
- If a customer replies to a mass/bulk campaign message with an opt-out keyword, the CRM immediately updates their status as opted out.
- This prevents them from receiving any further campaign or bulk promotional content.
- Workflow Messages
- While sending workflow-driven messages, customers can also opt out by replying with opt-out keywords
- Once opted out, the workflow will stop sending any further promotional messages to that customer.
Note: Once a contact opts out, they are excluded from all future promotional or campaign messages.
Customers can opt back in at any time by replying to the same WhatsApp Business numberGeneral Feature New Messages
- In the WhatsApp Business Global messages, New messages area list display all unread messages either from
“unknown number” or “existing contact records” - Global WhatsApp Business messaging has the same option as sending/receiving message to individual records
Important messages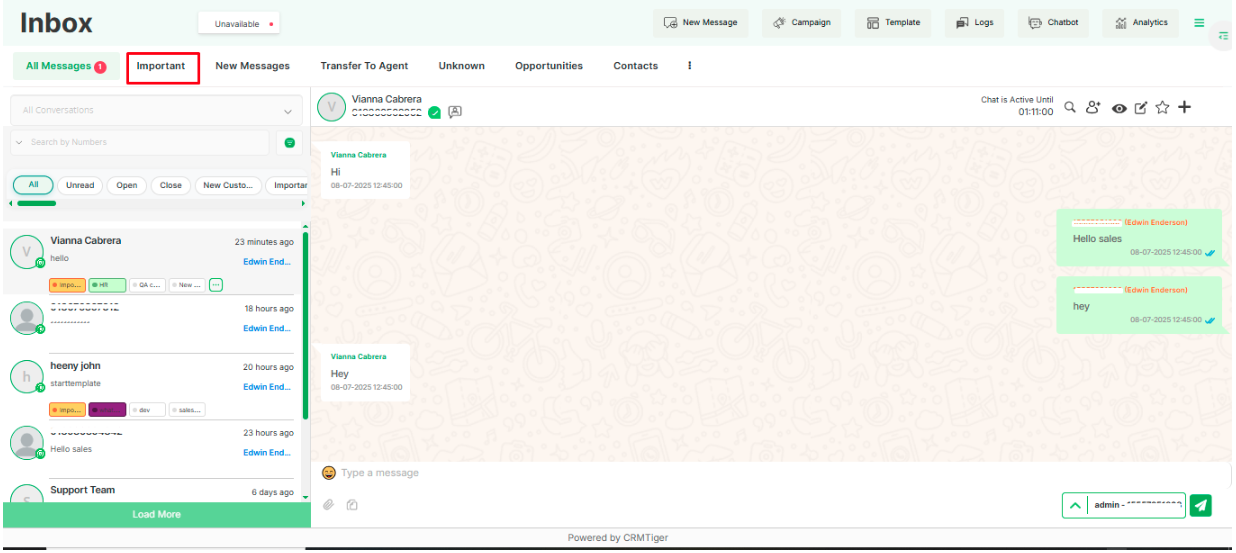
- Important feature helps you to quickly access your WhatsApp Business contact which is important.
- You can manage to move any contact under Important by simply click on
 icon to move contact under Important contact.
Transfer to Agent 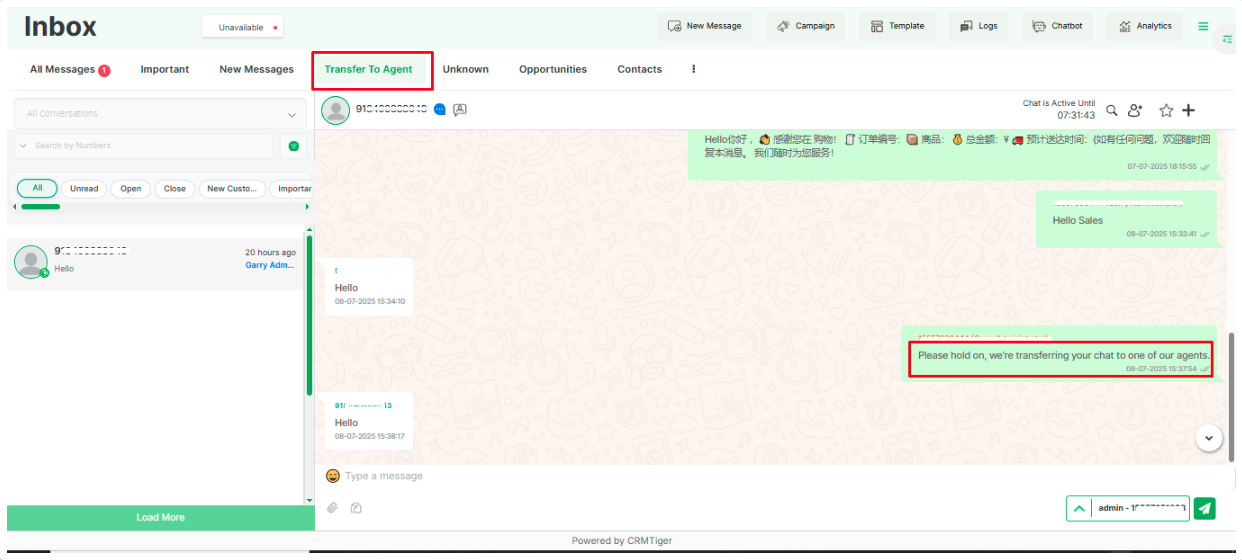
- The ‘Transfer to Agent’ feature displays all chats that have been transferred from the chatbot to a live agent, allowing any available agent to take over and continue the conversation with the user.
Message from unknown number
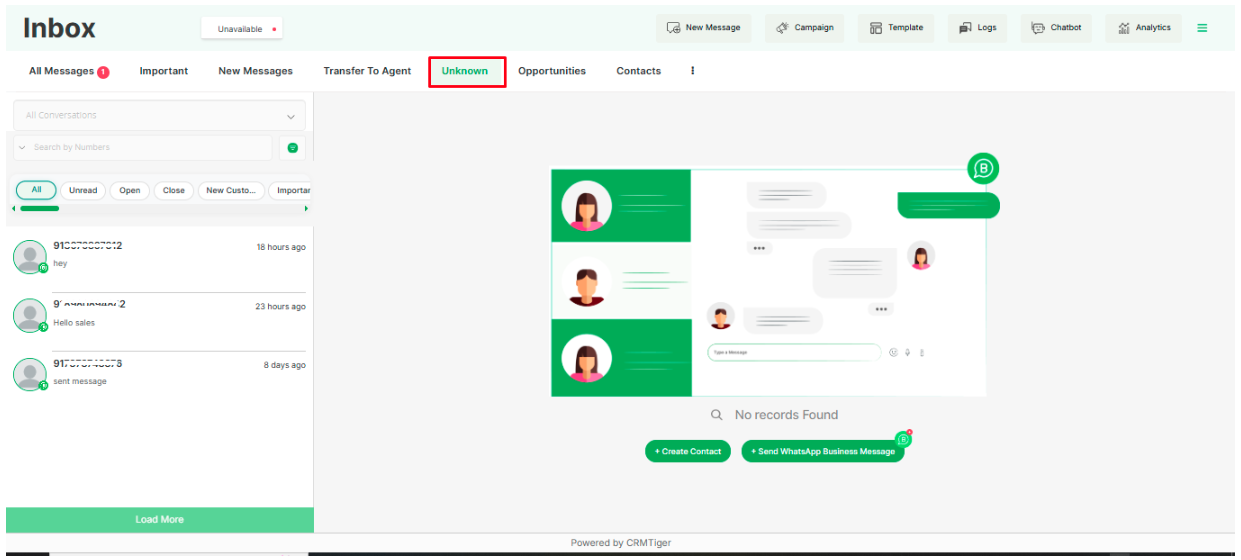
- “Unknown numbers” in the WhatsApp Business Global messages area list all messages from an “unknown number” not stored as a record in CRM.
- “Unknown numbers” messaging section has the same option as sending/receiving messages to individual records.
- From Unknown number there is an option to Create new customer record or update “Unknown number” to existing record in vTiger.
Open/Close Conversation
- In the image below, a green icon indicates that the chat is currently open.
- To close the conversation, click the green icon.
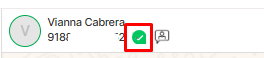
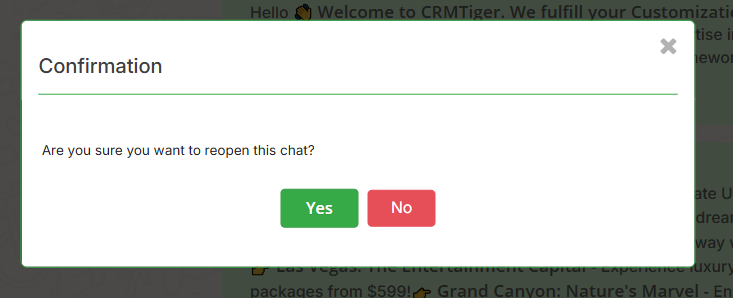
- Clicking this icon will display a confirmation dialog box. To proceed with closing the conversation, click ‘Yes’.
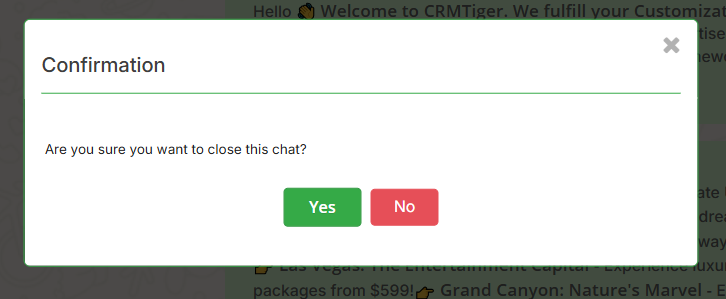
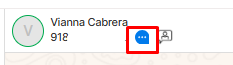
- Once a conversation is closed, the icon will change to blue.
- To reopen the conversation, click the blue icon. A confirmation dialog will appear asking if you want to reopen the chat. Click ‘Yes’ to confirm and reopen the conversation.
 User wise chat filter
- A user-wise chat filter is available that allows viewing chats specific to a selected user. For example, if multiple users have interacted with the same contact, all messages from all users will be shown unless the filter is applied. When a specific user is selected, only the messages sent by that user will be displayed.
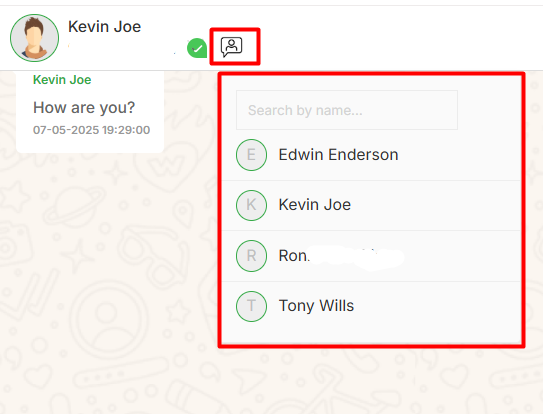
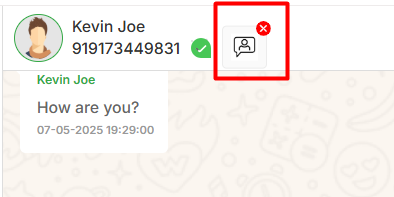
- After selecting any user from the given list the below shown icon will be visible .
- Which means currently a filter is applied to remove this filter click on red ‘x’ .
- By clicking on it the filter will be removed and all messages will be visible.
Search Messages by Keyword in Inbox
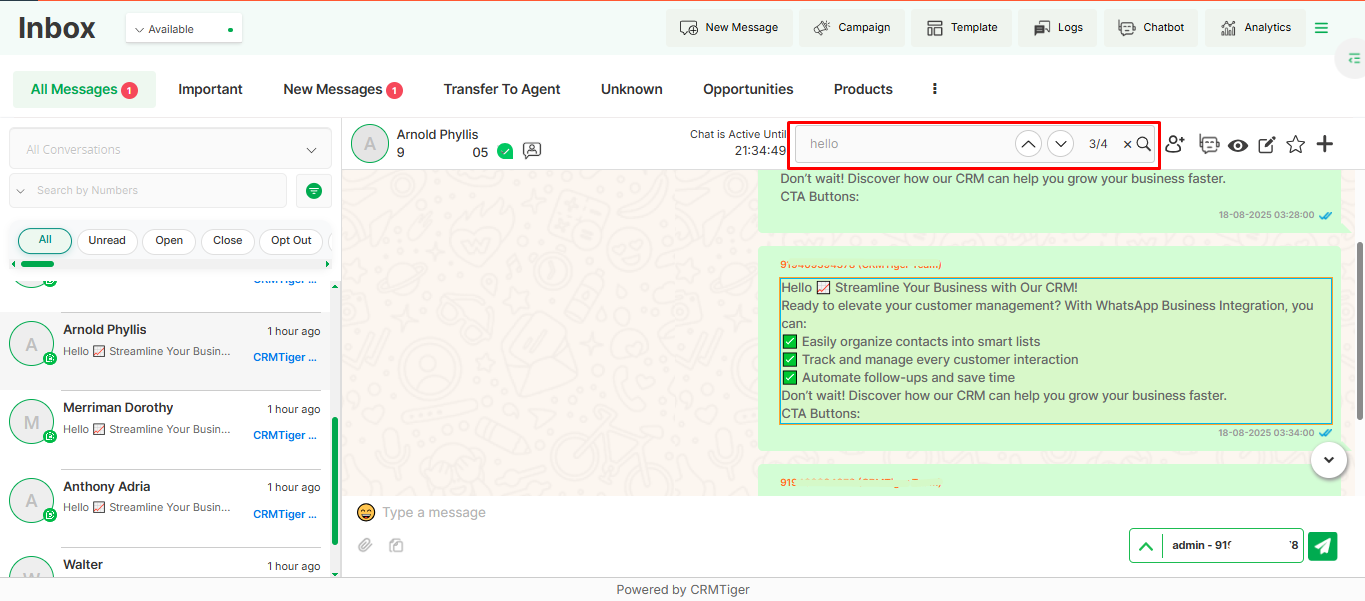
- This feature allows users to search for specific keywords within chat messages to quickly locate relevant conversations.

- When a keyword is entered into the search box, all matching results within the chat will be highlighted, as shown in the image below.
 Chat Assigned to User
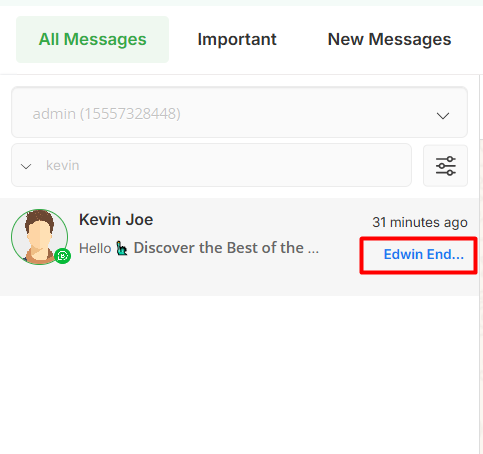
- This feature displays which user a particular chat is assigned to.
- In the example shown, the chat is assigned to Edwin Enderson.

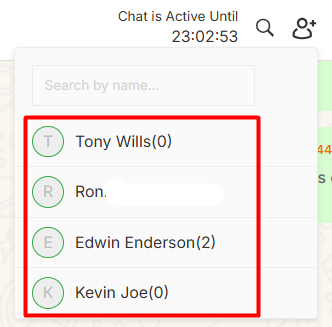
- Clicking on any user will open a pop-up asking for confirmation to assign the chat to the selected user.
- Click ‘Yes’ to assign the entire chat to the chosen user.

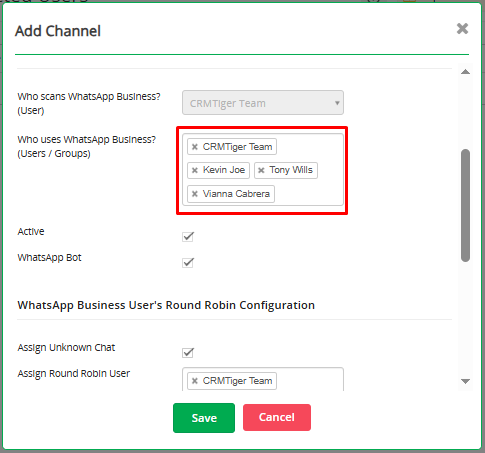
- The list of users displayed in the dropdown can be managed through the following path: Settings > CRM Settings > Other Settings > WhatsApp Business Configuration.

- Clicking the pencil icon will open a pop-up where users can add or remove users, granting access to the connected number as needed.
Create Related record from WhatsApp Business message
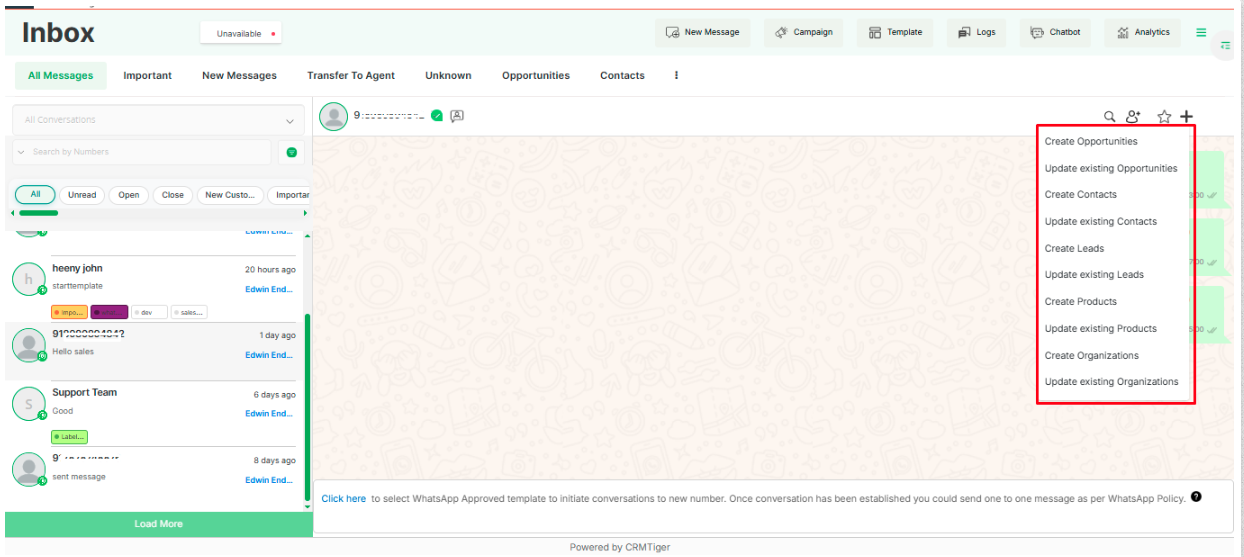
Preview Record

Edit Record
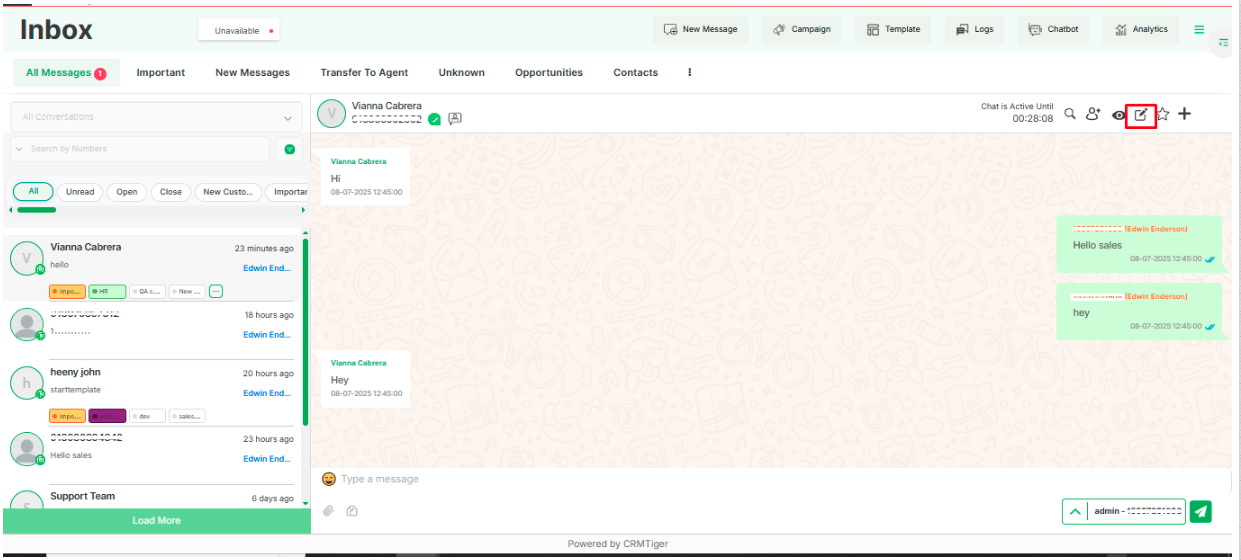
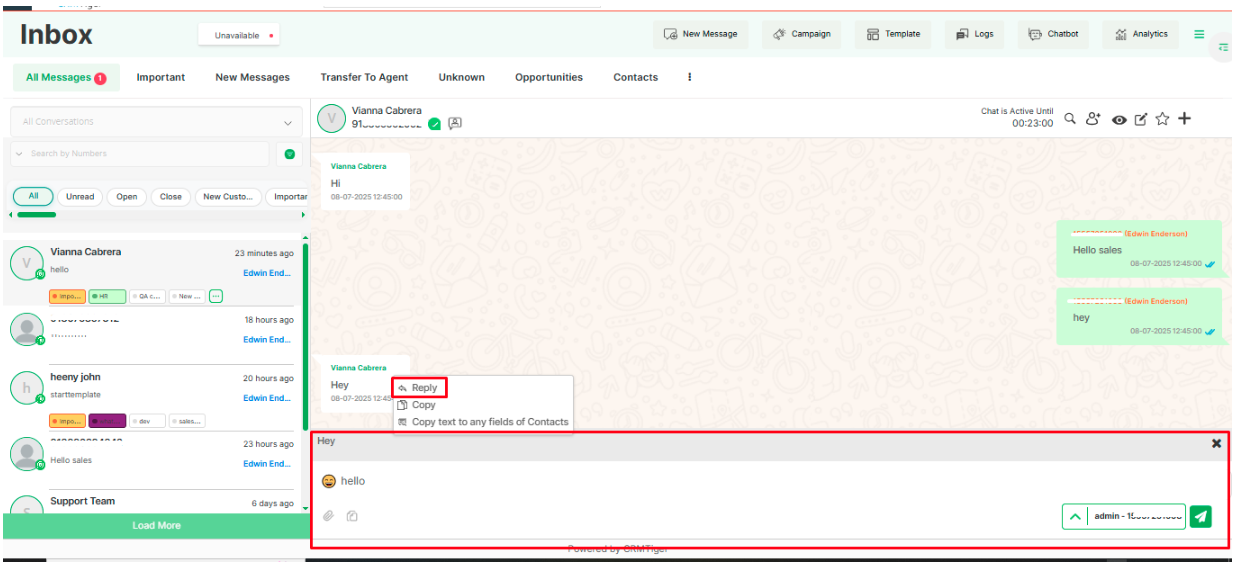
Reply Message
- Click on three dots of the Message you want to reply, then user can reply to that message by click on the
reply feature.
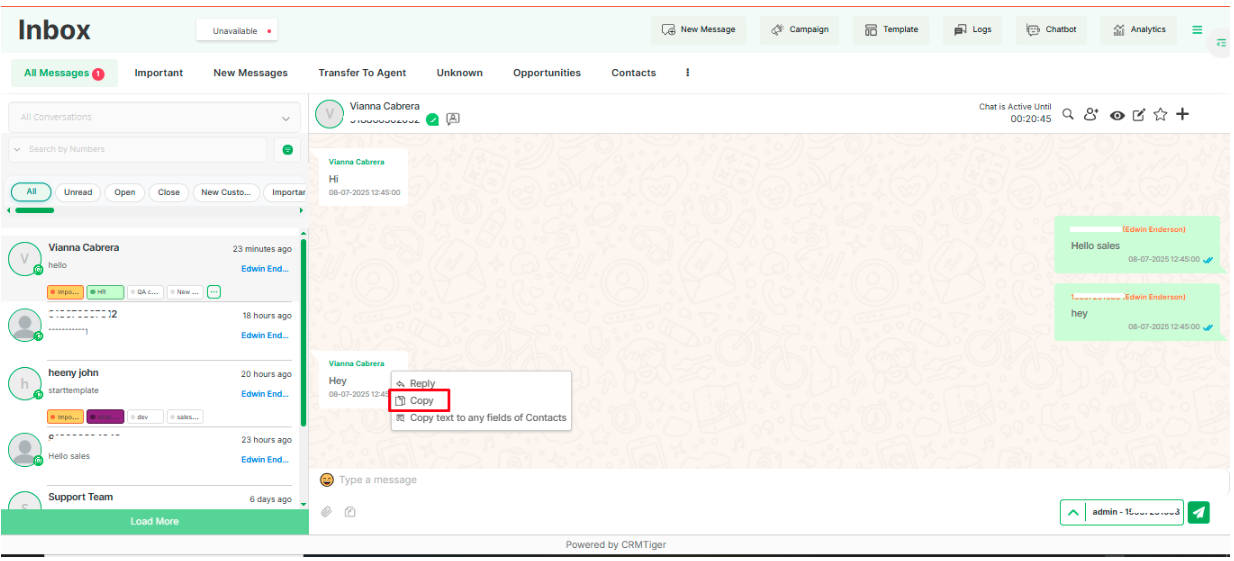
Copy Message
- Users can copy that message by click on the “copy” feature.
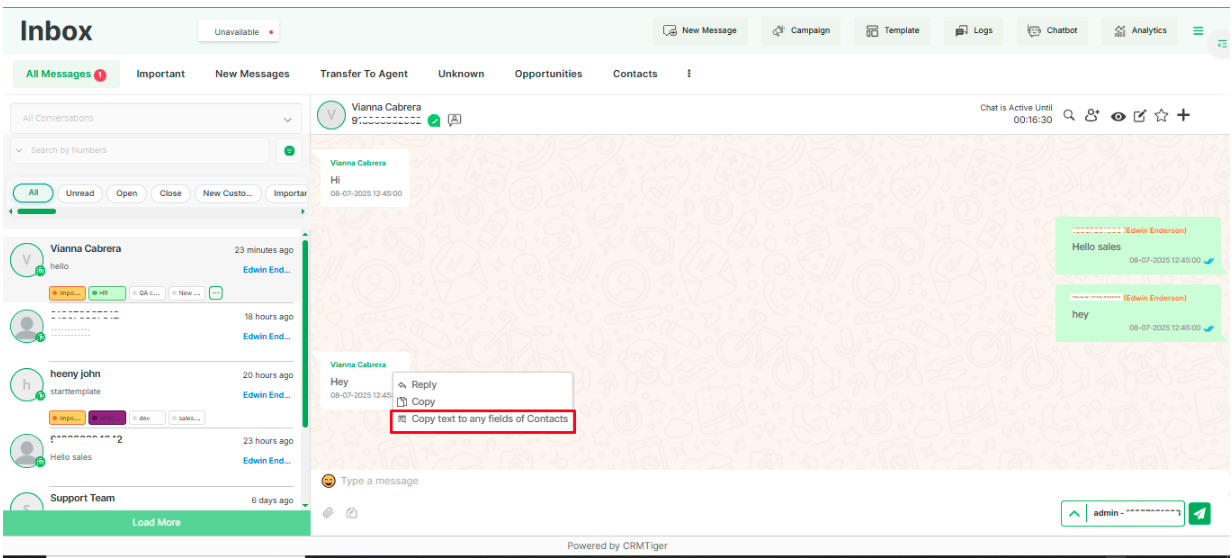
Copy text to any fields of Contacts
- By click on “copy text to any field of contact” feature, the user can Copy the message and save it to any fields of the record.

Send Attached file/Document in Timeline
- User can send attachment of file/Documents directly from the timeline page
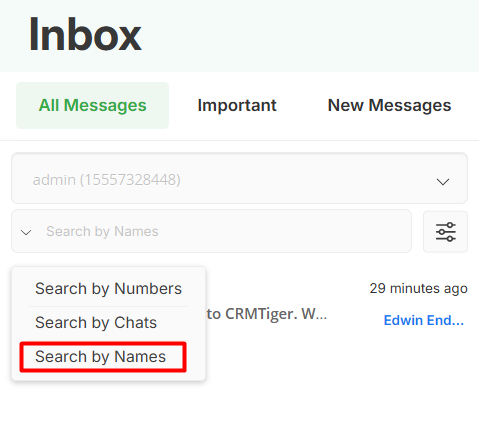
 Search Contact in Timeline
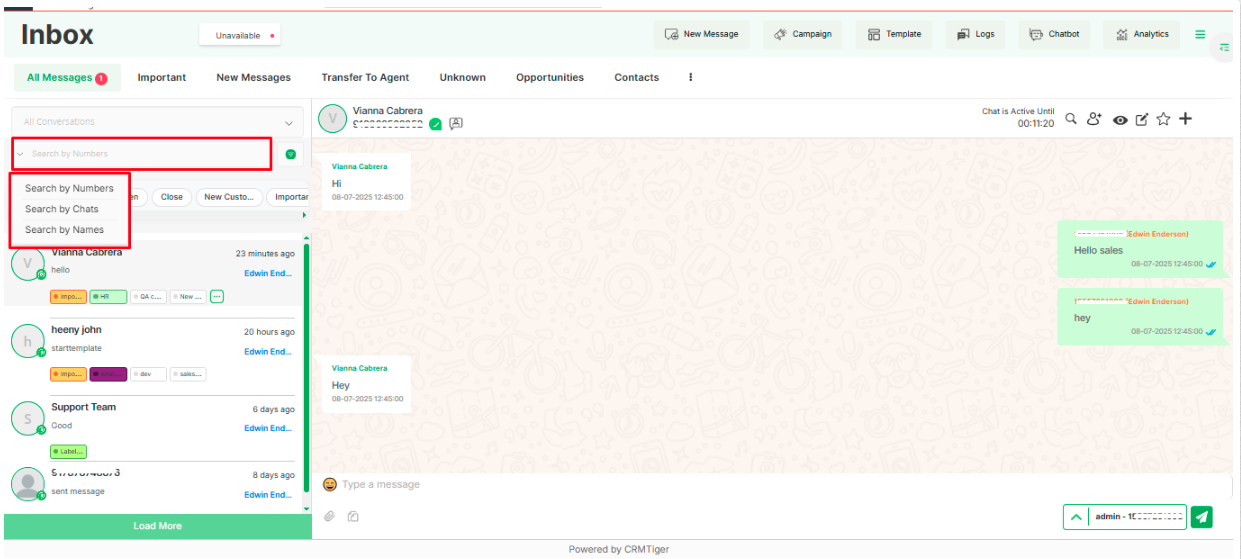
- Users can search contacts by Number ,Chats and Name of the Contact in Timeline View.
- Search by Chats, Numbers and Names
- Here for searching purposes 3 options are given .
- Search By Numbers
- Search By Chats
- Search By Names
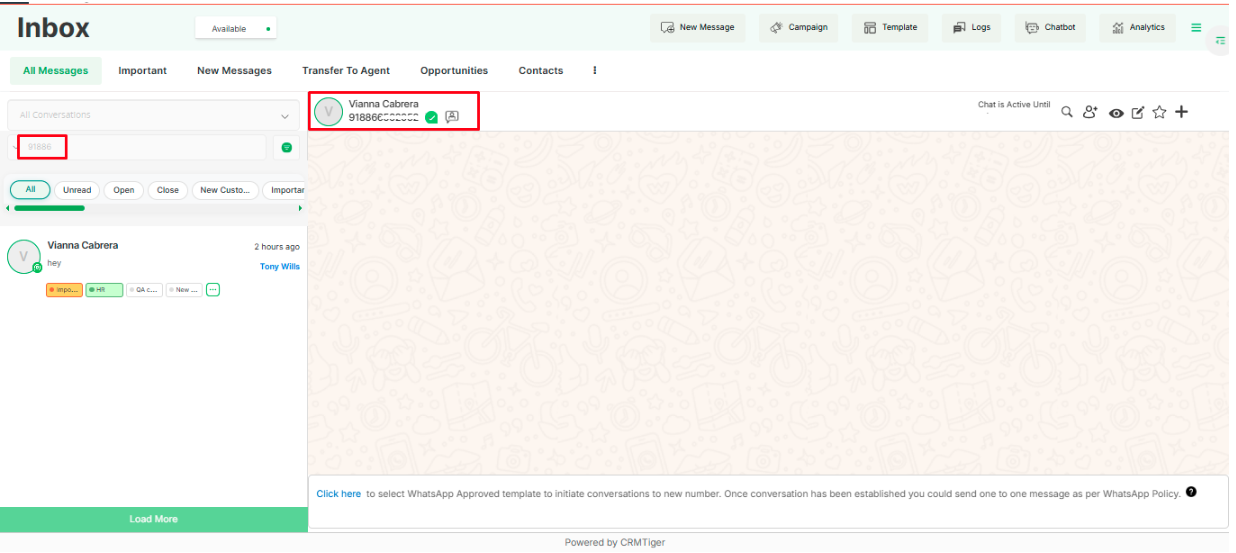
 Search by Numbers
- By clicking on this option, users can search any chat by phone number.
- To search users have to enter the number which needs to be searched.
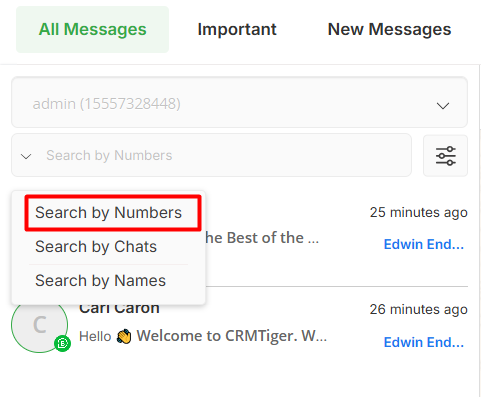
- As shown below screen users have entered 5 digits of the phone number and the matching result is visible.
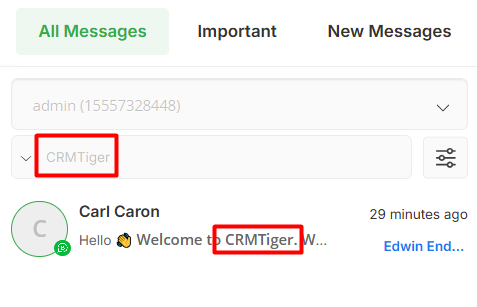
 Search by Chats
- To search by any keyword in chat, users can enter specific word in the search box.

- In the below screen user has entered the ‘CRMTiger’ keyword in the search box and it gives the chat which contains the matching result.
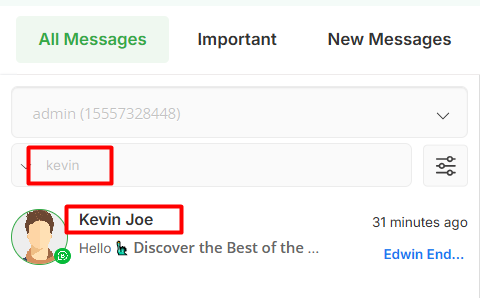
 Search by Names
- To search any chat by saved name user can enter the name of the saved contact and it will give matching result.
- In the below screen the user has entered the name ‘kevin’ and it gives a matching result.
 Filter Conversation
- To Filter conversations based on label and close or open chat this can be done from here.
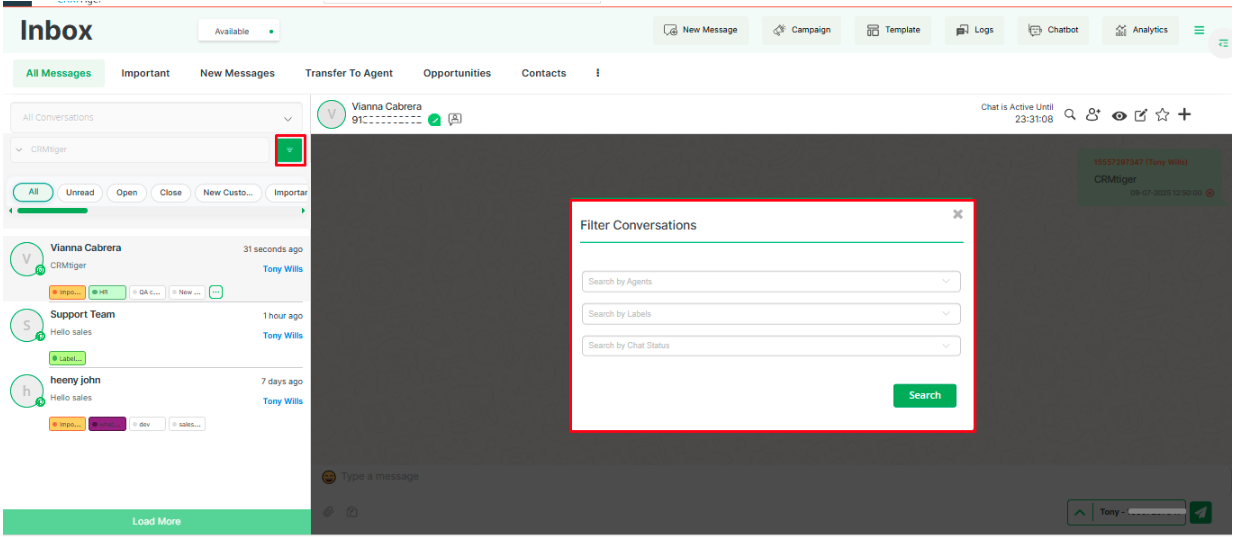
- In the ‘Search by Agents’ dropdown, users can view a list of available agents and select one or more to filter the records accordingly

- In the ‘Search by Label’ dropdown, users can view and select one or multiple labels from the available list.
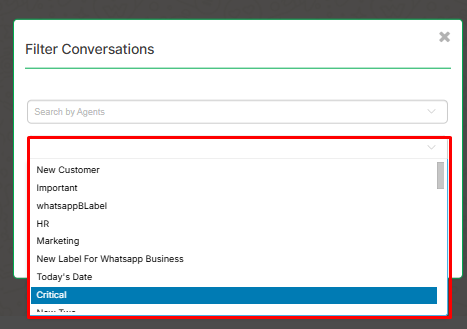
- In the ‘Search by Chat Status’ dropdown, users must select either ‘Open’ or ‘Closed’ to filter chats accordingly..
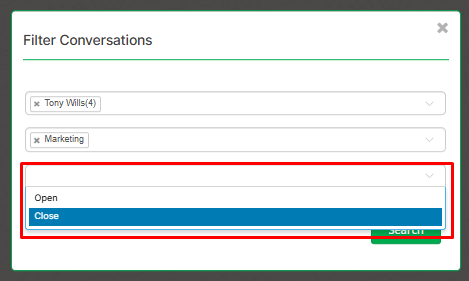
- After selecting the desired fields, click the ‘Search’ button to apply the filters.
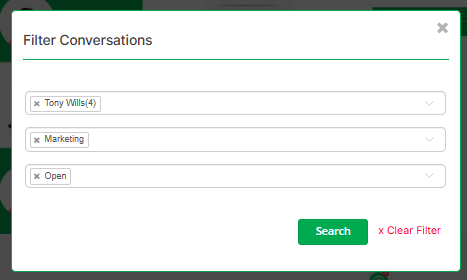
- The relevant records will then be displayed.
- In the example above, the label ‘Important’ is selected and the chat status is set to ‘Closed’, applying the filter.
- As shown in the image below, Kevin’s chat appears as it meets both criteria: it is closed and marked with the ‘Important’ label.

Quick Access Shortcuts
New Message
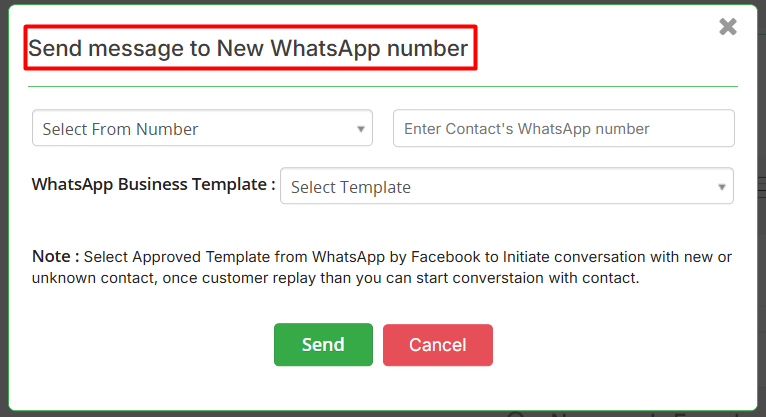 User can select Whatsapp Business Template
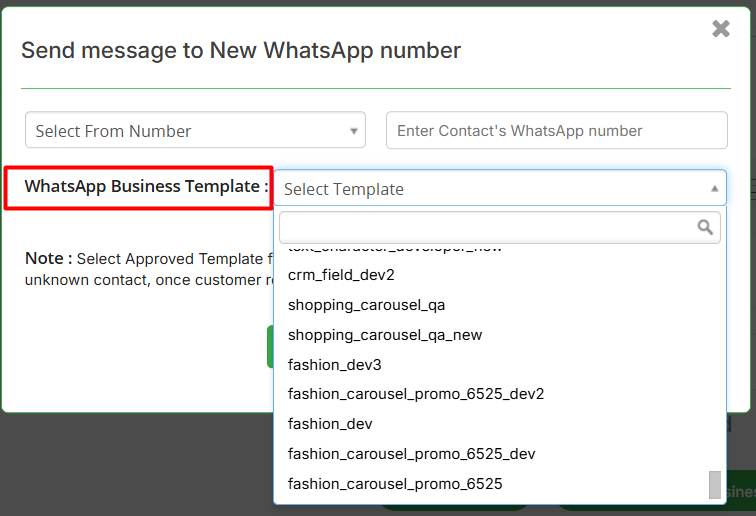
- It provides the capability to send WhatsApp Business messages to unknown or unsaved contacts, as well as the ability to send messages from any number
- WhatsApp Business Message is to send Business Template to the new number directly from the timeline without saving the record to the CRM
Campaign
- To view the details of how the Mass Campaign works, please click here
Template
- Users can create a WhatsApp Business Template in two ways.
- Facebook Developer page
- Whatsapp Business Create Template page
- To view the detailed instructions for creating or configuring a WhatsApp, Business template, please click here
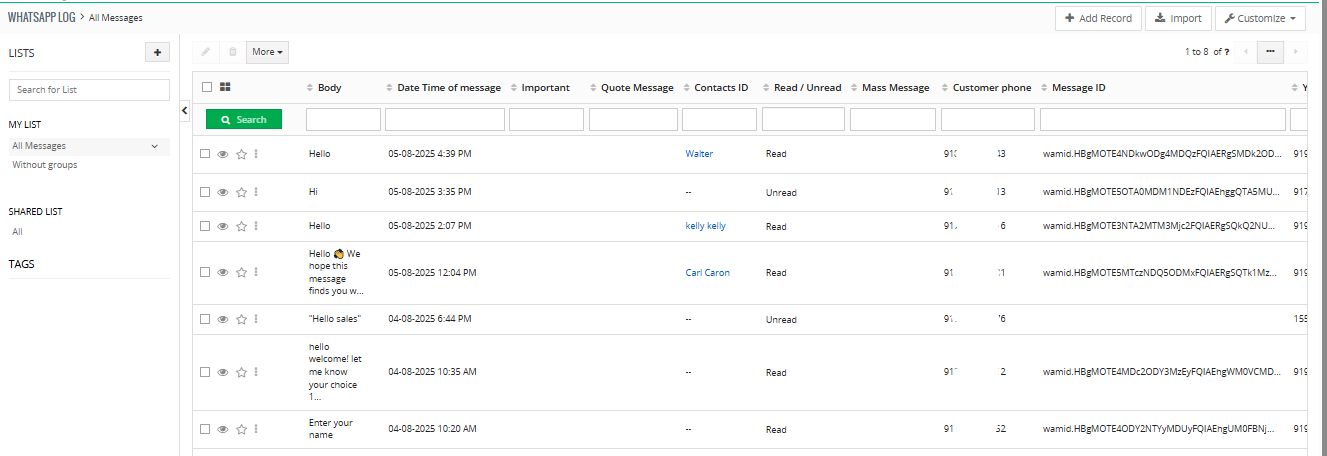
Logs
- The WhatsApp Business Logs section provides visibility into the most recent message exchanged with each customer, along with the corresponding API request and response. This is particularly useful for developers, support agents, or auditors who need to verify message delivery, debug issues, or track API activity.
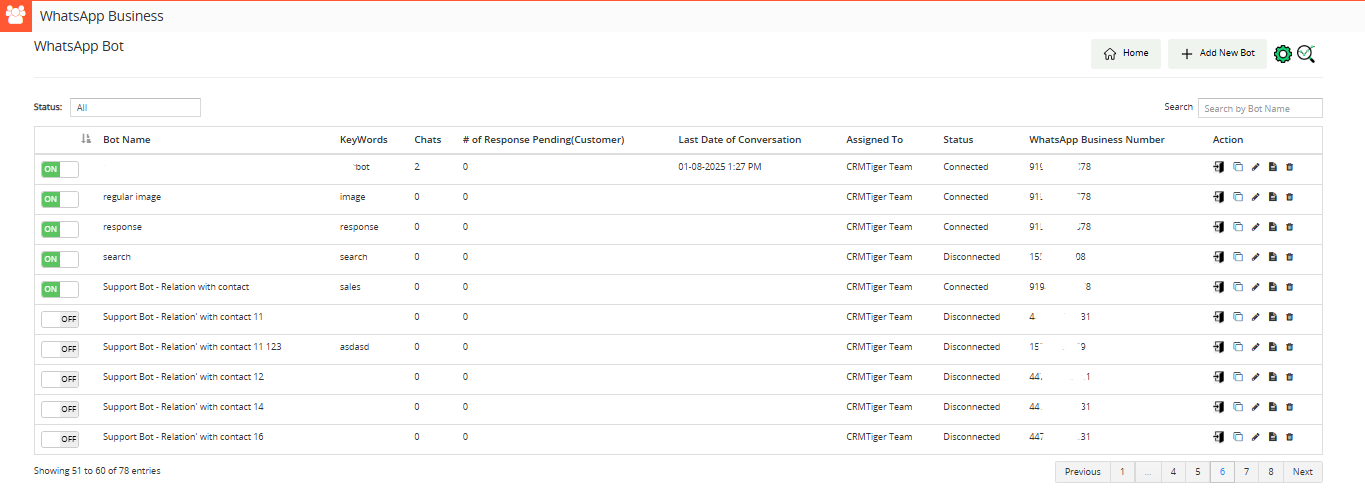
 Chatbot
- By clicking on the WhatsApp Bot, User will move to the main screen of WhatsApp Bot.
 Analytics

- Send / Receive statistics
- Broadcast statistics
- WhatsApp – Meta Usage
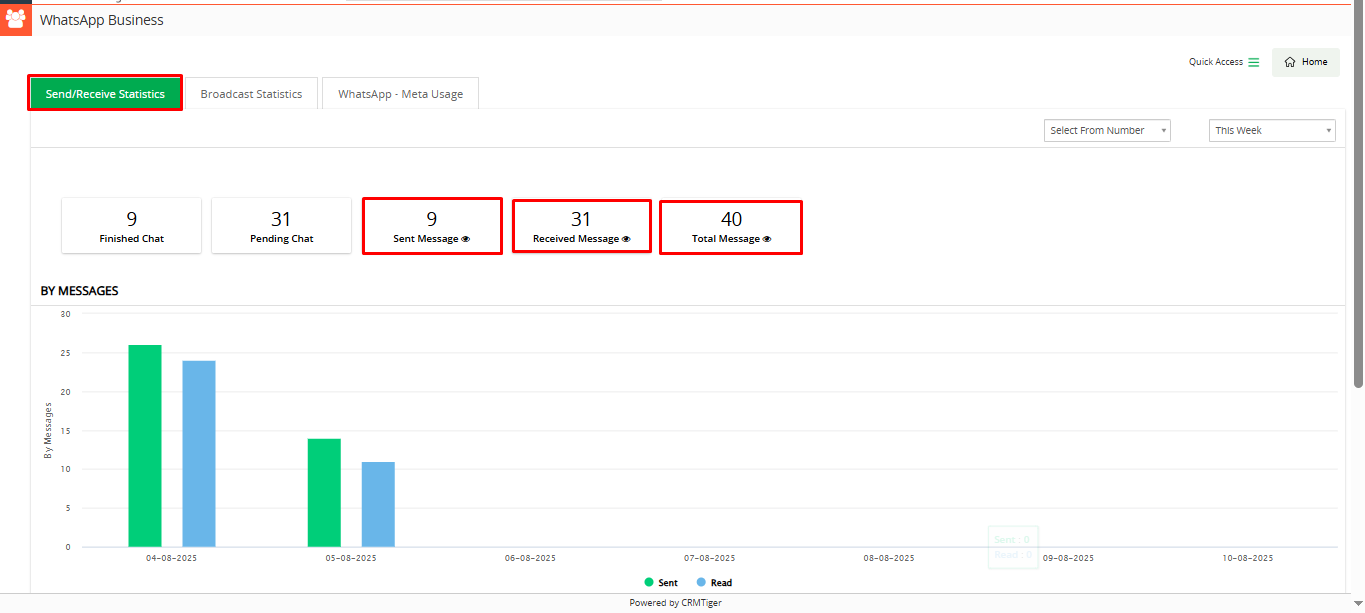
Send/Receive Statistics
The Send/Receive Statistics will display the following information:
- ‘Finished Chat’ for the last sent message from CRM
- ‘Pending Chat’ for the number of messages that are pending
- ‘Sent Messages’ for the total count of sent messages from CRM
- ‘Received Messages’ for the total count of received messages to the CRM
- ‘Total Messages’ which represents the combined count of both sent and received messages in CRM.
- Total Sent Message eye icon link will redirect to the sent message list.
- Total Received Message eye icon link will redirect to received message list.
- Total Message eye icon link will redirect to the total sent and received message list.
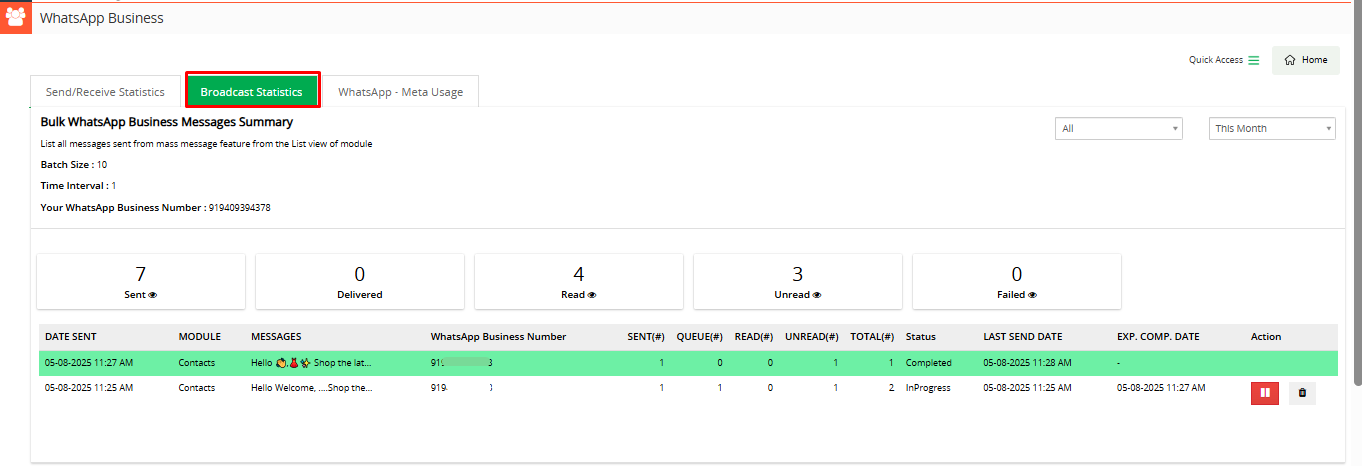
 Broadcast Statistics
- The Broadcast Statistics will display the total count of ‘Sent’, ‘Delivered’, ‘Read’, ‘Unread’, and ‘Failed’ messages for all bulk message lists.
- WhatsApp analytics accessible from WhatsApp icon on Top Right corner or click on
 (analytics).
- WhatsApp analytics offer you detailed reports specifically on Bulk messages sent to your customers.
- WhatsApp Business Bulk Message Summary
- The WhatsApp Business bulk message summary list will display the status of each message,including the number of messages in the queue, sent messages, read messages, unread messages,and the total count.
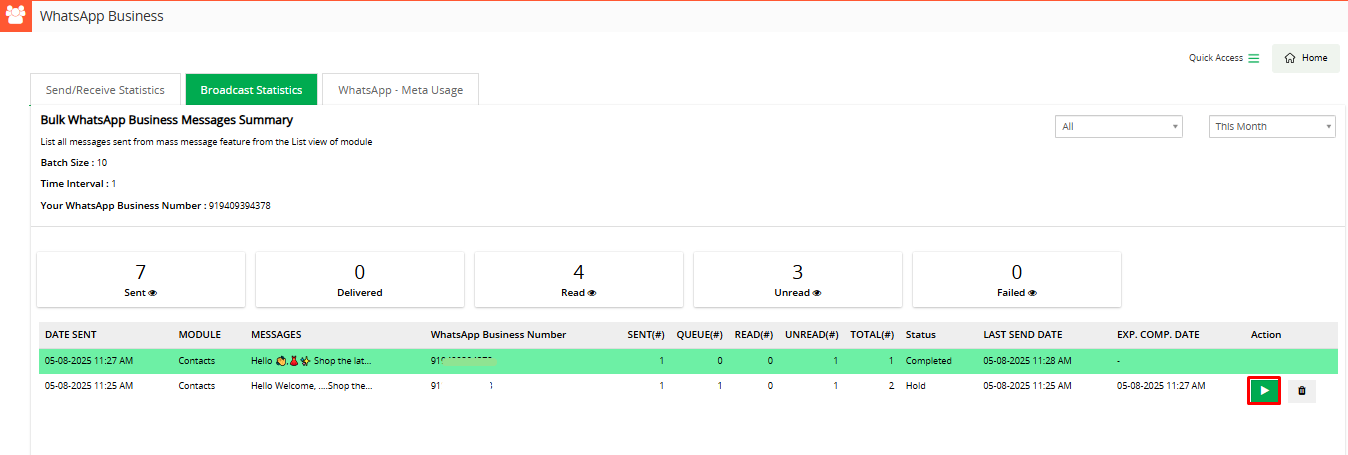
- Users can Stop/Pause bulk message operation by simply click on Start/Pause button to the message those are in Queue
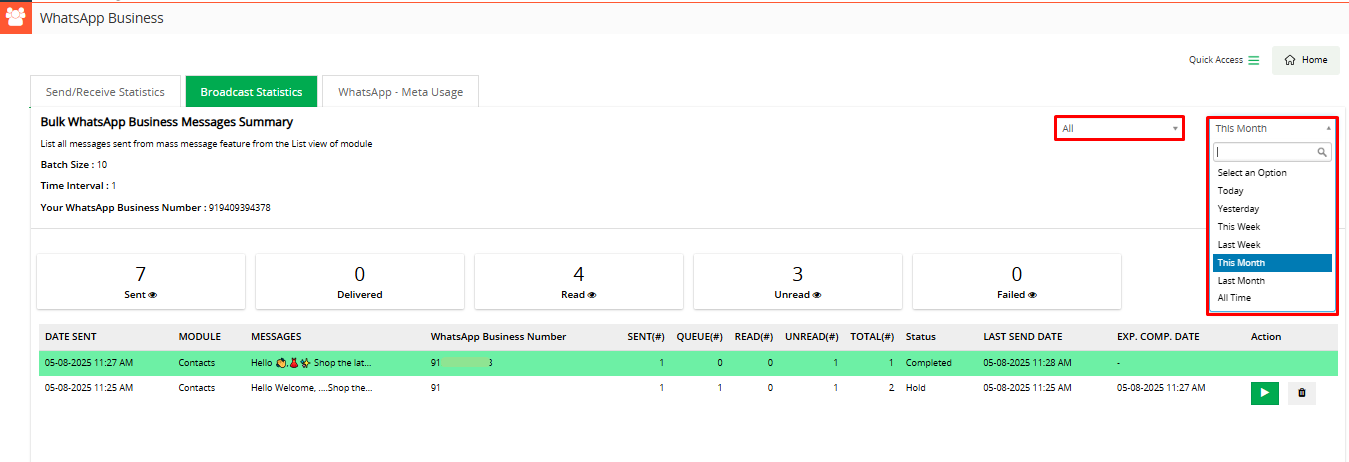
- By clicking on this feature shown in the below screenshot users can view data on sent mass messages based on the selected number and day/week/month.
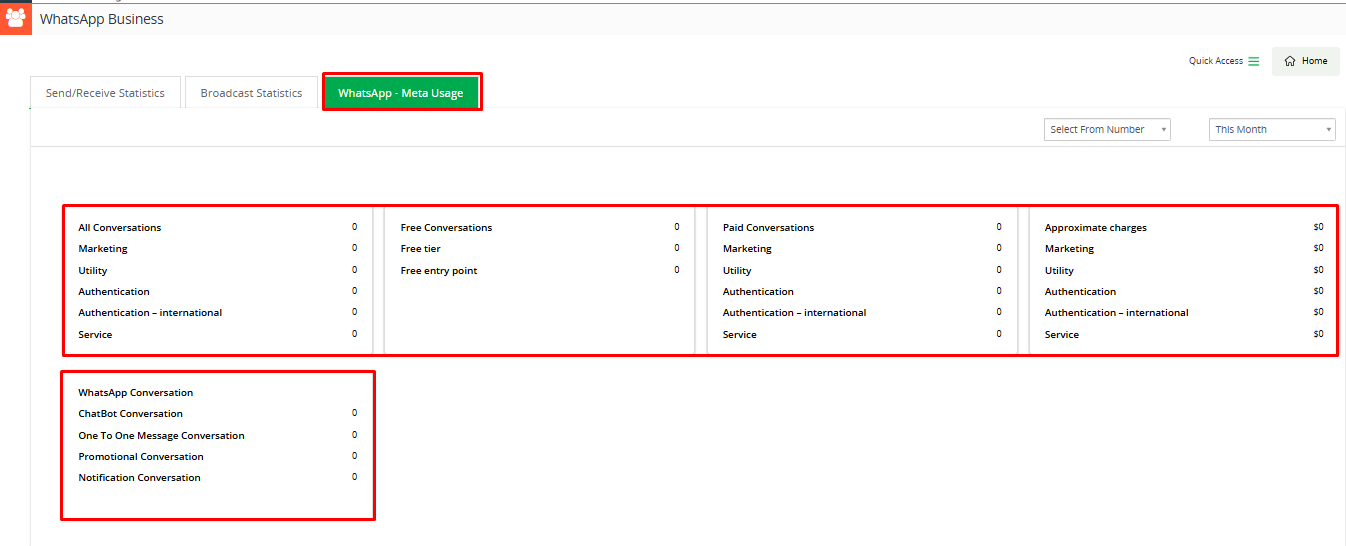
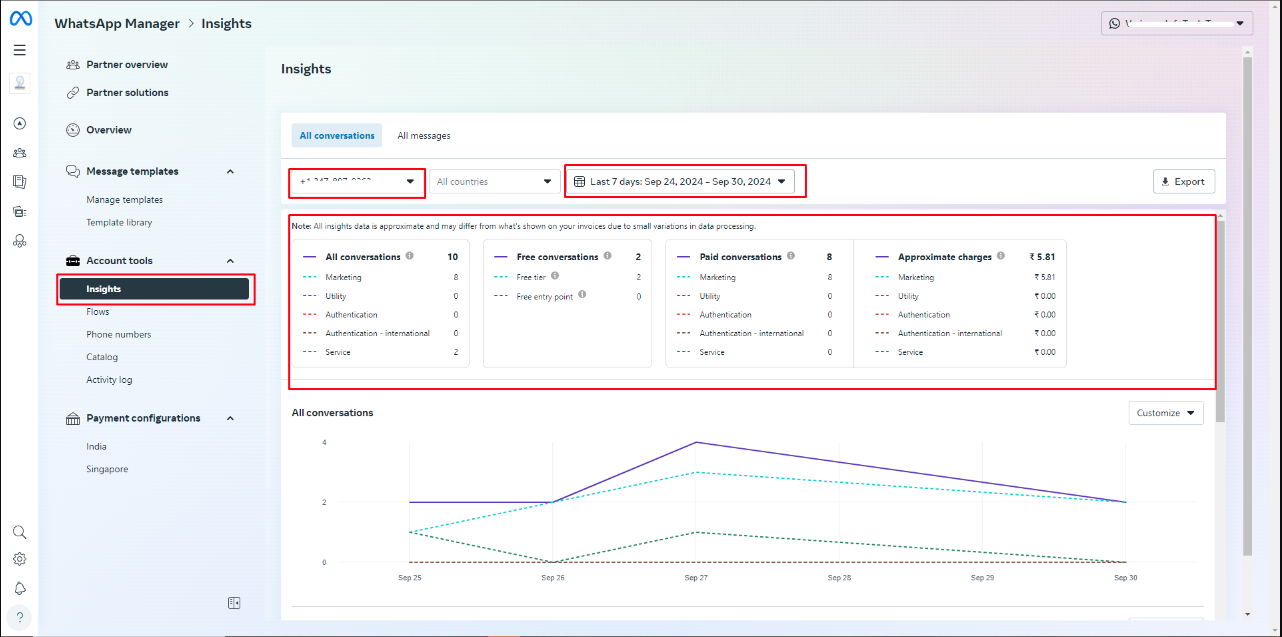
WhatsApp – Meta Usage
- WhatsApp – Meta Usage provides a detailed view of all conversations, both free and chargeable, within the CRM, along with analytics and estimated charges as shown in the below screenshot.
Steps to View Analytics in Your Facebook Meta Account
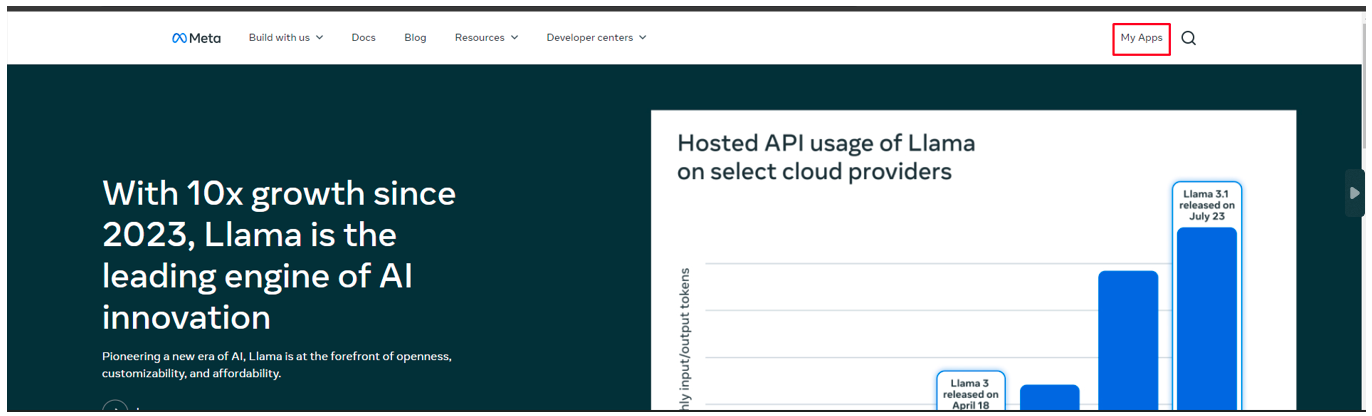
- Begin by logging into your Facebook Developer Account.
- Once logged in, navigate to the ‘My Apps’ section, which provides access to your applications and related settings.
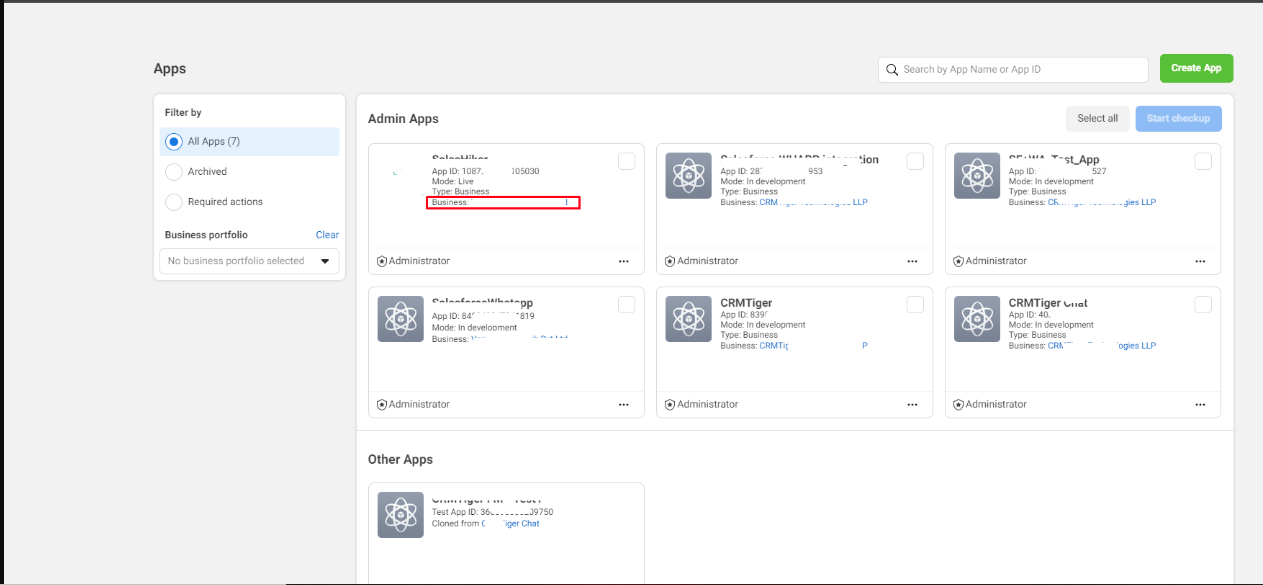
- Click on the Business Account URL from the app, as shown in the screenshot below.
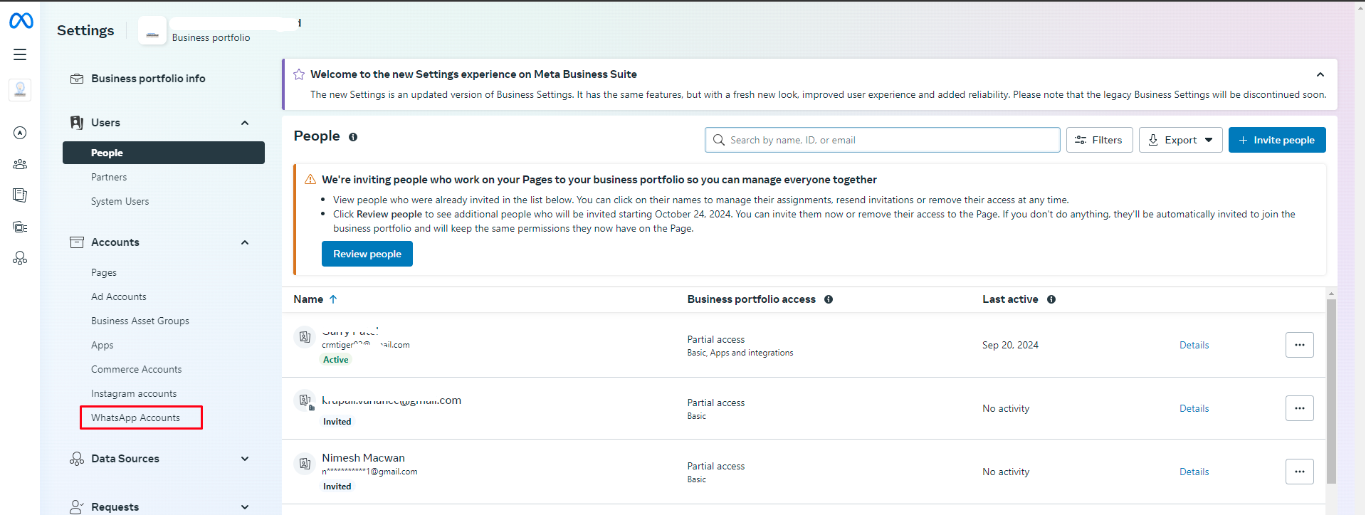
- Click on WhatsApp Account in the sidebar, as shown in the screenshot below.
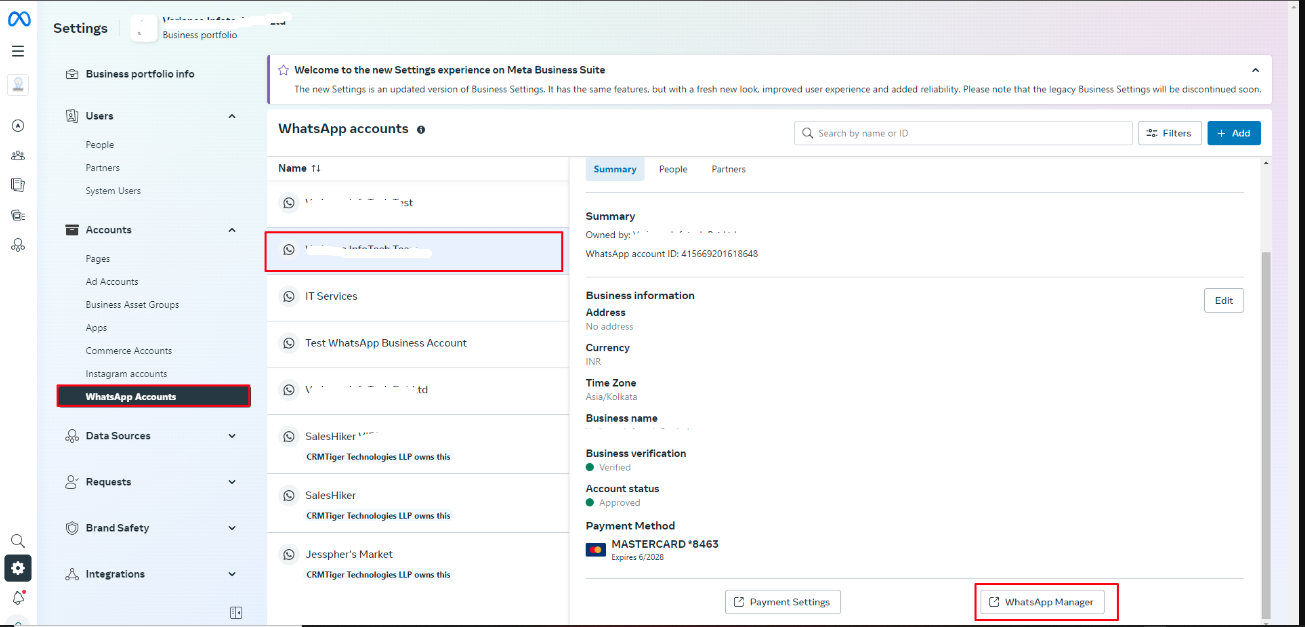
- Click on Insights from “Account Tool” to view analytics.
- By selecting a number and a day, week, or month, users can view the corresponding analytics.
Quick Actions Menu
 Send WhatsApp Business Message to New number
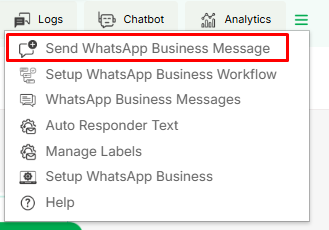
- It provides the capability to send WhatsApp Business messages to unknown or unsaved contacts, as well as the ability to send messages from any number
- WhatsApp Business Message is to send Business Template to the new number directly from the timeline without saving the record to the CRM
- User has to select Whatsapp Business Template to intiate conversation.
Setup WhatsApp Business Workflow
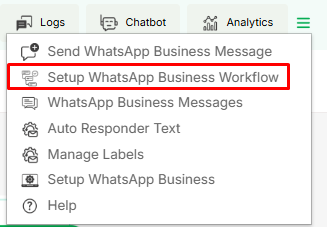
- WhatsApp Business Workflow allows sending Automated WhatsApp messages on the trigger event of any module link with the WhatsApp Business module.
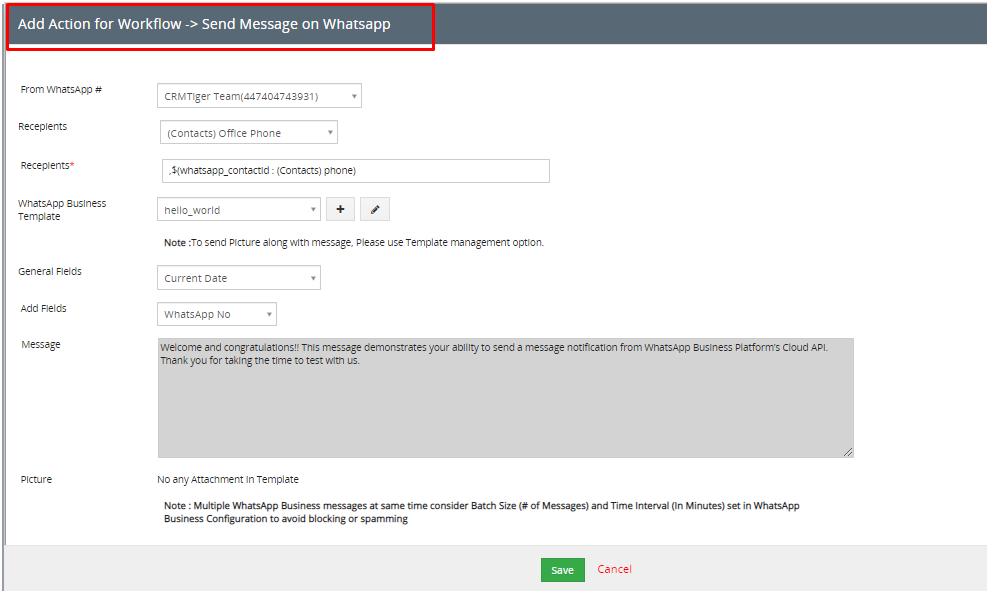
- Automated WhatsApp Business message sent to an Individual WhatsApp number associated with a selected WhatsApp Business number.
- Select “From WhatsApp#” to send WhatsApp from the selected WhatsApp number if more than one number is registered in the WhatsApp extension.
- Select “Send WhatsApp to Recipients” to send a WhatsApp Business message to record.
- The WhatsApp Business workflow can configure the whatsapp Business messages to whom we want to send individually WhatsApp Business templates to share files or message format, general field, add fields and message.
WhatsApp Business Messages
- The WhatsApp Business Messages interface displays the entire conversation history with each customer, showing all sent and received messages along with the corresponding API request and response data. This provides transparency and traceability for support, development, and compliance teams.
Auto Responder text
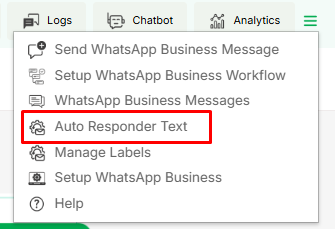
- This option will be enabled from Other Settings > WhatsApp Business Configuration > Gear Icon
 > Auto Message Responder
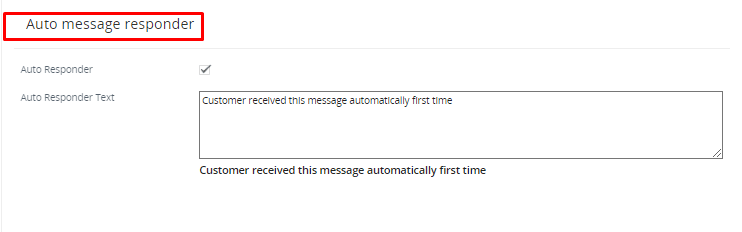
- It is helpful to enable automatic responses to messages, which means you can set up pre-written messages to be sent automatically to the sender.
- Note: Auto responder only works if chatbot is deactivated for user.
Manage Labels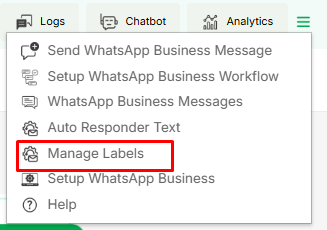 Managing Labels:
- Labels can be created and managed from this menu.
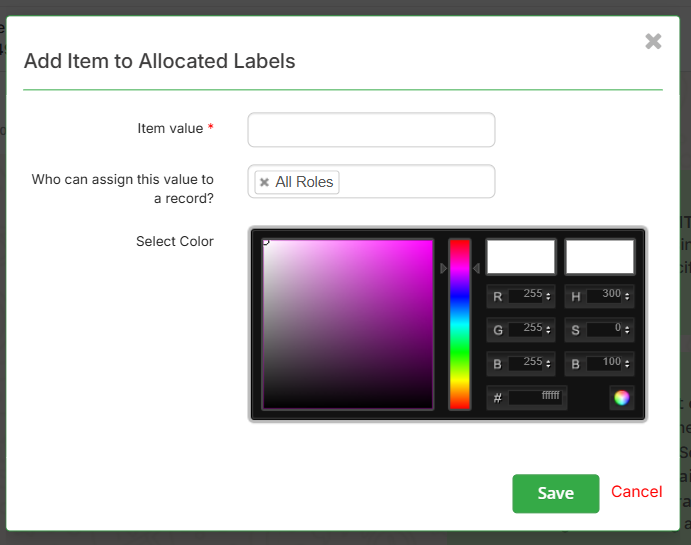
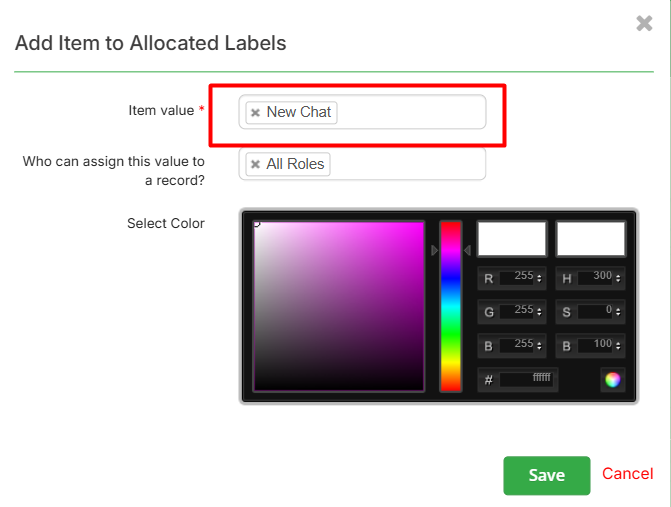
- Clicking on the menu will open the screen shown below.
- Here, users can add a label name, assign it to a specific role, and select a color for the label.
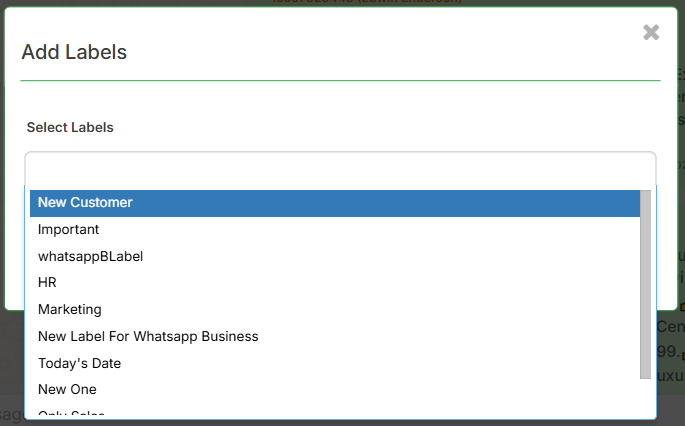
- After adding a new label user can apply the label from the label list. Which can be done by clicking on ‘Add Label’.
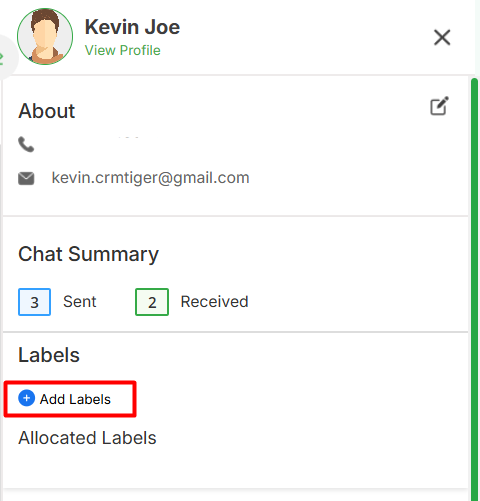
- By clicking on it below screen will be visible where list of labels will be visible.
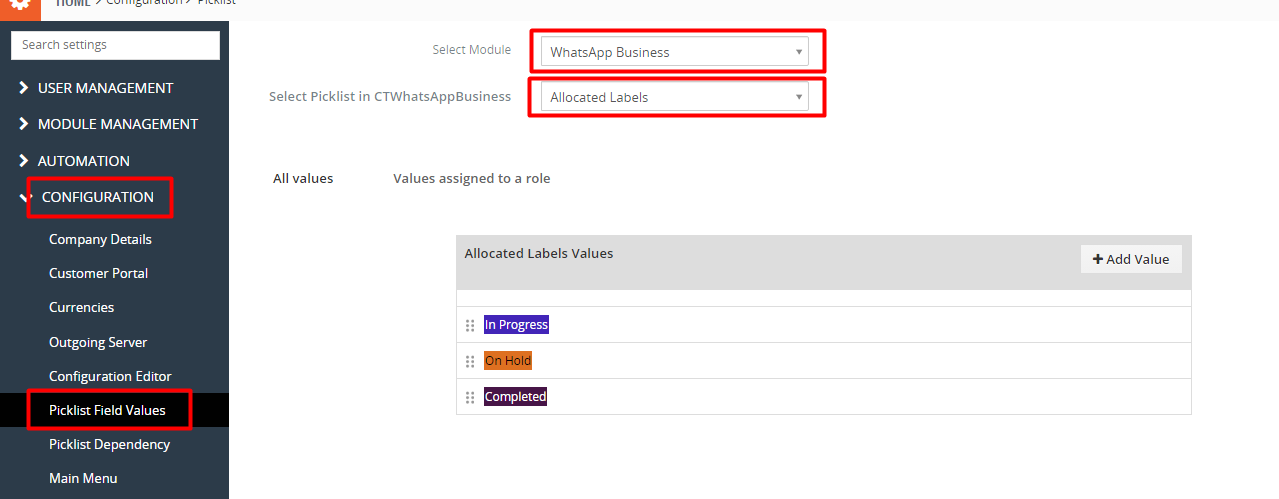
- To edit or delete any label go to Settings > CRM Settings > Configuration > Picklist Field values The screen below will be visible.
- To edit any label click on the highlighted icon.
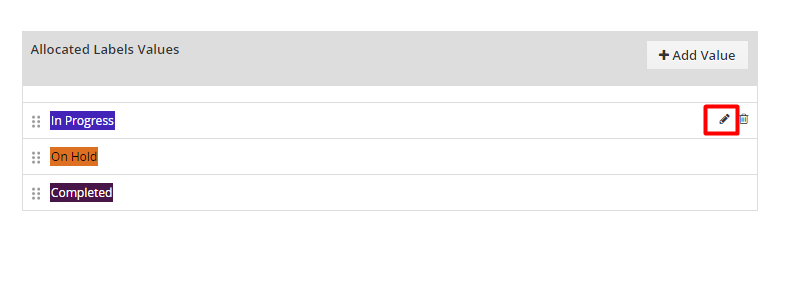
- By clicking on it below the screen will be open from where user can change the name and color of the label.

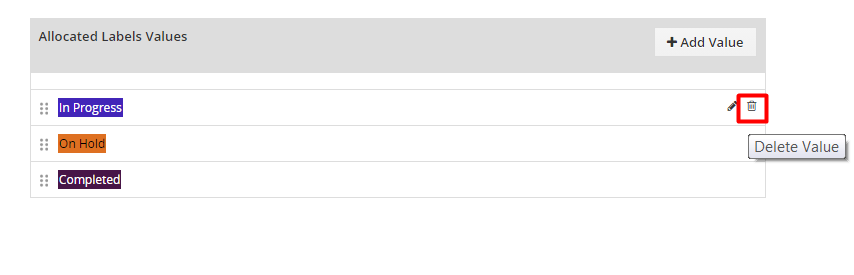
- To delete any label click on the delete icon.
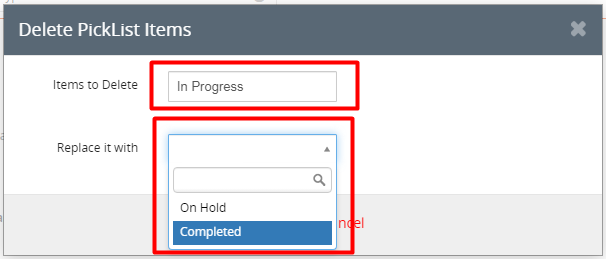
- Upon clicking, a popup will appear where the user needs to replace the existing label with another one. This ensures that any chats associated with the label being deleted are reassigned to the new label.
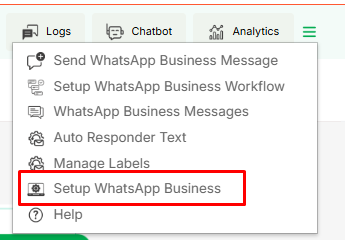
Setup WhatsApp Business
- By clicking on “Setup WhatsApp Business” the user get redirected to the WhatsApp Business configuration page
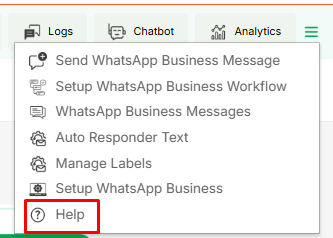
Help
- When the user clicks on ‘Help,’ it redirects to the
CRMTiger article that helps understand how to install and use WhatsApp Business integration.
Send Bulk / Mass Message
- Bulk/Mass message manage from Other Settings > WhatsApp configuration > Gear Icon > find Mass Message Configuration

- Click here to view how the Mass Message Configuration feature works, as described in the page above.
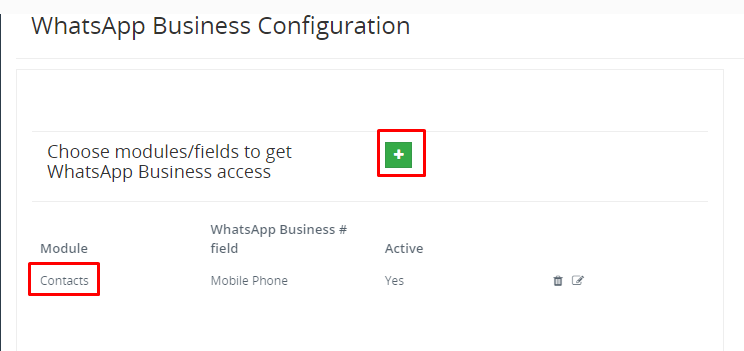
- Users can send Bulk/Mass message from Record List of CRM for those modules which are enabled from “Allow module access” feature from WhatsApp configuration page
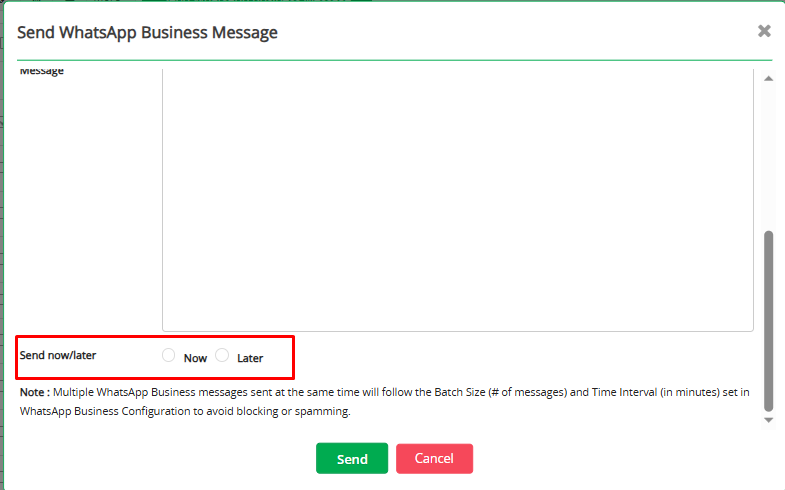
- From the record list, select multiple records, then go to ‘Send WhatsApp Business Message’ to send bulk WhatsApp messages to multiple contacts.

- Users can send bulk messages immediately or schedule them for a later date by selecting the desired time from the ‘Send Now/Later’ option.
Interested to Try WhatsApp Business Integration ? Click Here