
Installation of WhatsApp Business Extension for version 7.X
Inorder to install WhatsApp Business extension for vTiger Please follow steps below.
1. Place an online order from here, You could choose trial and paid option as per your choice.
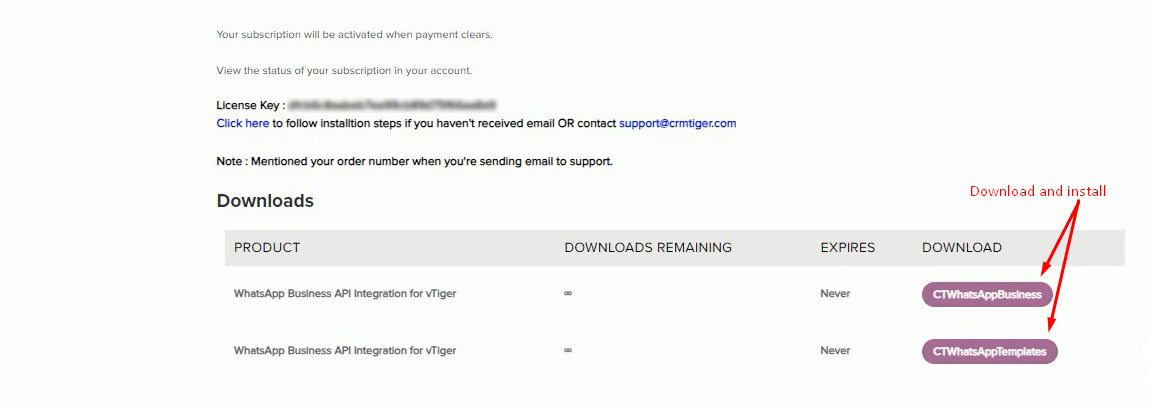
2. Once you place an order you will receive an email or page to download Extension ZIP to install in your vTiger Instance
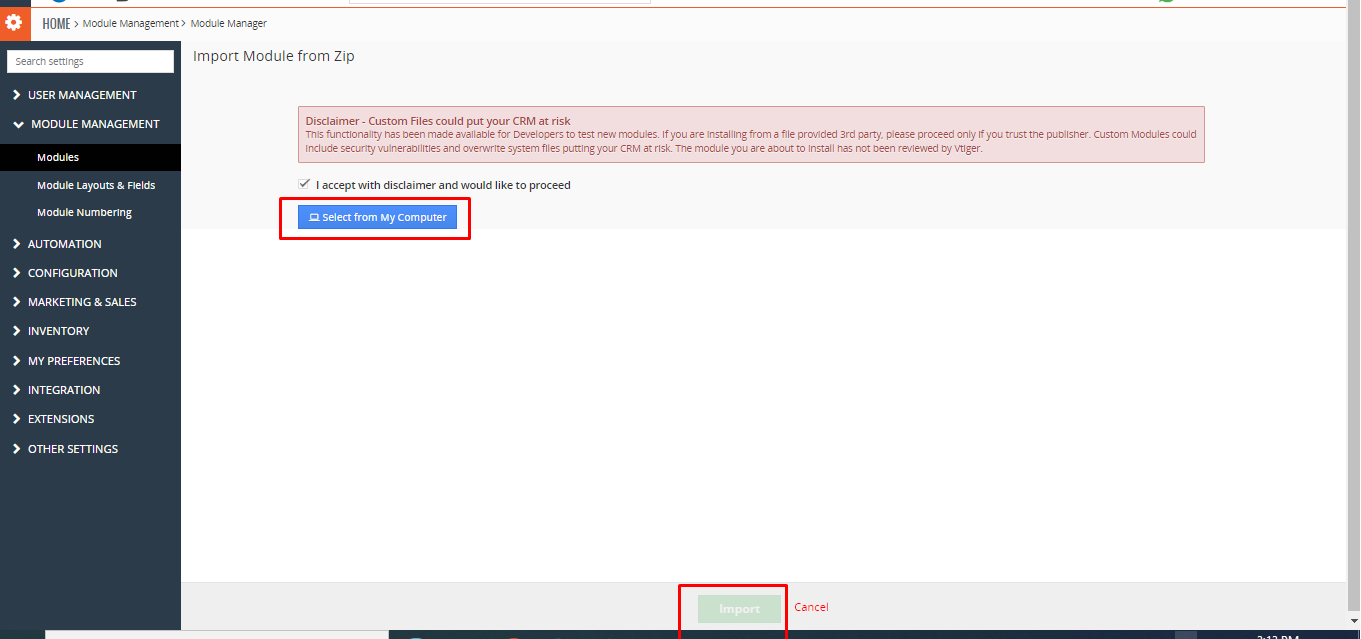
 3. Login to your vTiger CRM system using admin credential then GoTo Settings > CRM Settings > Module Management >Modules > Import from Zip > check checkbox & Select zip file > Click Import > Import Now
4. Once the WhatsApp extension is Installed Go To Settings > CRM Settings > other settings > Click on WhatsApp Business Configuration > Update license key received in Step#1.

5. Once License Key has been registered it will Redirect to the WhatsApp Business configuration page. Please follow the instructions below to configure and set up WhatsApp Business Integration for vTiger.
How to configure WhatsApp Business Account with Meta Facebook Account?
Before adding a WhatsApp Business account, the WhatsApp Business icon should appear in red, as shown in the screenshot below. Click on Other Settings > WhatsApp Business Configuration > Add WhatsApp Business Account to set up a WhatsApp Business Account
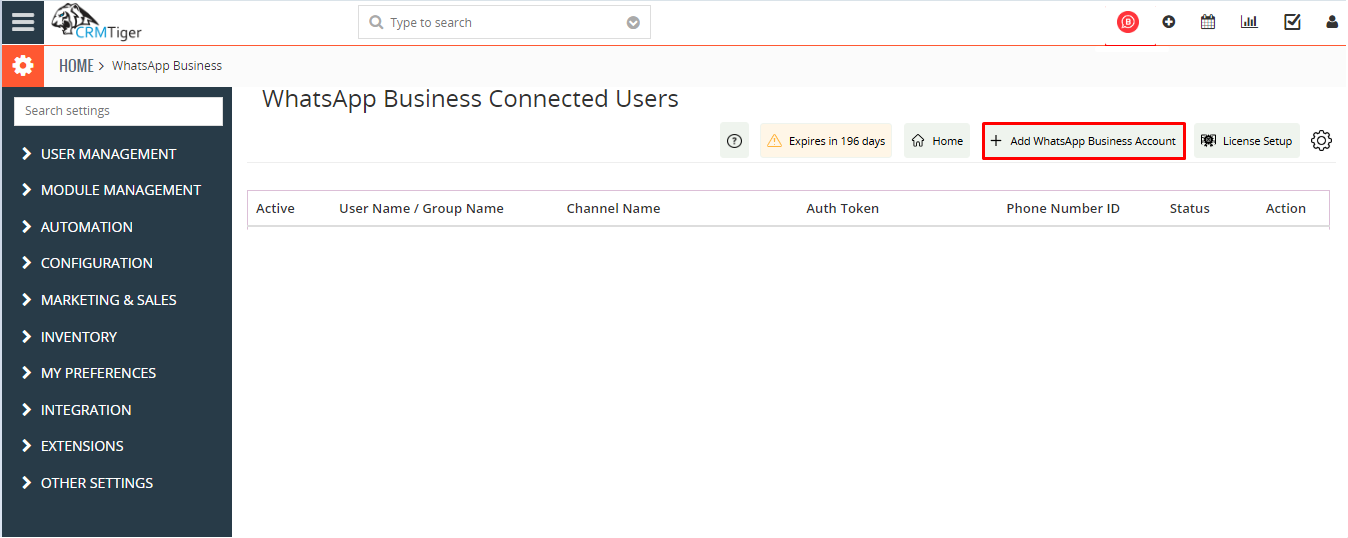 Once the user clicks on the ‘Add WhatsApp Business Account’ button, the pop-up shown in the screenshot below opens.
The user has to enter the desired channel name and click on ‘Connect Your WhatsApp Business Account.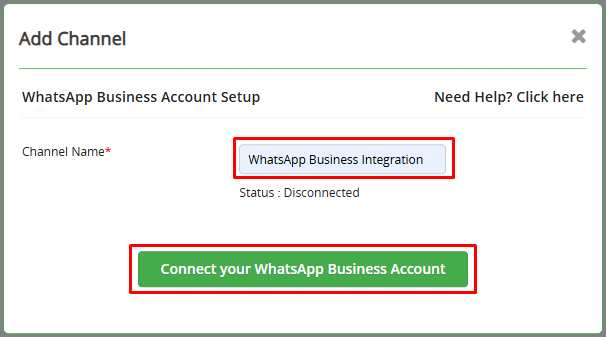 As displayed in the below screenshot After clicking on the ‘Connect Your WhatsApp Business Account’ button, it navigates to the Facebook account page, where the user has to enter their password and click on the continue button to log in to Facebook.
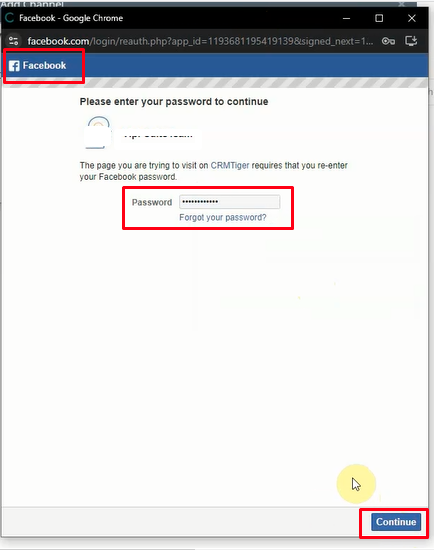 Upon clicking the ‘Continue’ button, the user is directed to the next page, where they are prompted to grant permission to proceed with the same account name, As shown in the below screenshot.
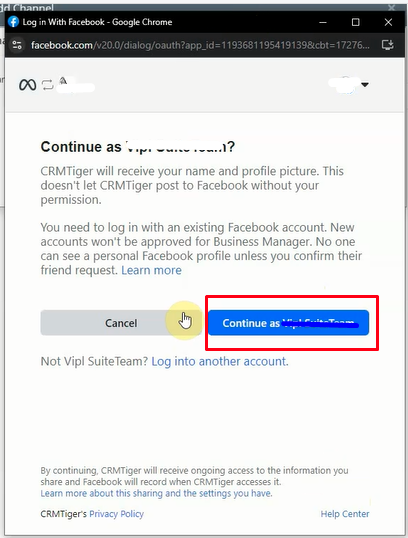 After selecting ‘Continue as [same user name],’ the user is redirected to a page to connect their account with CRMTiger. At this point, the user needs to click the ‘Get Started’ button, as illustrated below.
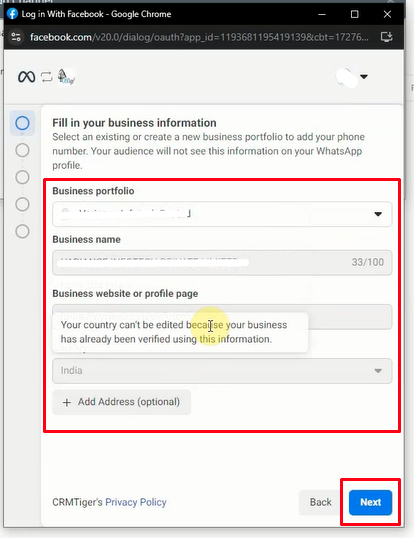
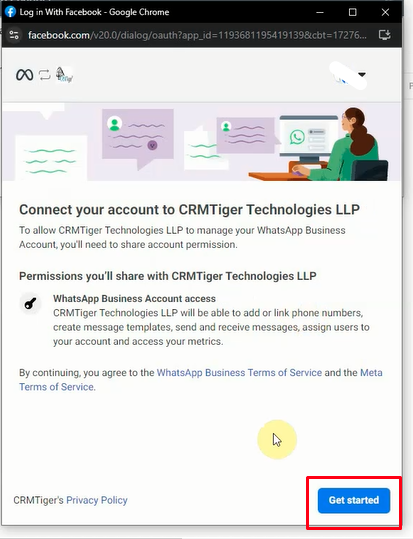 Upon clicking ‘Get Started,’ the user is taken to the ‘Business Information’ page, where they are required to enter the necessary details and proceed by clicking ‘Next,’ as shown below.
 On the next page, the user is required to create or select a WhatsApp Business account, as shown in the screenshot, and then click the ‘Next’ button.
  The user will then be directed to a permission page, where they need to click the ‘Continue’ button, as illustrated below.
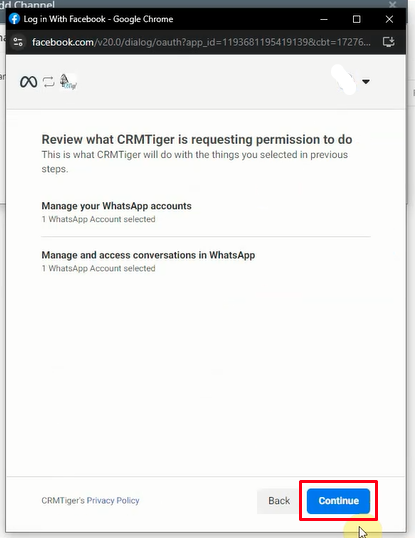 After verifying the information, the user will be taken to the final page. To complete the process, they should click the ‘Finish’ button, as shown.
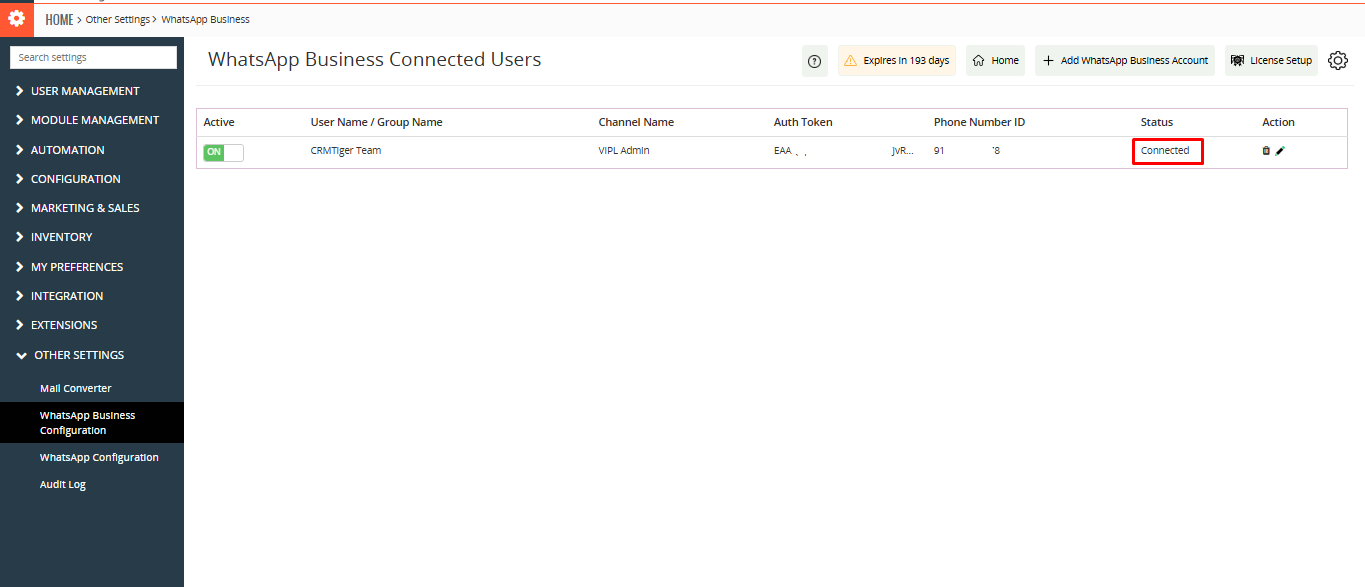
 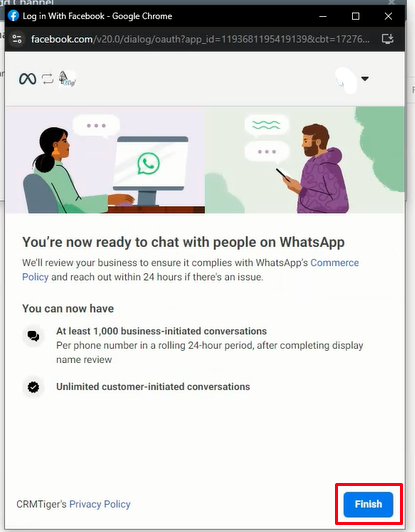 After the account is created it will show as the status connected with the phone number as shown in the below screenshot.
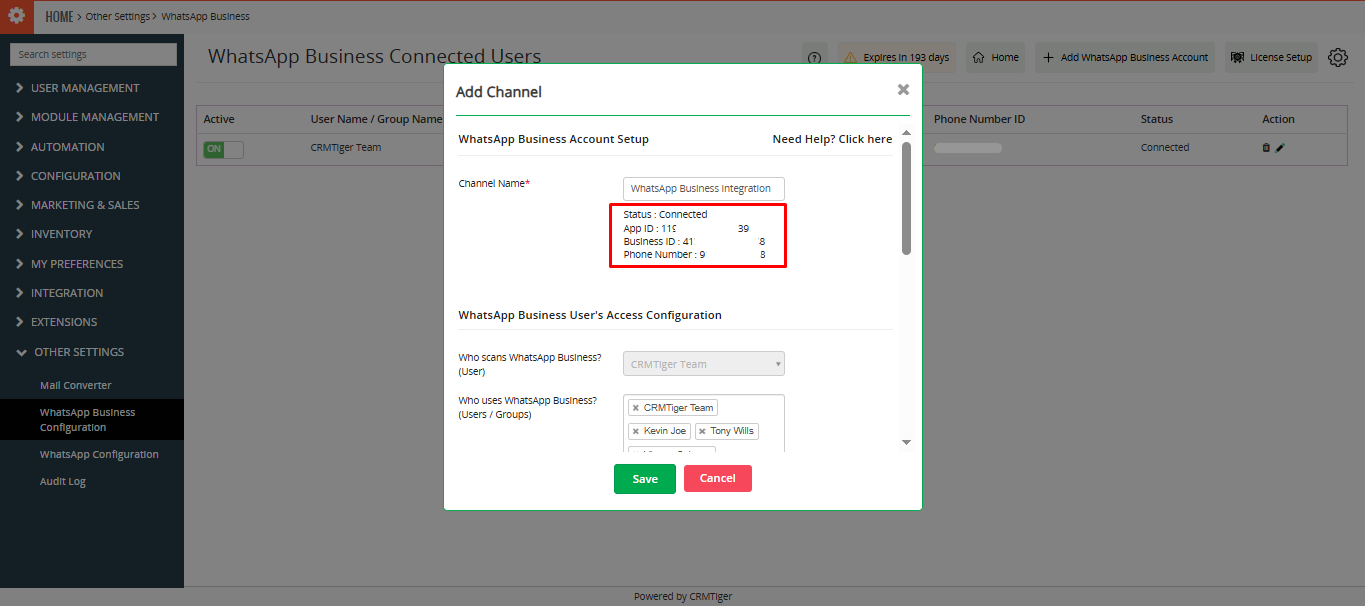 Once the account is created users have to select who uses WhatsApp Business and click on save button.
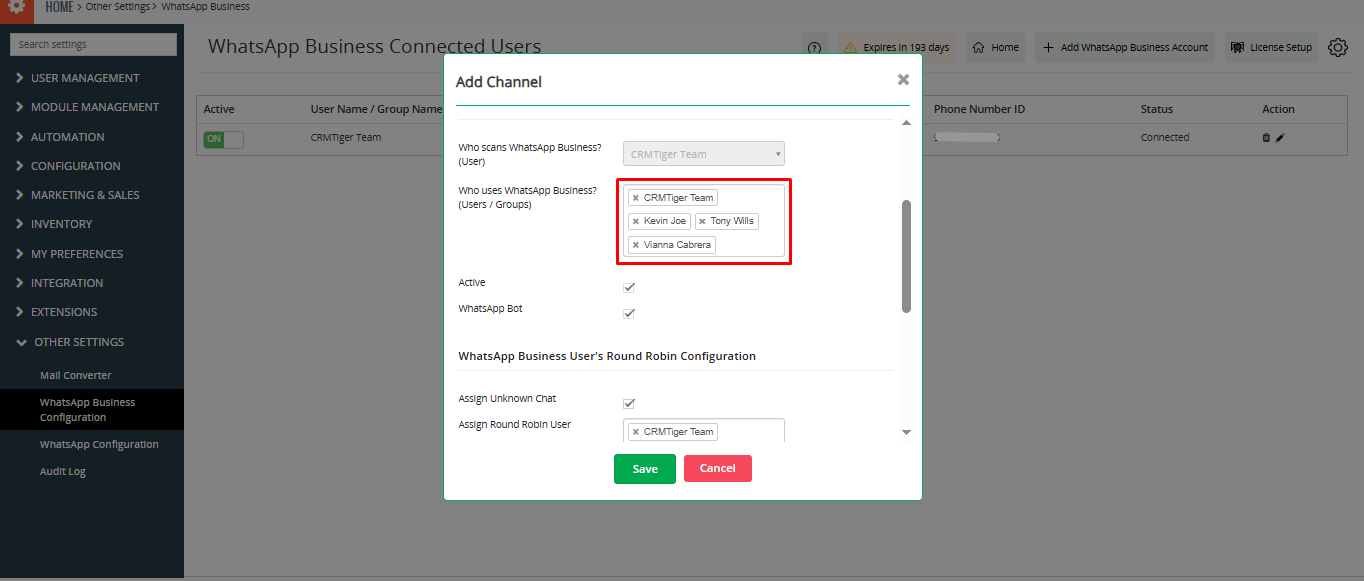
2FA PIN (Two-Factor Authentication)
Two-Factor Authentication (2FA) is a security feature designed to protect your WhatsApp Business account from unauthorized access. When enabled, it adds an extra layer of verification by requiring a 6-digit PIN in addition to your regular login credentials.
- Prevents unauthorized access.
- Ensures only verified users can make changes.
- Required for account recovery and number reactivation.
The user must enter the 6-digit 2FA PIN to successfully connect their WhatsApp Business account to the CRM, as shown in the screenshot below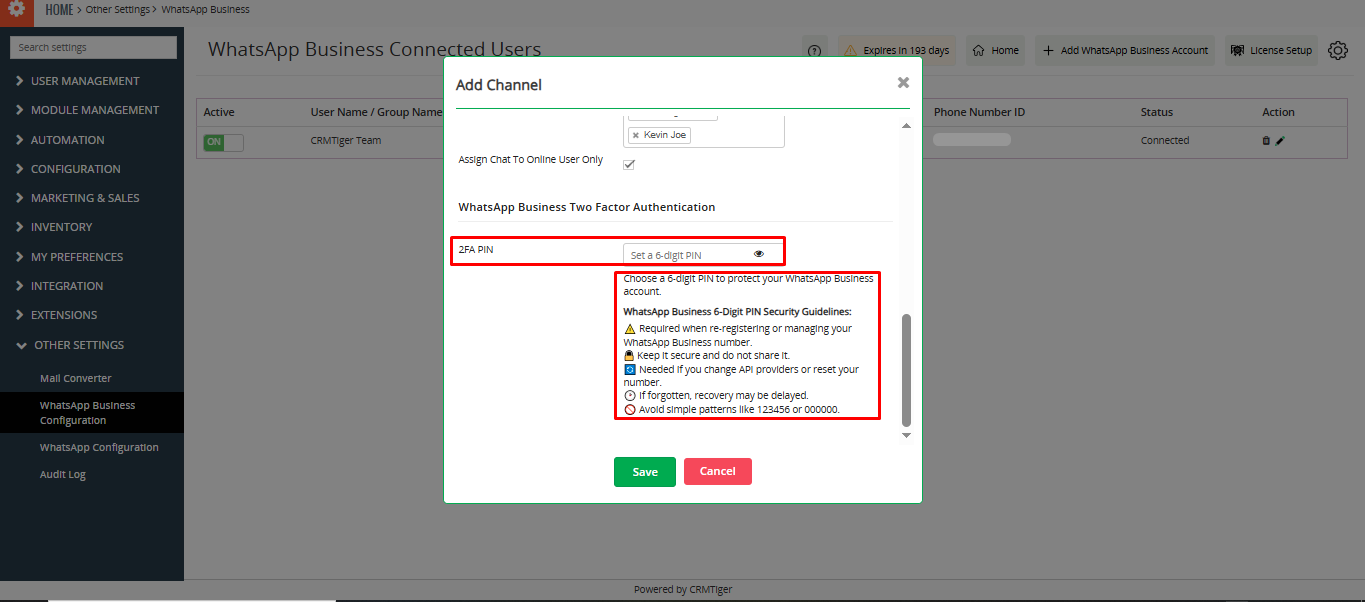 After saving the account will show as connected as shown in the below screenshot
 Click on Other Settings > WhatsApp Business Configuration > Edit icon will open the Pop-up for edit the old WhatsApp Business User’s Access Configuration
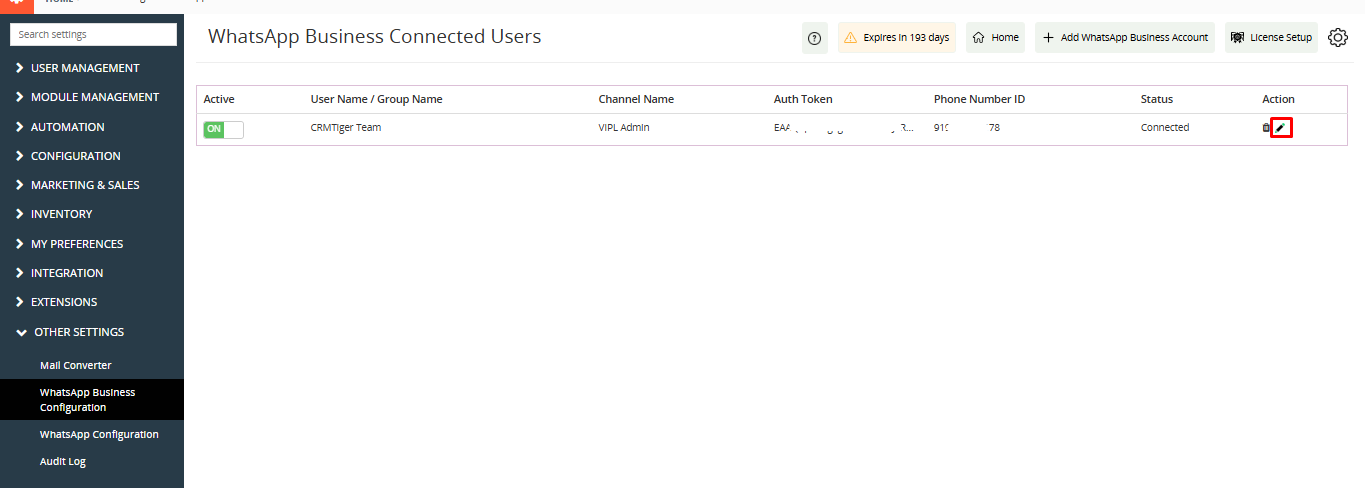
How to configure and set up WhatsApp Business Integration for vTiger
Access “WhatsApp Business Configuration” from Settings > Other Settings > WhatsApp Business Configuration > Gear Icon![]()
This is the setting page to manage various activities of WhatsApp Business within vTiger. 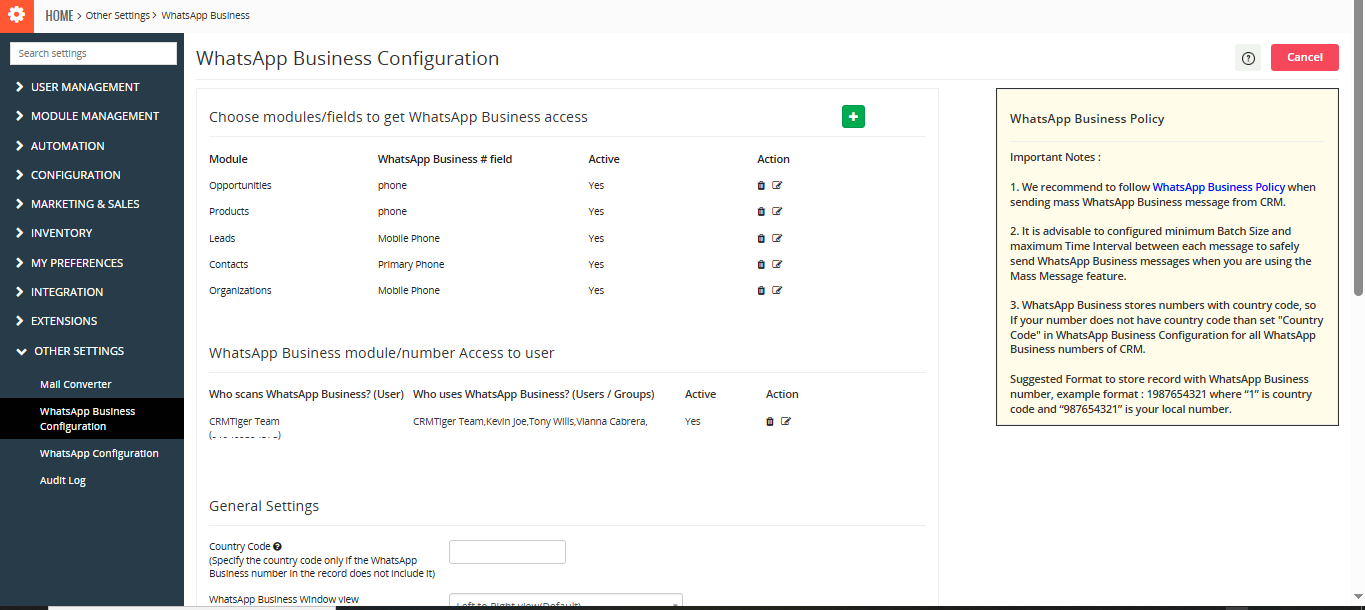
Add/Remove modules for WhatsApp Business Integration
Add/Remove modules to be integrated with WhatsApp to Send/Receive messages against any phone number of the module.
In “Access modules to WhatsApp” click on ![]() to add modules to provide access to display WhatsApp icons to send/receive WhatsApp Business messages.
to add modules to provide access to display WhatsApp icons to send/receive WhatsApp Business messages.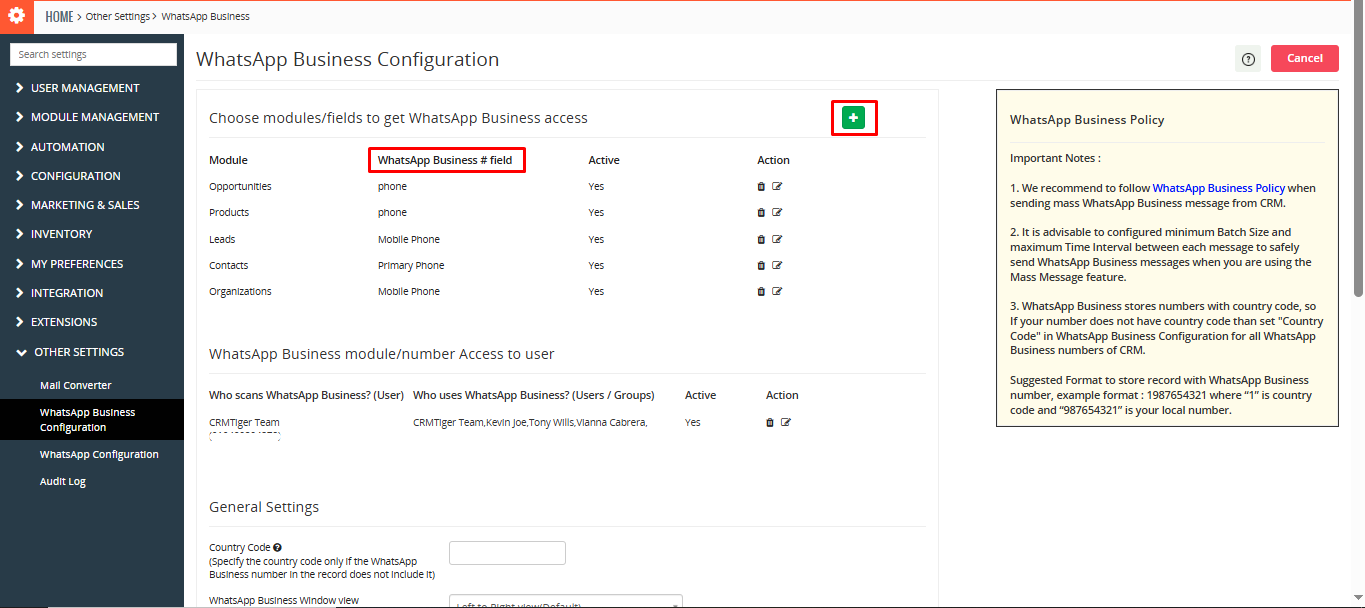 Select “WhatsApp Business # field” from “Access modules to WhatsApp Business integration” to allow which fields in selected modules to be considered as WhatsApp Business fields.
WhatsApp Business module/number Access to user
Multiple WhatsApp # for each user
- CRMTiger’s WhatsApp business integration allows this option for those companies who rely on a Multiple WhatsApp number configuration for each user. As well as allocate a WhatsApp number to each single user.
- This option will display from Other Settings > WhatsApp Business configuration > Gear Icon
 > Find “WhatsApp Business module/number Access to user”, it will display the selected list of users to get WhatsApp Business # access
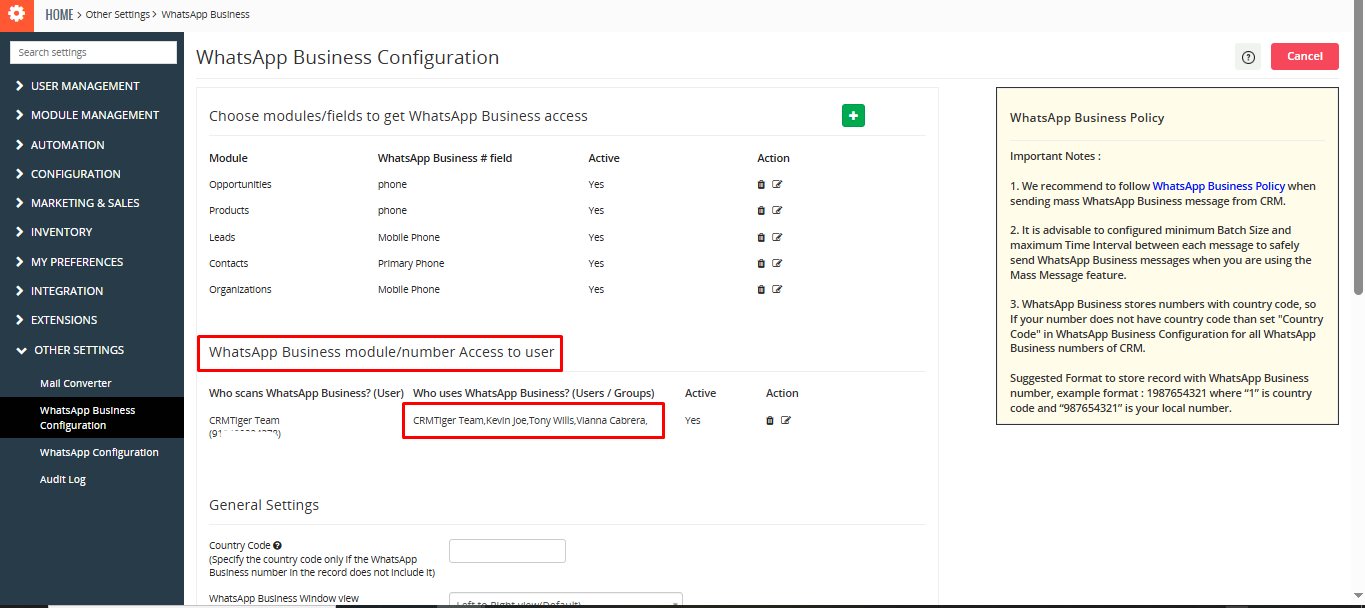 Click on Other Settings > WhatsApp Business configuration > edit icon will open the Pop-up for Add / Delete users/groups to use multiple WhatsApp Business numbers
 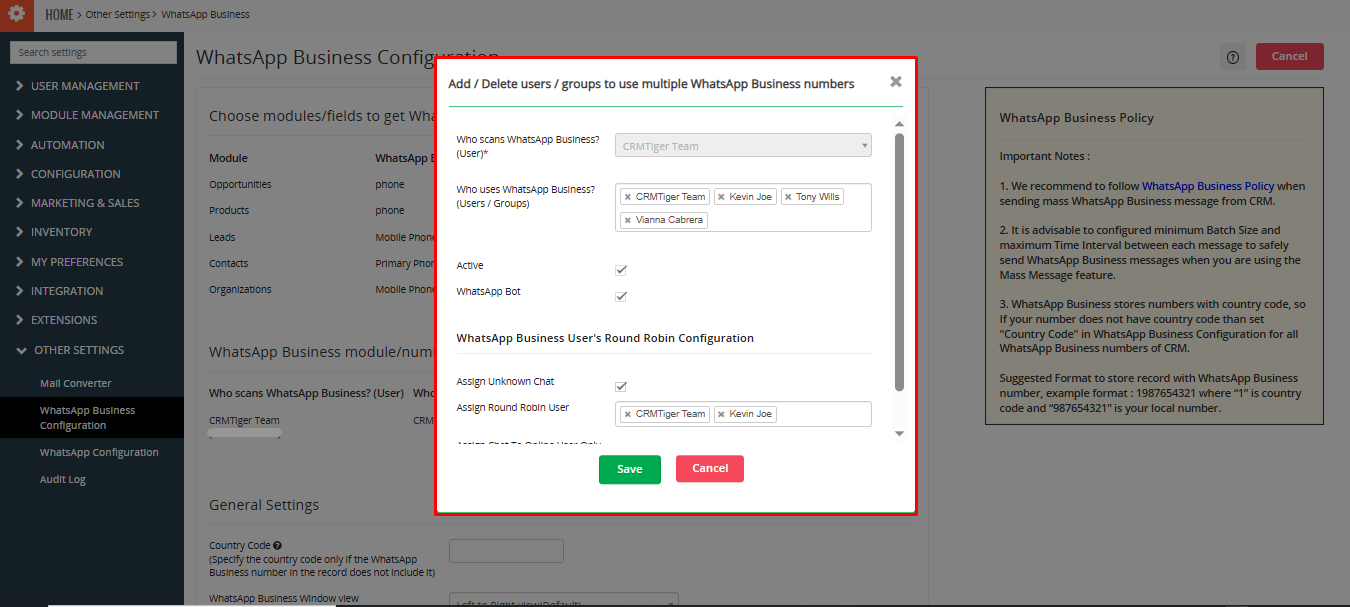 As per below screenshot, Kevin can send messages from both the WhatsApp Business number of CRMTiger Team(Admin) and Tony Wills.
 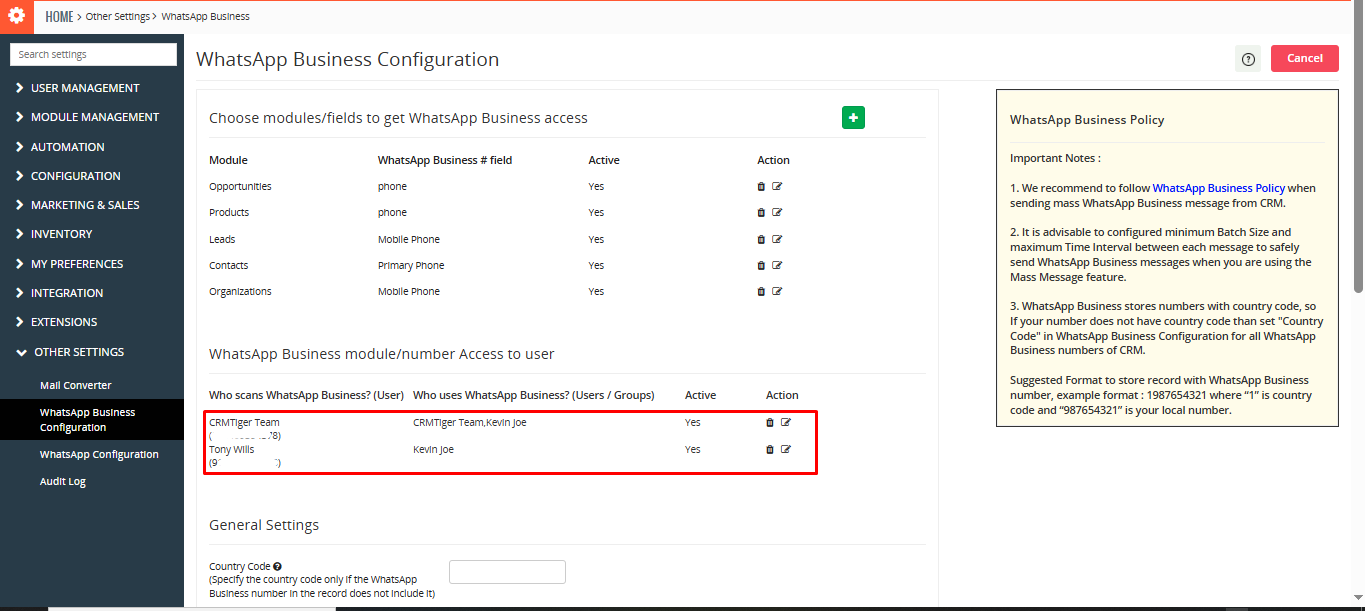 CRMTiger Team(Admin) and Tony Wills are the users who have connected numbers and they have given access to kevin to use their number. So kevin can message from both numbers.
 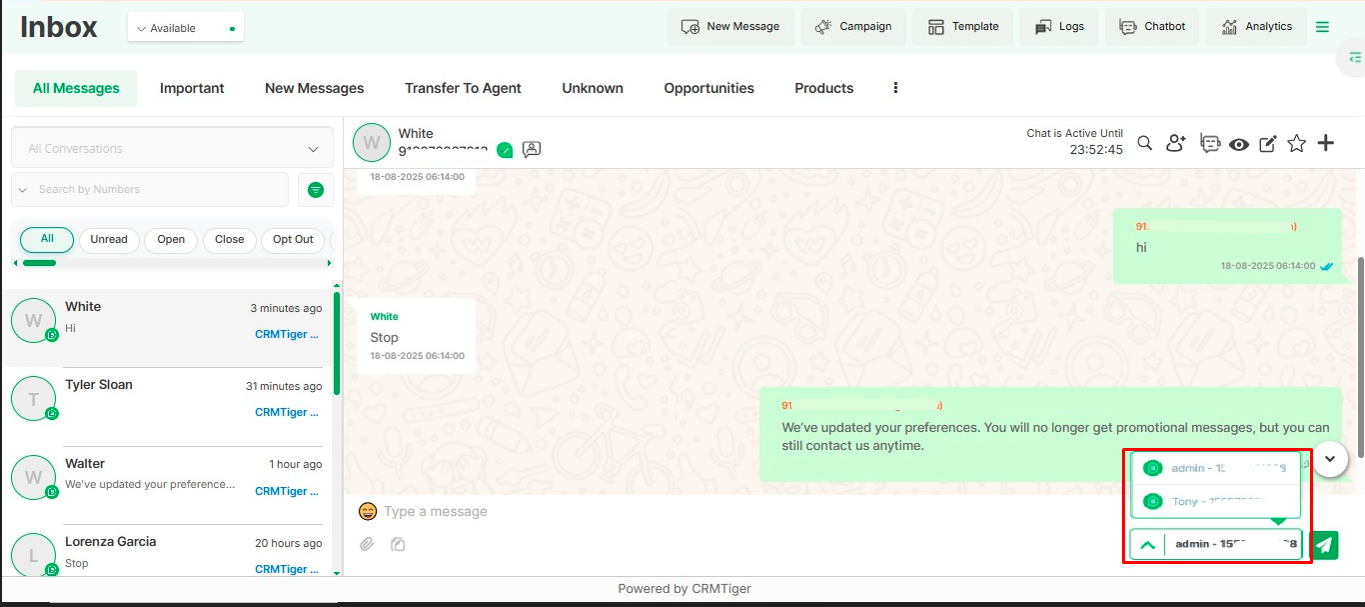 WhatsApp Business User’s Round Robin Configuration This option will be managed from Other Settings > WhatsApp Business Configuration > Gear Icon
 ![]() > Find WhatsApp Business module/number Access to user , it will display the selected list of users to get WhatsApp Business # access
> Find WhatsApp Business module/number Access to user , it will display the selected list of users to get WhatsApp Business # access
Click on Other Settings > WhatsApp Business configuration > edit icon will open the Pop-up for WhatsApp Business User’s Round Robin Configuration” to get WhatsApp Business # access 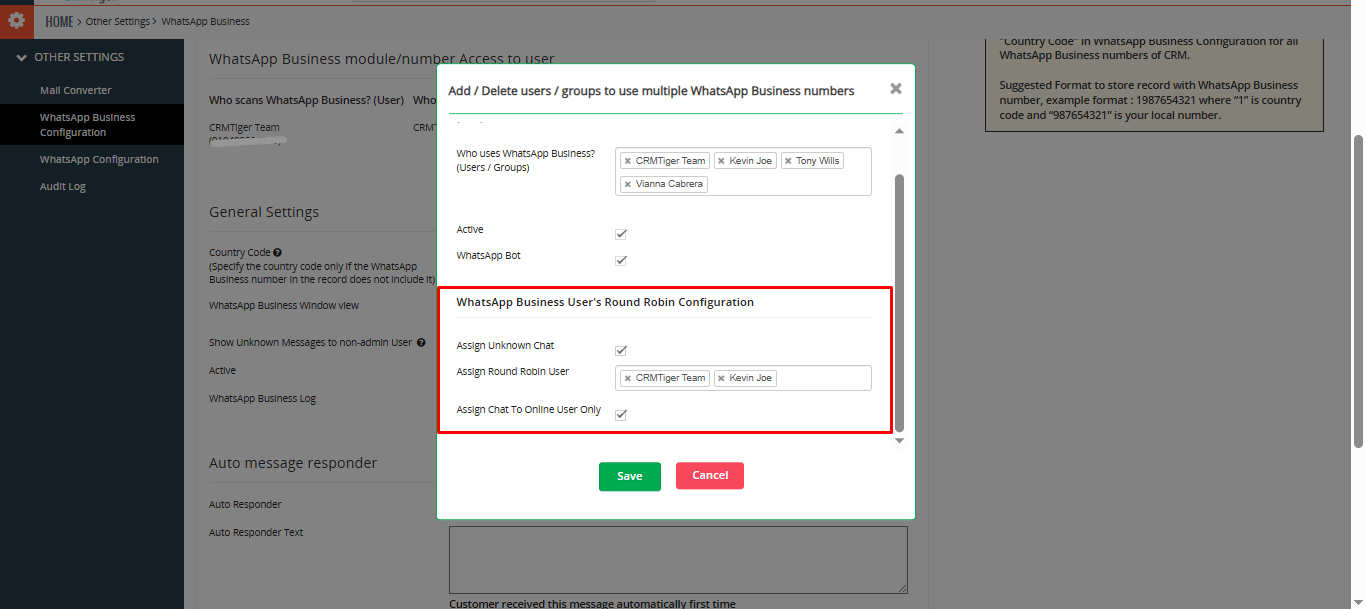 Assign Unknown Chat
Must be enabled for Round Robin to function.
If disabled, Round Robin will not assign messages from unknown numbers.
When enabled, new incoming messages from unknown numbers will be distributed using the Round Robin logic.
Assign Round Robin User
This field allows you to select users/groups who can receive chats via Round Robin.
Users listed here are filtered based on access granted under:
- “Who uses WhatsApp Business? (Users / Groups)”
Assign Chat To Online User Only
When checked, the system will only assign chats to users marked as “Available”.
It will ignore users with the following statuses:
- Unavailable
- Away
- In Break
Only users in the “Assign Round Robin User” list and with “Available” status will receive new chats.
Chat Assignment Fallback Rule
If no Round Robin user is available (i.e., all are Unavailable, Away, or In Break), the incoming chat will be automatically assigned to the Admin user.
This ensures no message goes unassigned, maintaining response continuity. 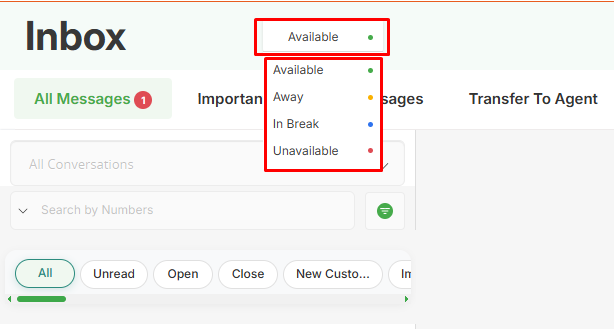 How Round Robin Works When a new message is received from an unknown WhatsApp number, and “Assign Unknown Chat” is enabled:
- The system checks all users listed under Assign Round Robin User.
- It filters out users who are not “Available” (if “Assign Chat To Online User Only” is checked).
- The system assigns the message to the next available user in sequence.
- The process ensures equal distribution of incoming chats.
Quick Reference
Case 1: All Users Available
Users: A, B, C, D
All statuses: Available
→ Messages are assigned in sequence: A → B → C → D → A (and so on).
Case 2: Some Users Available
Users: A (Unavailable), B (Available), C (In Break), D (Available)
→ Messages rotate only between B and D.
Case 3: Availability Changes
B receives a message when Available → later sets status to Unavailable
→ Next message assigned to next Available user (e.g., D).
Case 4: No Users Available
All users are Unavailable / Away / In Break
→ Message is assigned to Admin user. General Settings
This option will be managed from Other Settings > WhatsApp Business Configuration > Gear Icon Country Code![]() > Find General Settings.
> Find General Settings. 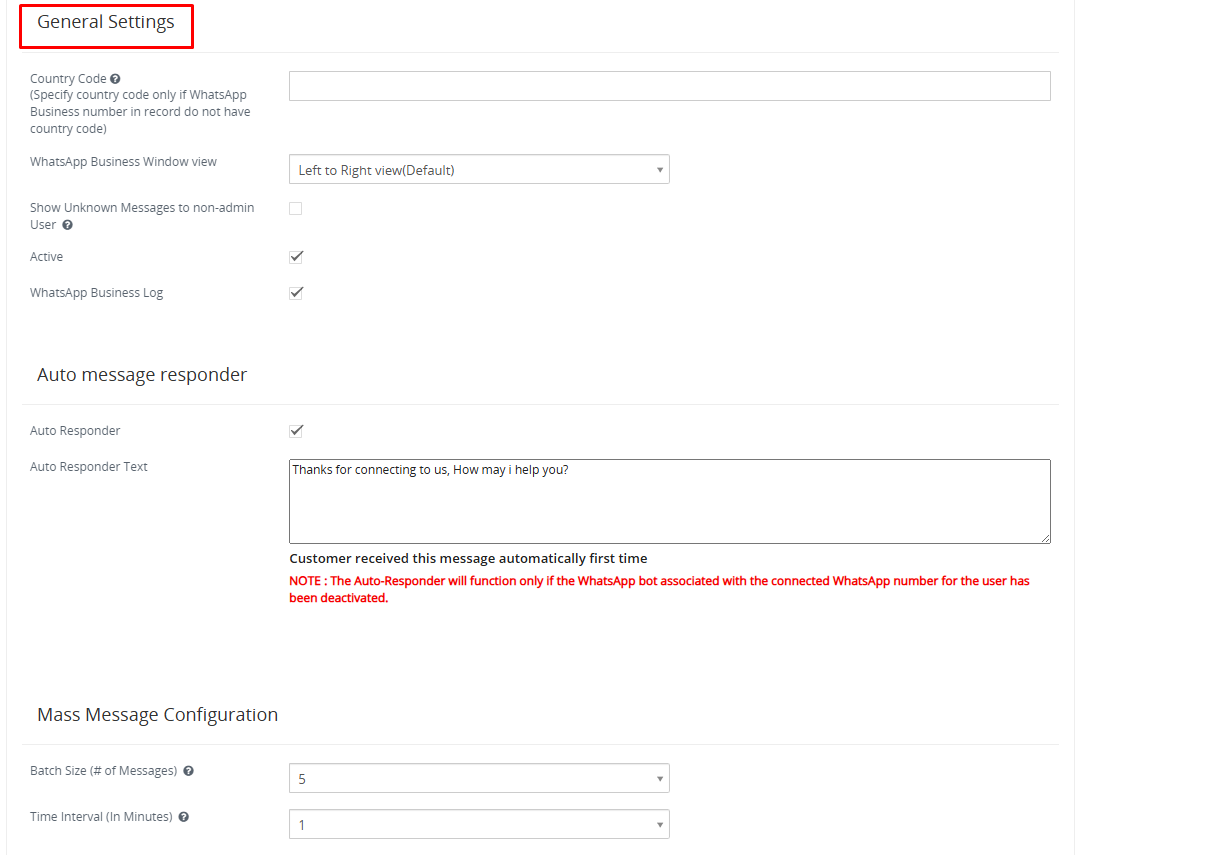 In the General Settings you can configure the Country code, WhatsApp Business Window View, Access to show Unknown Message to non-admin Users, and display the status indicating whether it is active or not.
This is an important setting before you start using WhatsApp Business integration. WhatsApp Store phone number with Country Code It means if your phone number is 6308618263 and Country code is +1 then the WhatsApp store number as “16308618263”. If you’ve a record having a phone number without a country code then follow the instructions below.
- WhatsApp Business number without country code in Records : In this scenario, if you want to apply country code as a prefix to all “Phone numbers” of all modules where you’ve to add the country code in the general setting > country code field in WhatsApp Business configuration page. So whenever a WhatsApp message is sent out from the CRM it will add a Prefix because WhatsApp requires “Country Code” to send a message to a contact.
- Record with country code as a prefix : If you already save a record/phone number with country code then In this scenario keep the country code field “Blank”.
For example : If the connected phone number is “987654321” and the country code is “+1” than WhatsApp Business number becomes “1987654321”
WhatsApp Business Window View
CRMTiger’s WhatsApp Business Integration allows their users to configure the WhatsApp Business Integration Window in Right to Left view which is mostly preferable in the middle east countries. CRMTiger by default supports the Left to Right view.
Show Unknown Message
If a WhatsApp Business message has been sent by a customer whose number is not in the CRM as a Record and if you want to allow all non-admin users to see those numbers then enable this feature. So all non-admin users can see those messages by clicking on the Global WhatsApp icon and see it under “Message from Unknown numbers”.
Active Status
This option allows you to show WhatsApp status. If you select the checkbox then it will show your status as active when you are active on WhatsApp otherwise it will not show anything.
Auto Message Responder
This option will be managed from Other Settings > WhatsApp Business Configuration > Gear Icon ![]() > Auto Message Responder
> Auto Message Responder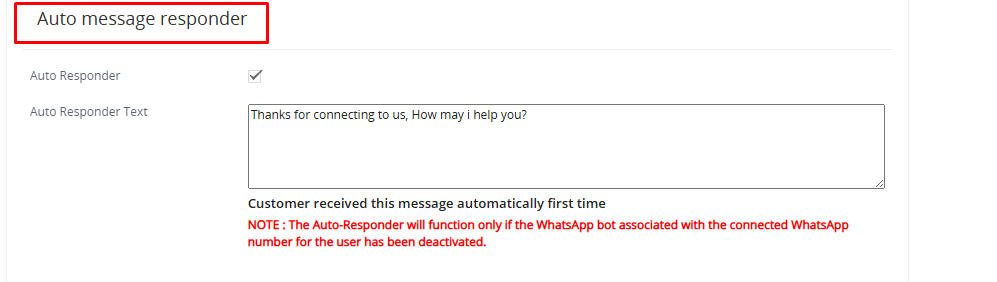 It is helpful to give answers to messages automatically. It means you have just written a message which will be sent automatically to the sender.
Customers received messages from auto responder message text automatically the first time or after 14 days of no activity.
Note: The Auto-Responder will function only if the WhatsApp bot associated with the connected WhatsApp Business number for the user has been deactivated.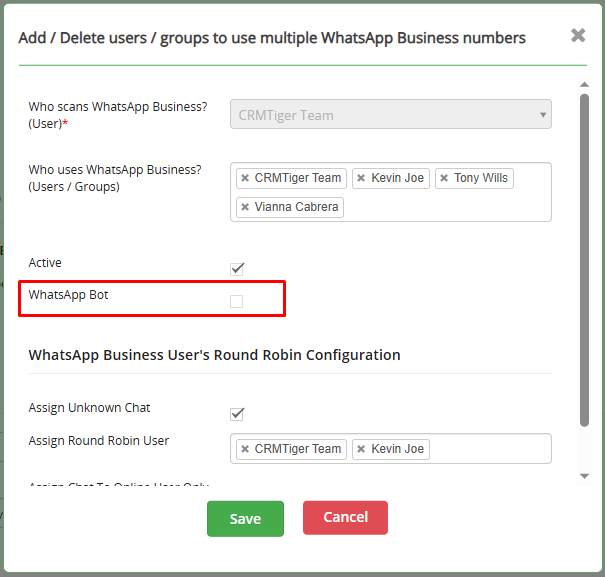 Mass Message Configuration This option will be manage from Other Settings > WhatsApp Business Configuration > Gear Icon
 ![]() > find Mass Message Configuration
> find Mass Message Configuration 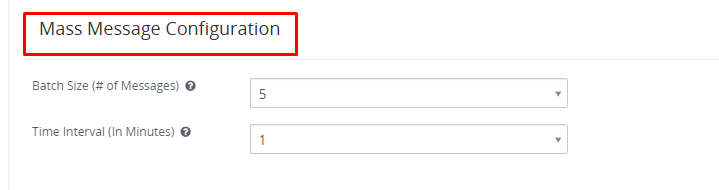 Batch size allows the user to send mass messages in a batch of messages to avoid Spamming.
- Example : If you wish to send 500 messages and if you set a batch size 15 and Time Interval to 15 minutes. Then it will send 15 messages in each batch based on the Time Interval calculated below.
- Time to send 500 messages = (500 messages / 15 Batch size) * 15 minutes = 500 minutes = 8 Hours Approximately.
 CAUTION: Sending bulk messages for Advertisement as per the WhatsApp Business policy is PROHIBITED.
Interested to Try WhatsApp Business Integration ? Click Here